
How to Build the Ultimate Raspberry Pi Retro Gaming Console
Building a Raspberry Pi retro gaming console remains one of the most enjoyable maker endeavors. Not only is it as simple or complex as you like, but it's infinitely rewarding once completed. My first ever Raspberry Pi project was making a game console with a Raspberry Pi running RetroPie. Since then, my set up has evolved. Learn how to build the ultimate retro gaming console, from picking a Raspberry Pi board to selecting a retro gaming distribution, and scraping ROMs!
How to Make the Ultimate Raspberry Pi Retro Gaming System: What You'll Need
To create a Raspberry Pi retro gaming build, you'll need a few items. First, a Raspberry Pi board. Then, an appropriate operating system (OS). You'll probably want a case or enclosure of some sort, microSD card, power supply, and peripherals such as a keyboard, mouse, and gamepads.
What you'll need:
- Raspberry Pi board (Raspberry Pi 4 recommended)
- microSD card
- Power supply
- Raspberry Pi case
- Raspberry Pi retro gaming OS
- Peripherals
Total cost: $5 USD+. Depending on your build, you could use a Raspberry Pi Zero as a lightweight board or anything up to a Raspberry Pi 3 B+ or Pi 4. Or, you might consider a full-on arcade cabinet. Depending on what you own, you could cobble together a project for as little as $5 USD or spend over $100. Expect the average Raspberry Pi retro gaming build to cost about $50 USD.
Raspberry Pi Retro Gaming System: Select a Raspberry Pi Board
First, pick out a Raspberry Pi board. The systems you'd like to emulate dictate which Raspberry Pi board you'll want. For instance, older consoles like Atari 2600, Nintendo Entertainment System (NES), and even Super Nintendo (SNES) ROMs run flawlessly on basic Raspberry Pi Zero boards.
However, while you can run Nintendo 64 (N64) and PlayStation 1 (PS1) ROMs on Pi Zero, RetroPie Raspberry Pi Zero performance is considerably worse than a Raspberry Pi 4 or even Raspberry Pi 3 B+. Therefore, for newer systems such as N64, PS1, Dreamcast, and PSP, opt for a Raspberry Pi 4. If you're building a portable Raspberry Pi retro gaming handheld console, I suggest a Raspberry Pi Zero or the RasPi Zero W. Otherwise, stick with the more powerful Raspberry Pi 3 or 3 B+.
- Raspberry Pi Zero/Zero W: Retro gaming handheld console
- Raspberry Pi 4: For more powerful emulation of N64, PSP, and Dreamcast titles
Choosing a Raspberry Pi Retro Gaming OS
There are tons of Raspberry Pi retro gaming OS options to pick from. RetroPie is arguably the most common. It's a Linux-based retro gaming distro that boasts tons of emulators, from the Apple II and Atari 2600 to N64, Dreamcast, and PSP. In addition to its gaming capabilities, RetroPie functions for home theatre PC (HTPC) use with the Kodi media center built-in.
Similarly, Recalbox is a Linux-based distribution. It's virtually identical to RetroPie, but maintains a more intuitive and beginner-friendly installation and configuration. For example, you don't even need to mount the image on a microSD, merely drag and drop a folder of files. Post-installation set up if incredibly simple. But this comes at the expense of customization. Unlike RetroPie, Recalbox lacks certain shaders which enhance the experience. Nevertheless, the inclusion of Kodi makes this a versatile option for Raspberry Pi beginners.
Whereas RetroPie and Recalbox provide a similar interface and are based on EmulationStation, Lakka uses RetroArch and a user interface (UI) similar to that of the PlayStation 3's XrossMediaBar. It's the more customizable than RetroPie, though its sheer number of options and settings may be overwhelming.
RetroPie, Recalbox, Batocera, and Lakka each use a Linux foundation. However, you can install Android on the Raspberry Pi for a Raspberry Pi Android TV box. It's not the Android TV OS, rather a tablet-optimized version of Android. You'll need to sideload emulators or add them via the Google Play Store or Aptiode. Plus, you can run media center apps like Kodi, Netflix, Plex, Hulu, Spotify, and Emby.
Since Lakka, Batocera, RetroPie, and Recalbox are based on Linux OSes, you can also simply roll your own Raspberry Pi retro gaming console. The main advantage here is that you gain a full desktop and media center alongside retro gaming capabilities.
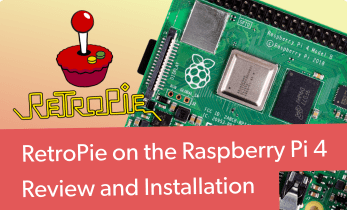
How to Install RetroPie on Raspberry Pi
For a standalone RetroPie installation, navigate to the RetroPie downloads page. Pick the correct image for your Raspberry Pi board. There's one image for the Raspberry Pi Zero and 1, and another for the Raspberry Pi 2 and 3. With your image downloaded, you'll need to extract the image file. Use a program like 7Zip to decompress the .gz file. With the IMG file extracted, mount it on a microSD card with a program such as Etcher. Then, pop your microSD card into your Raspberry Pi.
Or, you might wish to install RetroPie on top of a Linux desktop distro like Ubuntu or Debian. Start by checking your disk space:df -h
Now, run an upgrade and update:sudo apt-get update && sudo apt-get upgrade
Then, install RetroPie:sudo apt-get install git lsb-release
With RetroPie installed, load the latest RetroPie set up script:
cdgit clone --depth=1 https://github.com/RetroPie/RetroPie-Setup.git
Run the script with:cd RetroPie-Setupchmod +x retropie_setup.shsudo ./retropie_setup.sh
How to Install Recalbox on Raspberry Pi
Head over to the Recalbox downloads page. Select the right image file for your board. There are options for the Raspberry Pi Zero and 1, and Pi 2 or 3. Download the img.xz file. Then, use a program like 7Zip to extract the IMG file. Mount that on a microSD card with an application such as Etcher. When the download completes, insert your microSD card and you're ready to go.
How to Install Lakka on Raspberry Pi
Pop on over to the Lakka downloads page, and select the operating system of the machine you're currently using. Download the image file for the Raspberry Pi model you're using. You'll find Raspberry Pi 0, Raspberry Pi 1, Pi 2, and Pi 3 releases. Then, burn the image to a microSD card using a program such as Etcher. After that, pop in your microSD card and you're ready to begin using Lakka.
Roll Your Own Raspberry Pi Android Retro Gaming Console
Begin by choosing an Android release for the Raspberry Pi. You can download Lineage OS or Emteria. There are other Android OSes for the Pi. With Android installed, simply load the emulators you'd like to run. RetroArch is an awesome comprehensive software option which can run anything from Atari 2600 games to PS1 ROMs, N64 games, PSP titles, and Dreamcast as well. Loads of individual emulators exist too.
- RetroArch
- Classic Boy
- MAME4droid
- PPSSPP
- ePSXe
- DraStic DS Emulator
- Mupen64+
- My Boy! GBA Emulator
- My OldBoy GameBoy/GameBoy Color emulator
- Nostalgia.NES
- Snes9x
- SuperRetro16
- Reicast Dreamcast emulator
- NEO.emu Neo Geo emulator
- MD.emu
Roll Your Own Linux Retro Gaming Raspberry Pi Arcade
Likewise, you can install your own Linux emulators for a DIY retro gaming machine with a Raspberry Pi. RetroArch is arguably the best option because of its vast array of supported game systems. You can install RetroPie over a Linux OS on the Raspberry Pi for a desktop with retro gaming capabilities. Alternatively, try running standalone emulators on the Raspberry Pi.
- RetroArch
- RetroPie
- ZSNES
- PCSX2
- PCSX-Reloaded
- Snes9x
- VisualBoyAdvance
- Mupen64Plus
- Mednafen
- Higan
- ePSXe
- Nestopia
Select a Form Factor and Case
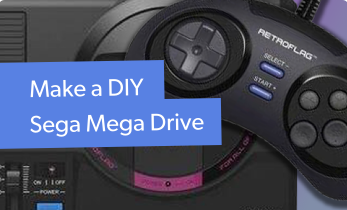
If you're going the case route, pretty much any Raspberry Pi case will suffice. But you can add flair to your Raspberry Pi retro gaming system with a RetroFlag NES case which comes for the Raspberry Pi 2/3/3B+ or the RasPi 4, or one of the two RetroFlag SNES cases: a North American version and a European model. The SNES RetroFlag cases come complete with matching controllers.
You might want to make a Raspberry Pi arcade cabinet. For this, you have two options: purchase a Raspberry Pi arcade kit, or make a DIY Raspberry Pi arcade. The Pimoroni Picade cabinet kit is an awesome DIY retro gaming arcade.
But a handheld Raspberry Pi retro gaming handheld system is a bit different. Here, you'll need an appropriate screen and battery. The Pocket PiGRRL pack lets you build a portable Raspberry Pi emulation system. Building a DIY retro arcade cabinet requires planning, component selection, laser cutting, and finally assembly.
ROM Storage Options
Many older ROMs take up little space. Yet PS1, N64, Dreamcast, and PSP ROMs can be pretty hefty in file size, from hundreds of MB to a few GB. As such, you may wish to store your ROMs on an external drive. I use a 256GB USB drive for my ROMs. The process for using external storage varies based on your OS.
On RetroPie:
Simply create a folder called retropie. Plug it into your Raspberry Pi, wait for a short data transfer to finish, and remove it. Then, you can add your ROMs to the proper folder under the retropie/roms folder on your flashdrive.
On Recalbox:
Under the main menu, select System Settings > Storage Device. Then, pick either a specific USB drive, or Any External.
On Lakka:
With Lakka, you can easily use an external drive for ROM storage. Just plug in a flash drive, and a folder called /storage/roms will be created. Then, add your ROMs here in their respective folders.
Bonus Level: ROM Scrapers
If you're like me and have tons of ROMs but want them organized neatly, you'll want to scrape your ROMs. You can use built-in scrapers, or scrape from a desktop.
- Skyscraper: A robust game metadata scraper which is compatible with Linux and macOS. It aggregates information from OpenVGDB, ArcadeItalia.net, ScreenScraper.fr, and TheGamedDB.net.
- Universal XML Scraper: This is my preferred ROM scraping method. It gives the option to scrape from ROMs stored locally or on networked storage, and you can choose from several box art alternatives.
- Selph's Scraper: This pulls in information from TheGamesDB.net, OpenRetro.org, MobyGames.com, IGDB.com, WorldOfSpectrum.org, and ScreenScraper.fr. Plus, you may import local media assets.
Complete Guide to Building the Ultimate Raspberry Pi Retro Gaming Arcade: Final Thoughts
Cobbling together a retro game system with a Raspberry Pi can be as easy as mounting an OS on a microSD card, popping it into a Raspberry Pi, and using a retro case which looks like an NES or SNES. Or, it can be as complex as a built-from-scratch arcade cabinet. Then, Raspberry Pi retro gaming kits offer a pre-fab Raspberry Pi arcade cabinet option.
You might also consider an Odroid XU4 retro gaming set up complete in a Nintendo 64 case. Or, the UDOO x86 makes a powerful emulation machine.
Your turn: What Raspberry Pi retro gaming set up are you using?

Moe Long is an editor, writer, and tech buff with a particular appreciation for Linux, Raspberry Pis, and retro gaming. Writing online since 2013, Moe has bylines at MakeUseOf, TechBeacon, DZone, SmartHomeBeginner, DEV.to, DVD Netflix, and Electropages. You can read his writings on film and pop culture at Cup of Moe, check out his tech reviews, guides, and tutorials at Tech Up Your Life, and hear his thoughts on movies on the Celluloid Fiends podcast. Aside from writing and editing, Moe has an online course, the Beginner's Guide to Affiliate Blogging From Scratch. When he's not hammering away at his keyboard, he enjoys running, reading, watching cinema, listening to vinyl, and playing with his dog Sebastian.


Leave your feedback...