
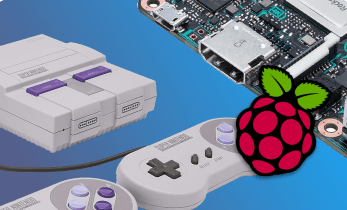
How to Make a DIY NES Classic with Raspberry Pi, ASUS Tinker Board, and More
Retro console clones such as the NES Classic Mini have exploded. While the likes of the SNES Classic and Sega Genesis Classic, or even RetroN 5 offer loads of fun, a do-it-yourself (DIY) retro game console is arguably a better choice. With a Raspberry Pi or other single-board (SBC)-based console clone, you'll be able to play more games, plus enjoy extra functionality such as home theatre PC (HTPC) capabilities. Learn how to make a DIY NES Classic Mini with a Raspberry Pi, ASUS Tinker Board, and more!
Why Make a DIY NES Classic Mini?
The NES Classic Edition is an admittedly neat console. Boasting the aesthetics of a Nintendo Entertainment System (NES) but shrunk down and with a handful of games built in, it's a nostalgic bit of hardware. However, the NES Classic Mini games list remains sparse. You'll find about 30 NES games pre-installed, a fraction of the original console. Although it is possible to flash more ROMs onto the NES Classic Mini, a DIY NES Classic Mini can play many more consoles than just the Nintendo Entertainment System. Likewise, you may benefit from game streaming capabilities such as Steam Link for the Raspberry Pi and home theatre PC apps like Kodi. Plus, it's rewarding to cobble together your own retro gaming arcade rather than buy an off-the-shelf system.
- More emulator options than just NES
- HTPC use
- Game streaming
How to Build a NES Classic with Raspberry Pi, ASUS Tinker Board, and More
A DIY NES Classic Mini with Raspberry Pi, ASUS Tinker Board, and other options remains an inexpensive project. You'll need a compatible maker board, microSD card for boot medium, NES Raspberry Pi case, and power supply. Additionally, you'll need peripherals such as a keyboard and mouse, gamepads, and an HDMI cable. Finally, you'll need appropriate an appropriate retro gaming software option, and an active internet connection.
- SBC (Raspberry Pi 3 B+, Raspberry Pi 4, ASUS Tinker Board/Tinker Board S, or another option)
- NES case (NESPi by RetroFlag for the Raspberry Pi 3 B+ or Raspberry Pi 4)
- Power supply
- microSD card/alternative boot medium
- Retro gaming OS
- Peripherals (keyboard, mouse, game controller)
- HDMI cable
NES Classic Mini Console Build: Picking Out a Board
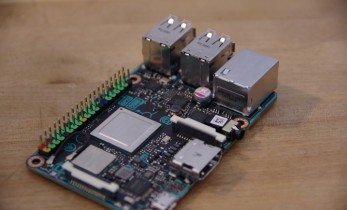
The Raspberry Pi 3 and Raspberry Pi 3 B+ are the most common SBCs for retro gaming and other tasks. However, the ASUS Tinker Board comes in a nearly identical form factor but opts for a Rockchip Rk3288 Cortex A17 quad-core system on a chip (SoC), a considerable improvement over the Broadcom BCM2837B0 quad-core A53 ARMv8 SoC found in the Pi. Moreover, the ARM Mali-T764 GPU handily trounces the Pi 3 B+ with its 4K video output support, and 2GB of DDR3 is a vast jump in multitasking capabilities when compared to the 1GB DDR2 in the Pi.
The Raspberry Pi admittedly boasts a larger community, but the Tinker Board features improved specs. Software support on the Pi is slightly larger, but Tinker Board support isn't far behind. If you wish to play newer systems such as PlayStation Portable (PSP), Nintendo 64 (N64), and Sega Dreamcast, opt for the Tinker Board.
Raspberry Pi 3 B+ specs:
- Broadcom BCM2837B0 quad-core A53 (ARMv8) 64-bit @ 1.4GHz SoC
- 1GB LPDDR2 SDRAM
- Gigabit Ethernet, 802.11b/g/n/ac Wi-Fi
- Bluetooth 4.2
- microSD storage
- 40-pin GPIO header
- HDMI port, 3.5mm A/V jack
- 4 x USB 2.0 ports
- CSI, DSI
- 5V/2.5A DC micro USB power input
ASUS Tinker Board specs:
- Rockchip RK3288 Cortex-A17 quad-core SoC
- ARM Mali-T764 GPU
- Up to 4K video support
- 2GB DDR3
- 802.11 b/g/n Wi-Fi
- Bluetooth 4.0
- 4 x USB 2.0 ports
- 15-pin MIPI CSI slot
- 40-pin GPIO header
- micro USB port for power
ASUS Tinker Board S (same as ASUS Tinker Board plus):
- 16GB eMMC
- HDMI-CEC
- Low-voltage input detection
- Plug-in detection, audio auto-switching
Install the Raspberry Pi in a NESPi Case
Putting a Raspberry Pi or ASUS Tinker Board in the RetroFlag NESPi case is fairly easy. First, plug in the USB and Ethernet ports. Line up the Raspberry Pi or Tinker Board so that its I/O ports line up with the correct cutouts on the NESPi case. You'll find slots for the HDMI, power connector, and the 3.5mm jack as well as microSD. There's only one way the Pi fits in its case.Next, connect the GPIO. A pair of black screws hold the Pi down in its case, and the rest of the screws go into the bottom of the console. When you're finished, it's time to start using the NESPi. You'll also find pre-built units which you can buy (save $1 off purchases of $10 or more with code EMSUPPORTER).
DIY NES Classic Mini OS Options - RetroPie vs Recalbox vs Lakka vs Batocera
For operating systems (OSes), you've got several choices. RetroPie is by far the most common retro gaming OS, but Recalbox is incredibly popular as well. Batocera is nearly identical to Recalbox. RetroPie, Recalbox, and Batocera are Linux-based, and run RetroArch with an EmulationStation frontend. Aside from gaming, Batocera, Recalbox, and RetroPie tout the versatile Kodi media center for streaming video, as well as local file playback. For a dual NES Classic Mini clone and HTPC, opt for Recalbox, Batocera, or RetroPie.
Lakka, on the other hand, remains entirely gaming-centric. You won't find Kodi or any media center apps baked in. Rather than the EmulationStation front end, Lakka uses a pretty vanilla RetroArch user interface (UI) and mimics the XrossMediaBar or XMB from the PlayStation 3. However, what it may lack in media playback functionality, Lakka makes up for with its simplicity. Installing emulators is a breeze, and most controllers should work out-of-the-box with no button mapping.
RetroPie boasts by far the largest community, though Recalbox maintains a loyal following. Batocera isn't as well-known, but it's intuitive and documentation ensures easy troubleshooting. For beginners, Recalbox and Batocera provide excellent ease of use. RetroPie ups the ante with more options such as custom shaders. That's not to say RetroPie is difficult, but different settings make it more complex than Recalbox and Batocera. Lakka however, is simultaneously flawlessly functioning out-of-the-box and chock full of settings. As such, it's fine for beginners, though better for more advanced users with its abundant bordering on overwhelming customization options.
- RetroPie: Best for most users
- Recalbox: Best for beginners
- Batocera: Best for beginners
- Lakka: Best for advanced users
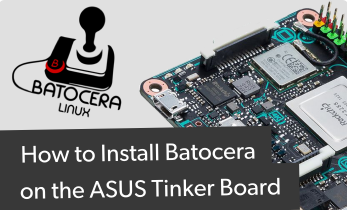
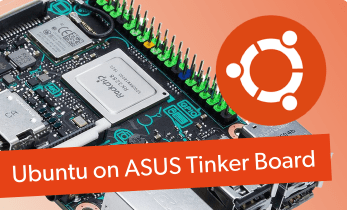
ASUS Tinker Board OSes Lakka vs ROTT vs Slash TV
For the ASUS Tinker Board, there's a port of RetroPie for the Tinker Board, dubbed ROTT for RetroPie on The Tinker Board. It's unaffiliated with the official RetroPie project, and includes a slew of emulators from Atari 2600 to PlayStation Portable. You won't find Nintendo DS yet, but many high-end emulators run extremely well considering the beefy ASUS Tinker Board specs.
Lakka makes an ASUS Tinker Board image which works like a champ, and comes with the ease of use that Lakka boasts. Alternatively, instead of a Linux-based distro such as RetroPie on the Tinker Board or Lakka, there's Slash TV. This Android TV OS image for the Tinker Board affords the ability to run a slew of multimedia apps such as Plex, Netflix, Funimation, and more in addition to retro gaming capabilities. Slash TV is my preferred Tinker Board operating system since it's a DIY Android TV box.
- ROTT: Best for most users
- Lakka: Best for advanced users
- Slash TV: Best for HTPC enthusiasts
How to Build a NES Classic on Raspberry Pi and ASUS Tinker Board
Here's how to build your own NES Classic with a Raspberry Pi and an ASUS Tinker Board.
How to Install RetroPie on the Raspberry Pi
Begin by heading over to the RetroPie downloads page. From there, download the correct image for your Raspberry Pi, in this case the Pi 3 or Pi 3 B+. With your image downloaded, you'll need to extract it with a program such as 7Zip. Then, you're left with an IMG file.
Using an application such as Etcher, select your RetroPie .img file, and your boot medium or microSD card. Once finished, pop the microSD card into your Raspberry Pi. Connect your power supply, and power the Pi on.
First up, you'll need to configure your controllers. This process varies based on what specific controller you're using. After that, you should be able to use RetroPie. But you'll want to make a few tweaks first. Start by expanding your file system. Head under RetroPie Menu > Raspberry Pi Configuration Tool Raspi-Config > Expand Filesystem. You'll see a message saying "Root partition has been resized. The filesystem will be enlarged upon the next boot." Go ahead and reboot your Pi.
Now, select your WiFi. Select RetroPie > WiFi > Connect to WiFi network. Now, choose your network and enter the proper password. Before you can complete this, you'll need to enter your country details.
Once you're either connected to WiFi or Ethernet, run an update. Hit F4 on your keyboard to exit EmulationStation, and enter:
sudo apt-get update
It's best to install emulators as well. Head under RetroPie > RetroPie Setup > Manage packages and pick either Binaries-based installation or Source-based installation. I recommend opting for a binaries-based installation since it's faster and should suffice.
Aside from running updates, you'll want to add your ROMs. The easiest method is an automount method. On a flash drive formatted as NTFS or FAT32, create a folder called retropie-mount. Then, plug it into your Raspberry Pi and wait a few minutes. RetroPie will copy the RetroPie folder and its contents to the flash drive. In order to load this, you'll probably need to reboot to view the contents. Once this is finished, you may transfer ROMs by plugging your flash drive into your PC, and dropping ROMs in the corresponding folders.
How to Install Recalbox on Raspberry Pi
Similarly, Recalbox is easy to install on the Raspberry Pi. Navigate to the Recalbox download page, and snag the Raspberry Pi 3/3 B+ installer. Once downloaded, you'll need to extract the img.xz with a program like 7Zip. After you've completed this, mount the Recalbox Raspberry Pi image to a microSD card with an app such as Etcher.
With a properly mounted Recalbox for Raspberry Pi image, pop the microSD card into your Pi and wait a few minutes for some files to copy. After the initial automated setup, you're ready to go. Running ROMs from an external drive is pretty simple. Plug in a USB drive, press Start > System Settings > Storage Device and select either a specific external drive or Any External. The system now reboots, and creates a folder with ROM folders. Remove that USB stick, plug it into a PC, and you can drag and drop ROMs as you please.
How to Install Batocera on Raspberry Pi
Batocera is nearly identical to Recalbox, so the two are simple to get started with. First off, download the Batocera Raspberry Pi image for the Pi 3 B+. Then, extract the img.gz file with an application such as 7Zip. You'll now have an IMG file which you can mount to a microSD card. Go ahead and use Etcher to mount that IMG file, and when the burning process completes you'll have a bootable microSD card. Pop it into your Raspberry Pi and you're ready to start using Batocera.As with Recalbox, to load ROMs from an external drive navigate to Start > System Settings > Storage Device and select any external or a specific drive. Then, Batocera reboots and you'll have a recalbox folder on your flash drive. You can load the correct ROMs under their corresponding folders.
How to Install Lakka on the Raspberry Pi and ASUS Tinker Board
The process for installing Lakka on the Raspberry Pi and ASUS Tinker Board is basically the same. Navigate to the Get Lakka page and download either the Tinker Board image or Raspberry Pi image. After downloading the img.gz file, you'll need to extract it with 7Zip, which will leave you an img file. With that image file, mount it to a microSD card with Etcher. Once the mounting process finishes, you're ready to begin using Lakka.
Pop in your Lakka microSD card, and you'll see its splash screen with a flower. Wait a couple of minutes for the file system to expand and a reboot to finish. Next, you'll see the Lakka user interface. From here, you'll be able to add ROMs and load cores.
How to Install RetroPie on the Tinker Board (ROTT)
While RetroPie for boards such as the Raspberry Pi and Odroid XU4 comes via the RetroPie Project, ROTT is a community project from developer Steve Lambo. It's still a similar installation process to its Raspberry Pi counterpart. Download the ROTT image, which is a ZIP file. It is a 7Z, so you'll need to extract the compressed image file with a program such as 7Zip. Use Etcher to mount the decompressed image file to a microSD card, then pop it into your ASUS Tinker Board.
After installation, SSH into your ROTT OS. You'll use the username root and password 1234. Grab the modified setup.sh file:
sudo wget https://raw.githubusercontent.com/…/Armbian…/master/setup.sh
And allow for any user to run it plus make it executable:
sudo chmod 777 setup.sh
sudo chmod a+x setup.sh
Next, run the setup script with:
./setup.sh
or
bash setup.sh
Follow all onscreen prompts, and reboot. SSH back into the Tinker Board running RetroPie, and run the basic install or for a microSD card or EMMC smaller than 16GB, head to Manage Packages > Core Packages > Install all from source.
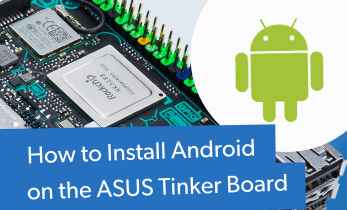
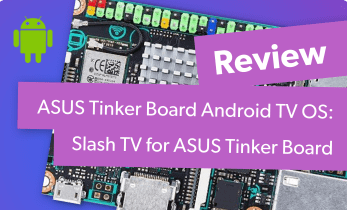
How to Install Slash TV on ASUS Tinker Board
Slash TV, also from Steve Lambo, is an Android TV image for the Tinker Board. It comes preloaded a slew of apps including RetroArch for Android, Netflix, PPSSPP, and Reicast. It's my personal favorite choice for the ASUS Tinker Board. Download the Slash TV image, which is a pretty sizable RAR file. Then, use 7Zip to extract the compressed image file. With an extracted img file, mount it on your microSD card or EMMC module, and boot into Slash TV.Preloaded, you'll find Netflix, Kodi, Reicast, PPSSPP, RetroARch, Firefox, and the Google Play store. It's a beefy OS that's incredibly easy to use. You can connect to Wi-Fi via the system settings menu, or use Ethernet. You can runs ROMs from the microSD card, or an external drive.
Build a DIY NES Classic with a Raspberry Pi or ASUS Tinker Board: Final Thoughts
While the NES Classic Mini is truly awesome, it pales in comparison to a do-it-yourself NES Classic Edition. Both the Tinker Board and Raspberry Pi are true DIY NES Classic mini killers with the ability to run a bevy of different ROMs from a host of systems, from the NES and SNES to Atari 2600, Apple II, and PlayStation Portable. Plus, different operating systems provide HTPC features which you won't find with the NES Classic Mini.
What are you using for retro gaming?

Moe Long is an editor, writer, and tech buff with a particular appreciation for Linux, Raspberry Pis, and retro gaming. Writing online since 2013, Moe has bylines at MakeUseOf, TechBeacon, DZone, SmartHomeBeginner, DEV.to, DVD Netflix, and Electropages. You can read his writings on film and pop culture at Cup of Moe, check out his tech reviews, guides, and tutorials at Tech Up Your Life, and hear his thoughts on movies on the Celluloid Fiends podcast. Aside from writing and editing, Moe has an online course, the Beginner's Guide to Affiliate Blogging From Scratch. When he's not hammering away at his keyboard, he enjoys running, reading, watching cinema, listening to vinyl, and playing with his dog Sebastian.


Leave your feedback...