
How to Create a Retro Arcade with RetroPie
Raspberry Pi boards offer loads of uses for do-it-yourself (DIY) projects. One of the easiest and most gratifying is creating a retro gaming machine. There are several means to make a DIY gaming center. Among the popular options, RetroPie ranks as a top choice. Learn how to create a retro arcade with RetroPie for retro video games on the Raspberry Pi!
What is RetroPie?
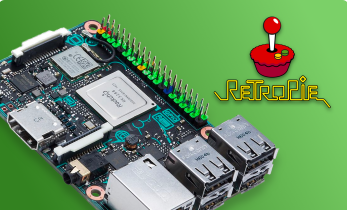
RetroPie is a simple means of transforming a Raspberry Pi, ODroid C1/C2, or even desktop PC into a retro arcade. It’s an EmulationStation frontend that’s built upon the Raspberry Pi-specific Linux distribution Raspbian. Therefore, RetroPie includes not only a lovely frontend, along with RetroArch for gaming but also a full Linux subsystem. Because Raspbian is a Debian-based distro, it’s packed with potential to install additional programs.
What You’ll Need
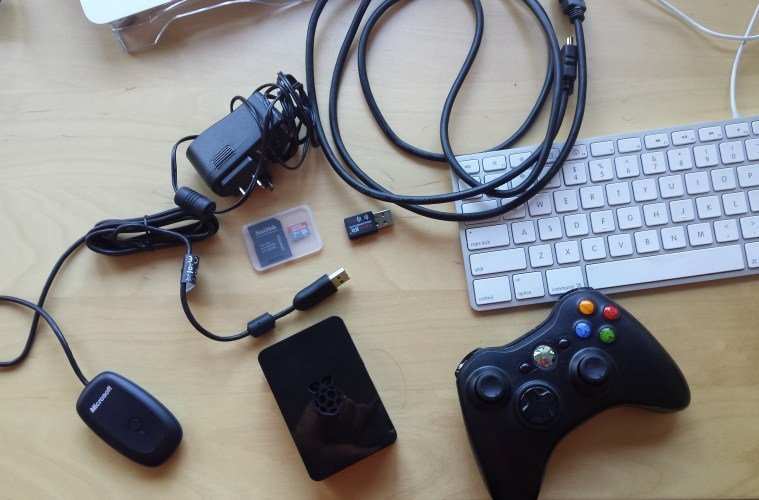
Before forging ahead, here’s what you’ll need:
- Raspberry Pi board (Raspberry Pi 4 recommended for best performance, but RetroPie runs on the Raspberry Pi 3/3 B+, 2, and Zero/Zero W)
- microSD card
- microSD card reader
- HDMI cable
- USB keyboard
- Mouse
- Power supply
- Gamepad
- Monitor
- RetroPie image
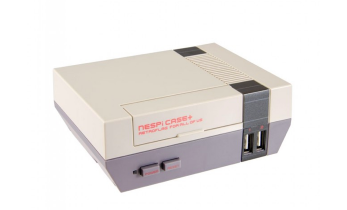
- Case (optional)
- ROMs (optional)
- Flash drive (optional)
Several Raspberry Pi boards function with RetroPie. If you're looking for the best Raspberry Pi for emulation, snag the most recent Raspberry Pi iteration. In this case, that means running RetroPie on the Raspberry Pi 4. RAM doesn't really matter since emulation is tied to CPU and GPU power, not RAM. For multi-tasking and desktop PC use, RAM is crucial, so if you plan to use your Raspberry Pi board for a desktop as well as RetroPie, grab the 2GB or 4GB RAM Raspberry Pi 4. Otherwise, the 1GB unit will do just fine.
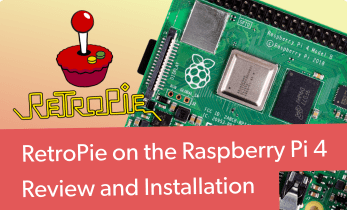
Does RetroPie Work on the Pi 4?
With the release of the Raspberry Pi 4, fittingly debuted on March 14, 2019 or Pi Day, the Raspberry Pi Foundation debuted its most powerful and capable single-board computer yet. However, underlying hardware changes rendered previous Raspbian versions obsolete on the Pi 4. Only Raspbian Buster images run on the Pi 4. As such, RetroPie initially didn't function on the Raspberry Pi 4. But in an April 28, 2020 release of RetroPie 4.6, beta support for the Raspberry Pi 4 debuted. So RetroPie does work on the Pi 4. Performance is drastically improved, particularly for many higher-end systems that are difficult to emulate, such as Nintendo 64, Sega Dreamcast, and Playstation Portable ROMs. You'll still need to make some tweaks, and I expect that performance will only improve as RetroPie on the Raspberry Pi 4 sees additional optimizations.
How to Create a Retro Arcade with RetroPie
Here’s how to cobble together a retro gaming machine using RetroPie.
Download Your RetroPie Image
First, head over to the RetroPie Download page and select the proper image. Which image you select depends on your Raspberry Pi model, as well as installation. Since we’re focusing on the Raspberry Pi, snag the correct image for your Pi board. There’s one image for the Raspberry Pi 0 and 1, and another for the Pi 2 and 3/3 B+. I recommend using an official RetroPie image, but you can find unofficial Raspberry Pi 4 RetroPie images that work extremely well.
Install RetroPie on Top of Raspbian
Alternatively, if you have a Raspberry Pi running Raspbian, you may install RetroPie on top of your distro. With Raspbian installed, first check your free disk space:
df -h
Then, perform an upgrade and update:
sudo apt-get update && sudo apt-get upgrade
Next, install RetroPie. In a command prompt, run:
sudo apt-get install git lsb-release
After that, install the most up to date RetroPie set up script:
cdgit clone --depth=1 https://github.com/RetroPie/RetroPie-Setup.git
Once that’s complete, you can execute the script with:
cd RetroPie-Setupchmod +x retropie_setup.shsudo ./retropie_setup.sh
Extract Your Image
With your image downloaded, navigate to the correct folder on your hard drive where you saved your RetroPie image. Typically, that’s the Downloads folder. Since the RetroPie image is a .gz file, you’ll need to extract the image somehow. On a Linux machine, you should be able to extract the .gz file natively. However, for macOS and Windows, you may need a separate program. For Windows, 7-Zip is a solid choice. With macOS, try The Unarchiver.
Mount Your Image
When you’ve successfully extracted your image, you’ll see a .img file. Therefore, it’s time to mount that .img to a microSD card with an appropriate program. There exist several options:
- Windows: Win32DiskImager
- macOS: ApplePi-Baker
- Linux: LiveUSB Install
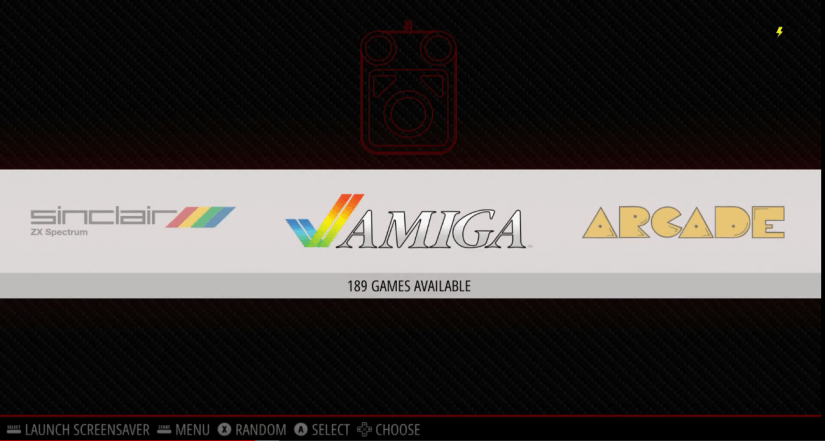
Starting Up RetroPie
Once the RetroPie image has been mounted to a microSD card, it’s time to test out the installation. Start by inserting the microSD card. Ensure that the Raspberry Pi is connected with an HDMI to a monitor or television. Additionally, confirm that your peripherals such as the keyboard, mouse, gamepad, and WiFi dongle (if needed) are plugged in. If everything worked properly, you should see the RetroPie splash screen.
Controller Configuration
Upon first booting into RetroPie, you’ll see a brief intro where RetroPie will detect any gamepads. I used a wireless Xbox 360 controller which was immediately recognized by the operating system. There’s a short button mapping segment where RetroPie prompts you to press the corresponding buttons on your controller. Press “A” to start, and then carefully press the proper buttons.
However, you can also use a dedicated Xbox 360 driver. The default driver functions fine, but you can use the improved Xbox 360 driver instead. Open a terminal and enter:
sudo nano /etc/modprobe.d/raspi-blacklist.conf
Next, type
blacklist xpad
Save that and enter:
sudo /home/pi/RetroPie-Setup/retropie_setup.sh
Doing so will open the setup menu. Navigate to Install Xbox contr 360 driver and select this option. Finally, reboot.
But to add multiple controllers, you’ll require lines for each additional controller. In this case, enter:
sudo nano /etc/rc.local
You will see:
xboxdrv --trigger-as-button --id 0 --led 2 --deadzone 4000 --silent & sleep 1
Perform the same action for each controller. Following this logic, controller 2 would be:
Xboxdrv --trigger-as-button --id 1 --led 2 --deadzone 4000 --silent & sleep 1
And controller 3:
Xboxdrv --trigger-as-button --id 0 --led 3 --deadzone 4000 --silent & sleep 1
With controller 4 as:
Xboxdrv --trigger-as-button --id 0 --led 4 --deadzone 4000 --silent & sleep 1
First Set Up
After first booting into RetroPie, perform a bit of maintenance. Begin by selecting the RetroPie menu.
Expanding the Filesystem
- Scroll down to Raspberry Pi Configuration Tool Raspi-Config
- Choose Expand Filesystem
- This brings up a message that “Root partition has been resized. The filesystem will be enlarged upon the next reboot
- Pick Finish and reboot
Adding WiFi
You may also wish to use WiFi. This is a great means of updating your RetroPie operating system (OS), as well as using your network to transfer ROMs.
- Under EmulationStation, select RetroPie
- Scroll to WiFi
- Choose Connect to WiFi network
- Select the proper WiFi network
- Enter the correct password
Performing an Update
As with any OS installation, it’s best to check for an update. With your keyboard and mouse plugged in and either connected to the Internet via WiFi or Ethernet, hit F4 to open a command line. Then, enter:
sudo apt-get update
After that, install netatalk for ease of system access via the network:
sudo apt-get install netatalk
Emulator Installation
Once you’ve completed basic setup, you can begin playing ROMs. However, you’ll want to install some emulators first. Begin by opening the RetroPie menu on EmulationStation. Then, scroll to RetroPie Setup. In the menu, select Manage Packages. You’ll see several sections. Each section features a list of packages which you can install, as well as what’s currently installed. Under the Optional section, you’ll find unstable packages which are listed as experimental. When you pick a package, it may feature additional configuration options.
For updating and installing emulators, you have a few options:
- Binaries-based installation
- Source-based installation
I suggest opting for binaries-based installation. It’s a lot faster than source-based installation.
Transferring ROMS
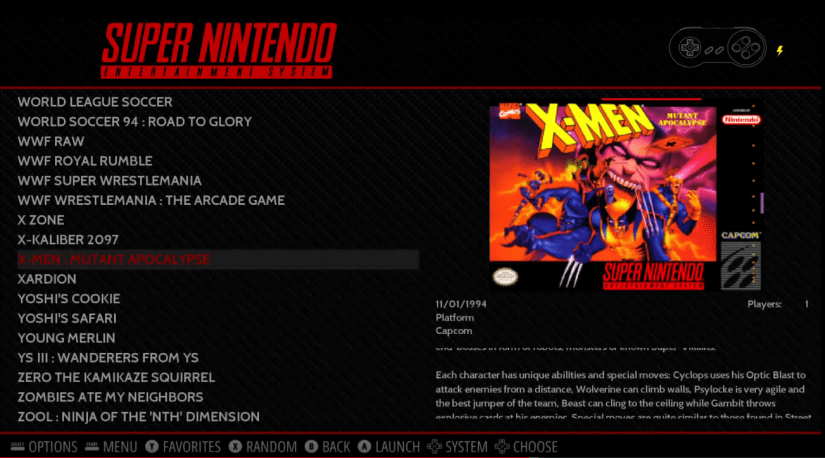
Now for the fun part! There are a few ways to transfer and store ROMs on your Raspberry Pi running RetroPie. As a reminder, please only use ROMs for games that you own.
From USB
When transferring ROMs from a USB stick, you’ll need a flash drive formatted in either NTFS or Fat32. On the flash drive, create a folder called retropie. Then, plug that USB stick into the Pi and wait for it to stop blinking. Remove the flash drive, and plug it back into a PC. You’ll have corresponding folders for each emulator. Place the ROMs in their respective folders under the retropie/roms folder on the flash driven. Then, plug the flash drive back into the Pi, and wait for the USB stick to stop blinking. Your ROMs have transferred. However, you’ll need to refresh EmulationStation by restarting with the start menu.
SFTP
If you’re using SFTP, you’ll first need to enable SSH. Using an SD card reader, access the /boot/ directory and make a colder called ssh. Then, under Raspi Config, navigate to Interfacing Options, then SSH, and select Enable. Finally, reboot the Pi.
For SFTP, you’ll need a program for macOS or Windows. Linux has SSH and SFTP compatibility baked in. WinSCP or Cyberduck are solid options.
The default username is: pi
The default password is: raspberry
Samba Share
A Samba Share also works. On Windows, type in \\retropie. Alternately, use your Pi’s IP address instead of retropie. For macOS, open the finder, select Go, and type in smb://retropie then pick Connect.
Running ROMs From a USB Stick
You may also store your ROMs on a flash drive. The major advantage here is that you can take your ROMs with you and if you upgrade your RetroPie setup, the ROMs are separate from the OS.
- Update the RetroPie setup script
- Enable the USB ROM transfer service
- Format your USB drive to Fat32
- Make a folder on the flash drive called
retropie-mount - Plug your flash drive into the Pi
- The Pi will copy the RetroPie folder and its contents if any to the USB stick
Once you’ve completed that, disable the USB daemon:
- Enter RetroPie Setup menu
- Pick Setup/Tools
- Choose usbromservice - USB ROM Service
- Disable USB ROM service
Finally, plug in the USB drive. You’ll also want to transfer the RetroPie file structure. Using SFTP or the terminal, move the /home/pi/RetroPie folder to the USB drive. That way, not just the ROMs, but the BIOS are also on the external drive.
To accomplish this, connected to the Pi via SSH run:
df
Look for something like /media/usb0
Then, with that USB device located, run:
sudo mv - v /home/pi/RetroPie/* /media/usb0/
Then, the USB directory should appear as:
pi@retropie:~ $ ls /media/usb0 -ltotal 96drwxrwxrwx 8 root root 16384 Jun 15 00:17 BIOSdrwxrwxrwx 3 root root 16384 Apr 22 17:05 retropiemenudrwxrwxrwx 52 root root 16384 Jun 3 00:11 romsdrwxrwxrwx 2 root root 16384 Apr 13 16:14 splashscreensAdditionally, you’ll want to configure fstab to automatically mount the USB drive. To do so, run the command:ls -l /dev/disk/by-uuid/
Now edit fstab with the command:
sudo nano /etc/fstab
Add a new line such as:
proc /proc proc defaults 0 0/dev/mmcblk0p1 /boot vfat defaults 0 2/dev/mmcblk0p2 / ext4 defaults,noatime 0 1# a swapfile is not a swap partition, no line here# use dphys-swapfile swap[on|off] for thatUUID=E44B-FC4E /home/pi/RetroPie vfat nofail,user,uid=pi,gid=pi 0 2
Such that UUID= is the UUID of the USB drive. Then, perform a restart.
Other Resources
RetroPie has a thriving GitHub with an extensive Wiki. Its Wiki and forums are excellent resources for troubleshooting.
If you’re looking for ROM sources, please only download ROMs to games you legally own. Better yet, rip your own. Here are a few reliable sites for video game ROMs:
- The ISO Zone – Tons of ROMs and ROM sets
- Doperoms – Excellent navigation
- Emuparadise – Strong categorization of ROMs
How to Create a Retro Arcade with RetroPie: Final Thoughts
Ultimately, it’s pretty intuitive to create a retro gaming machine with a Raspberry Pi and RetroPie. It’s best to use a Raspberry Pi 4 or Raspberry Pi 3 B+ if possible. The Raspberry Pi 4 still can't perfectly emulate PSP, N64, or Dreamcast ROMs, but it's able to run, albeit poorly, Gamecube titles via the Dolphin emulator. As such, it boasts considerable processing power over the Raspberry Pi 3 B+. The Pi 3 B+ handles PlayStation 1 and earlier games like a champ, though isn't up to tackling many PSP, Dreamcast, and N64 games. For older systems and portable gaming, the Raspberry Pi Zero and Zero W is a fantastic pick. One of the top reasons to use RetroPie on the Raspberry Pi is its capabilities beyond retro gaming. Onboard, there's the ultra-popular Kodi media center for home theatre PC use, and you can install either Moonlight or Steam Link for game streaming from a host PC. Overall, this is one of the simplest but best Raspberry Pi projects available.
Your turn: What retro games are you playing on the Raspberry Pi?

Moe Long is an editor, writer, and tech buff with a particular appreciation for Linux, Raspberry Pis, and retro gaming. Writing online since 2013, Moe has bylines at MakeUseOf, TechBeacon, DZone, SmartHomeBeginner, DEV.to, DVD Netflix, and Electropages. You can read his writings on film and pop culture at Cup of Moe, check out his tech reviews, guides, and tutorials at Tech Up Your Life, and hear his thoughts on movies on the Celluloid Fiends podcast. Aside from writing and editing, Moe has an online course, the Beginner's Guide to Affiliate Blogging From Scratch. When he's not hammering away at his keyboard, he enjoys running, reading, watching cinema, listening to vinyl, and playing with his dog Sebastian.


Leave your feedback...