
Getting Started with RetroPie on Odroid XU4
Among the easiest and most enjoyable do-it-yourself (DIY) projects is making a retro gaming machine. The Raspberry Pi is a popular device for creating a retro arcade with the likes of retro gaming operating systems (OSes) such as RetroPie. However, there’s a slew of Raspberry Pi alternatives including the Odroid XU4. Learn all about getting started with RetroPie on the Odroid XU4!
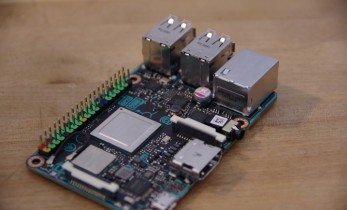
Odroid XU4 Hardware
The Odroid XU4 is an ultra-powerful single-board computer (SBC). Decked out with Exynos5422 Cortex™-A15 2Ghz and Cortex™-A7 Octa core CPUs, the Odroid XU4 benefits from octa-core processing power. It’s outfitted with a Mali-T628 MP6, 2GB of RAM, a microSD card slot, eMMC module, two USB 3.0 ports and one USB 2.0, plus an HDMI output.
Odroid XU4 Specs:
- Exynos5422 Cortex™-A15 2Ghz and Cortex™-A7 Octa core CPUs
- Mali-T628 MP6(OpenGL ES 3.1/2.0/1.1 and OpenCL 1.2 Full profile)
- 2GB LPDDR3 RAM
- eMMC flash storage
- 2x USB 3.0, 1x USB 2.0
- HDMI 1.4a
- Dimensions: 83mm x 58mm x 20mm
- PSU: 5V/4A
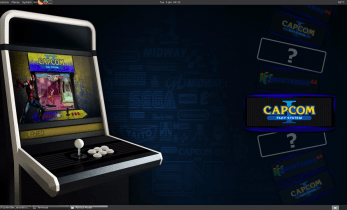
Odroid XU4 Software
On the software side, the Odroid XU4 sports compatibility with several operating systems, including these 13 best Odroid XU4 supported OS options. Among them, you’ll find Ubuntu MATE, Android and Android TV, Lakka, Recalbox, and RetroPie.
Getting Started with RetroPie on the Odroid XU4
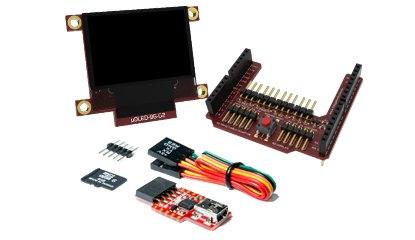
Before you proceed with an Odroid XU4 RetroPie installation, you’ll need a few items. However, Configuring the Odroid XU4 is pretty simple. For running RetroPie on the Odroid XU4 you’ll need:
- Odroid XU4 board ($62)
- microSD card and/or eMMC module
- PSU
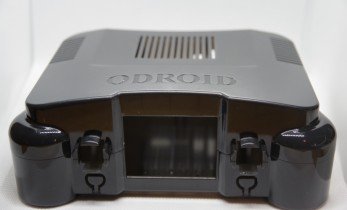
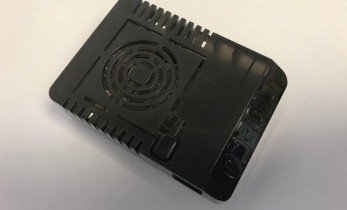
- Case (optional, recommended)
- Input device (gamepad, keyboard)
- RetroPie image or Ubuntu image
- Extraction program (i.e. 7Zip)
- Image mounting program (i.e. Etcher)
You can purchase an Odroid XU4 from AmeriDroid for $62. But that’s just the price of the board itself. Add a few extras like an Odroid XU4 case, power supply, and microSD card and the price hits about $90. Especially considering the beefy processing power and well-rounded specs, that’s totally reasonable (a huge thanks to AmeriDroid for the Odroid XU4 kit!).
Total cost: $62 (board only), about $90 (with accessories)
There are two main methods for running RetroPie on an Odroid XU4. One requires installing RetroPie in a Linux OS such as Ubuntu MATE. However, a standalone Odroid XU4 RetroPie image exists. The latter is a bit more streamlined since it merely requires mounting an ISO to bootable media like a microSD card, popping it in your Odroid XU4, and powering it on. However, installing RetroPie in a full-fledged Linux operating system combines a complete desktop experience with retro gaming.
- Standalone Odroid XU4 RetroPie image
- RetroPie running in a Linux distro
When compared to single-board computers such as the Raspberry Pi 3 B+, the Odroid XU4 wields several advantages. Namely, its octa-core processing means you’ll experience better Odroid XU4 RetroPie performance, particularly with Nintendo 64 (N64) and PlayStation Portable (PSP) titles. Additionally, the eMMC module speeds up boot time. As such, it’s arguably a better SBC than the Raspberry Pi for use with RetroPie.
How to Install RetroPie on Odroid XU4 with Ubuntu
Begin by installing Ubuntu. You can pick a release from the Odroid XU4 Ubuntu page. With your image file downloaded, use a program such as 7Zip to extract it. After extracting your image file, mount it to bootable media, in this case your microSD card or eMMC module, using a program such as Etcher.
With your Ubuntu image mounted, pop the eMMC or microSD card into your Odroid XU4 and power it on.
Upon first boot, you’ll notice that the Ubuntu Minimal installation only features a root user, with a password of odroid. As such, you need to create a new user. In a command line, enter:
adduser NameOfYourChoice
Then, add the freshly created user to your
sudo
unit:
usermod -a -G sudo NameOfYourChoice
As is common when installing new software, it’s best to perform an upgrade:
sudo apt update
sudo apt upgrade
sudo apt dist-upgrade
shutdown -r now
Restart your Odroid XU4 and make sure to update the locale settings. For American English (what I’m using), you’ll use these settings:
apt-get install language-pack-en-base
update-locale LC_ALL="en_US.UTF-8"
update-locale LANG="en_US.UTF-8"
update-locale LANGUAGE="en_US.UTF-8"
dpkg-reconfigure locales
Similarly, use the locale command and double-check your locale settings. Here’s a sample output if you’re using American English:
LANG=en_US.UTF-8
LANGUAGE=en_US.UTF-8
LC_CTYPE="en_US.UTF-8"
LC_NUMERIC="en_US.UTF-8"
LC_TIME="en_US.UTF-8"
LC_COLLATE="en_US.UTF-8"
LC_MONETARY="en_US.UTF-8"
LC_MESSAGES="en_US.UTF-8"
LC_PAPER="en_US.UTF-8"
LC_NAME="en_US.UTF-8"
LC_ADDRESS="en_US.UTF-8"
LC_TELEPHONE="en_US.UTF-8"
LC_MEASUREMENT="en_US.UTF-8"
LC_IDENTIFICATION="en_US.UTF-8"
LC_ALL=en_US.UTF-8
With your locale settings properly configured, update the visudo editor:
sudo update-alternatives --config editor
Now, allow NOPASSWD for your new user profile:
sudo visudo
Running this launches
/etc/sudoers
in a file editor. Insert this line at the end of the file:
NameOfYourChoice ALL=(ALL) NOPASSWD:ALL
What this does is remove the need for a password for your newly created user. Save your work and exit the file editor. Next, remove the password for the user you just created:
sudo passwd -d NameOfYourChoice
After that, run:
sudo date
This is a basic command asking for the date using superuser permissions. If all went well, the result should display without asking for your password. Alternatively, you may run any other command with
sudo
and test if it doesn’t ask for your password.
With that completed, alter the startup of tty1:
sudo systemctl edit getty@tty1
This opens a file editor. Add:
[Service]
ExecStart=
ExecStart=-/sbin/agetty -a NameOfYourChoice --noclear %I $TERM
Save and exit. Now, restart the service using:
sudo systemctl restart getty@tty1
Once this is complete, disable screen blanking in the console, and configure the CPU governor by editing
/media/boot/boot.ini
. Before
setenv bootargs
add:
setenv RetroPie "no_console_suspend consoleblank=0"

# --- CPU Governor Setup ---
# Uncomment only one line. New governor is set after 90secs after boot.
# ------------------------------------------
# - Performance (Keep all the CPU's at Maximum frequency)
# setenv governor "performance"
# ------------------------------------------
# - Ondemand (recommended)
setenv governor "ondemand"
Additionally, add the newly created variable to
setenv bootarg
:
setenv bootargs "${bootrootfs} ${videoconfig} ${hdmi_phy_control} ${hud_quirks} smsc95xx.macaddr=${macaddr} ${external_watchdog} governor=${governor} ${RetroPie}"
Perform a reboot:
sudo reboot
Login, and install the RetroPie setup script:
cd
sudo apt install git
git clone --depth=1 https://github.com/RetroPie/RetroPie-Setup.git
With the RetroPie setup script installed, run it using:
cd RetroPie-Setup
sudo ./retropie_setup.sh
From here, you can install modules such as EmulationStation, the EmulationStation theme, and RetroArch under the RetroPie setup script. You can also install emulators.
RetroPie Odroid XU4 Image Installation
For a standalone Odroid XU4 RetroPie experience, head over to the Odroid Arena website and download the RetroPie image.
With that downloaded, extract the image file from the compressed version using a program such as 7Zip. Once you’ve extracted the image, mount it to a microSD card or an eMMC module with a program such as Etcher.
Then, pop the bootable medium into your Odroid XU4 and boot it up.
Odroid XU4 RetroPie: Post-installation
Once you’ve installed RetroPie for the Odroid XU4, you’ll want to update RetroPie with either basic install under RetroPie menu > Manage Core Package > Install/Update all core packages
You can choose either from binary or source. While source is the latest version, it takes a while to compile. Binary is pre-compiled and is much faster. I suggest this option. If you want to store your ROMs on a flash drive, head to Options > RetroArena Set Up > Settings > USB ROM Service and select Enable. Then, after a few minutes, your attached flash drive or hard drive should have various folders for systems. Drop your ROMs in the appropriate folders.
Overall, I'm a huge fan of the Retro Arena for the Odroid XU4. I appreciate the ease of use, pleasing interface, and tons of different options. You can install a slew of emulators, add custom themes, and run ROMs from an external device. Plus, there are a few ports pre-installed such as Doom. You can download Kodi for media centre use and take advantage of its plethora of streaming vide add-ons.
Odroid XU4 RetroPie Performance
RetroPie on the Odroid XU4 is superb. Notably, Odroid XU4 RetroPie N64 performance is much improved over the Raspberry Pi, with smooth gameplay in games such as Goldeneye 64. Similarly, Sega Dreamcast and Sony PSP titles run better on the Odroid XU4 than on a Pi. You’ll probably want to turn off framekip, and change the resolution to 1x, though 2x-3x should function fine. With some settings changes, you can hit 30 frames per second (FPS) in many games.
Running RetroPie on the Odroid XU4: Final Thoughts
If you’re thinking of picking up an Odroid XU4 for any purpose, it’s a solid buy. Particularly, you’ll benefit from improved performance in RetroPie on an Odroid XU4 when playing N64, PSP, and Dreamcast games. The only potential issues you might encounter are minor glitches because of the Mali GPU. This isn’t unique to the Odroid XU4, and does affect several other SBCs and Android devices. Aside from that, there’s no Wi-Fi, but adapters are inexpensive, plus there’s always Ethernet.
What SBCs do you prefer for retro gaming?

Moe Long is an editor, writer, and tech buff with a particular appreciation for Linux, Raspberry Pis, and retro gaming. Writing online since 2013, Moe has bylines at MakeUseOf, TechBeacon, DZone, SmartHomeBeginner, DEV.to, DVD Netflix, and Electropages. You can read his writings on film and pop culture at Cup of Moe, check out his tech reviews, guides, and tutorials at Tech Up Your Life, and hear his thoughts on movies on the Celluloid Fiends podcast. Aside from writing and editing, Moe has an online course, the Beginner's Guide to Affiliate Blogging From Scratch. When he's not hammering away at his keyboard, he enjoys running, reading, watching cinema, listening to vinyl, and playing with his dog Sebastian.


Leave your feedback...