
Make a DIY Nintendo 64 Classic: Odroid XU4 N64 Build
The Odroid XU4 is among my favorite Raspberry Pi alternatives. With its octa-core processing, eMMC module support, and operating system (OS) compatibility, the Odroid XU4 is a versatile single-board computer. Though the XU4 is well-suited to use for a bevy of projects, one of the most enjoyable and fun endeavors is making a DIY Nintendo 64 Classic with an OGST Gaming Console Kit for XU4.
What is the Odroid XU4?
![]()
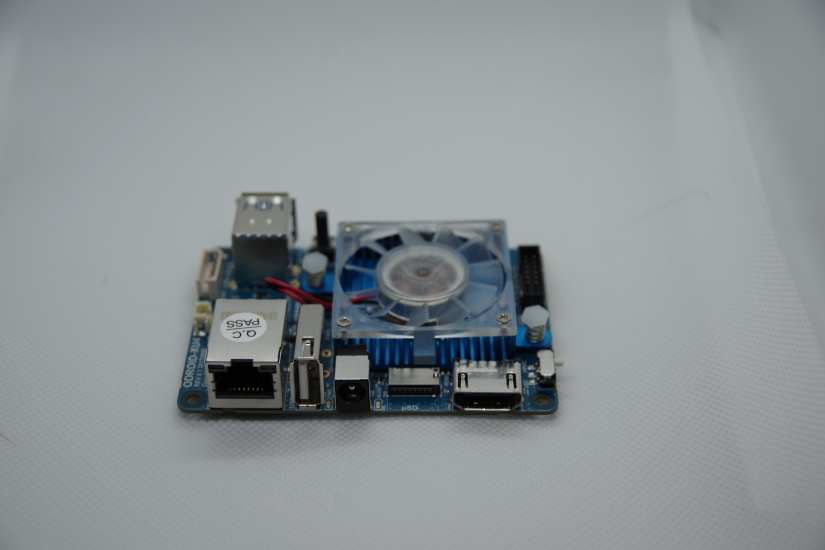
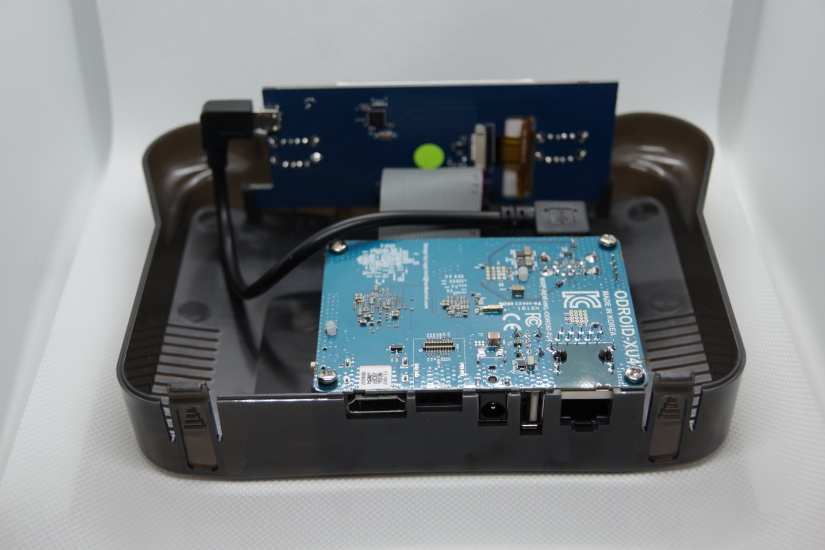
The Odroid XU4 is a single-board computer manufactured by Hardkernel. It's powered by Exynos5422 Cortex-A15 2GHz and Cortex-A7 CPUs. Onboard, there's a Mali-T628 MP6 GPU and the XU4 is outfitted with 2GB of DDR3 RAM. I/O ports include an HDMI, two USB 3.0 slots, and a USB 2.0. For bootable media, there's a microSD card slot as well as eMMC module connectivity.
- Samsung Exynos5422 Cortex-A15 2Ghz and Cortex-A7 Octa core CPUs
- Mali-T628 MP6
- 2GB DDR3 RAM
- 2x USB 3.0, 1x USB 2.0
- Gigabit Ethernet
- HDMI 1.4a
In Unixbench and Nbench benchmarks, the Odroid XU4 bested the Odroid C2, Odroid C1+, and Raspberry Pi 3.
DIY Nintendo 64 Mini: What You'll Need
![]()
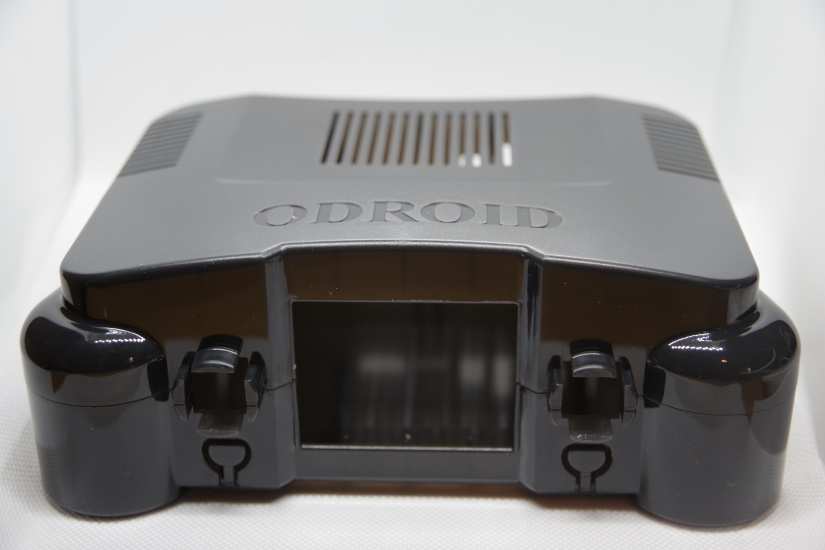
To make your own N64 Mini with an Odroid XU4, you'll need a few items. First, an Odroid XU4 or Odroid XU4Q. Then, the OGST Gaming Console Kit for XU4. Finally, on the software side, you'll need GameStation Turbo. It's the Odroid OGST case which allows you to make an Odroid XU4 N64 Classic Edition.
- Odroid XU4 or XU4Q
- OGST Gaming Console Kit
- 5V/4A power supply
- microSD card or eMMC module
- GameStation Turbo OS, Recalbox, The Retro Arena, or another Odroid XU4 retro gaming OS
- Peripherals (controllers, keyboard, mouse)
Total cost: $85+. The Odroid XU4 board retails for about $60. It's $24 for the OGST Gaming Console Kit for XU4. A 5V/4A power supply is sold separately, though you might have one lying around. You'll also need USB controllers and joysticks, a microSD card or eMMC module, and ROMs. An Odroid XU4Q with microSD card, PSU, OGST Gaming Console Kit, and controller is available for $150 USD.
What is GameStation Turbo?
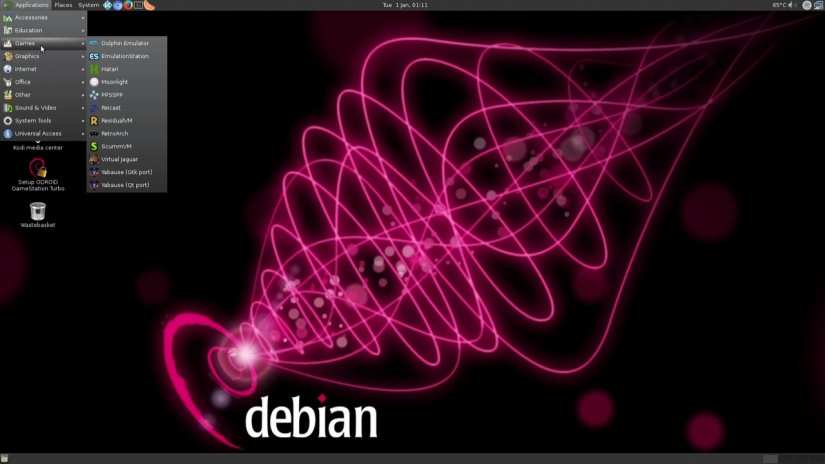
GameStation Turbo is a Linux distribution (distro) for the Odroid XU4. It's a Debian derivative with loads of software pre-installed, ranging from Kodi to various emulators. Because it's a full-on Debian OS, you benefit from a Linux desktop with home theatre PC (HTPC) and retro gaming functionality.
GameStation Turbo vs RetroPie/Recalbox/Lakka
Where GameStation Turbo differs from RetroPie, Recalbox, and Lakka is its desktop capabilities. While RetroPie and Recalbox do include Kodi as an addon for HTPC use, Lakka is purely focused on gaming. Then GameStation Turbo boasts desktop use for web browsing, office productivity, and more. Technically, you don't need to use GameStation Turbo with the OGST case. Instead, you can use virtually any compatible Odroid XU4 operating system, whether a retro gaming OS or a desktop distro. But if you want functionality with the N64 case's LCD screen, GameStation Turbo, Recalbox, and TheRA provide support.
- Lakka: Retro gaming
- RetroPie: Retro gaming and HTPC use
- Recalbox: Retro gaming and HTPC use
- GameStation Turbo: Retro gaming, HTPC and desktop use
- RetroArena: Retro gaming and HTPC use
How to Make an Odroid XU4 N64 Mini
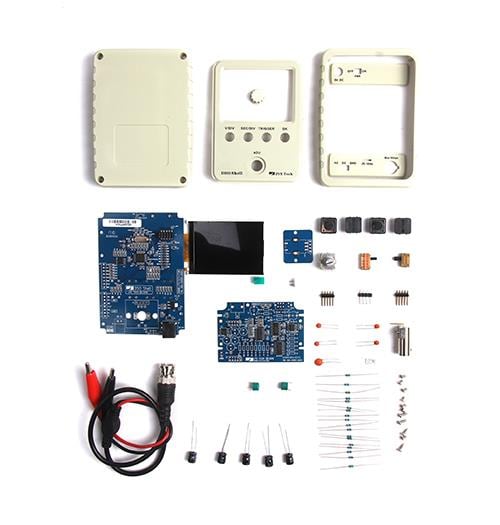
Begin by putting together the Odroid XU4 gaming kit. The contents of the OGST N64 kit are:
- Odroid XU4 OGST N64 case top and bottom
- OGST XU4 LCD screen
- USB 2.0 extension cable
- 30-pin flat cable
- Rubber feet for console
- USB 3.0 extension cable for 2.5-inch USB hard drive
- USB port covers
First, use the 30-pin flat cable to connect the OGST N64 LCD screen to the Odroid XU4 board. Once that's complete, insert the LCD screen and Odroid XU4 into the top half of the Odroid N64 case. The top of the XU4 faces up, and the LCD screen only faces one way. The HDMI, USB, microSD slot, power supply port, and Ethernet all line up with slots in the back of the unit, so there's only one way to insert the board and LCD screen. Once everything's properly set up, screw in the Odroid XU4 board.
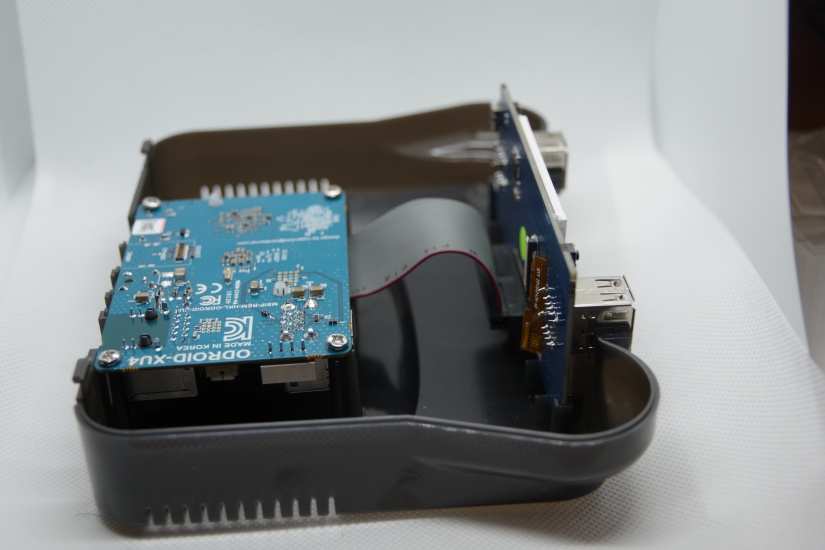
Next, use the USB to micro USB cable to connect the LCD screen's power port to a free USB port on the Odroid XU4. If you plan to use a 2.5-inch HDD with your Odroid XU4, you may attach that with the USB cable. However, if you pick this option you'll probably need the 5V/6A power supply as the 5V/4A PSU isn't strong enough to power the Odroid XU4 and an external HDD.
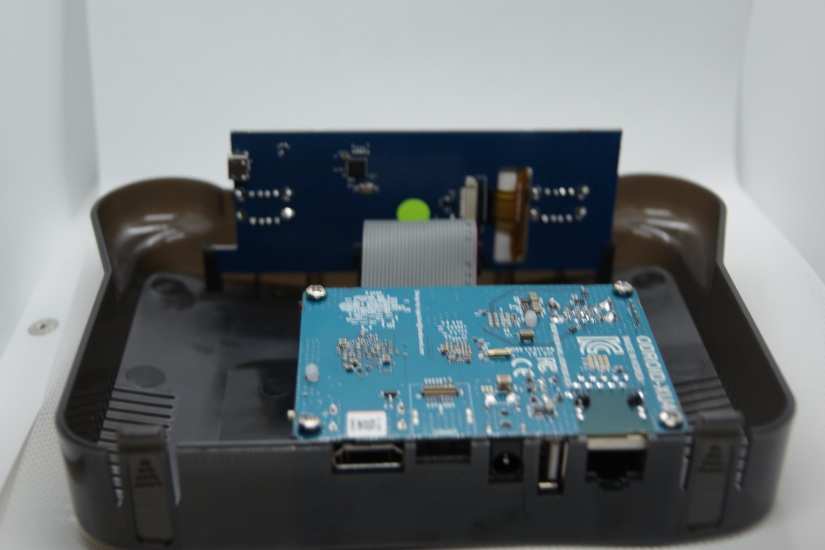
After everything's in place, simply close the shell. Place the rubber geet into their sections on the bottom of the case, and slip the USB covers over the front two USB sections. Now that assembly is complete, set up your GameStation Turbo software.
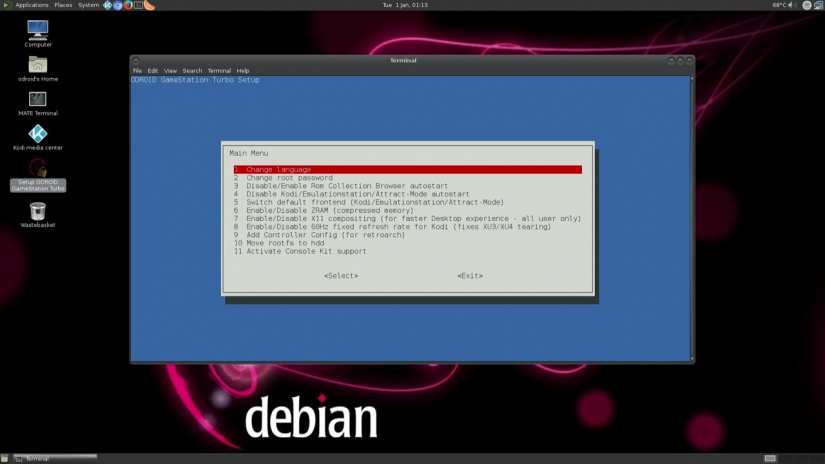
GameStation Turbo Odroid OS Configuration
Download the latest version of OGST. OGST downloads as an img.xz file, so you'll first have to extract it with an application like 7Zip. Using a program like Etcher, mount OGST on a microSD card or eMMC module. Now, pop your finalized boot media into your Odroid XU4.
By default, GameStation Turbo boots into Kodi. To exit, click the power button in the lower left-hand corner of the screen and select "Exit Kodi."
First, as with most Linux OS installations, it's best to perform an update:
apt-get update && apt-get upgrade && apt-get dist-upgrade
You can update to the Linux 4.14 LTS kernel with:
apt-get install linux-image-4.14-armhf-odroid-xu4 linux-headers-4.14-armhf-odroid-xu4
For Kodi v17.x and later, upgrade with:
apt-get install -t jessie kodi-next-odroid
Then, I suggest launching the Odroid GameStation Turbo maintenance section. Since I prefer hosting my OS on an external drive for more space, I selected the move OS to HDD option. For an external HDD, you'll need the 5V/6A PSU. But for a high capacity flash drive, you should be fine with the 5V/4A PSU.
Alternatively, you might want to move your ROM installation folders to an external drive. To create a symlink, open a terminal and run:
cp -av /home/odroid/ROMS /media/odroid/MyHDD/
and delete or rename the ROMs folder on your eMMC module or microSD card:
mv /home/odroid/ROMS{,.bak}
Now generate the symlink from your external drive:
ln -sf /media/odroid/MyHDD/ROMS /home/odroid/ROMS
You might want to mount a partition on an external drive as the ROMs folder. Start with mounting the partition so you can copy the appropriate files to that device:
mount /dev/sda1 /mnt
Now, copy the contents of the ROMs folder to the partition:
cp -av /home/odroid/ROMS/* /mnt/
After that, unmount the partition:
umount /mnt
Make an fstab entry for this new partition:
/dev/sda1 /home/odroid/ROMS ext4 defaults 0 0
Then, mount the partition:
mount -a
Lastly, set the root Odroid user as the owner of this folder:
chown -R odroid:odroid /home/odroid/ROMS
Or, you can set up a samba share. Ensure that the cfis-utils is installed:
apt-get install cifs-utils
And edit:
/etc/fstab
Make an entry for your samba share:
//10.0.0.1/ROMS /home/odroid/ROMS cifs credentials=/home/odroid/.smbcredentials,uid=odroid,gid=odroid 0 0
Generate .smbcredentials within the Odroid home folder:
username= password= domain= (mostly WORKGROUP)
Post-Installation Set Up
After installing GameStation Turbo, click on the Setup ODROID GameStation Turbo icon. From here, you can perform various actions such as moving the root file system to an external drive, and activating console kit support. The console kit is what allows animations to display on the front LCD screen.
It's definitely worth using an external drive for multimedia and ROM storage if you've got a ton of games, particularly for newer generations such as PSP and N64. Plus, with Kodi included, you can create an awesome HTPC for local media playback.
OGST Gaming Console Kit for XU4 Review
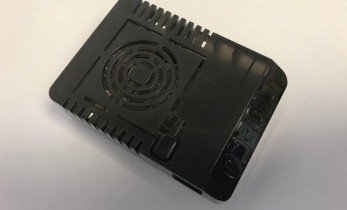
![]()
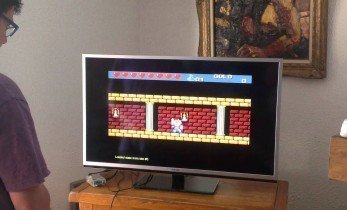
The OGST Ordoid XU4 N64 case clocks in as one of my favorite Odroid XU4 case options, and single-board computer cases overall. It's a high-quality kit which allows you to make a DIY Nintendo 64 Classic Mini. With the front LCD screen, it's a premium experience. I enjoyed the animations for game systems when I loaded ROMs. Build quality is superb with premium feeling plastics. On top and the sides, there's ventilation. Even though the Odroid XU4 features a fan, the SBC does get a bit warm particularly under load.
GameStation Turbo by default includes EmulationStation, PPSSPP, Reicast, ResidualVM, RetroArch, ScummVM, Virtual Jaguar, Hatari, Moonlight, Kodi, Clementine for music playing, Firefox, and the Chromium web browser. Thus, it's an incredible home theatre PC, retro gaming console, and even productivity machine. I used my XU4 running GameStation Turbo for web browsing, writing in LibreOffice which comes standard, and even podcast recording with Audacity.
Should You Make a DIY N64 Mini With the OGST Gaming Console Kit?
If you're looking for arguably the best retro gaming and HTPC experience from a single-board computer, I highly suggest the OGST Odroid XU4 kit. It's more expensive than a Raspberry Pi 3, but does feature better performance of newer game systems such as PSP, Dreamcast, and N64.
Moreover, the physical appearance mimics that of the Nintendo 64. Because of GameStation Turbo's versatility as a desktop operating system, HTPC, and game console, you gain a robust device with lots of customization. Additionally, it's pretty simple to set up. For a less expensive option, build your own NES Mini or SNES Classic with a Raspberry Pi 3 and custom case.
What SBCs are you using for retro gaming?

Moe Long is an editor, writer, and tech buff with a particular appreciation for Linux, Raspberry Pis, and retro gaming. Writing online since 2013, Moe has bylines at MakeUseOf, TechBeacon, DZone, SmartHomeBeginner, DEV.to, DVD Netflix, and Electropages. You can read his writings on film and pop culture at Cup of Moe, check out his tech reviews, guides, and tutorials at Tech Up Your Life, and hear his thoughts on movies on the Celluloid Fiends podcast. Aside from writing and editing, Moe has an online course, the Beginner's Guide to Affiliate Blogging From Scratch. When he's not hammering away at his keyboard, he enjoys running, reading, watching cinema, listening to vinyl, and playing with his dog Sebastian.


Leave your feedback...