
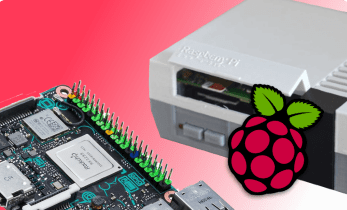
How to make a DIY SNES Classic with Raspberry Pi, ASUS Tinker Board, and More
Retro console clones are all the rage. You'll find a slew of these devices, from the NES Classic Mini to the Sega Mega Drive Mini, and Atari Flashback. Easily one of the most popular consoles of all-time, the Super Nintendo Entertainment System (SNES) features a bevy of fantastic gaming gems, from "Turtles in Time," to "Yoshi's Island." Just like the NES Mini, there's a SNES Classic Mini. However, a do-it-yourself SNES Mini boasts increased utility over the Super Nintendo Classic Mini. Learn how to make a DIY SNES Classic with a Raspberry Pi, ASUS Tinker Board, or RockPro64!
What is the SNES Classic Mini?
The SNES Classic Edition is a tiny Super Nintendo Entertainment System which emulates not only games, but the look and feel of the original console. It's packed with 20 classic games as well as the never-before-released "Star Fox 2" game. You'll find features such as the ability to rewind from the last suspend point, and using frames for a border around your game. Onboard titles include "Super Mario," "The Legend of Zelda: A Link to the Past," and "Yoshi's Island." However, that's only a fraction of the overall SNES game library.Why Build a DIY SNES Classic Mini with a Raspberry Pi or Other SBC
Instead of, or in addition to buying a SNES Classic Mini, you can build your own SNES Mini with a Raspberry Pi or another single-board computer. There are a few different benefits of a make your own Super Nintendo Classic over the SNES Classic. For one, you'll be able to play virtually any Super Nintendo game released, including unofficial titles, homebrew games, and demos. (Note: Electromaker does not condone piracy, so please only use ROMs of games which you legally own copies of).
Moreover, a DIY Super Nintendo with a Raspberry Pi, ASUS Tinker Board, or RockPro64 can emulate games from a variety of systems including Atari 2600, SNES, NES, and ranging all the way up to the PlayStation Portable, Nintendo 64, and Sega Dreamcast. Performance will vary based on board though.
How to Make a DIY SNES Classic Mini: Picking Out a Board and Case
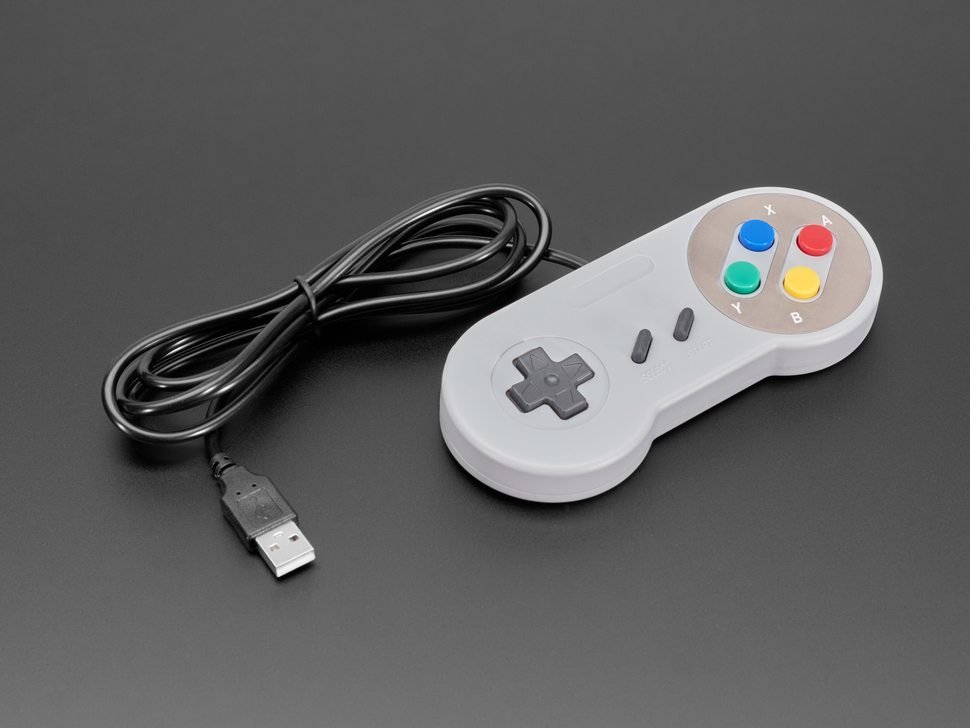
Step one in a DIY Super Nintendo Mini is selecting a board and case. The Raspberry Pi is arguably the most popular maker board on the market, and features a ton of case options including a Super Nintendo RetroFlag shell and RetroFlag Super Famicom case. The Super Famicom is basically the Japanese release of the SNES. Kintaro also offers its Super Kuma SNES-inspired case.
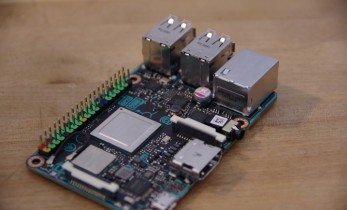
For systems through the PS1, a Raspberry Pi 3 B+ should be fine. Many Dreamcast and N64 games will run well, and even some PSP titles work like a champ on the Pi. But an ASUS Tinker Board with its Rockchip RK3288 Cortex-A17 system on a chip (SoC) and ARM Mali-T764 GPU provides better performance with high-end systems. Both the Tinker Board and Pi remain compatible with the same cases, so offerings from the likes of RetroFlag will fit a Tinker Board.
Then the RockPro64 and its RK3399 SoC touts superb performance with demanding titles like PSP and N64 ROMs. For the RockPro64, you can snag a Roshambo Retro Gaming case along with a cartridge-shaped SSD.
Raspberry Pi 3 B+ specs:
- Broadcom BCM2837B0 quad-core A53 (ARMv8) 64-bit @ 1.4GHz SoC
- 1GB LPDDR2 SDRAM
- Gigabit Ethernet, 802.11b/g/n/ac Wi-Fi
- Bluetooth 4.2
- microSD storage
- 40-pin GPIO header
- HDMI port, 3.5mm A/V jack
- 4 x USB 2.0 ports
- CSI, DSI
- 5V/2.5A DC micro USB power input
ASUS Tinker Board specs:
- Rockchip RK3288 Cortex-A17 quad-core SoC
- ARM Mali-T764 GPU
- Up to 4K video support
- 2GB DDR3
- 802.11 b/g/n Wi-Fi
- Bluetooth 4.0
- 4 x USB 2.0 ports
- 15-pin MIPI CSI slot
- 40-pin GPIO header
- micro USB port for power
ASUS Tinker Board S (same as ASUS Tinker Board plus):
- 16GB eMMC
- HDMI-CEC
- Low-voltage input detection
- Plug-in detection, audio auto-switching
Pine64 RockPro64 specs:
- Rockchip RK3399 Hexa-Core (dual ARM Cortex A72 and quad ARM Cortex A53) processor
- MALI T-860 Quad-Core GPU
- eMMC slot
- microSD card slot
- 1 x USB 3.0 Type C
- 1x USB 3.0 type A
- 2x USB 2.0 Host
- Gigabit Ethernet
- PI-2 GPIO Bus
- eDP interface
- MiPi DSI interface
- Touch panel interface
- Stereo MiPi CSI interface
Raspberry Pi and ASUS Tinker Board Cases:
RockPro64 Cases:
DIY SNES Mini Retro Gaming OS Options - RetroPie vs Recalbox vs Lakka vs Batocera on the Raspberry Pi
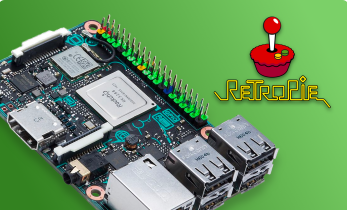
For the Raspberry Pi, you can pick between RetroPie, Recalbox, Lakka, and Batocera. RetroPie is arguably the most popular of the available Raspberry Pi retro gaming operating system options. You'll find installers for the Raspberry Pi 0 and Raspberry Pi Zero W, Pi 1, 2, 3, and Raspberry Pi 3 B+. It's simple enough to use, while offering tons of different settings to tweak such as custom shaders.
Recalbox provides a similar experience with RetroArch and the EmulationStation frontend over top. But it's a bit easier for beginners, at the cost of customization tweaks. You won't find many of the custom shaders that RetroPie boasts. Batocera is nearly identical to Recalbox, and a super simple Raspberry Pi gaming OS. Batocera, RetroPie, and Recalbox each feature the ultra-powerful Kodi media centre for home theatre PC (HTPC) purposes.
Finally, Lakka provides a completely different experience. Its layout mimics that of the PlayStation 3's XcrossMediaBar (XMB). It's packed with settings to tweak, and works with virtually any controller you throw at it out-of-the-box. Still, its robust nature means that Lakka can be a bit overwhelming for new users. The array of customization options surpasses RetroPie, Recalbox, and Lakka. Since Lakka lacks Kodi while Batocera, RetroPie, and Recalbox each feature the popular open-source media centre, it's better for those that don't require
RetroPie: Best for most users
Recalbox/Batocera: Best for beginners but totally suitable for advanced users
Lakka: Best for advanced users with no HTPC needs
DIY SNES Classic Mini ASUS Tinker Board OSes - Lakka vs RoTT vs Slash TV
While the Raspberry Pi remains the most popular maker board available, it's not the only single-board computer on the market. Nor is it the most powerful. The ASUS Tinker Board with its RK3288 SoC and ARM Mali-T764 GPU yields enhanced performance for emulating more powerful systems such as the Sega Dreamcast, Nintendo 64, and even PlayStation Portable. Although the RetroPie Project doesn't officially support the Tinker Board, dedicated community member Steve Laminger offers RetroPie on Tinker Board, or ROTT. It's loaded with tons of different emulators.
Lakka once again delivers an excellent retro gaming experience on the Tinker Board. Loads of settings to fiddle with, out-of-the-box controller support, and great performance make Lakka a fantastic choice for retro gaming.
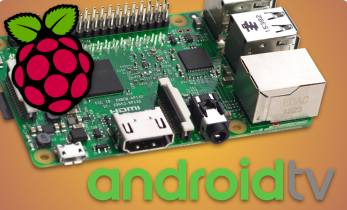
Slash TV is an Android TV operating system for the ASUS Tinker Board hailing from Laminger. Onboard, you'll find a smorgasbord of apps for retro gaming and HTPC use, including Plex, Netflix, and RetroArch. Of the various ASUS Tinker Board retro gaming OSes, Slash TV is my favorite.
RoTT: Best for beginners
Slash TV: Best for HTPC and gaming use
Lakka: Best for advanced users
RockPro64 Retro Gaming OS Options - Recalbox vs Lakka vs Batocera
Stepping up to the RockPro64 affords the ability to run many high-end systems such as PSP and N64 games. Still, some titles aren't going to perform well without options like frameskip enabled. Recalbox is available for the RockPro64 and provides a similar experience to its Raspberry Pi variant. Batocera, nearly identical to Recalbox, runs on the RockPro64 for retro gaming as well, and I appreciate the ability to run Kodi in both of these releases. Lakka is pretty plug and play, but I prefer Batocera or Recalbox on the RockPro64 since both include Kodi baked in.
Recalbox/Batocera: Best for beginners and HTPC users
Lakka: Best for advanced users
How to Make a DIY SNES Classic Mini
Once you've decided on what case, board, and retro gaming OS to use, it's time to actually make a DIY SNES Classic Mini.
How to Install RetroPie on the Raspberry Pi
First up, navigate to the RetroPie downloads page and snag the proper installer for your board. I recommend a Raspberry Pi 3 or Raspberry Pi 3 B+, but you can use a Pi Zero, 1, 2, or A+ as well. After downloading your Raspberry Pi RetroPie image, use a program such as 7Zip to extract the compressed image file.
You'll then have an IMG file which you'll need to mount to a microSD card with an app like Etcher. When you've successfully mounted the RetroPie image to your boot medium, pop that microSD card into your Raspberry Pi and power it on.
Before you can actually use RetroPie on the Raspberry Pi, you'll need to map the buttons on your controller. Follow the prompts and when you're finished you can begin using RetroPie. As a first step, navigate to RetroPie Menu > Raspberry Pi Configuration Tool Raspi-Config > Expand Filesystem to expand your file system. Once complete, you'll get a message reading "Root partition has been resized. The filesystem will be enlarged upon the next boot." Proceed to reboot your Pi.
I'd suggest connecting to Wi-Fi next by heading under RetroPie > WiFi > Connect to WiFi network. Then, select your network and enter your credentials. After getting the internet up and running, either Ethernet or Wi-Fi, it's best to perform an update. On your keyboard, hit F4 to drop to the command line, and run:
sudo apt-get update
When your update completes, reboot:
sudo reboot
After expanding your file system, updating to the latest version of RetroPie, and getting connected to the internet, install more emulators with RetroPie > RetroPie Setup > Manage packages. Choose either source- or binaries-based installation. A binaries-based install should be fine, and is far quicker than a source-based install.
You'll need to add ROMs as well which you can do via several methods. The simplest way is with a flash drive. Take an NTFS or FAT32 formatted drive and create a retropie-mount folder at the root of the drive. Plug it into your Pi, wait a few minutes, then remove it and you should find the RetroPie folder with ROMs folders inside of the retropie-mount folder. Then, just drag and drop your ROMs into the corresponding folders.
How to Install Recalbox on the Raspberry Pi or RockPro64
I really enjoy the simplicity of Recalbox. Like RetroPie, it's RetroArch with the EmulationStation frontend, but it's a little friendlier for beginners. Begin by downloading the Recalbox image for your Pi or RockPro64 board. After you've obtained the correct Recalbox installer, extract the img.xz file with a program such as 7Zip which will leave you with am IMG file.Using an app like Etcher, mount the image to an eMMC module or microSD card, and when mounting finishes pop it in your RockPro64 or Pi, then power it on. You'll need to proceed through a brief controller config, and then you can begin using Recalbox. Storing ROMs on an external drive is pretty simple. Hook up your flash drive or harddrive, then hit Start > System Settings > Storage Device and pick either a specific external drive or Any External.
How to Install Batocera on the Raspberry Pi and RockPro64
Batocera installs pretty much the same way as Recalbox. Download the Batocera image that's best suited to your Pi or RockPro64 board. Now, extract the img.gz with an app like 7Zip.Using Etcher or another mounting program, burn the decompressed Batocera image file to a microSD card slot. Once mounting finishes, insert your microSD card or eMMC module into your Raspberry Pi or RockPro64, and fire it up.
Navigation is identical to Recalbox essentially. Head to Start > System Settings > Storage Device to select a specific external drive or any external drive as ROM storage. Batocera restarts, and at the root of your external drive you'll find a recalbox folder with folders for each system where you'll need to put your ROMs.
How to Install Lakka on the Raspberry Pi, ASUS Tinker Board, and RockPro64
Lakka is fairly easy to install. Head over to the Lakka downloads page and snag the appropriate installer for your board. With the correct Lakka image downloaded, use 7Zip or another program to extract the img.gz file.Now, you're left with a Lakka image file which you can mount on a microSD card or eMMC module depending on which board and storage medium you're using. Go ahead and mount your Lakka image with an app such as Etcher.
Insert the microSD card or eMMC module, power on your board, and you've successfully booted into Lakka.
How to Install RoTT on the ASUS Tinker Board
RetroPie on the Tinker Board runs like a champ. Download the ROTT image. You'll find several versions including the Epic Edition and Ultimate Edition. Pick a version, and download the installer for either an EMMC or microSD card. Extract the image using 7Zip.With your image extracted, mount it to your boot medium with Etcher or another similar application. Then, pop your microSD card or eMMC module into the Tinker Board, and power it on. Once you've booted up ROTT, you can run ROMs from a flash drive by creating a retropie-mount folder at the root of your flash drive, and wait a few minutes for the RetroPie folder to copy its contents. Notably, for an existing retropie-mount folder from a Raspberry Pi or Odroid XU4, you can easily just use that flash drive for external ROM storage.
How to Install Slash TV on the ASUS Tinker Board
Download the Slash TV ASUS Tinker Board Android TV image. The RAR file needs to be extracted using 7Zip or a comparable program. Decompress it, then mount the image file to an eMMC module or microSD card.Now, pop the boot medium into your Tinker Board and power it on. It's packed with emulators such as PPSSPP, Reicast, and RetroArch. Fire up whichever emulator you want to play, browse for your ROMs, and you're ready to go. I used a flash drive for my ROMs, but only an NTFS formatted drive worked. Aside from gaming, you'll find the likes of Kodi and Netflix pre-installed for streaming purposes, and you can even access the Google Play store.
Make Your Own SNES Classic Mini With a Raspberry Pi, ASUS Tinker Board, or RockPro64: Final Thoughts
While you can, and should, buy a SNES Mini, a DIY SNES with a Raspberry Pi, RockPro64, or ASUS Tinker Board is an excellent device. You'll be able to emulate tons of consoles, far more than merely the Super Nintendo, and depending on which board and OS you pick, will gain access to streaming services such as Netflix for an all-in-one multimedia and game console. On the Raspberry Pi, I prefer RetroPie, while my RockPro64 runs Recalbox. For Tinker Board use, I'm partial to the ultra-utilitarian Slash TV. As for cases, I've got my RockPro64 in a Roshambo retro gaming case for a Super Famicom clone, and RetroFlag SNES and Super Famicom cases for a Pi and Tinker Board respectively.
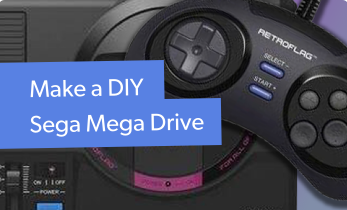
For more retro fun, try making a DIY NES Classic Mini!

Moe Long is an editor, writer, and tech buff with a particular appreciation for Linux, Raspberry Pis, and retro gaming. Writing online since 2013, Moe has bylines at MakeUseOf, TechBeacon, DZone, SmartHomeBeginner, DEV.to, DVD Netflix, and Electropages. You can read his writings on film and pop culture at Cup of Moe, check out his tech reviews, guides, and tutorials at Tech Up Your Life, and hear his thoughts on movies on the Celluloid Fiends podcast. Aside from writing and editing, Moe has an online course, the Beginner's Guide to Affiliate Blogging From Scratch. When he's not hammering away at his keyboard, he enjoys running, reading, watching cinema, listening to vinyl, and playing with his dog Sebastian.


Leave your feedback...