
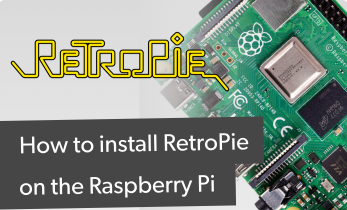
Asus Tinker Board RetroPie Installation and Getting Started
While loads of retro gaming operating system (OS) options abound, RetroPie remains arguably the most popular. This Linux-based distribution (distro) provides a streamlined, simple but effective means of playing a variety of retro games. RetroPie runs on a variety of boards including the Raspberry Pi, Odroid XU4/XU3, Odroid C1/C2, or on top of Ubuntu/Debian. Learn about an Asus Tinker Board RetroPie installation, from what you'll need to initial set up!
What is RetroPie?
RetroPie is a Debian Linux-based retro gaming operating system. It runs RetroArch with the EmulationStation frontend. While RetroArch is the gaming framework with cores for emulation, EmulationStation provides a pretty user interface.
Among the systems you can emulate with RetroPie on the Asus Tinker Board, you'll find the Nintendo 64, Nintendo Entertainment System, Super Nintendo Entertainment System (SNES), Atari 2600/5200/7800/Jaguar/Lynx, PlayStation 1 (PS1) and PlayStation Portable (PSP), and more.
RetroPie emulators list:
- Apple II
- Atari 2600
- Atari 5200
- Atari 7800
- Atari Lynx
- Atari Jaguar
- GCE Vectrex
- NEC TurboGrafx-16
- Nintendo 64
- Nintendo Entertainment System
- Nintendo Super NES
- Nintendo Game Boy
- Nintendo Game Boy Color
- Nintendo Game Boy Advance
- Nintendo Virtual Boy
- Sega 32X
- Sega CD
- Sega Master System
- Sega Genesis
- Sega Game Gear
- Sega Saturn
- SNK Neo Geo
- SNK Neo Geo Pocket Color
- Sony PlayStation
- Sony PlayStation Portable
Additionally, RetroPie allows for ports. You can install the likes of Kodi for home theatre PC (HTPC) use like streaming and local media playback. As such, RetroPie provides an easy way of creating an ASUS Tinker Board HTPC. With its versatility and ease of use, RetroPie is one of the top ASUS Tinker Board OS options.
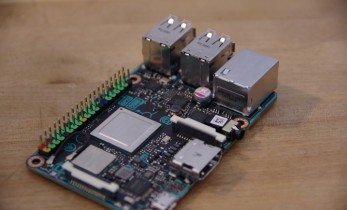
What is the ASUS Tinker Board?
The ASUS Tinker Board is a beefy little single-board computer (SBC). It comes in two flavors, the ASUS Tinker Board and ASUS Tinker Board S. Onboard, you'll find a Rockchip RK3328 Cortex-A17 quad-core system on a chip (SoC). There's an ARM Mali-T764 GPU that delivers up to 4K video output. ASUS's Tinker Board packs 2GB of DDR3, and solid connectivity. There's 802.11 b/g/n Wi-Fi, Bluetooth 4.0, and four USB 2.0 ports. Plus, there's a 40-pin GPIO header.
ASUS Tinker Board specs:
- Rockchip RK3288 Cortex-A17 quad-core SoC
- ARM Mali-T764 GPU with 4K video out support
- 2GB DDR3
- 802.11 b/g/n Wi-Fi
- Bluetooth 4.0
- 4 x USB 2.0 ports
- 1 x 15-pin MIPI CSI slot
- 1 x 40-pin GPIO header
- micro USB port for power
- Linux compatibility
ASUS Tinker Board RetroPie Installation and Set Up
Because of its ease of use and powerful GPU/CPU combo, RetroPie is an awesome way to get started with ASUS Tinker Board gaming. You'll need an ASUS Tinker Board, microSD card for boot medium, and a Debian-based Linux distro. Debian or Ubuntu will work perfectly.
Additionally, you'll require a micro USB power supply, peripherals such as a keyboard, mouse, and gamepad, and an optional but recommended case. Since the ASUS Tinker Board fits in Raspberry Pi cases, you can snag a retro-inspired case and build the ultimate retro gaming console.
What you'll need for making a RetroPie console with an ASUS Tinker Board:
- ASUS Tinker Board
- Debian-based Linux OS
- RetroPie software
- microSD card (8 GB+)
- Peripherals (keyboard, mouse, game controller)
- Case (optional, recommended)
Total cost: $57+ USD. The ASUS Tinker Board alone retails for about $57, and the Tinker Board S runs around $85 USD. Specs are virtually the same, so I suggest opting for the vanilla Tinker Board unless you need HDMI-CEC, enhanced power management, or a smart audio jack.
How to Install RetroPie on the ASUS Tinker Board
As of RetroPie 4.4, there's compatibility with the ASUS Tinker Board. With a Debian-based Linux OS installed, open a new command line (CTRL + ALT + T). Perform an update and upgrade:
sudo apt-get update && sudo apt-get upgrade
Next, install the required packages for the RetroPie setup script:
sudo apt-get install -y git dialog unzip xmlstarlet
After that, downloaded the latest iteration of the RetroPie setup script:
git clone --depth=1 https://github.com/RetroPie/RetroPie-Setup.git
Then, change directories into the RetroPie-Setup folder:
cd RetroPie-Setup
Run the RetroPie setup script:
sudo ./retropie_setup.sh
You should see a screen which gives a few options including:
- I Basic install
- U Update all installed packages
- P Manage packages
- C Configuration / Tools
- S Update RetroPie-Setup script
- X Uninstall RetroPie
- R Perform reboot
Now, you'll want to choose Basic install. This installs the main packages found in the RetroPi. image.
Standalone ASUS Tinker Board RetroPie Image: ROTT
Alternately, there's a kind soul, Crash, who made a standalone image called RetroPie on The Tinker Board or ROTT. It's about 5 GB in size, and is stable. No ROMs ship on this RetroPie image, but it's easy to install. Crash's RetroPie image for the ASUS Tinker Board boasts an auto-expansion on first boot, as well working Wi-Fi, Samba shares, Bluetooth, a BIOs pack, and more.
For an ASUS Tinker Board gaming device running the standalone RetroPie image, first download the image. It's a ZIP file, so first you'll need to unzip the image file. Once that's complete, mount the IMG to your microSD card using a program such as Etcher.
After burning to boot medium, pop the microSD card into your Raspberry Pi. Now, you're ready to boot into RetroPie.
Once you've booted into RetroPie, it's basically the same as on other boards like the Raspberry Pi or Odroid XU4. The easiest method of setup is simply creating a folder called retropie-mount on a flash drive or hard drive formatted in FAT 32. Then, attach it to your Tinker Board. Wait a few seconds or minutes, then take it out. The retropie-mount folder should be populated with a RetroPie folder. Inside, you'll find folders for all of your ROMs. I have a 256GB flash drive full of ROMs and it's functioned with RetroPie images regardless of the board.
Running ROMs From a Samba Share
Using a Windows PC, enter \\retropie or use your device's IP address instead of retropie. On macOS, launch the finder, pick Go, and type smb://retropie then choose Connect.
Running ROMs off of SFTP
For SFTP, you’ll first need to enable SSH. Navigate to the /boot/ directory and make an SSH folder. Head to Tinker Config, select Interfacing Options, SSH, and Enable. Reboot. You will need a program for Windows or macOS to access SFTP. Linux has SSH and SFTP compatibility built into its OS. WinSCP or Cyberduck are solid options.
Default username: tinker
Default password: tinker
Root user: root
Root password: tinkermaster
Gameplay is pretty smooth, though performance does vary a bit. Notably, Nintendo 64 ROMs like Goldeneye 64 run superbly. PlayStation 1 ROMs are solid. PSP games on the ASUS Tinker Board vary. Titles like Grand Theft Auto: Vice City Stories run with ease. Other games such as God of War: Chains of Olympus provide a bit of an issue, but those even struggle on high-end Android devices including the Nvidia Shield TV.
The ASUS Tinker Board provides a performance boost over the Raspberry Pi though it's not quite as hefty as the Odroid XU4. Alternative retro gaming OSes you might consider include Lakka and Recalbox which differ from RetroPie a bit. Recalbox runs on the Odroid XU4 as well as Raspberry Pi, and x86 PCs.
RetroPie on the Tinker Board: Final Thoughts
Ultimately, RetroPie on the ASUS Tinker Board performs noticeably better than on the Raspberry Pi 3 B+. Installation is fairly easy, though the official standalone image for the Raspberry Pi is a bit more intuitive, and sports increased longevity since it's backed by the official RetroPie team.
An Odroid XU4 hits the sweet spot though, with the ability to make a do-it-yourself (DIY) N64 Classic Mini. But the ASUS Tinker Board is a phenomenal device running RetroPie. Retro gaming OS Lakka, which is also available for the Raspberry Pi, Odroid XU4, and more SBCs, features an installer for the Tinker Board. But unlike with RetroPie, there's no way to install Kodi for an ASUS Tinker Board HTPC. The ASUS Tinker Board positions itself well as a nifty Raspberry Pi alternative.
Your turn: What are you running on your ASUS Tinker Board, and which SBCs do you prefer?

Moe Long is an editor, writer, and tech buff with a particular appreciation for Linux, Raspberry Pis, and retro gaming. Writing online since 2013, Moe has bylines at MakeUseOf, TechBeacon, DZone, SmartHomeBeginner, DEV.to, DVD Netflix, and Electropages. You can read his writings on film and pop culture at Cup of Moe, check out his tech reviews, guides, and tutorials at Tech Up Your Life, and hear his thoughts on movies on the Celluloid Fiends podcast. Aside from writing and editing, Moe has an online course, the Beginner's Guide to Affiliate Blogging From Scratch. When he's not hammering away at his keyboard, he enjoys running, reading, watching cinema, listening to vinyl, and playing with his dog Sebastian.


Leave your feedback...