
How to build a low-powered Home theater PC with a Raspberry Pi
The Raspberry Pi is a fantastic single-board computer (SBC). Despite its small stature and minimal power consumption, the Pi boasts excellent computing capabilities. With its tiny footprint, low power draw, and commendable processing, the Raspberry Pi makes an excellent home theatre PC (HTPC). Learn all about building a low-powered Home theater PC (HTPC) with a Raspberry Pi!
Low-powered Raspberry Pi Home theater PC (HTPC): What You’ll Need
Before getting started, you’ll need a few items:
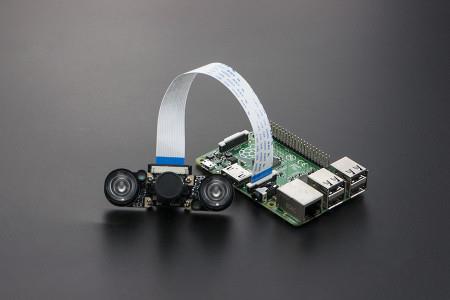
- Raspberry Pi board (Raspberry Pi 4 recommended)
- microSD card
- Compatible power supply
- Input devices (keyboard, mouse)
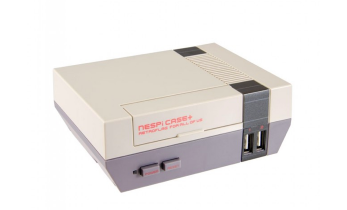
- Case (optional but recommended)
- HTPC distribution for the Raspberry Pi
Total Cost: $60-75
You can snag an entire kit with a Raspberry Pi 4, microSD card, power supply, and case for around $60. Any input device, such as a keyboard and mouse will suffice. However, you may consider a mini keyboard with a touchpad such as the Rii i8+. Likewise, almost any case will do, but these awesome Raspberry Pi cases are sure to spice up your HTPC set up.
Pick Your HTPC Distro
Next, select your Raspberry Pi media center OS. There are loads of choices, and which you opt for depends on your needs. For instance, many Kodi-based Raspberry Pi media center distros are ideal for movies, television, music, and more. However, for gaming plus HTPC use, look to operating systems such as Recalbox and RetroPie.
Originally XBMC, or Xbox Media Center, Kodi remains at the forefront of open-source media centers. It’s easy to use, lightweight, yet robust in its functionality. With Kodi, you can stream media from add-ons, essentially apps as you’d find on a Roku or Android TV box. Additionally, Kodi is great for local file playback, and sports compatibility with virtually any file you throw at it. You’ll find a few Kodi media center OSes for the Raspberry Pi. Alternately, you may choose a distro with Kodi pre-installed, or install Kodi as an app op top of a distro. If this is a dedicated low-powered Raspberry Pi HTPC, simply use an HTPC operating system. For gaming, grab a game-centric distro that offers media center functionality. However, if you desire desktop capabilities, run Kodi as an app from a Raspberry Pi-compatible distro such as Raspbian.
- Standalone Kodi-based HTPC distro vs Kodi installed within an OS
OSMC
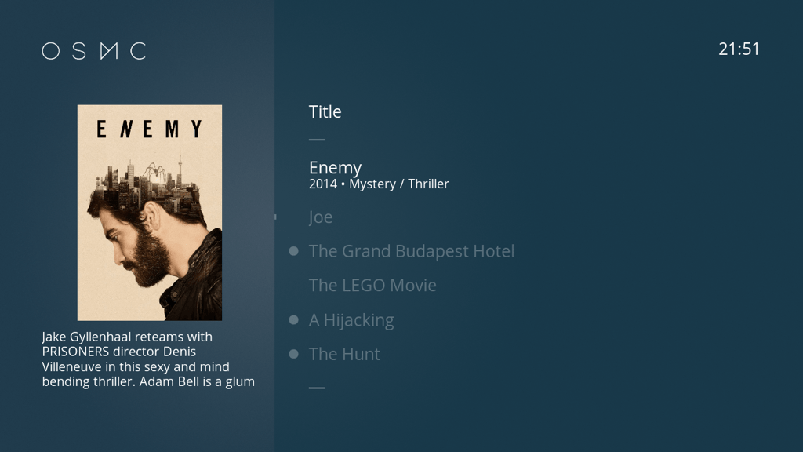
Open-source Media Center, or OSMC, is a nifty standalone Kodi OS. It’s free and simple to set up and use. Plus, there’s an excellent app store and installers for the Raspberry Pi 1, 2, 3, and Zero. It uses a different skin, but you can quickly switch to the old school Kodi theme. The default OSMC user interface (UI) feels polished and modern, with touches such as artwork and plot synopsis for titles in your library. The UI is among the best you’ll find, OSMC gets loads of updates and patches, plus it’s Debian-based for extra functionality.
- Debian-based Kodi OS
- Minimalist, modern UI
- Includes default Estuary skin
- Regular updates and patches
LibreELEC
Branded as just enough OS for Kodi, LibreELEC is another Linux-based Kodi HTPC distro. According to Flixed.io, LibreELEC is a better choice than OpenELEC. That’s because LibreELEC is simpler to install and features regular updates. It’s incredibly Kodi-centric, even using the main Kodi Estuary skin. Moreover, Raspberry Pi performance is better with LibreELEC than OpenELEC and yields better security.
- Kodi-based OS
- Uses Estuary skin
- Great Raspberry Pi performance
- Regular updates and patches
OpenELEC
For a lightweight, capable Kodi media center, OpenELEC is a solid choice. It’s not system-intensive, and OpenELEC has been around quite a while. However, newer OSes such as OSMC and LibreELEC receive more frequent updates and security patches. Nevertheless, OpenELEC remains a good choice for a Raspberry Pi low-powered HTPC build.
- Kodi-based OS
- Uses Estuary skin
- Has been around a while
XBian
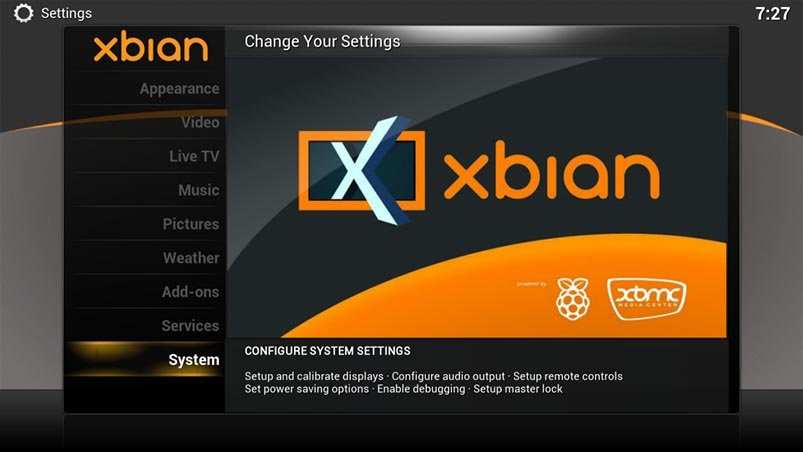
This Debian derivative runs Kodi on top of a full Debian subsystem. Therefore, it’s compatible with pretty much any app you want to run. htpcBeginner reports that XBian is a top choice for the latest patches, upgrades, and fixes. Like OSMC, XBian is awesome for allowing users to use the underlying operating system.
- Debian-based Kodi OS
- Regular updates and patches
RetroPie
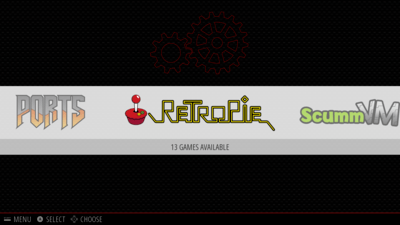
Whereas many HTPC software options for the Raspberry Pi focus primarily on media consumption, RetroPie is a retro gaming arcade. It boots into the EmulationStation frontend for gaming on a Raspberry Pi. However, RetroPie includes Kodi as an app, so if you’re a gamer seeking a low-powered home theatre PC, RetroPie is the way to go. Among its amenities, you’ll find extreme customization options such as the ability to tweak shaders. But Kodi is a bit slow to run, even on a Raspberry Pi 3. Still, it works and it great for a gaming-first HTPC.
- Retro gaming OS
- Loads EmulationStation frontend
- Includes Kodi
Recalbox
Similar to RetroPie, Recalbox boots into the EmulationStation frontend. Also, like RetroPie, Recalbox features Kodi as an app within the operating system. It’s another primarily retro gaming operating system for the Raspberry Pi, though it’s more user-friendly than RetroPie. For beginners, check out Recalbox.
- Retro gaming OS
- Loads EmulationStation frontend
- Includes Kodi
- Beginner-friendly
Raspbian
As the name suggests, Raspbian is a Debian-based operating system for the Raspberry Pi. It’s robust, and from Raspbian you can install tons of programs, from Mycroft to Kodi. If you seek a Raspberry Pi with desktop and home theatre PC capabilities, install Raspbian.
- Debian-based desktop
- Can install Kodi on Raspbian
Installation
After deciding on your operating system, whether a standalone Kodi operating system, retro gaming OS, or desktop environment with Kodi as a program within, it’s time to install your OS.
NOOBS
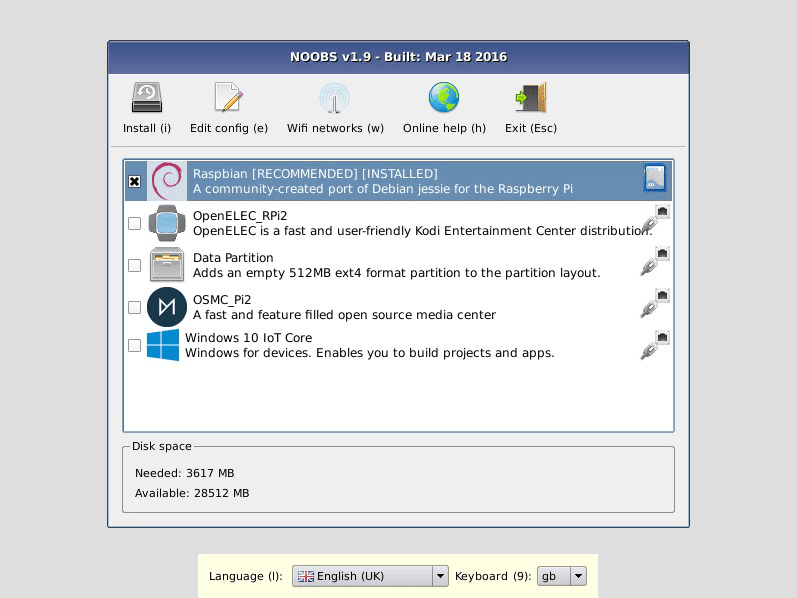
Arguably the easiest method, you can download the NOOBS image. This includes Raspbian, LibreELEC, OSMC, among others. Merely download NOOBS, unzip the image file and mount the image to a microSD card.
The following programs are great for unzipping .gz files:
- Windows: 7-Zip
- macOS: The Unarchiver
Try one of these mounting software options:
- Windows: Win32DiskImager
- macOS: ApplePi-Baker
- Linux: LiveUSB Install
On initial boot, you may choose which operating systems to install. However, for anything other than Raspbian, you’ll need an active Internet connection.
Install OSMC for the Raspberry Pi
Navigate to the OSMC Download page. From here, choose the operating system of the computer which you’re using to create your bootable microSD card. For instance, if you’re downloading OSMC for use on a Windows PC, choose “Windows.” This downloads the OSMC EXE installer. On macOS, pick OS X.
Linux comes in several flavors. For Ubuntu 16.04, run:
sudo sh -c "echo 'deb http://download.opensuse.org/repositories/home:/osmc/xUbuntu_16.04/ /' > /etc/apt/sources.list.d/osmc-installer.list"
sudo apt-get update
sudo apt-get install osmc-installer
If you like, you may add the repository key to apt:
wget -nv https://download.opensuse.org/repositories/home:osmc/xUbuntu_16.04/Release.key -O Release.key
sudo apt-key add - < Release.key
sudo apt-get update
On Ubuntu 14.04, enter:
sudo sh -c "echo 'deb http://download.opensuse.org/repositories/home:/osmc/xUbuntu_14.04/ /' > /etc/apt/sources.list.d/osmc-installer.list"
sudo apt-get update
sudo apt-get install osmc-installer
To add the repository to apt, run:
wget -nv https://download.opensuse.org/repositories/home:osmc/xUbuntu_14.04/Release.key -O Release.key
sudo apt-key add - < Release.key
sudo apt-get update
If you’re using Ubuntu 12.04, you’ll enter:
sudo sh -c "echo 'deb http://download.opensuse.org/repositories/home:/osmc/xUbuntu_12.04/ /' > /etc/apt/sources.list.d/osmc-installer.list"
sudo apt-get update
sudo apt-get install osmc-installer
And to add the repository to apt:
wget -nv https://download.opensuse.org/repositories/home:osmc/xUbuntu_12.04/Release.key -O Release.key
sudo apt-key add - < Release.key
sudo apt-get update
On RHEL 7, run:
cd /etc/yum.repos.d/
wget https://download.opensuse.org/repositories/home:osmc/RHEL_7/home:osmc.repo
yum install osmc-installer
Or, for RHEL 6 enter:
cd /etc/yum.repos.d/
wget https://download.opensuse.org/repositories/home:osmc/RHEL_6/home:osmc.repo
yum install osmc-installer
For CentOS 7, use:
cd /etc/yum.repos.d/
wget https://download.opensuse.org/repositories/home:osmc/CentOS_7/home:osmc.repo
yum install osmc-installer
But for CentOS 6, run:
cd /etc/yum.repos.d/
wget https://download.opensuse.org/repositories/home:osmc/CentOS_6/home:osmc.repo
yum install osmc-installer
On Debian 8, enter:
echo 'deb http://download.opensuse.org/repositories/home:/osmc/Debian_8.0/ /' > /etc/apt/sources.list.d/osmc-installer.list
apt-get update
apt-get install osmc-installer
Add the repository key to apt with:
wget -nv https://download.opensuse.org/repositories/home:osmc/Debian_8.0/Release.key -O Release.key
apt-key add - < Release.key
apt-get update
For those using Debian 7, run:
echo 'deb http://download.opensuse.org/repositories/home:/osmc/Debian_7.0/ /' > /etc/apt/sources.list.d/osmc-installer.list
apt-get update
apt-get install osmc-installer
Enter the following to add the repository key to apt:
wget -nv https://download.opensuse.org/repositories/home:osmc/Debian_7.0/Release.key -O Release.key
apt-key add - < Release.key
apt-get update
On OpenSUSE, you’ll find simple one-click installs for several recent flavors. Alternatively, you can snag the binary packages directly for CentOS, Debian, RHEL, Ubuntu, and OpenSUSE from the downloads page.
Once you’ve downloaded the appropriate installer, launch the installer. Pick the language of choice from the drop-down. Under the language drop-down, select your preferred device type.
Next, you’ll choose the Raspberry Pi version. This will be “Raspberry Pi 2/3" or “Raspberry Pi 1/Zero.”
After that, pick your install options. These include SD card, USB stick, internal storage, and NFS share. For a Raspberry Pi, use SD card.
Then, the installer prompts you for networking information. Select wired connection, wireless connection, or check “configure network manually” to set up your Internet once you’ve inserted your OSMC microSD into your Raspberry Pi.
If you pick Wi-Fi, you’re asked to enter the Wi-Fi credentials of the network you’re connecting to for your Raspberry Pi HTPC.
Finally, choose the installation media. This is the microSD where you’re installing OSMC. Select that, and the installer will write OSMC to the SD card. When that’s complete, you’re ready to pop your microSD card into your Raspberry Pi and start using OSMC.
Install LibreELEC for the Raspberry Pi
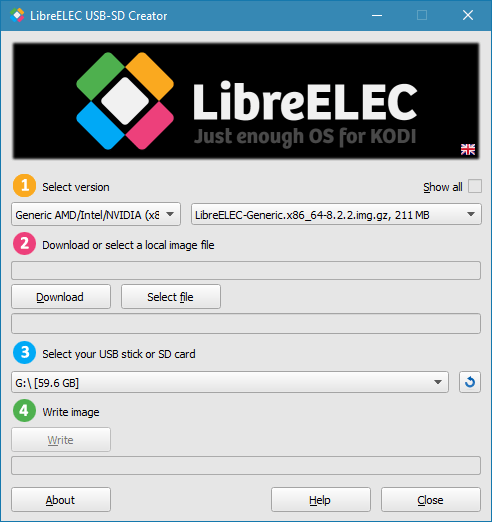
The easiest way to install LibreELEC on the Raspberry Pi is by downloading the appropriate SD creator. You’ll find options for Linux 32-bit and 64-bit systems, a macOS installer, and Windows alternative.
Launch the installer, and use the drop-downs to select your version and installation media. When that’s finalized, click write to burn the image to an SD card. When mounting your image completes, merely insert your SD card into the Pi and begin using your Kodi OS.
Install OpenELEC on a Raspberry Pi
Head to the OpenELEC downloads page and choose your Raspberry Pi model. You’ll see images and update files. Grab the appropriate image file for your Pi board. Since it’s an img.gz, you’ll need to extract the compressed image file somehow.
With your image file extracted, mount the .img to a microSD card.
After mounting your .img on a microSD, you’re ready to pop in your SD card and begin using OpenELEC.
Install XBian on a Raspberry Pi
On the XBian downloads page, choose your preferred Raspberry Pi image. Once you’ve downloaded the .gz file, extract the .img, burn it to a microSD card, and insert into your Raspberry Pi. Then, you’re ready to go.
Install Recalbox on a Raspberry Pi
It’s super simple to install Recalbox on a Raspberry Pi. Download the correct image, and use an appropriate burning program to mount your IMG file on a microSD card.
Install RetroPie on a Raspberry Pi
Similarly, RetroPie is easy to configure on a Raspberry Pi. Download the proper image file, extract the .img, and burn it to a microSD card.
Install Kodi on Raspbian
For a full desktop with Kodi, begin with Raspbian installed. Then, to install Kodi, run:
sudo apt-get update
sudo apt-get install kodi
This downloads and installs the latest version of Kodi.
If you want to download PVR addons, you’ll need to load those from the command line with:
sudo apt-get update
sudo apt-get install PACKAGENAMEHERE
How to Store Your Media
After installing a media center OS or media center software, you’ll want to figure out how to store your media. You can accomplish this via a few methods. Local storage such as a USB drive or hard drive is the easiest means. You can also use network storage with a UPnP, or universal plug and play protocol, a Samba share, or Network File System (NFS).
- Local storage (USB drive, hard drive
- UPnP
- Samba share
- NFS
Get Add-ons
If you’re using Kodi on a Raspberry Pi, you’ll want to get add-ons for streaming media. Kodi itself doesn’t host any content. Instead, that’s all available via community-created third-party add-ons. Please only download add-ons that provide legal content. A few best-picks include:
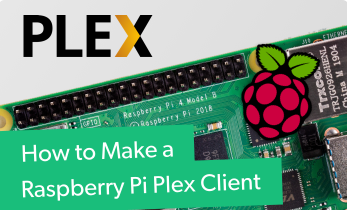
- Plex for Kodi
- Funimation
- PlayStation Vue
- Kodi broadcast TV streaming add-ons
How to Build a Low-powered HTPC With a Raspberry Pi
Cobbling together an inexpensive yet capable low-powered HTPC with a Raspberry Pi is uncomplicated. Merely decide upon an operating system, install it, and begin adding your local media as well as streaming sources. I’ve used OSMC, OpenELEC, LibreELEC, RetroPie, and RecalBox. Currently, my Raspberry Pi runs RetroPie, as I use it for gaming first, and HTPC use second. However, that’s because I have an OSMC Vero 4K as a dedicated OSMC device, and Kodi installed on my Nvidia Shield TV.
If you purely want a low-powered HTPC, I suggest using OSMC or LibreELEC on your Raspberry Pi. For the goodness of a desktop with home theatre PC capabilities, install Kodi on Raspbian. Gamers, try RetroPie or Recalbox.
What operating systems, tips, and tricks do you recommend for making a Raspberry Pi HTPC?

Moe Long is an editor, writer, and tech buff with a particular appreciation for Linux, Raspberry Pis, and retro gaming. Writing online since 2013, Moe has bylines at MakeUseOf, TechBeacon, DZone, SmartHomeBeginner, DEV.to, DVD Netflix, and Electropages. You can read his writings on film and pop culture at Cup of Moe, check out his tech reviews, guides, and tutorials at Tech Up Your Life, and hear his thoughts on movies on the Celluloid Fiends podcast. Aside from writing and editing, Moe has an online course, the Beginner's Guide to Affiliate Blogging From Scratch. When he's not hammering away at his keyboard, he enjoys running, reading, watching cinema, listening to vinyl, and playing with his dog Sebastian.


Leave your feedback...