
How to Build a Raspberry Pi Podcast Recording Station
The Raspberry Pi is a versatile single-board computer. Capable of projects ranging from a retro gaming emulation PC to a home server or smart home hub, it's a multi-purpose maker board. With the launch of the Raspberry Pi 4 which gained a more powerful system-on-a-chip (SoC) as well as additional RAM options, the Pi became increasingly functional for desktop use. With its low power-draw, it's a great device for podcast recording. Learn how to build a Raspberry Pi podcast recorder!
Why Make a Raspberry Pi Recording Studio
Because of its energy efficiency and small footprint, the Raspberry Pi 4 makes an excellent basic desktop. Linux distributions (distros) such as Raspberry Pi OS (formerly Raspbian) or Ubuntu run flawlessly on the Pi. While a laptop works just fine, Pi 4 pricing begins at $35 USD. As such, it's an economical purchase for podcasting. Pair it with a USB mic, portable monitor or projector, keyboard, and mouse for a mobile podcast recording studio. You could even add a power bank for a totally mobile recording studio. I tested this with a Pi 4, 30000mAh power bank and it worked like a champ. And with podcasts as being all the rage, the Pi provides an ultra-affordable solution for podcast recording and editing.
Why the Raspberry Pi makes a great recording station:
- Cheap
- Small footprint
- Handles audio recording and editing
- Can be made mobile by running the Pi off of a power bank for a mobile audio recording studio
What You'll Need to Build a Raspberry Pi Podcasting Station
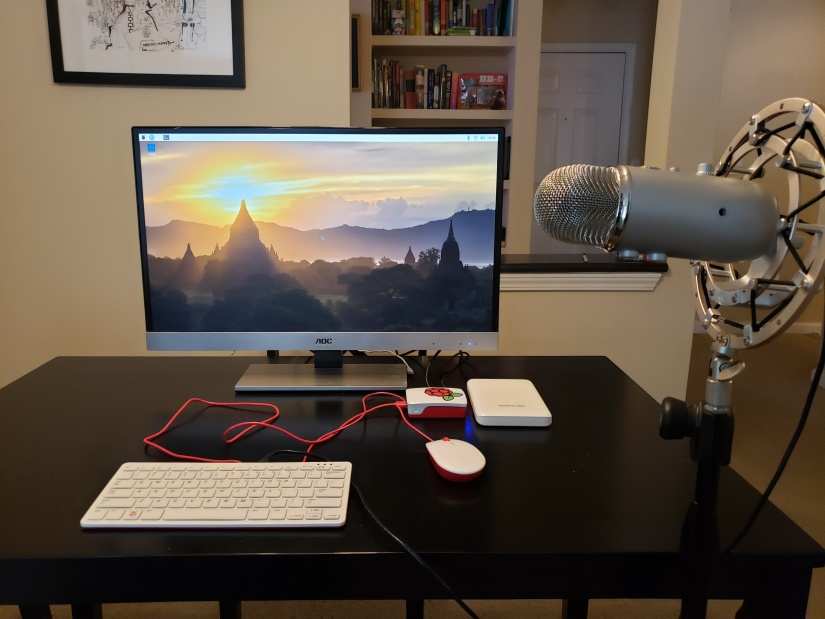
A Raspberry Pi podcast machine is fairly simple, yet extremely practical. You'll need a Raspberry Pi 4, and I suggest a 4GB or 8GB model. Particularly if you plan to perform any audio editing on your Raspberry Pi, the additional memory will greatly benefit multi-tasking. A case is optional but recommended. Peripherals like a keyboard and mouse are needed. A microSD card of at least 16GB loaded up with your preferred Raspberry Pi Linux operating system (OS) is essential. To power the Pi, you'll want an official Raspberry Pi power supply unit (PSU).
For podcast recording, you'll need an appropriate mic for podcasting. If you pick a standard USB mic, you can connect that straight to your Raspberry Pi. I use a Blue Yeti for my podcast, and it works perfectly. Selecting an XLR mic necessitates a USB mixer. On the software side, there are plenty of Raspberry Pi audio recording software options to use such as Audacity. If you want to take your Pi on the go for a mobile podcasting rig, you could even tack on a USB-powered monitor.
Raspberry Pi podcast recording studio parts list:
- Raspberry Pi 4 (4 or 8GB RAM model recommended)
- Case (optional, recommended)
- Compatible PSU
- microSD card (at least 16GB)
- External USB storage (optional, to hold large audio files)
- Peripherals (keyboard, mouse)
- Mic (USB or XLR)
- USB mixer (if using an XLR-only mic)
- Audio recording software (i.e. Audacity)
- Power bank (optional)
- USB monitor (optional)
Total cost: $35+ USD. You can get a standalone Raspberry Pi board for $35. Depending on which components you have, you might not need to spend much, or you could go all out and purchase a mic, Raspberry Pi starter kit, and mixer.
What Raspberry Pi Audio Recording Software Should You Use?
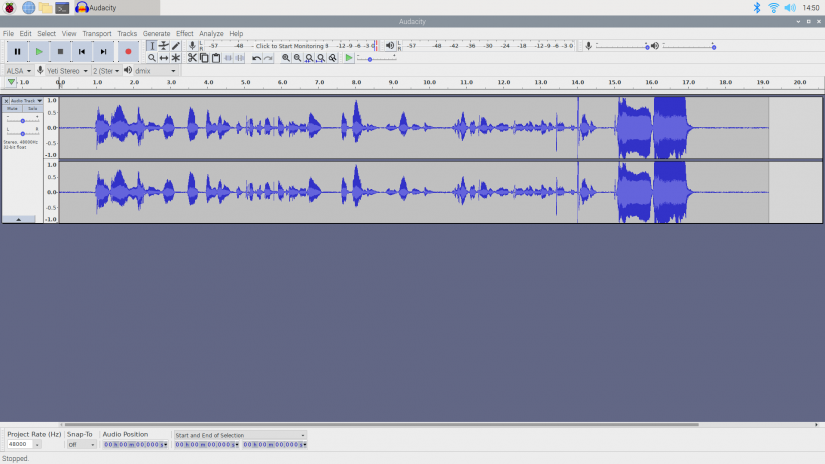
Audacity is the best Raspberry Pi audio recording software for most people. It's free, incredibly robust, and runs incredibly well on Linux distros. What's more, Audacity is compatible with virtually any hardware you throw at it including USB mics and mixers. Aside from recording, Audacity offers rich audio editing features. You might also consider the digital audio workstation (DAW) Reaper which works for podcast recording and editing.
Alternatively, you might consider an in-browser podcast recording solution. Zencastr is an awesome remote podcasting platform that lets you record sans a software download. It's got a free tier and professional plan. Since it runs in a web browser, you don't have to download any software. Thankfully, Zencastr supports Linux browsers like Firefox. I got Zencastr to function fine with Firefox on the Pi, but not Chromium. Although it runs in-browser, Zencastr temporarily caches recordings locally before uploading to the cloud so you maintain excellent quality throughout.
Raspberry Pi audio recording software solutions:
- Audacity
- Reaper DAW
- Zencastr
How to Build a Raspberry Pi Podcast Recording Studio
Before installing your software, make sure to connect your microphone. For a simple USB mic, merely hook up your microphone's USB cable to a free USB input on the Pi. If you're using an XLR mic, you need to first run the microphone's XLR cable into a USB mixer, then connect the mixer via USB to the Raspberry Pi.
Install your Raspberry Pi Audio Recording and Editing Software
With your preferred Raspberry Pi-compatible Linux operating system installed such as Ubuntu or Raspberry Pi OS, begin by downloading your audio recording software. As with any software installation, it's best to run an update and upgrade first:
sudo apt-get update && sudo apt-get upgrade -yNext, install Audacity:
sudo apt-get install AudacityAfter that, Audacity should be installed, and you can launch it from the apps menu.
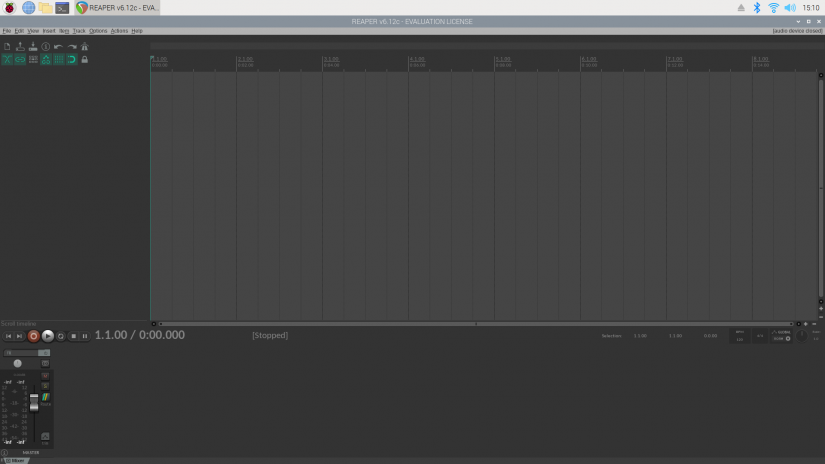
You might also want to install Reaper. There's an ARMv7L installer, so you'll need to use a 32-bit operating system. Reaper should work just fine on Raspberry Pi 2 or higher. Navigate to the official Reaper DAW downloads page and click Linux experimental builds. Then, download the Linux armv7l app. Since it's a tar.xz file, you'll need to first extract it. In a command line, navigate into the correct directory where your Reaper installer is saved, typically the Downloads folder:
cd path/to/file
Then, run (where file.tar.xz is the name of the file you want to decompress):
tar -xvf file.tar.xz
This extracts the compressed files. Open up the directory where Reaper is, and find the decompressed folder. Open it up and locate the install-reaper.sh file. Click it and select Execute in terminal. Then follow the different prompts to pick where you want to install Reaper. When finished, you should find a menu item.
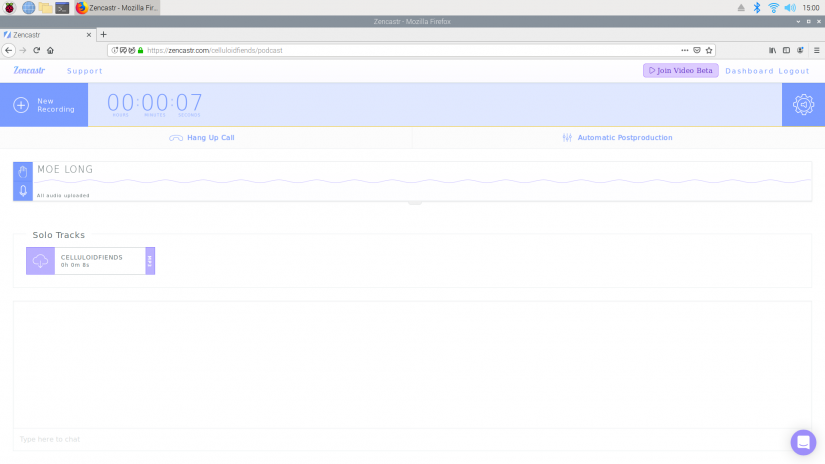
Alternatively, if you'd prefer to use a browser-based solution, fire up Firefox. You can install Firefox on the Raspberry Pi with sudo apt install firefox-esr. Go to the Zencaster website. Register for an account, and stick to the free tier or upgrade to a paid plan. Once you're in, click Create New Episode and give your episode a name. Wait for health checks to pass, and when you're done you can begin recording.
Configure the Raspberry Pi's Audio Output
Depending on your set up, you might want to set the Pi to output audio through the analog 3.5mm headphone jack. To accomplish this, open a terminal and run:
amixer cset numid=3 1
That sets the RasPi to pump system sounds through the audio jack. You can set audio to pipe via HDMI by replacing the 1 with a 2:
amixer cset numid=3 2
Record and Have Fun
Once you've got your mic hooked up and software installed, you can begin recording audio on the Raspberry Pi. Depending on your software, you might have to select the correct audio input or output device. For instance, if you'd like to monitor your own voice while recording, you can pipe audio through the analog headphone jack on the Pi. Or, you can leave your system sounds outputting through HDMI. And you might need to pick the right microphone or USB mixer from a list of multiple options if your audio recording software doesn't select it automatically. Audacity recognized and automatically selected my Blue Yeti USB mic. Since audio recording and editing isn't terribly system resource-intensive, a Raspberry Pi is more than up to the task. Because of the Pi's low power-draw, I even tested out running my Pi off of a 30000 mAh power bank, and to my delight, it worked perfectly. Add a USB-powered monitor, and you've got a completely mobile podcasting station. Creating a Raspberry Pi podcast recorder is a really cool use case that's cheap and utilitarian.
What are you using your Raspberry Pi for, and how do you record you podcasts?

Moe Long is an editor, writer, and tech buff with a particular appreciation for Linux, Raspberry Pis, and retro gaming. Writing online since 2013, Moe has bylines at MakeUseOf, TechBeacon, DZone, SmartHomeBeginner, DEV.to, DVD Netflix, and Electropages. You can read his writings on film and pop culture at Cup of Moe, check out his tech reviews, guides, and tutorials at Tech Up Your Life, and hear his thoughts on movies on the Celluloid Fiends podcast. Aside from writing and editing, Moe has an online course, the Beginner's Guide to Affiliate Blogging From Scratch. When he's not hammering away at his keyboard, he enjoys running, reading, watching cinema, listening to vinyl, and playing with his dog Sebastian.


Leave your feedback...