
How to Make an Emby Media Server With a Raspberry Pi
The Raspberry Pi works extremely well for a variety of purposes. You can use a Pi board for tons of projects, from smart home hubs to robotics projects and even simply as a basic desktop, home theatre PC (HTPC), or retro gaming console. Because of its tiny footprint and extremely low power draw, the Raspberry Pi makes a superb budget NAS (network-attached storage) device. One of the best media server apps for a do-it-yourself (DIY) Raspberry Pi NAS is Emby. Learn how to make your own Emby server with a Raspberry Pi 4 in this Emby Raspberry Pi tutorial!
What is Emby Server?
Emby server is a media centre option designed to host and serve multimedia content such as movies, TV shows, and music to compatible client devices. In this way, Emby is akin to a DIY Netflix or Spotify. Whereas services such as Hulu, Netflix, and Spotify host content and allow you to stream it, Emby lets you access your own (legally obtained) videos and audio files from anywhere. There's a pretty interface that adds box art and metadata when available.
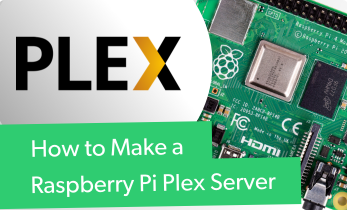
Plex vs. Emby on the Raspberry Pi
Both Plex and Emby are pretty similar. Both media server software options achieve the same result: organizing your multimedia files and allowing for access virtually anywhere. However, when comparing Plex vs. Emby, the two differ. I have both Plex and Emby installed on my Lenovo ThinkStation TS140, and enjoy the two quite a bit. Generally, Plex is more user-friendly. It's as simple as pointing your Plex Media Server software to the correct directories where you've got your movies, TV shows, and music stored, then streaming to any compatible Plex client devices. Although Plex initially launched as a mere media server ecosystem, it's since blossomed into the ultimate cord-cutting app with garnished such as live TV and DVR capabilities, podcasts, Tidal integration, and free ad-supported movies and television shows. Despite these additions, Plex continues its core focus on being a media server platform first, and cord-cutting paradise second. With Plex, you can stream to TV and set-top clients for free.
Likewise, Emby can be as simple as just pointing Emby server to your media files and streaming. But library creation touts true power-user functionality such as the ability to toggle on chapter image extraction and downloading metadata images in advance. Where Emby really shines is its extreme customization with a slew of settings to tweak and customize to your heart's content. Similar to Plex, Emby provides live TV and DVR features. However, while it's free to stream Emby on mobile apps for Android and iOS as well as Apple TV, Roku, and Samsung Smart TVs, you'll need to pay for streaming to devices such as Android TV streaming boxes.
Plex pros:
- Free streaming to any client
- User-friendly
- Cord-cutting features like free ad-supported movies and TV shows, Tidal integration
- Live TV and DVR functionality
- Lots of client devices
Plex cons:
- Not as customizable as Emby
Emby pros:
- User-friendly
- Great for power users
- Live TV and DVR functionality
- Lots of client devices
Emby cons:
- Premium Emby Premiere necessary for Emby Theater use on select clients such as Android TV set-top boxes
Emby Raspberry Pi Tutorial
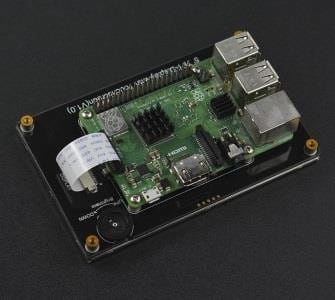
You can easily install Emby media server on the Raspberry Pi. You'll need only a handful of items. First up, a Raspberry Pi 2 or later. I suggest using a Raspberry Pi 4 for the best results. Then, a microSD card. 8GB is the minimum you should use, and a 16GB card or larger is best. If you plan to host your media files on your microSD card, a high-capacity card is best, but using an external storage device such as a flash drive or external hard-drive is the most desirable solution. You'll also need peripherals like a keyboard and mouse, monitor, TV, or projector for a display, and an active internet connection. Lastly, this Emby server Raspberry Pi build assumes you're using a compatible Debian-based Linux distribution (distro) such as Raspbian.
What you'll need for an Emby Raspberry Pi media server:
- Raspberry Pi 2 or later (Raspberry Pi 4 recommended)
- microSD card (8GB or larger)
- Peripherals (keyboard, mouse)
- Raspberry Pi case
- Compatible Linux distro (i.e. Debian, Ubuntu, Raspbian, Fedora, CentOS, OpenSUSE)
- HDMI-compatible display (monitor, TV, or projector)
Total cost: $35+ USD. You can get started with Emby on the Raspberry Pi for as little as $35. Step up to the 2GB Raspberry Pi 4 for a cool $45, the 4GB model for $55, or max it out with 8GB of RAM. Alternatively, a Raspberry Pi starter kit can be a cost-effective means of getting a Raspberry Pi, microSD card, power supply, case, and HDMI cable.
Download Emby Media Server on Raspberry Pi
Before downloading and installing Emby media server on the Raspberry Pi, it's best to run an update. In a new terminal, enter:
sudo apt-get update && apt-get upgrade
This strings together the commands sudo apt-get update and sudo apt-get upgrade to first update the list of available packages and versions before installing the newest versions of those packages.
After that, download the ARMHF version of Emby. You can find the appropriate installers on the Emby Linux server downloads page. On Debian-based distros such as Debian, Raspbian, Linux Mint, or Ubuntu, run:
wget https://github.com/MediaBrowser/Emby.Releases/releases/download/4.3.1.0/emby-server-deb_4.3.1.0_armhf.deb
Alternatively, download the emby-server-deb_4.3.1.0_armhf.deb and in a command line run:
dpkg -i emby-server-deb_4.3.1.0_armhf.deb
If you're using CentOS Armv7hl, run:
yum install https://github.com/MediaBrowser/Emby.Releases/releases/download/4.3.1.0/emby-server-rpm_4.3.1.0_armv7hl.rpm
Fedora users, enter:
dnf install https://github.com/MediaBrowser/Emby.Releases/releases/download/4.3.1.0/emby-server-rpm_4.3.1.0_armv7hl.rpm
For OpenSUSE Armv7hl, you'll need to enter:
zypper install https://github.com/MediaBrowser/Emby.Releases/releases/download/4.3.1.0/emby-server-rpm_4.3.1.0_armv7hl.rpm
When you've successfully installed Emby media server on the Raspberry Pi, it's time to set up Emby Media Server.
DietPi Emby Media Server on the Raspberry Pi
One of the best Raspberry Pi operating systems (OSes) is easily DietPi. A lightweight Linux distro, there's little overhead and a modular installation for an incredibly flexible, customizable software installation. With DietPi installed, in a command line, run:
dietpi-software
This pulls up the DietPi-Software console. Select Software Optimized. From here, scroll down to Emby Server and hit the spacebar to select it. Hit tab to press Ok, then choose Install and click Ok. You'll receive a message asking if you'd like to begin installing Emby on DietPi. Choose Ok.
Emby Media Server Raspberry Pi Set Up
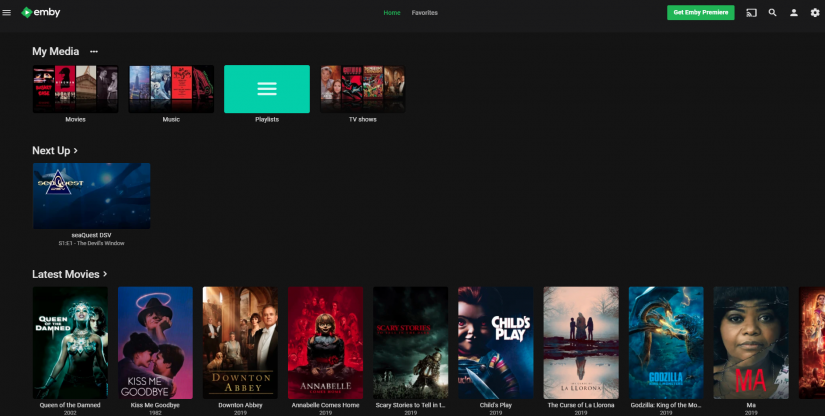
In a web browser, navigate to http://localhost:8096. If you're using a different PC from the Raspberry Pi, enter http://YOU RASPBERRY PI IP ADDRESS:8096 where YOUR RASPBERRY PI IP ADDRESS is, well, the IP address of your Raspberry Pi Emby server.
You'll be greeted by the friendly Emby media server set up screen. Begin by selecting your language preference. Then, enter a username, password, and pick your preferred options. If you have an Emby Connect account, you can enter it here.
Once that's complete, it's time to configure your Emby media libraries. Click the Add Media Library button.
Next, select the content type (i.e. Movies, TV Shows, or Music). Then, choose a display name such as Movies. Under Folders, hit the plus (+) sign to add a folder of media that's appropriate for this particular content type. Input your metadata download language preference, such as English, and country, like the United States or UK. Hit Ok, and you'll confirm your preferred metadata language settings. If everything looks correct, click Next.
After you've finished adding all your media locations, Save, then you can begin enjoying Emby media server content streamed to your various Emby clients.
Emby Raspberry Pi Transcoding and Performance
While Emby runs pretty well on the Raspberry Pi, you'll find that performance won't match that of a more robust server. Don't Emby Raspberry Pi hardware transcoding. Therefore, you'll need to pre-encode your movies, such as H.264 use. I found in-home streaming to my Android Galaxy S9+, Nvidia Shield TV Android streaming box, Windows 10 PC, and my Hisense H8F 4K smart TV worked like a champ so long as they were encoded properly. You should be able to hit around four or five simultaneous 1080p streams as long as there's no transcoding required. 4K playback should work, again as longs as files are properly encoded in H.264 or another container that doesn't require transcoding.
How to Install Emby Server on Raspberry Pi Devices - Final Thoughts
The Raspberry Pi is quite utilitarian. With its small, credit card-sized form factor and extremely low power consumption, it's a modestly capable yet affordable NAS device. For media centre enthusiasts, Emby is a great alternative to Plex. Though Emby media server is easy enough to set up, its power-user caliber settings allow for tons of customization. With fantastic Raspberry Pi support, you can easily create a solid, cheap personal Netflix by running Emby media server on the Raspberry Pi.
Your turn: what media server software options are you using?

Moe Long is an editor, writer, and tech buff with a particular appreciation for Linux, Raspberry Pis, and retro gaming. Writing online since 2013, Moe has bylines at MakeUseOf, TechBeacon, DZone, SmartHomeBeginner, DEV.to, DVD Netflix, and Electropages. You can read his writings on film and pop culture at Cup of Moe, check out his tech reviews, guides, and tutorials at Tech Up Your Life, and hear his thoughts on movies on the Celluloid Fiends podcast. Aside from writing and editing, Moe has an online course, the Beginner's Guide to Affiliate Blogging From Scratch. When he's not hammering away at his keyboard, he enjoys running, reading, watching cinema, listening to vinyl, and playing with his dog Sebastian.


Leave your feedback...