
How to make a Raspberry Pi media server
The Raspberry Pi is a nifty single-board computer (SBC). It’s capable of fitting many purposes, from a desktop to home theatre PC (HTPC), retro gaming console, cryptocurrency mining rig, and more. You can even make a tablet using a Pi. The low-powered device is fantastic as a media server. Learn all about how to make a Raspberry Pi media server!
Why Use a Raspberry Pi as a Media Server
Because it’s so inexpensive and features a low power draw, the Raspberry Pi is an awesome option for a media server. Since most media servers are always-on and the Pi sips power, it’s a cost-effective means to cobble together a server. Similarly, the Raspberry Pi comes replete with almost everything needed for a server. RAM, CPU, and GPU are baked into the board. As such, you won’t have to purchase components aside from a case, microSD card, power supply, and storage medium.
Yet, by the same measure, the Pi is underpowered for processing. For tasks such as transcoding, the Pi is pretty weak. However, the Raspberry Pi is fantastic for purposes like a do-it-yourself Spotify using the likes of Plex or Subsonic.
Pros:
- Low power use
- Inexpensive
- Complete package (includes all components)
Cons:
- Low computing power
How to Make a Raspberry Pi Media Server: What You’ll Need
To make a Raspberry Pi media server, you’ll need:
- Raspberry Pi board (Raspberry Pi 3 B+ or Raspberry Pi 4 recommended)
- Compatible operating system (OS): most Debian-based distributions (distros) should suffice
- microSD card (8GB+ recommended)
- Case (optional, recommended)
- Power supply
- Storage media
Total Cost: $60+. You can grab an all-in-one kit with a Raspberry Pi board, case, power supply, and microSD card for around $60. Then, you’ll just need to add your media via a flash drive, external hard drive, or network-attached storage (NAS).
How to Make a Raspberry Pi Media Server: The Software
There are loads of software options for making a Raspberry Pi media server.
Mopidy
As a server option, Mopidy is a neat choice. It’s capable of playing locally stored music files, as well as integrating with Spotify, Google Play Music, SoundCloud, and more. This Python application can run on a Raspberry Pi with a Debian-based Linux operating system, or Arch Linux. Though Mopidy suggests that it may be slow depending on your Raspberry Pi board, it’s super cheap.
Best for: Music server
How to install Mopidy on Raspberry Pi:
If you’re using a Debian-based OS such as Raspbian, first add the archive’s GPG key:
wget -q -O - https://apt.mopidy.com/mopidy.gpg | sudo apt-key add -
Then, load the apt repository to your sources:
sudo wget -q -O /etc/apt/sources.list.d/mopidy.list https://apt.mopidy.com/jessie.list
When that’s complete, install Mopidy with its dependencies:
sudo apt-get update
sudo apt-get install mopidy
Pi MusicBox

Specifically looking for a Raspberry Pi music streaming server? Check out Pi MusicBox. It’s based on Mopidy, so brings the slew of music streaming features such as Spotify, SoundCloud, and Google Play Music integration. You can run it headless, and there’s a lovely remote web interface as well.
Best for: Music server
How to install Pi MusicBox on Raspberry Pi:
Head over to the Pi MusicBox website. Download the ZIP file for Pi MusicBox. After that, uncompress the ZIP file and use a program such as Etcher to mount the image file to your microSD card. Once that’s complete, pop the card in the Pi, boot it up, and you’re ready to begin configuring and using Pi MusicBox.
OpenMediaVault
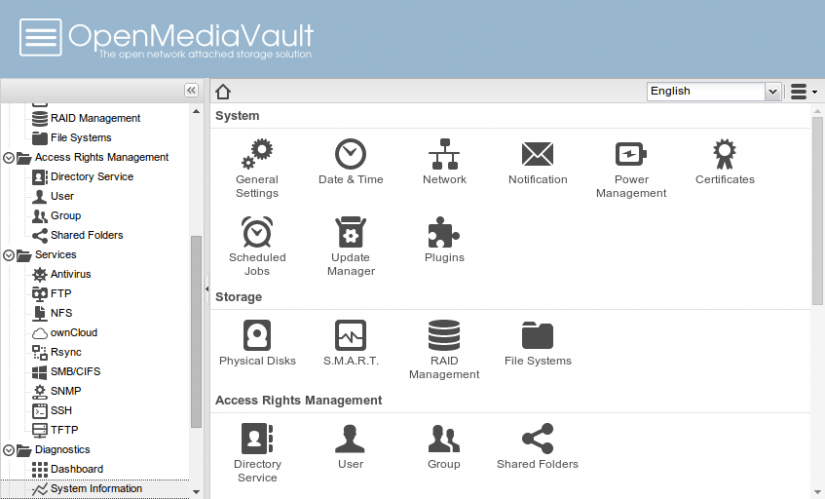
An awesome, robust NAS software, OpenMediaVault is a Debian-based Linux distro with services such as a BitTorrent client, SSH, SFTP, SMB, and DAAP baked in. Featuring a modular design, OpenMediaVault allows you to install plugins to extend its functionality.
Best for: General media server
How to install OpenMediaVault on Raspberry Pi:
Navigate to the Sourceforge page. From there, select the Raspberry Pi images folder. Download the IMG.XZ image and burn it to an SD card with a program such as Etcher. Then, put the microSD card into the Pi and boot it up.
Icecast
![]()

A super neat media server software option for the Raspberry Pi is Icecast. This streaming media server supports the likes of Ogg, Opus, mp3, WebM, and more. Notably, you can use Icecast to make an Internet radio station in addition to its functionality as a personal Netflix or Spotify type server.
Best for: Music server
How to install Icecast on Raspberry Pi:
On the Icecast download page, snag the Icecast for Linux/Unix .tar.gz file. Once you’ve downloaded the .tar.gz file, change directory via the terminal into the folder where the .tar.gz is located:
cd PATH/TO/FILE
Then, run:
tar -zxvf FILE-NAME.tar.gz
Alternatively, you may install Icecast on the Raspberry Pi via purely the command line. Download the Debian package for armhf processors with:
wget http://ftp.us.debian.org/debian/pool/main/i/icecast2/icecast2_2.4.2-1+b1_armhf.deb
Then, install Icecast using:
apt-get update
apt-get install icecast2
For an incredibly comprehensive installation and configuration guide, check out SmartHomeBeginner’s write up.
Libresonic
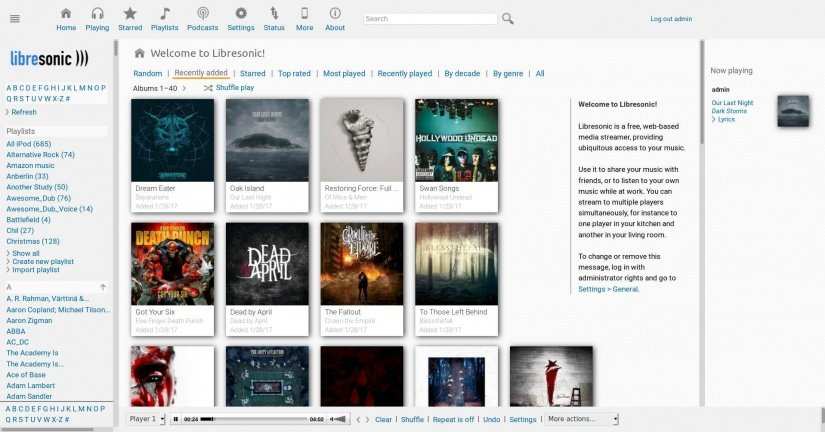
This free web-based media streaming service is fantastic for a video and music server. It’s particularly adept at on-the-fly conversion of many audio formats including FLAC, APE, WMA, WavPack, and Shorten.
Best for: Music and video server
How to install Libresonic on Raspberry Pi:
For Debian 8 based distros, run:
sudo nano /etc/apt/source.list
Add the backports repo by adding:
deb http://ftp.fr.debian.org/debian/ jessie-backports main contrib
Next, update the package list using:
sudo apt-get update
Then, install openjdk-8-jre:
sudo apt-get install -t jessie-backports openjdk-8-jre
After that set the default JAVA_HOMe with the following command:
sudo update-alternatives --config java
If you’re using Ubuntu 16.04, run:
sudo apt-get install openjdk-8-jre
And set the default JAVA_HOME:
sudo update-alternatives --config java
After that, you’re ready to install Libresonic. In a terminal, enter:
wget https://libresonic.org/release/libresonic-v6.2.war
Now, make a Libresonic directory:
sudo mkdir /var/libresonic/
sudo chown -R tomcat8:tomcat8 /var/libresonic/
When you’ve completed that, stop the tomcat8 service:
sudo systemctl stop tomcat8.service
Next, remove potential Libresonic files from TOMCAT_HOME:
sudo rm /var/lib/tomcat8/webapps/libresonic.war
sudo rm -R /var/lib/tomcat8/webapps/libresonic/
sudo rm -R /var/lib/tomcat8/work/*
Then, move the WAR file:
sudo mv libresonic-v6.2.war /var/lib/tomcat8/webapps/libresonic.war
Finally, restart tomcat8:
sudo systemctl start tomcat8.service
Madsonic
![]()
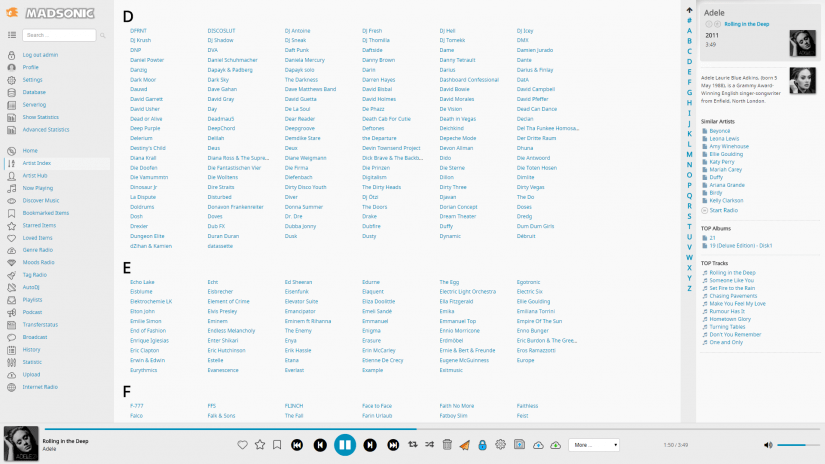
You may also consider Madsonic on the Raspberry Pi for a media server. It’s similar to Libresonic and is a fork of Subsonic. You can run it on a variety of devices, from Synology NAS devices to FreeBSD, Centos, macOS, Windows, and Ubuntu/Debian-based distros which is perfect for the Raspberry Pi.
Best for: Music and video server
How to install Madsonic on the Raspberry Pi:
Begin by installing Java. On Ubuntu, add the PPA:
sudo add-apt-repository ppa:webupd8team/java
sudo apt-get update
Then, install Java:
sudo apt-get install oracle-java8-installer
sudo apt-get install oracle-java8-set-default
For Debian, begin by adding the PPA:
sudo echo "deb http://ppa.launchpad.net/webupd8team/java/ubuntu trusty main" | tee -a /etc/apt/sources.list
sudo apt-key adv --keyserver hkp://keyserver.ubuntu.com:80 --recv-keys EEA14886
sudo apt-get update
After that, install Java:
sudo apt-get install oracle-java8-installer
With Java installed as a prerequisite, download the .deb package for Madsonic and install it with:
sudo dpkg -i Madsonic-x.x.xxxx.deb
Subsonic

Dubbed “easy listening”, Subsonic is indeed a simple means to cobble together a media server with a Raspberry Pi. Again, it’s really easy to use and set up, boasting a similar feature set to its forks Madsonic and Libresonic.
Best for: Music and video server
How to install Subsonic on Raspberry Pi:
Begin by installing Java:
sudo apt-get install openjdk-8-jre
Then download the Subsonic .deb and install the package:
sudo dpkg -i subsonic-x.x.deb
Emby
Like Plex, Emby is an amazing media server pick. Whereas Plex is good for power users but suitable for beginners, Emby is more the Lakka of the media server realm. It’s chock full of customization options, and better for seasoned pros than novices. Still, it’s a really functional piece of software.
Best for: Video server and music server
How to install Emby on Raspberry Pi:
Download Emby for Armhf devices from the downloads page.
Then, change the directory to the folder where your .deb file resides:
cd PATH/TO/FILE
Run:
dpkg -i emby-server-deb_3.3.1.0_amd64.deb
You should be ready to log into Emby and begin configuring it.
Plex
If you're looking for a superb media server option that runs like a champ on the Raspberry Pi, Plex is a top contender. It's easy and really functional for cord-cutters. The good folks over at Plex continue offering new features such as ad-supported movies and TV shows, podcast integration, and the ability to hook up an antenna for DVR and live TV in Plex. For serving media to your client devices, Plex is both user-friendly and comprehensive. On the Raspberry Pi 4, you can achieve around four or five simultaneous direct play streams. Don't expect transcoding to work, or at least work well. But 1080p and even 4K direct play streams to local Plex client devices runs like a champ.
First, run an update:
sudo apt-get update

sudo apt-get upgrade
Then, install the Plex package repository requirement of the apt-transport-https package which allows the apt package manager to download packages over the HTTPC protocol:
sudo apt-get install apt-transport-https
After that, add Plex's repo to the apt key list to verify that downloaded files are properly signed with a key:
curl https://downloads.plex.tv/plex-keys/PlexSign.key | sudo apt-key add -
Now that you've added the Plex repo to your key list, add the official Plex repository:
echo deb https://downloads.plex.tv/repo/deb public main | sudo tee /etc/apt/sources.list.d/plexmediaserver.list
With the Plex repository installed, run another update:
sudo apt-get update
Go ahead and install Plex:
sudo apt-get install plexmediaserver
By default, Plex uses the user plex. However, you might want to change that to pi. To accomplish this run:
sudo nano /etc/default/plexmediaserver
And change PLEX_MEDIA_SERVER_USER from plex to pi. Likewise, change export PLEX_MEDIA_SERVER_USER=plex to export PLEX_MEDIA_SERVER_USER=pi. Now save with CTRL + X, the Y.
Restart your Plex media server service:
sudo systemctl restart plexmediaserver
You'll probably want to set a static IP. Enter:
hostname -I
And open up cmdline.txt:
sudo nano /boot/cmdline.txt
Add your IP address in the following line:
ip=RASPBERRY PI IP ADDRESS
Save with CTRL + X, Y. Then reboot:
sudo reboot
Head over to localhost:32400/web/ and you'll be greeted by a friendly Plex log in screen. Name your server, then hit Next. Point your server towards your media libraries. Select Add Library, and pick the library type i.e. movies, TV shows, music, or photos. Now locate the folder where you've got the matching media files. Once you've saved this, Plex should automatically import your media and scan for metadata and box art if available.
How to Make a Raspberry Pi Media Server: Final Thoughts
There are loads of ways to transform a Raspberry Pi into a media server. For music streaming the Pi is more than capable, especially when you’re only streaming to a few client devices. However, the Raspberry Pi isn’t suited to transcoding 4K or even 1080p videos to multiple, or possibly even one, device. Nevertheless, a Raspberry Pi is an awesome low-power media server foundation with tons of software choices.
What software are you using to make a Raspberry Pi media server?

Moe Long is an editor, writer, and tech buff with a particular appreciation for Linux, Raspberry Pis, and retro gaming. Writing online since 2013, Moe has bylines at MakeUseOf, TechBeacon, DZone, SmartHomeBeginner, DEV.to, DVD Netflix, and Electropages. You can read his writings on film and pop culture at Cup of Moe, check out his tech reviews, guides, and tutorials at Tech Up Your Life, and hear his thoughts on movies on the Celluloid Fiends podcast. Aside from writing and editing, Moe has an online course, the Beginner's Guide to Affiliate Blogging From Scratch. When he's not hammering away at his keyboard, he enjoys running, reading, watching cinema, listening to vinyl, and playing with his dog Sebastian.


Leave your feedback...