
How to boot to Kodi in Manjaro Linux on the Raspberry Pi
You can easily create your own Kodi Media Box using the Manjaro Raspberry Pi 4 Minimal ARM Edition. Yes, you can do it on Manjaro, boot to "Kodi only" on Manjaro ARM Editions. Try today by installing Kodi Standalone Service on the Raspberry Pi 4. This brief guide describes how to boot directly to Kodi on the Manjaro ARM Edition for the Raspberry Pi 4.
We are going to install a minimal image for experimentation, testing, programming, and playing around. The Raspberry Pi 4 Manjaro Minimal image only boots to a command line and cannot do much more at the beginning, but with just a few tweaks and some small configuration, you can be up and running in no time.
Getting started
Normally, for someone who already tinkers with the Pi, you have everything you need. I would like to make a few recommendations with a few explanations.
What you need
- Raspberry Pi 4B—The 8GB Pi 4B board is ideal while the Pi 4B 4GB models is more than sufficient, but the 2GB Pi 4B board is all you need if it will only play audio.
- USB Keyboard—This is necessary for me when first booting the Pi board, because while most wireless mini-keyboards work out-of-the-box a Bluetooth keyboard must be configured.
- Wireless Keyboard—This is a good option if want to use a mini-keyboard but do not want to configure Bluetooth.
- Bluetooth Keyboard—These are usually better keyboards and used as the main keyboard without requiring a USB connection, and some come with touchpads!
- Micro-SD card—Ensure it has a video speed of V90 (90 MBps) if it will stream video.
- Micro-SD card reader/writer—I recommend getting a SD reader/writer with a sturdy case that will last longer, because the case usually gets flimsy well before the reader/writer begins to show signs of getting old.
- TV, PC Monitor, or Touchsreen—On first run it will be unlikely you want to use a touchscreen, but some have shopped around to find a trusted touchscreen that will prove it can anyway.
- Standard PC with external USB port—This is so you can connect the reader/writer to a traditional computer to burn the image to the Raspberry Pi.
That is what you need, but let me tell you what you want!
What you want
This is my recipe for speed...
- SSD USB flash drive—Because USB 3.0 is faster than the internal microSD put the operating system on the USB flash drive, but make it an SSD USB jump drive!
- SSD microSD—Put the swap partition on the internal SSD microSD and allocate the rest of the free space to storage.
- USB Internet connection—A direct USB connection to an enabled USB port on your home router is faster than Ethernet and connection media.
- Uninterruptable power supply—This ensures that the power adapter the Pi is plugged into is never running under voltage.
- Use EXT4 as your filesystem—While the installer does not give you the option to choose, it is possible to convert your filesystem. Despite not being the coolest, EXT4 is the fastest choice for filesystems and the best choice for Pi.
- Use a remote protocol and local resources—If you use
ssh, for example, you can add the-Yoption to use hardware installed locally on the PC instead of hardware on the Raspberry Pi.
Most of these products and accessories can be found right here on the Electromaker shop.
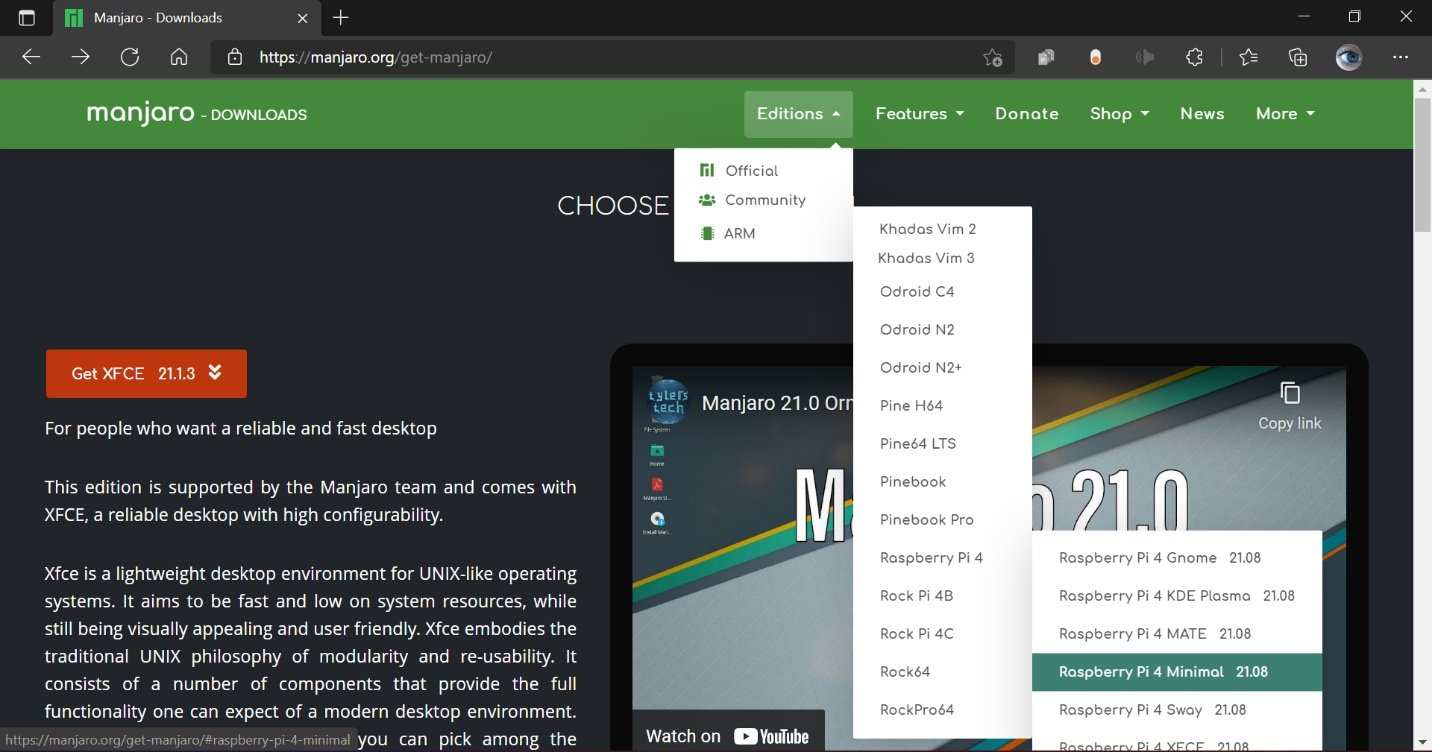
Downloading Manjaro ARM Editions
My development board will be a Kodi Embedded Raspberry Pi 4 Manjaro Minimal system image, no DE.
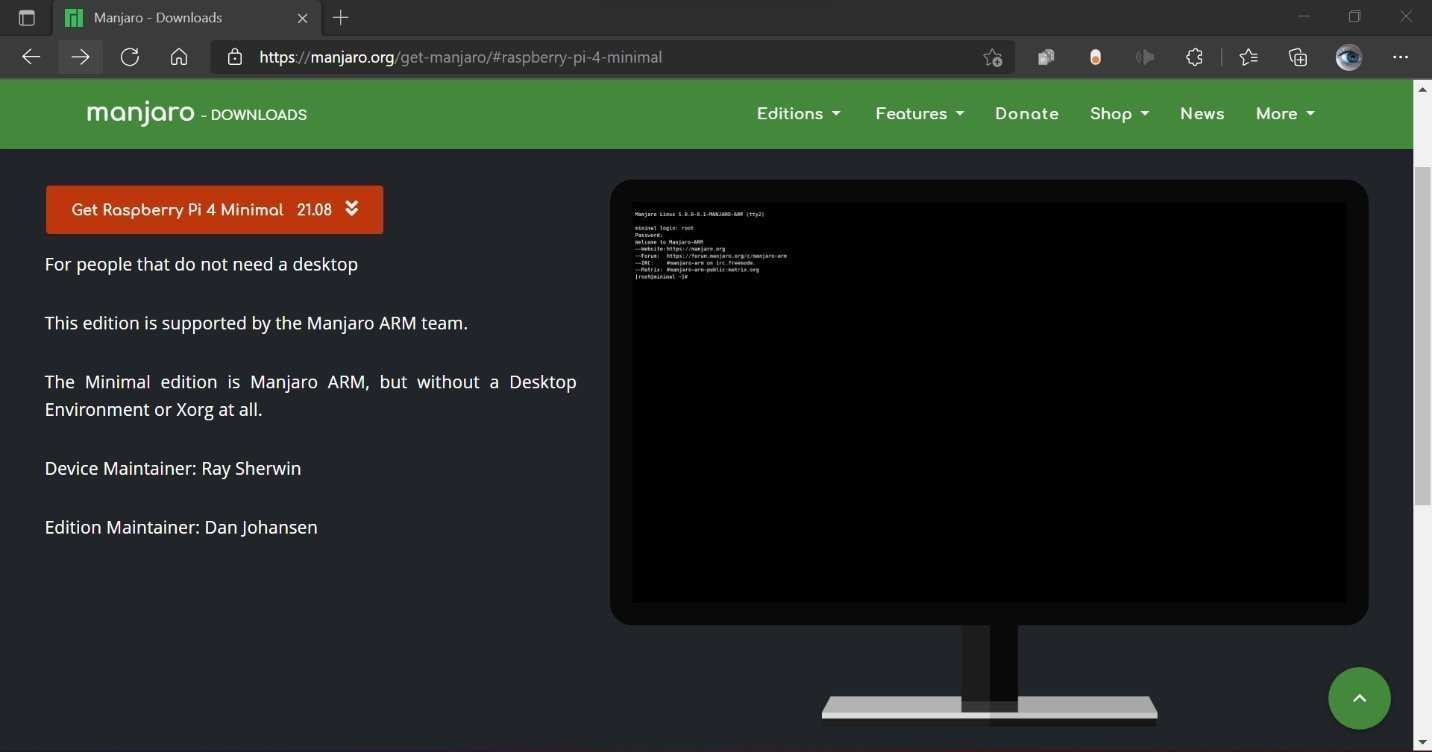
When you click on the Raspberry Pi 4 Minimal context menu item, it takes to you to another page with a screenshot inside a picture of a monitor and download button to yet another page. The next page displays your options, direct download or torrent.
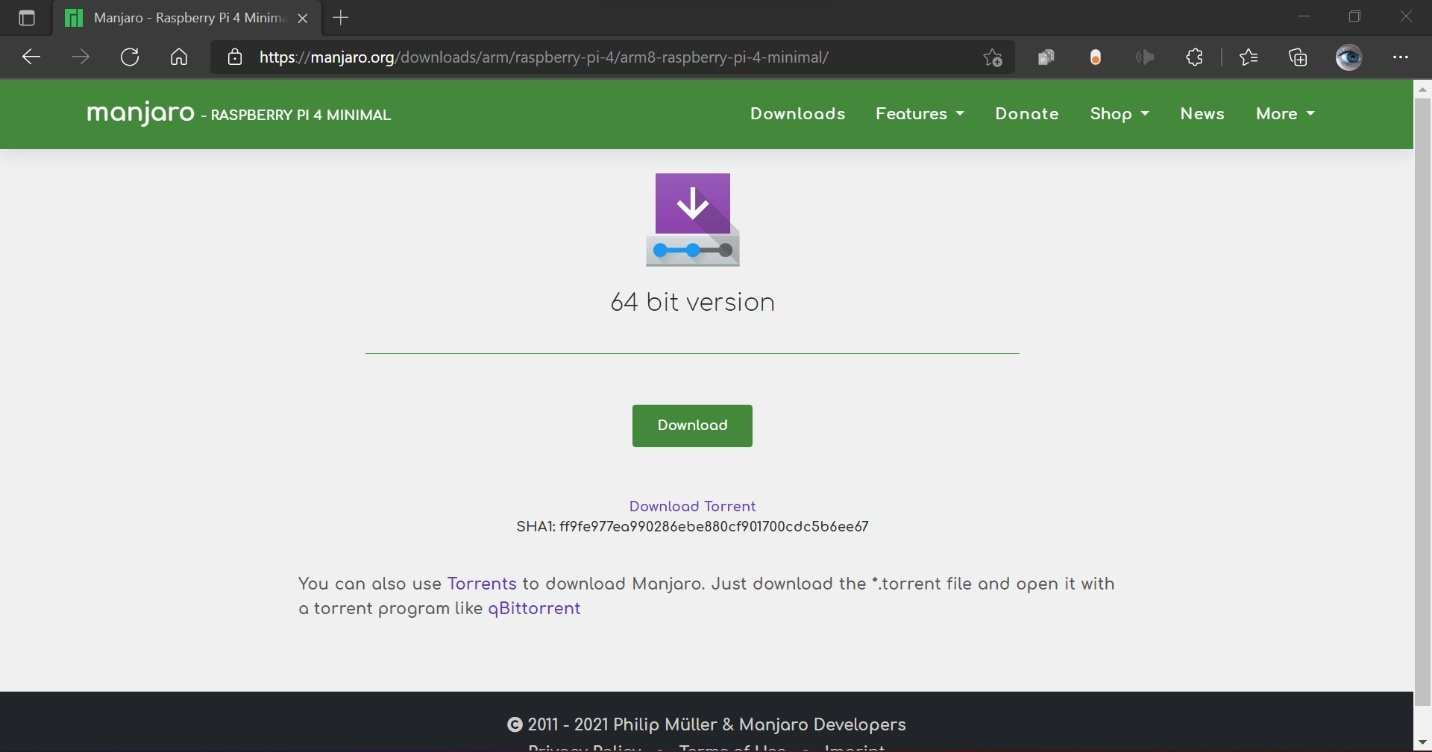
As recommended by the web page, I decided to install and use qBittorrent. Before it downloads you will see a friendly pop-up dialogue from Manjaro.org.
If you want to try some of the unofficial community editions, check out Manjaro on Open Source Developer Network to download the latest Manjaro ARM Edition releases.
Manjaro on social media
You can also connect with Manjaro developers and users, and others involved on social media.
Manjaro Linux | Facebook.com
Manjaro Linux | YouTube.com
Manjaro Linux (@ManjaroLinux)/Twitter | Twitter.com
Manjaro GitLabs: Explore Projects | GitLab.Manjaro.org
Once you have the .img file downloaded, you should be ready to burn them to USB and microSD. Follows are instructions for Linux, Windows and macOS.
Linux commands for image burning
Several built-in commands already are at your disposal when you open the Linux terminal app. One of them you may have heard or read about is the dd command. The other is mkusb, which uses dd under the hood. This is a good option if you want to use dd but are not familiar with the dd command. I can understand that even for experienced users, especially if you are unboxing a new microSD or USB.
Using the dd command
The simplest way to use dd to burn an .img file to USB flash drive or microSD is with dd as follows.
dd if=Manjaro-ARM-minimal-rpi4-21.04.img of=/dev/sdd
You can also use the mkusb command either with the GUI or as a CLI app.
If you do not want to use a command or simply aren't on Linux to do so, you can use the Raspberry Pi Imager or one of several alternatives.
6 Best Raspberry Pi Imager Options and My Surprise Top Pick
Funny things to consider with Linux
Typically, a USB flash drive will show up as /dev/sdb, /dev/sdc, and skip /dev/sdd because it is reserved for microSD cards. However, that means /dev/sde could be either a USB drive or microSD, if it is present. A USB drive typically does not ever become /dev/sdd, but it still occurs when switching out a lot of removable media in one desktop session and is not otherwise normally achieved. Normally, a USB drive does not become /dev/sdd, just as a microSD card cannot become /dev/sdb or /dev/sdc.
Setting up Manjaro Linux
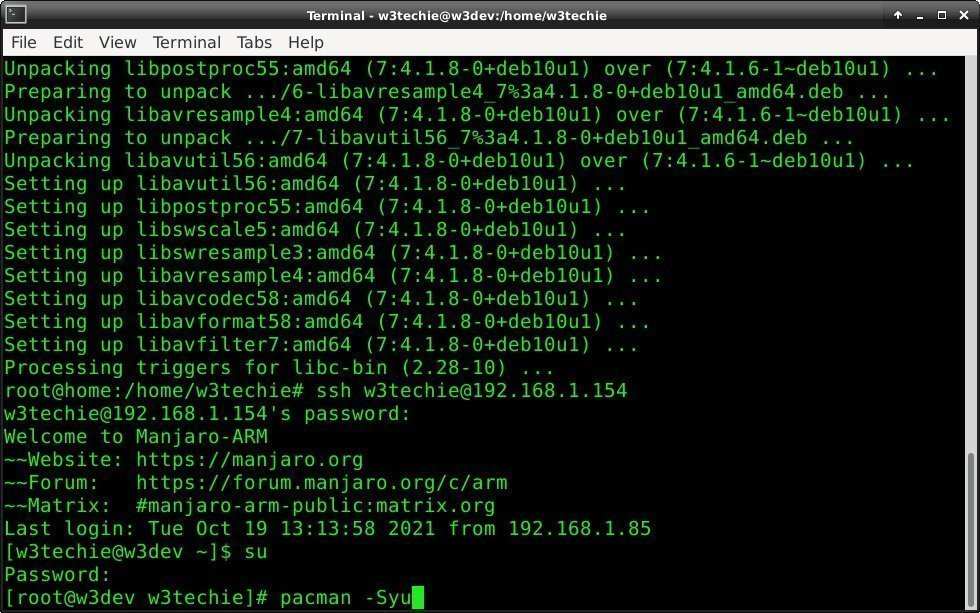
The physical setup of the Raspberry Pi is easy, most of the setup is software. Once everything is plugged in, boot your Raspberry Pi and the filesystem should expand to fill the rest of the microSD card. When it boots to the command line the first thing we want to do is enable SSH. Because we are on Manjaro we cannot do it by running raspi-config, as we can on RaspiOS. If you want the raspi-config command, install the AUR package.
Switch to a standard user, if you are root.
su w3techie
You must install dependencies as root or using sudo, but you must build and install them as a standard user when using makepkg. Here we are installing the dependencies to build raspi-config.
sudo pacman -S fakeroot alsa-utils libnewt lua51 git
If makepkg complains it is missing a build dependency, you can use sudo to install it.
sudo pacman -S
To build and compile raspi-config:
cd ~
wget https://aur.archlinux.org/cgit/aur.git/snapshot/raspi-config-git.tar.gz
tar xvf raspi-config-git.tar.gz
cd raspi-config-git
makepkg
makepkg --install
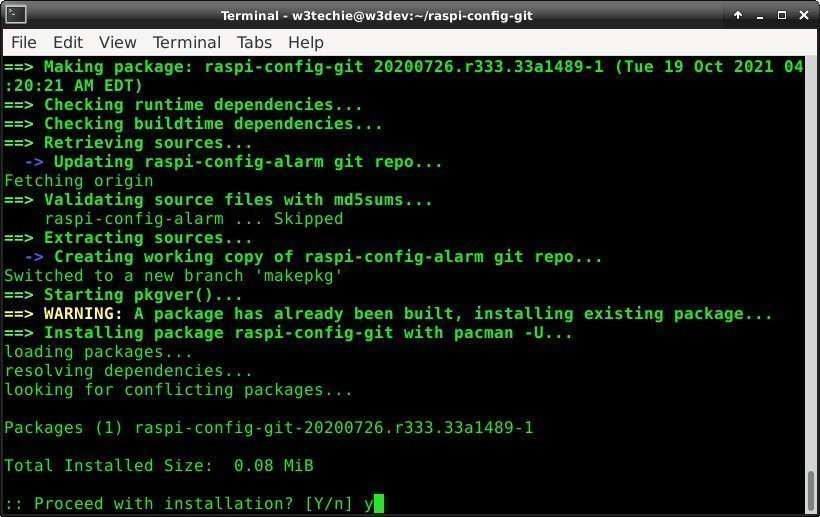
The makepkg command searches for the PKGBUILD file, and installs the build files.
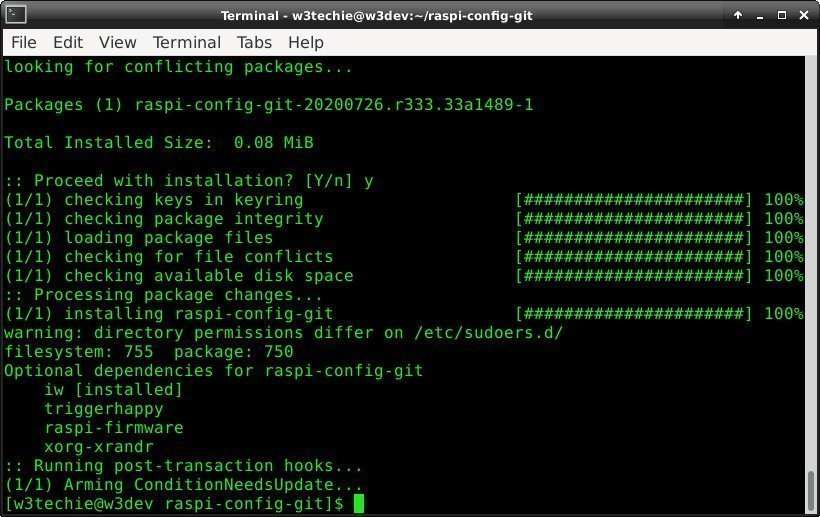
Notice there are optional software dependencies listed here. The only one of these you might wish to install for functionality is raspi-firmware, which is not yet available for Raspberry Pi 4. Without it raspi-config may not be able to do many of the things it promises. You cannot configure Wi-Fi with raspi-config without raspi-firmware, for instance. Whether you use raspi-config or not, you need raspi-firmware to configure hardware.
If all went well building our package, we can launch raspi-config as root or using sudo. It should look something like this...
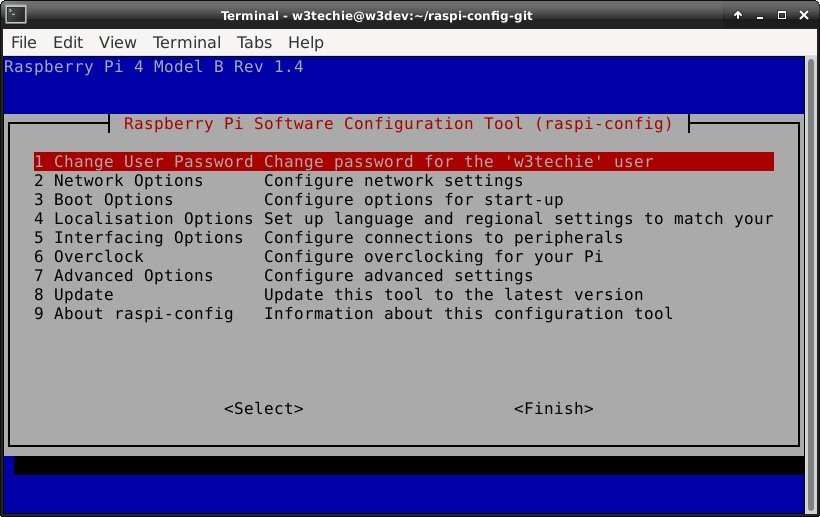
Only be cautious about doing the same things as raspi-config differently on the command line, and vice versa. You should also note that to run makepkg, you must do so as a non-root user.
Enabling SSH Manually
Enabling SSH allows you to remote in even if you are in the same room, which eliminates the need to use a mini-keyboard as you enter a lot of commands.
To start SSH use,
systemctl start sshd
To run SSH automatically on boot use,
systemctl enable sshd
This is easier for me than using a "plugged in" keyboard and allows me to turn off the screen if it is not needed.
Installing Kodi from Manjaro
Installing Kodi is as easy as using the Pacman package manager, which provides the pacman command.
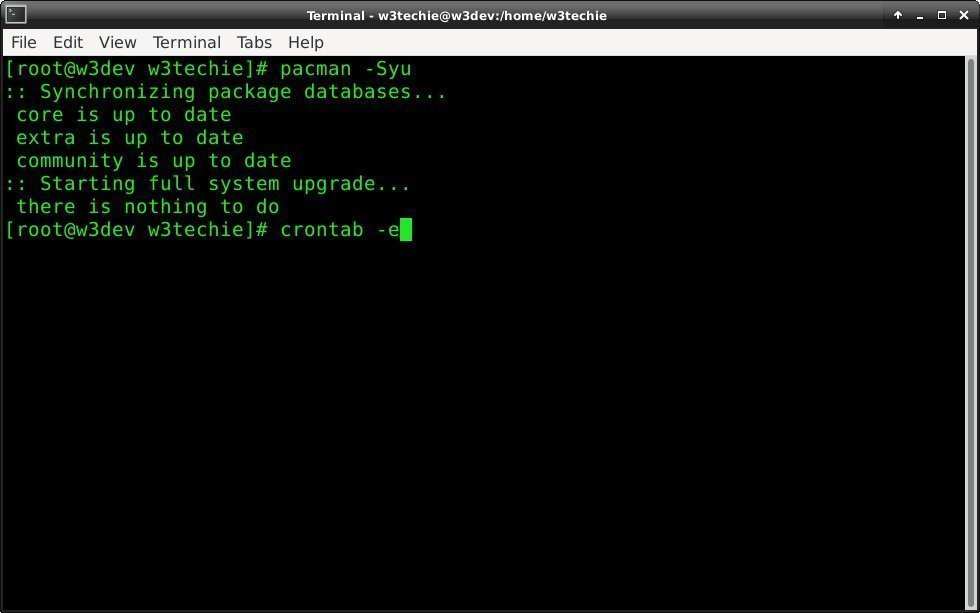
First update Pacman and installed software.
pacman -Syu
Then use Pacman to install Kodi.
pacman -S kodi
This is all you need to do for current releases of Manjaro ARM Edition, all software dependencies for Kodi Standalone Service are satisfied, and you are ready to go. This is not quite the same process for previous versions of Manjaro ARM Editions. In previous releases of Manjaro ARM Editions, when you tried to install Kodi with Pacman it would prompt you to choose:
kodi-gbm
kodi-rpi
kodi-wayland
kodi-x11
As you can see there are four choices.
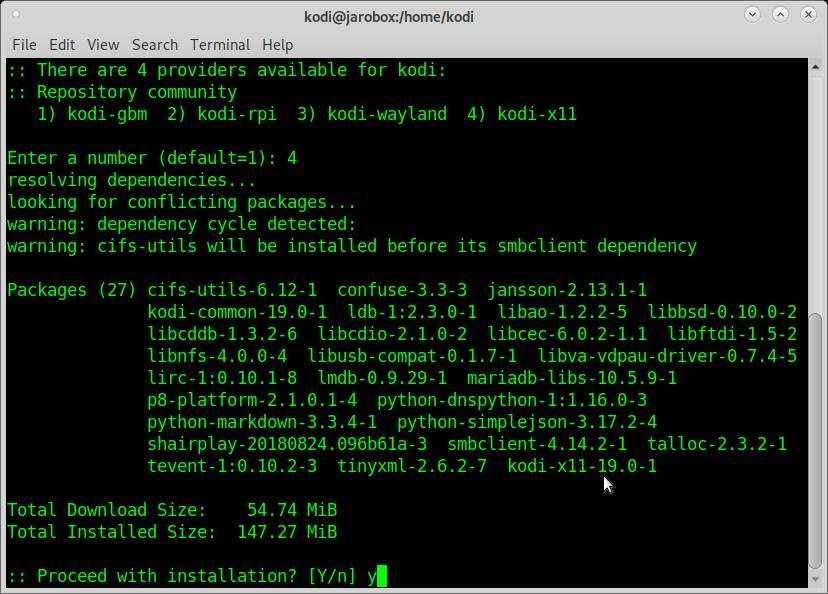
The Pacman package manager no longer prompts you to choose between four other packages, but three of them Wayland, GBM and X11 are supported by Kodi Standalone Service. The dependencies for all three kodi-wayland, kodi-gbm and kodi-x11 are satisfied by installing the current distro repo kodi software package, which does not prompt you to choose.
For Kodi Standalone Service you must choose between kodi-wayland, kodi-gbm and kodi-x11. The software package kodi currently provided by the distro repo is capable of all three of these options. You may see references to the kodi-rpi package on GitHub, but it inevitably becomes part of the master branch. You do not use kodi-rpi with Kodi Standalone Service.
Systemd service units to run Kodi in standalone mode without the need for a DE, using X11, Wayland, and GBM are supported. The gbm_matrix branch of Kodi and offer some flavor of HW-accelerated decoding just like LibreELEC. Install kodi-gbm for this branch. The kodi-rpi package also offers similar hardware acceleration. Wayland is a protocol that utilizes a graphical compositor, which has its own configuration.
My recommendation is kodi-x11. Ironically, X11 is the latest greatest trend that is actually based on pre-existing Xorg and the X11 windowing system. You might also consider reading the GBM roadmap, todo list and issue list #14876 before proceeding with kodi-gdm.
Configuring Kodi Standalone Service
Kodi Standalone Service is three parts:
- Kodi as a Service, running in a Systemd container.
- Kodi Standalone, which is available in the standard kodi software package we installed with the Pacman package manager.
- Kodi the application and GUI.
You can run the Kodi GUI as /usr/bin/kodi or /usr/bin/kodi-standalone, which is the same as kodi --standalone. When you are in your desktop and you go to your apps and open Kodi, you are launching /usr/bin/kodi. If you open the terminal app and type in kodi, it is the same thing.
If you run kodi-standalone from inside the terminal app or your desktop, you open an instance of Kodi that does not rely on the DE or WE. This also means you really have no reason to use kodi-standalone inside a DE or WM. Kodi Standalone Service is more secure and gives us the freedom to securely configure autologin and a passwordless Kodi user, whereas we do not need Kodi Standalone Service to configure Kodi to autostart with LightDM or NoDM.
Autostarting Kodi is not the same thing as Kodi Standalone Service, and does not configure Kodi to autostart. Autostarting Kodi is not the same thing as autologin, and will not allow you to boot to Kodi directly without disabling the login prompt. Cron is not required to run Kodi on startup, but if you do not use a Cron task you must autostart Kodi within Xinitrc by invoking an Xsession using LightDM or NoDM.
Even if you use a Cron task, you must configure Kodi as a passwordless user to autologin. Configuring autologin does not disable the login prompt. So, do not skip the step to disable the login prompt because even the CLI has a login prompt. Just make sure when booting to a "CLI only" not to disable the login prompt before enabling SSH, and making sure you can login with SSH by going out of your way to do so.
All that being said, Kodi Standalone Service does none of these things!
If you don't want it you don't need it, and you do not need it to use this guide. This information is provided first because it is easier to read and better organized and follow that way. Also, you do not have to boot to the Kodi GUI to use Kodi Standalone Service. You could configure Kodi Headless as a media appliance with Kodi Standalone Service.
If you do not want security and integrity, you do not need it to boot to "Kodi only" and it will not achieve it at all. When you install it you will only no it is there by using the kodi command either locally or remotely. Launching the GUI requires a user to be logged in, even if it is root. That is not advisable, but a standard user can be configured with the process below. Here in this guide, we create user Kodi.
If you do not want to use Kodi Standalone Service but want to boot directly to the Kodi GUI, skip this step entirely and configure LightDM.
If you want to use LightDM, skip to the very end and use NoDM instead.
Install software dependencies
Kodi Standalone Service will still require the correct software dependencies, whether you are prompted to choose kodi-x11, kodi-gbm, kodi-wayland or kodi-rpi. As mentioned, it will only prompt you to choose on previous releases of Manjaro, but you can use the package manager to ensure you have the software dependencies installed for the required Kodi Standalone Service files to work.
Use pacman -Ss or pacman -Si to see if these dependencies are installed already.
pacman -Si kodi-11
For kodi-x11 you require xorg-server and xorg-xinit.
pacman -S xorg-server xorg-xinit
And for GBM you need to install libinput.
pacman -S libinput
Wayland users need both libinput and cage installed.
pacman -S libinput cage
Build Kodi Standalone Service from source
To setup Kodi Standalone Service using Systemd, the process is made simple by GraySky2 on GitHub. From the README.md file there is a handy PKGBUILD file in the AUR repository for us to use. We can download it with wget, and install it with makepkg.
cd ~
wget https://github.com/graysky2/kodi-standalone-service/archive/v1.130.tar.gz
tar xvf v1.130.tar.gz
cd kodi-standalone-service-1.130/
make
make install
You must install make to build the package.
pacman -S make
[root@w3dev kodi-standalone-service-1.130]# make install
install -p -d "/usr/lib/udev/rules.d"
install -p -d "/etc/conf.d"
install -p -m644 x86/udev/99-kodi.rules "/usr/lib/udev/rules.d/99-kodi.rules"
install -p -m644 common/kodi-standalone "/etc/conf.d/kodi-standalone"
install -p -d "/usr/lib/systemd/system"
install -p -d "/usr/lib/sysusers.d"
install -p -d "/usr/lib/tmpfiles.d"
install -p -m644 x86/init/kodi-gbm.service "/usr/lib/systemd/system/kodi-gbm.service"
install -p -m644 x86/init/kodi-wayland.service "/usr/lib/systemd/system/kodi-wayland.service"
install -p -m644 x86/init/kodi-x11.service "/usr/lib/systemd/system/kodi-x11.service"
install -p -m644 x86/init/tmpfiles.conf "/usr/lib/tmpfiles.d/kodi-standalone.conf"
install -p -m644 x86/init/sysusers.conf "/usr/lib/sysusers.d/kodi-standalone.conf"
install -p -d "/usr/share/man/man1"
install -p -m644 x86/doc/kodi.service.1 "/usr/share/man/man1/kodi.service.1"
[root@w3dev kodi-standalone-service-1.130]#
Here we can see the new .service files in /usr/lib/systemd/system/. 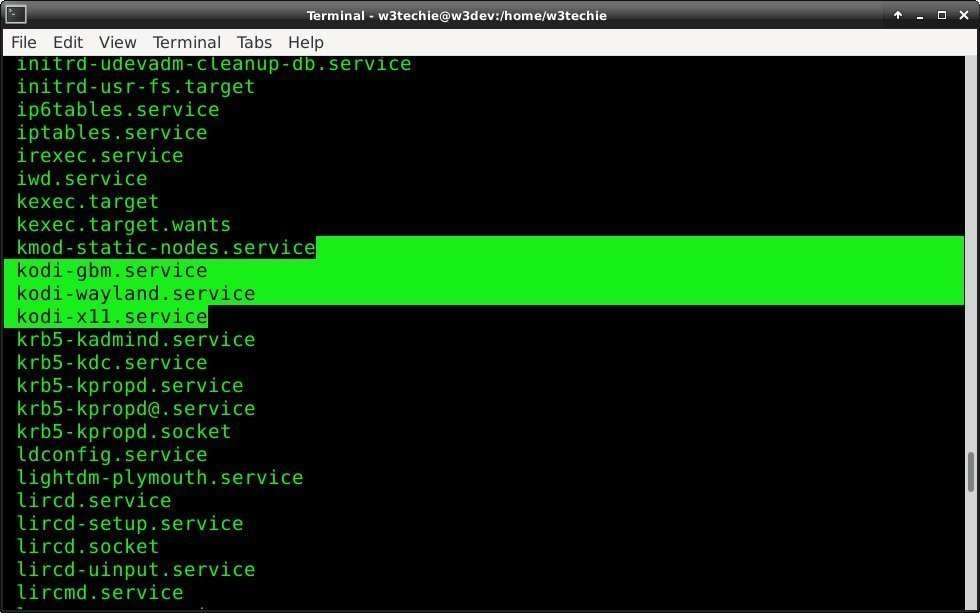
Anytime you make changes to Systemd unit files, you must reload the Systemd daemon.
systemctl --system daemon-reload
Use Systemctl to manage services
You can start, stop, enable or disable a service using the systemctl command.
systemctl start kodi-x11.service
To enable the service to run automatically use,
systemctl enable kodi-x11.service
Naturally, you can oppositely disable Kodi Standalone Service.
systemctl disable kodi-x11.service
Easily stop Kodi this way too, adding the --now option to quit immediately instead of gracefully.
systemctl stop kodi-x11.service --now
You can also run Kodi as a web service by creating a Systemd "drop-in" file.
systemctl edit kodi-x11.service
This opens /etc/systemd/system/unit.d/override.conf, so you can add this entry to configure Kodi as a web service.
[Service]
AmbientCapabilities=CAP_NET_BIND_SERVICE
Here I add my line of code to configure Kodi as a web server.
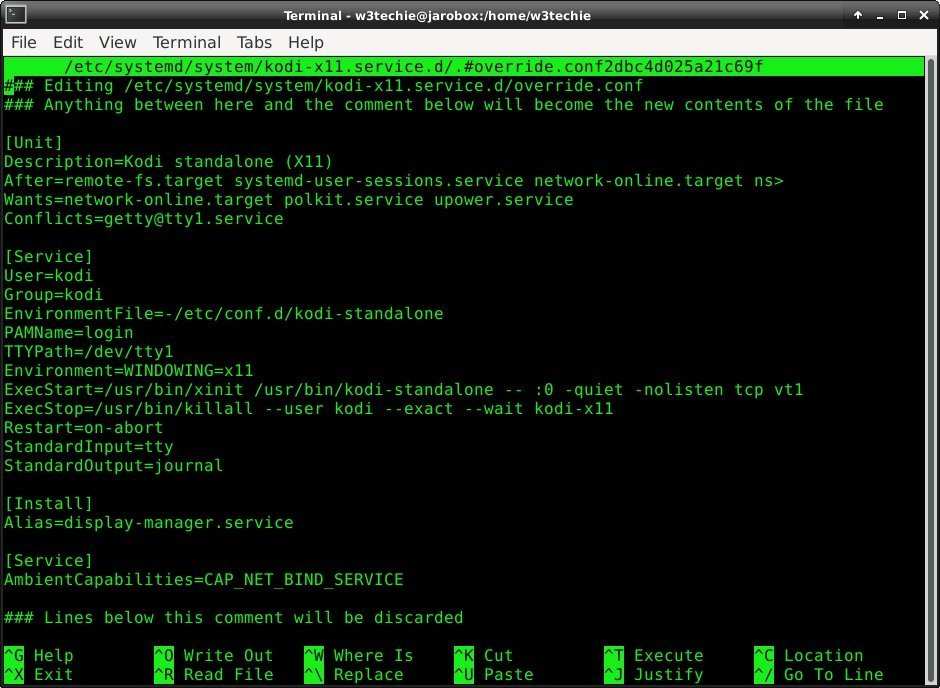
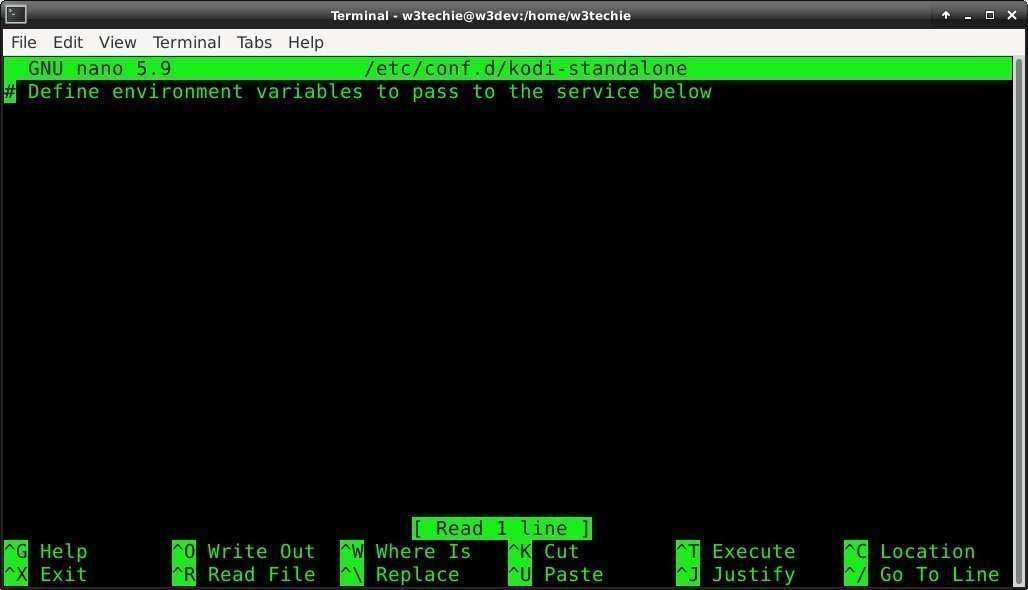
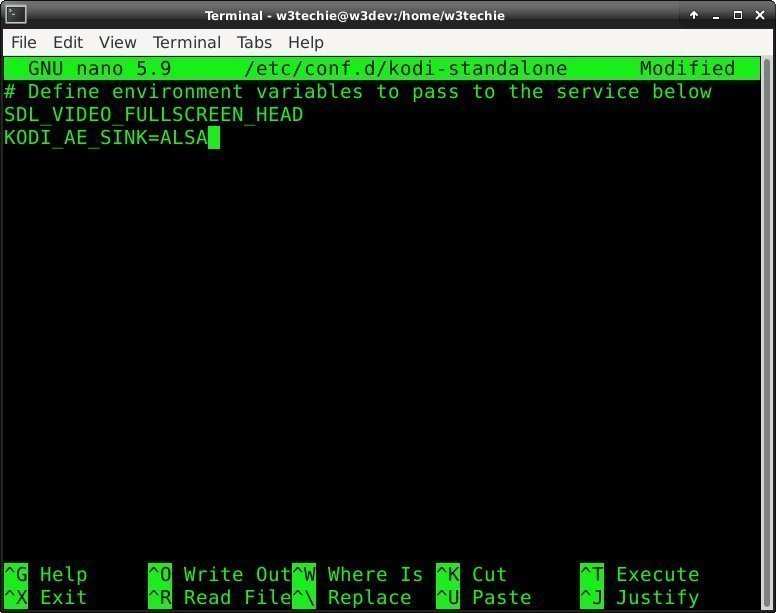
Notice there is a line relevant to kodi-standalone, which you can uncomment to use environment variables in /etc/conf.d/kodi-standalone. Move all of the commented text to area where you can make changes by copying them. Do not worry you cannot remove the commented text, it repopulates itself. So, if you make a mistake and reopen the file, the commented template remains.
# EnvironmentFile=-/etc/conf.d/kodi-standalone
Commenting this out allows you to add environment variables for /etc/conf.d/kodi-standalone, but if you do not add them there are none there.
As you can see, it's up to you.
If you are going to use Kodi on multiple monitors, set an environment variable here to keep Kodi's screen from stretching across all the monitors.
SDL_VIDEO_FULLSCREEN_HEAD
ALSA uses AE_SINK=ALSA by default, but if PulseAudio does not work pass KODI_AE_SINK=ALSA for PulseAudio to use ALSA directly.
Using systemctl to see services
To see your running services simply run systemctl status, or:
systemctl #is the same as,
systemctl list-units
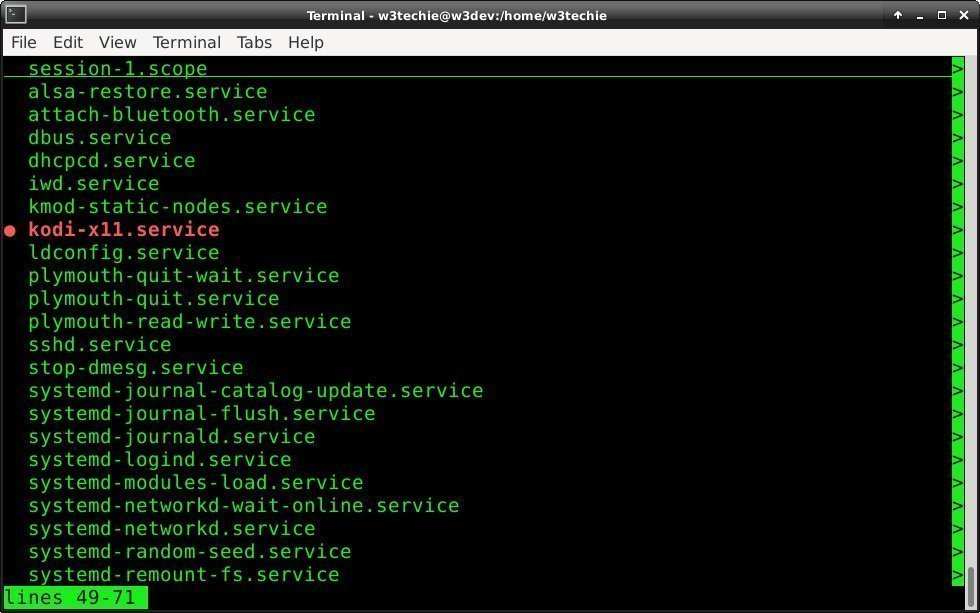
To narrow down the scope of your list use,
systemctl list-units --type=service
To show failed unites use,
systemctl --failed
To show installed units use,
systemctl list-unit-files
To undo the change use systemctl revert.
systemctl revert kodi-x11.service
You can do many things more efficiently with Kodi as a service.
Autostart Kodi with Cron
So far we have Kodi all setup to run as a service, but this is in no way how to run the GUI. To run a GUI, you must configure Kodi to autostart. Kodi Standalone Service works fine and responds to any commands sent to the Raspberry Pi, but by default it runs headless without a GUI. We will create a crontab to autostart /usr/bin/kodi for a user named Kodi, disable Kodi's password, and enable autologin for Kodi.
To autostart Kodi and login automatically requires a few fairly simple steps.
- Create user Kodi.
- Configure user Kodi to autologin.
- LightDM
- NoDM
- Make Kodi passwordless.
- Autostart Kodi's GUI with a
crontab(optional), which can otherwise be done inside Xinitrc. - Create a custom Xinitrc, which allows us to implment other Xsession options.
While X11 and Xserver or other implementations of X11 such as Xorg are all able to create Xsession automatically, you can create your own Xinitrc and Xsessions or modify existing files to change the behavior of X11. This allows you to run Kodi, if the user has permissions. To do this another way, you can run a Cron job. That means using LightDM or NoDM to autologin Kodi and Cronie to create a crontab to autostart Kodi when user Kodi logs in.
Create user Kodi, if Kodi does not already exist.
useradd -mU kodi
User Kodi is created by Kodi Standalone Service, but not by installed the kodi package. So if you are not using Kodi Standalone Service this applies to you.
Creating a crontab with Cronie
Use crontab -e to create a new crontab or edit an existing one.
If you create a crontab with Cronie, do not try launching Kodi with Xinitrc because it will only try to launch a second instance. Creating a crontab is optional, but then you will only use an Xsession to autologin with LightDM. You do not use it to autostart Kodi.

You could just use @reboot kodi, but I like to have user Kodi launch /usr/bin/kodi with the -c option to enter a command.
@reboot su kodi -c kodi
If you are not using Kodi Standalone Service use,
@reboot su kodi -c kodi-standalone
This is the same as,
@reboot su kodi -c kodi --standalone
Of course, you could use the form,
@reboot /usr/bin/kodi
And,
@reboot /usr/bin/kodi-standalone
@reboot /usr/bin/kodi --standalone
If you were to use a command "line" rather than a single command (such as just one word "kodi"), use quotes to wrap your command.
@reboot su kodi -c "kodi playlist.m3u"
You can, however, remove the crontab.
crontab -r
If you are a standard user, you can do this because user Kodi is configured for passwordless autologin. So, I can configure myself w3techie as a standard user but run Kodi as user Kodi using this one line in .xinitrc.
X11 and LightDM
Install LightDM with Pacman.
pacman -S lightdm
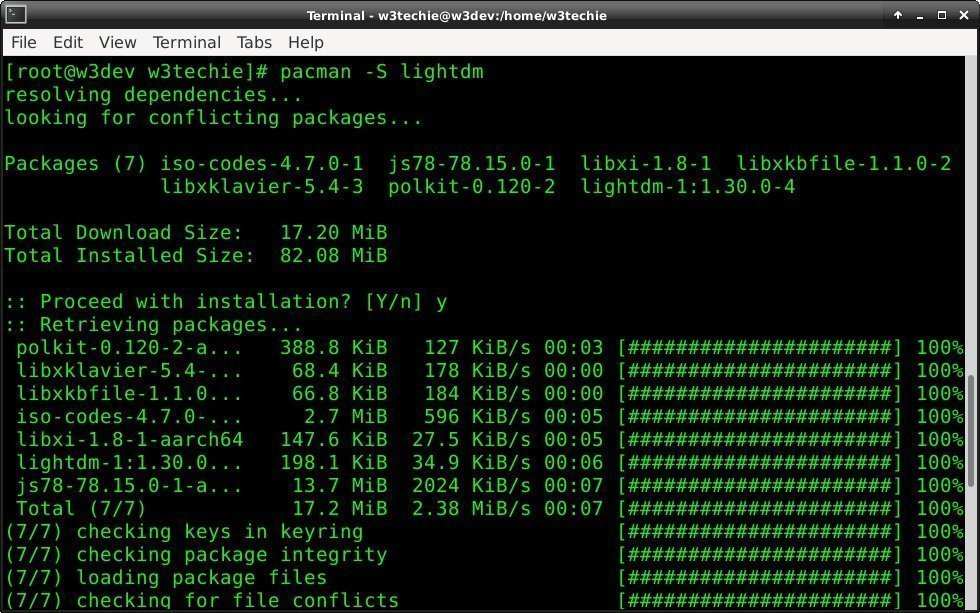
Notice again Pacman lists optional dependencies.
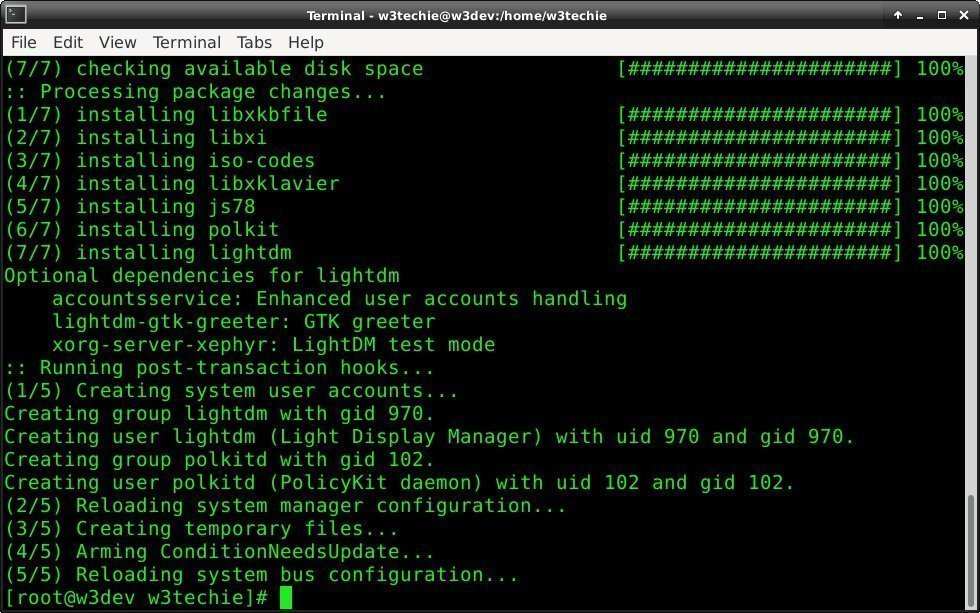
If you want more information about each of these dependencies use pacman -Ss.
pacman -Ss accountsservice
Open /etc/lightdm/lightdm.conf,
[Seat:seat0]
pam-service=lightdm-autologin
autologin-user=kodi
autologin-user-timeout=0
user-session=kodi
and add the entry as shown.
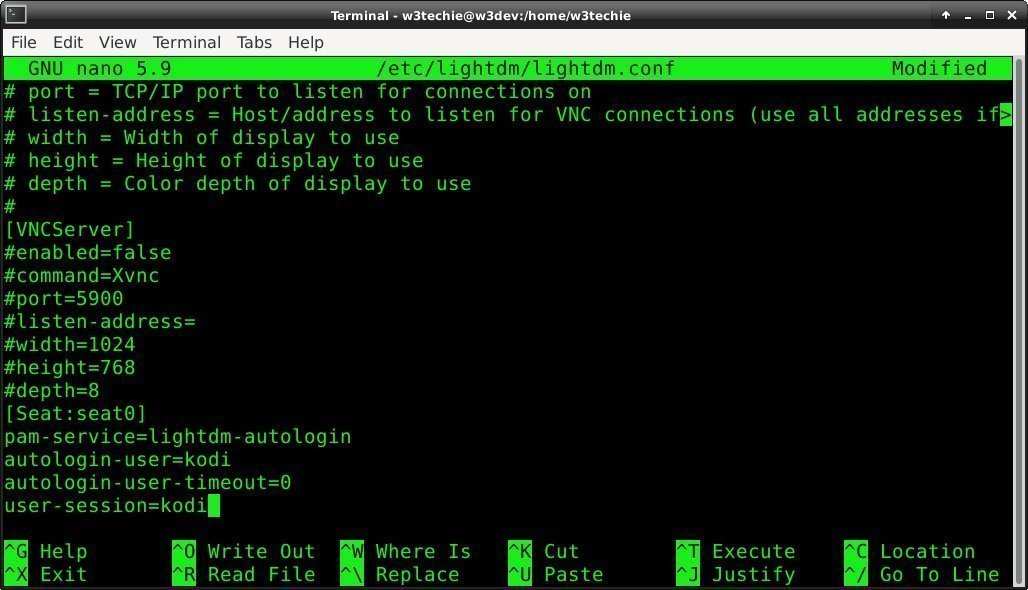
Inside /etc/lightdm/lightdm.conf do not uncomment lines to configure [Seat:*] to autologin-user=kodi. Generally, using commented entries is unwise because you lose your template that way.
#[Seat:*]
I put the entry at the bottom only so it is easy to find for me, but mostly others I might ask to tinker on my behalf.
Configure the /etc/pam.d/lightdm
Configure the /etc/pam.d/lightdm with these two lines.
#%PAM-1.0
auth        sufficient  pam_succeed_if.so user ingroup nopasswdlogin
auth        include     system-login
Normally /etc/pam.d/lightdm looks like this.
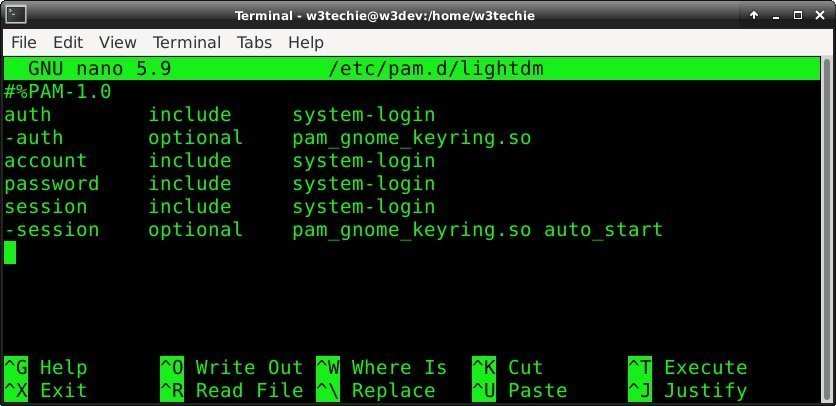
Use nano to open and edit /etc/pam.d/lightdm
[root@w3dev w3techie]# nano /etc/pam.d/lightdm
It should look like this.

To keep from seeing the login prompt, we must disable the DM (or display manager) login prompt. To do this we use systemctl next.
Disabling login prompt
In order to disable the login prompt, we start with the bult-in systemctl command. First, we disable graphical login and the login prompt to get only the command-line, if there is a DE or WM installed.
To see the current default use,
systemctl get-default
If the output is,
graphical.target
you are configured to see a login prompt.
To change it to multi-user target use,
systemctl set-default multi-user.target
Now systemctl get-default produces multi-user.target.
[root@w3dev w3techie]# systemctl get-default
multi-user.target
This step will only disable the login prompt on the CLI. You will still only get a command prompt before configuring autologin. So, the next step is to configure autologin for a passordless user. In this case, for user Kodi logging in automatically with LightDM.
Creating a kodi.desktop file
By default the kodi.desktop file is in /usr/share/applications. If it is insalled for only one user to use, it is in the users home directory ~/.local/share/applications/
[Desktop Entry]
Version=1.0
Name=Kodi
GenericName=Media Center
GenericName[zh_CN]=媒体中心
Comment=Manage and view your media
Comment[ru]=Просмотр и управление мультимедиа
Comment[zh_CN]=管理和查看您的媒体
Exec=kodi
Icon=kodi
Terminal=false
Type=Application
Categories=AudioVideo;Video;Player;TV;
Keywords=audio;video;media;center;tv;movies;series;songs;remote;

Actions=Fullscreen;Standalone;

[Desktop Action Fullscreen]
Name=Open in fullscreen
Name[zh_CN]=全屏打开
Exec=kodi -fs

[Desktop Action Standalone]
Name=Open in standalone mode
Name[zh_CN]=在独立模式下打开
Exec=kodi --standalone
Notice where it has a language other than English [ru] for Russian and [zh_CN] for Chinese are used. This is to tell you what language it is in rather than make you guess or expect you to know.
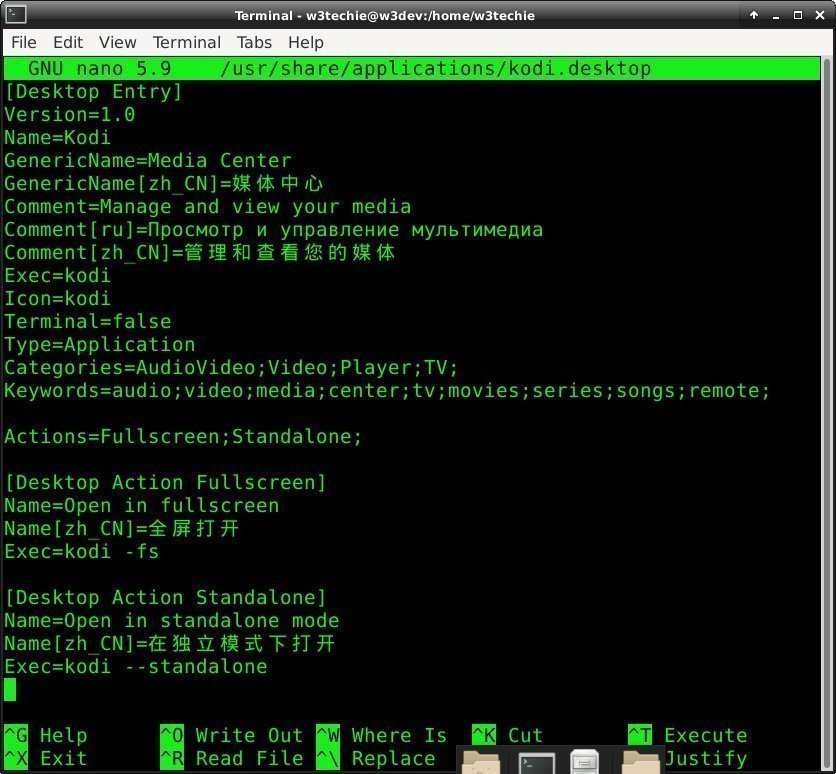
We use kodi.desktop to configure LightDM or NoDM.
See also: Desktop Entries – ArchWiki | Wiki.ArchLinux.org
Enabling passwordless login
Kodi must be part of the autologin group for passwordless login.
groupadd -r autologin
gpasswd -a kodi autologin
This outputs the following.
[root@w3dev w3techie]# groupadd -r autologin
[root@w3dev w3techie]# gpasswd -a kodi autologin
Adding user kodi to group autologin
[root@w3dev w3techie]#
LightDM logs in using the session specified in the ~/.dmrc of the user logging in automatically.
Override this file by specifying autologin-user=kodi in /etc/lightdm/lightdm.conf:
[Seat:*]
autologin-user=kodi
autologin-session=kodi.desktop
To see a list of valid session names, use the ls command.
ls /usr/share/applications/*.desktop #for X11 sessions
Creating a passwordless Kodi user
Kodi must be part of the nopasswdlogin group to be able to login interactively without a password.
groupadd -r nopasswdlogin
gpasswd -a kodi nopasswdlogin
This looks like this in my terminal.
[root@w3dev w3techie]# groupadd -r nopasswdlogin
[root@w3dev w3techie]# gpasswd -a kodi nopasswdlogin
Adding user kodi to group nopasswdlogin
[root@w3dev w3techie]#
To remove a user from a group again use,
gpasswd -r kodi nopasswdlogin
To delete a group use,
groupdel nopasswdlogin
To make Kodi part of autologin and nopasswordlogin use,
usermod -mG autologin,nopasswdlogin -d /home/Kodi/ -s /bin/bash kodi
To create a new user account that logs in automatically without a password, make the user member of both groups.
useradd -dG autologin,nopasswdlogin -s /bin/bash
To modify an existing user use usermod instead of useradd.
usermod -G autologin,nopasswdlogin -s /bin/bash
If you just finished configuring LightDM, skip the next section on NoDM to "What's in Xinitrc?".
X11 and NoDM
An alternative to LightDM is NoDM.
pacman -S nodm
Specify the Kodi user in /etc/nodm.conf,
NODM_USER=kodi
NODM_XSESSION=/home/Kodi/.xinitrc
Make sure to execute /usr/bin/kodi-standalone (or equivalent) inside the xinitrc file. Also, ensure xinitrc is executable by running,
chmod +x /home/Kodi/.xinitrc
What's in Xinitrc?
We can create xinitrc in Kodi's home directory as root.
su kodi -c "touch /home/Kodi/.xinitrc"
Then edit ~/.xinitrc.
nano /home/Kodi/.xinitrc
Insert the command to launch Kodi.
#!bin/sh
/usr/bin/kodi &
exec dbus-run-session -- bash

If you do not have Kodi Standalone Service installed use,
#!bin/sh
/usr/bin/kodi-standalone &
exec dbus-run-session -- bash
or
#!bin/sh
/usr/bin/kodi --standalone &
exec dbus-run-session -- bash
Use CTRL + O + X to overwrite and exit Nano.
Now make xinitrc executable.
chmod +x /home/Kodi/.xinitrc
At home you can add all the scripting you want to both Xinitrc and an Xsession file. You can even call other scripts from inside both. If you do not create an Xsession script or modify Xinitrc, X11 handles Xsessions automatically. What you do not put inside a custom Xsession is still handled automatically because no custom settings are configured in an Xsession or Xinitrc.
That means automatically handling advanced video and audio settings, deciding what firmware to use with which drivers, and what codecs to play media files, etc. You get to add your own code to scripts and it takes care of those advanced settings for you, where settings are not specified.
What a great deal!
Resource openers and xdg-utils
To ensure Kodi is the default player for your media files install xdg-utils.
pacman -S xdg-utils
To see what the MIME type for a file is use,
xdg-mime query filetype video.mp4
video/mp4
To see what the default application for the file is use,
xdg-mime query default video/mp4
vlc.desktop
To set the default app for opening the file to Kodi use,
xdg-mime default kodi.desktop video/mp4
To debug a MIME type with xdg-utils use,
env XDG_UTILS_DEBUG_LEVEL=10 xdg-mime query default video/mp4
What good is it having Kodi all set up if it is not the default player for all your media files!?
Conclusion
If you take care to do everything, any media player can be configured to make use of all its features. Being able to run Kodi within a minimal Manjaro Linux operating system has many advantages.
- You can login remotely and use Linux commands.
- You can install all kinds of great open source software.
- Your media player is on a separate device, freeing up your phone, tablet or laptop.
- Running Kodi on an operating system it was truly developed for.
- Unlocking features only available to Kodi on Linux.
Kodi Standalone Service can secure your system whether you are booting directly to Kodi or are autostarting Kodi after logging in with LightDM. When you or other users login remotely using a protocol like SSH, Kodi is running securely as a Systemd service on your Raspberry Pi.
Booting directly to Kodi is cool. I like it. It saves me time.
Kodi Standalone Service is not only the best way to run Kodi, but the only way IMO.
You always had Kodi Media Center. Now you have your own Kodi Media Box.
One last thing...
If you are interested in the differences between the various Raspberry Pi models then check out this article which I also wrote. It includes an easy to read specification comparison table.

A freelance web and FOSS developer and technical writer. My job involves creating server-side code, SEO, and a lot of just knowing things no one else wants to know. While my contributions are boring and dry, they are valuable. My other great skill is container technology and creating container applications from scratch. Linux and FOSS are my fancy. I also write for SHB, SmartHomeBeginner.com.


Leave your feedback...