
How to Run Zoom on the Raspberry Pi
The Raspberry Pi is a fantastic little single-board computer (SBC). With the Raspberry Pi 4's more, faster RAM in up to 8GB of DDR4 as well as its faster processor, the Pi is a shockingly competent desktop replacement. Especially with an increase in remote work and school situations, a Raspberry Pi can be a cost-effective desktop for both work and play. And with its ability to teleconference, the Pi is an excellent maker board that can easily be set up as a work or school machine. Learn how to run Zoom on the Raspberry Pi!
What is Zoom and Why Should You Use it?
There are tons of video conferencing apps available such as Skype, Google Hangouts, and Zoom. Although Zoom might not be the only, or first, video conferencing tool on the market, it's certainly one of the best choices. It's easy to use, doesn't require an account to join meetings, and boasts robust security features.
What is Zoom: A videoconferencing platform like Skype or Google Hangouts
Benefits of using Zoom:
- Easy to use
- Free version available
- Account creation not required to join videos and calls
- Built-in recording capabilities
- Strong security features
- Many different features like virtual backgrounds
- Web app doesn't require any downloads
What is the Raspberry Pi?
The Raspberry Pi is a SBC. As the name suggests, the credit card-sized Raspberry Pi comes with all required components baked onto the chip: RAM, CPU, a GPU, and wireless antennas are onboard. Just add a microSD card with a Raspberry Pi-compatible operating system (OS) in order to get started. For its fourth iteration, the aptly-named Raspberry Pi 4, you'll find a Broadcom BCM2711 quad-core Cortex-A7s ARM v8 64-bit system-on-a-chip (SoC) clocked at 1.5Ghz. There's a choice of 1GB, 2GB, 4GB, or 8GB of DDR4 RAM.
On the networking side, you'll find both 2.4GHz and 5.0GHz 802.11ac Wi-Fi, Bluetooth 5.0 BLE (Bluetooth Low Energy), and Gigabit Ethernet. Inputs/outputs are plentiful with four USB ports, two USB 3.0 and a pair of USB 2.0, a standard 40-pin GPIO (general purpose input-output) header, 2-lane MIPI DSI display port, and 2-lane MIPI CSI camera port.
A pair of micro-HDMI ports handle video output at 4K 60 frames per second (FPS). The RasPi can handle H.265 4K decoding and H.264 at both 1080p 60 FPS as well as 30 FPS. What's more, there's OpenGL ES 3.0 compatibility. Additionally, you'll find a 4-pole stereo audio/video composite port. For mounting an operating system, the Pi 4 packs a microSD card. A 5V DC USB-C connector provides juice to the Pi.
Can the Raspberry Pi Run Zoom?
The Raspberry Pi can run Zoom fairly easily. While there's not a Zoom client for ARM devices, you can run Zoom in a web browser.
To use your Raspberry Pi for Zoom videoconferencing, you'll need a few items. First, a Raspberry Pi board. I recommend the Raspberry Pi 4, although the Raspberry Pi 3 B+ works as well. Additionally, you'll need a microSD card for running an operating system. Raspberry Pi OS is a great choice, Ubuntu works well, and there are plenty of other Linux-based Raspberry Pi distributions (distros) as well.
You'll need a display device such as a TV, monitor, or projector along with a micro-HDMI cable or micro-HDMI adapter. For controlling the Pi, a keyboard and mouse are needed. To power the Pi, you will require a USB-C 5V power adapter. A case and fan are optional but recommended. Since Zoom requires video and audio functionality, you'll need a webcam as well as a microphone and maybe a pair of headphones. There are plenty of mics on the market, but I suggest the Blue Yeti or Movo UM700. Alternatively, you may consider using a headset with a built-in microphone.
What you'll need to run Zoom on the Raspberry Pi
- Raspberry Pi board (Raspberry Pi 4 with 4GB or 8GB or RAM recommended)
- microSD card
- micro-HDMI cable or HDMI/DisplayPort cable with micro-HDMI adapter
- 5V USB-C power cable
- Keyboard and mouse
- Case (optional, recommended)
- Heatsink/fan (optional, recommended)
- Display device (monitor, TV, or projector)
- Microphone (i.e. Blue Yeti, Movo UM700)
- Webcam (i.e. Logitech C920S, Anker PowerConf)
- Headphones/headset with mic (optional_
- Linux OS (i.e. Raspberry Pi OS, Ubuntu)
- Zoom web client
- Active Internet connection
Total cost: $35+ USD. You snag a Raspberry Pi 4 for around $35 USD. A Pi with more RAM retails for a higher price tag. One of the best options if you're just getting started is to cop a Raspberry Pi starter kit that comes with a Pi board, microSD card, case, fan, and other amenities.
Running Zoom on the Raspberry Pi
With your Raspberry Pi powered on and booted into a Linux distro like Ubuntu or Raspberry Pi OS, go ahead and connect all of your webcam, microphone, and headset.
First, connect your webcam. Simply connect your webcam to a free port on your Raspberry Pi.
Next, hook up your microphone. A standard USB microphone is the easiest option. If you're using a USB mic, simply plug your audio capture device into a free USB port on the Pi. For an XLR mic, you'll need to connect the XLR microphone first to a USB interface and then to the Pi. If you're using a headset with an integrated microphone, skip this step.
Now, connect your headphones or speakers. There are a few ways of accomplishing this. Some headsets and speakers use a USB dongle or USB connection. If so, plug in your device's USB into a free USB port on the Pi. Alternatively, you may use the Pi's analog audio output to connect a pair of headphones or speakers. Since the Pi transmits audio and video over HDMI, you could also use the built-in speakers of your display device, or pipe audio from the Pi over HDMI and utilize an audio output on your display device such as analog 3.5mm, optical TOSLink, etc.
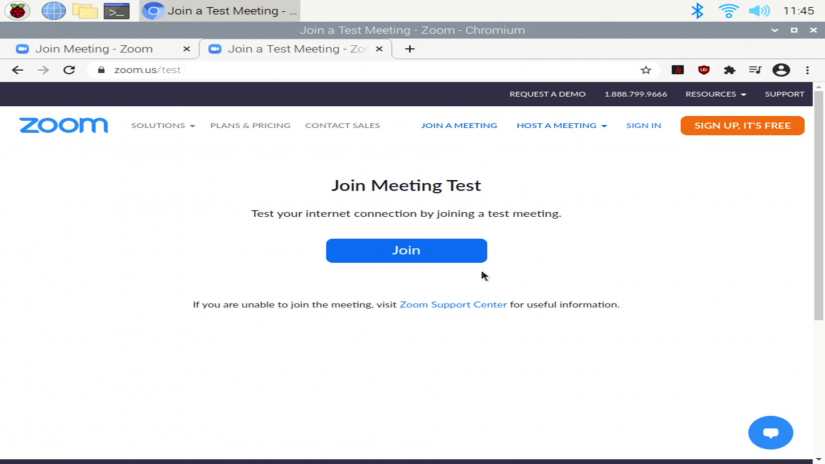
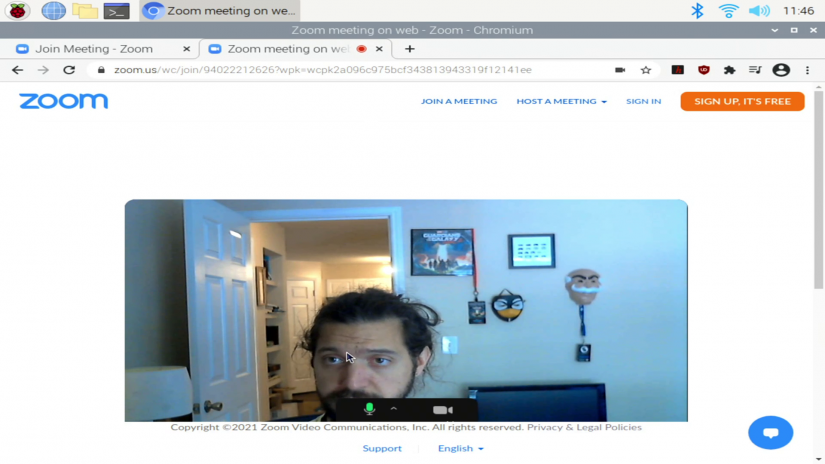
After that, you should have your webcam, mic, and headphones or speakers properly connected. Then, it's time to fire up Zoom. In a browser, head to join.zoom.us. This will open Zoom in a web browser.
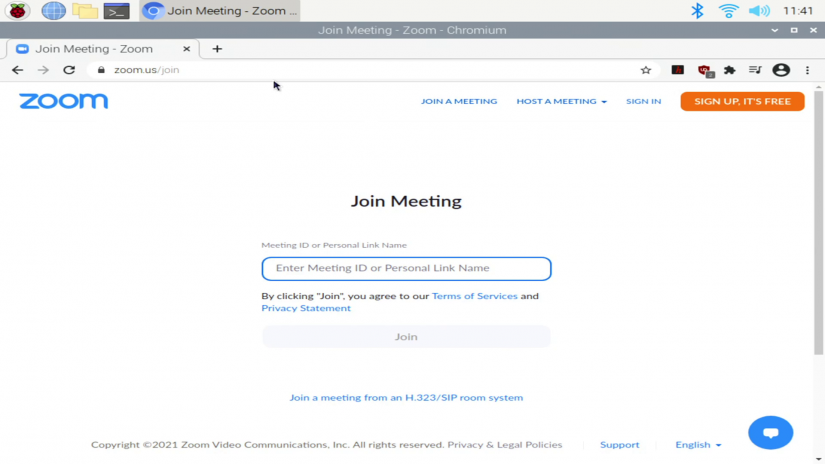
You can now enter a meeting ID and password, or if you've received an email Zoom link invitation, you can click on the meeting request URL in the email.
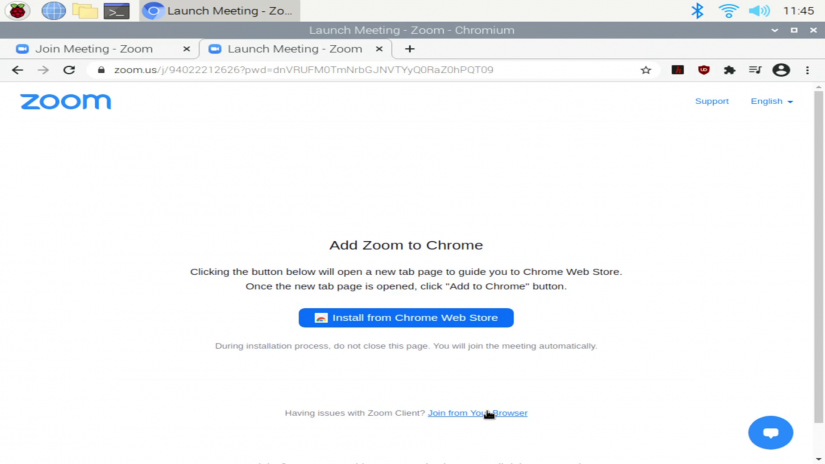
You'll be prompted to add Zoom to Chrome. Instead, select Join from Your Browser to launch the Zoom web app.
Now, the Zoom web app should launch. You'll be asked to enable your microphone and camera, so select Allow.
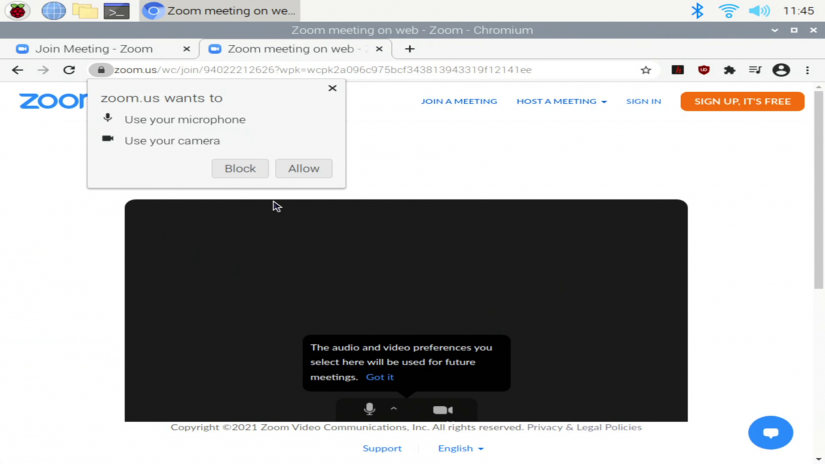
Zoom should now load on the Raspberry Pi!
How to Run Zoom on the Raspberry Pi - Final Thoughts
With its low price tag, small footprint, and energy efficiency, the Raspberry Pi makes a great desktop PC for basic tasks. Since you can run Zoom on the Raspberry Pi, it's a great option for both students seeking a cheap computer or work-from-home employees. It's affordable and easy to set up for video conferencing.
Your turn: How are you working from home with your Raspberry Pi?

Moe Long is an editor, writer, and tech buff with a particular appreciation for Linux, Raspberry Pis, and retro gaming. Writing online since 2013, Moe has bylines at MakeUseOf, TechBeacon, DZone, SmartHomeBeginner, DEV.to, DVD Netflix, and Electropages. You can read his writings on film and pop culture at Cup of Moe, check out his tech reviews, guides, and tutorials at Tech Up Your Life, and hear his thoughts on movies on the Celluloid Fiends podcast. Aside from writing and editing, Moe has an online course, the Beginner's Guide to Affiliate Blogging From Scratch. When he's not hammering away at his keyboard, he enjoys running, reading, watching cinema, listening to vinyl, and playing with his dog Sebastian.


Leave your feedback...