
How to Install Airsonic on the Raspberry Pi
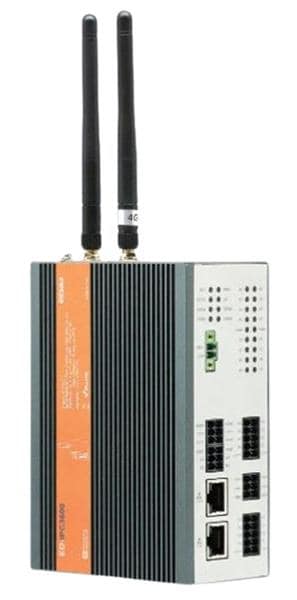
The Raspberry Pi is a credit card-sized single-board computer (SBC). With all of its components including a CPU, GPU, and RAM baked in, the Raspberry Pi offers a superb mix of computing power, energy efficiency, and utility. Because of a low power-draw and tiny footprint, Raspberry Pi boards rock of home server use. One of the best media server software options around is Airsonic. Learn how to install Airsonic on the Raspberry Pi, and make your own personal media streamer!
What is Airsonic?
Subsonic launched as a media server app with an onus on music server use. While initially open-source, Subsonic eventually went closed source. However, several forks spawned from Subsonic including the aptly-named Madsonic, and Airsonic. Whereas both Madsonic and Subsonic operate on a freemium model where most functionality is free with select features behind a paywall, Airsonic is completely open-source and free to use. As such, it's a fantastic open-source alternative to Subsonic, Madsonic, Plex, and Emby. Its Subsonic roots remain since it's a Java-based application.
How to Install Airsonic on the Raspberry Pi
An Airsonic media server running on a Raspberry Pi is pretty easy. You'll need a Raspberry Pi board, and I recommend using the Raspberry Pi 4 or Raspberry Pi 3 B+. A Pi 3 B+ should work just fine for music streaming, but if you plan to stream any videos, the Pi 4's extra oomph will really prove noticeable. A case is optional, but definitely recommended. It's necessary to run a Linux distribution (distro) such as Raspbian, and you'll need a microSD card for an operating installation. Plus, peripherals like a keyboard and mouse are necessary. For installing Airsonic, an active internet connection is required. And of course, the most fun part, a library of (legally obtained) digital music and video files for streaming! While you can store your media collection on the Pi itself, an external storage device such as a flash drive or external harddrive is your best choice. If you care to stream from your Airsonic media server to compatible client devices, you might need an Airsonic client app.
What you need for an Airsonic media server on the Raspberry Pi:
- Raspberry Pi board (Raspberry Pi 4 recommended)
- Case (optional, recommended)
- microSD card for the host OS
- Debian Linux-based distro (i.e. Raspbian, Ubuntu, Debian)
- Compatible power supply
- Peripherals (keyboard, mouse)
- Monitor, TV, or projector as a display device with HDMI input
- Personal media collection
- External storage device (optional, recommended)
- Active internet connection
- Airsonic software
Total cost: Since you really only need a Raspberry Pi and a few accessories, an Airsonic NAS running on a Raspberry Pi is an affordable project. You can snag a Raspberry Pi 3 B+ or Raspberry Pi 4 for around $35 USD. I suggest picking up a complete Raspberry Pi kit with case, microSD card, and power supply. Regardless, you won't break the bank building a media server with Airsonic.
Install Java
First up, Airsonic requires installing Java. As with any software installation, it's best to run an update and ensure that you've got the latest software packages installed. In a terminal on your Debian-based Linux distro, run:
sudo apt-get update && apt-get upgrade
Next up, install Java:
sudo apt install oracle-java8-jdk tomcat8
You'll need to check if JAVA_HOME is set. Enter:
ls -l /usr/lib/jvm
And you can view the available versions of Java on your machine. Then, edit /etc/default/tomcat8 with your preferred text editor:
sudo nano /etc/default/tomcat8
And set the path to JAVA_HOME:
# The home directory of the Java development kit (JDK). You need at least
# JDK version 7. If JAVA_HOME is not set, some common directories for
# OpenJDK and the Oracle JDK are tried.
JAVA_HOME=/usr/lib/jvm/java-8-oracle/
Save and exit.
Install Airsonic
Next up, install Airsonic on the Raspberry Pi. You can download the most recent Airsonic WAR file from the Airsonic downloads page. Alternately, you can download it via the command line with (replacing the version number x.x.x with the latest Airsonic release i.e. 10.5.0):
wget https://github.com/airsonic/airsonic/releases/download/vx.x.x/airsonic.war
Now, make an Airsonic directory. If you're running Tomcat as a service, give Tomcat ownership of that directory:
sudo mkdir /var/airsonic/
sudo chown -R tomcat8:tomcat8 /var/airsonic/
You might need to remove Airsonic files from the TOMCAT_HOME folder. First stop the Tomcat service from running:
sudo systemctl stop tomcat8.service
Then, remove any already existing Airsonic files:
sudo rm /var/lib/tomcat8/webapps/airsonic.war
sudo rm -R /var/lib/tomcat8/webapps/airsonic/
sudo rm -R /var/lib/tomcat8/work/*
Now migrate your WAR file to the TOMCAT_HOME/webapps/ folder:
sudo mv airsonic.war /var/lib/tomcat8/webapps/airsonic.war
Once that's complete, restart Tomcat:
sudo systemctl start tomcat8.service
This may take a few minutes, so take a break and make a cup of tea or coffee. You can follow along with installation using the tail command:
sudo tail -f /var/log/tomcat8/catalina.out
After that, Airsonic should be installed! You can access it at http://localhost:8080/airsonic. Or, from another PC on your home network, enter http://[PI IP ADDRESS]:8080/airsonic replacing PI IP ADDRESS with your Raspberry Pi's IP address. You can find out your Raspberry Pi IP by entering:
ifconfig wlan0
on Wi-Fi or on Ethernet:
ifconfig eth0
Now, Airsonic should be installed!
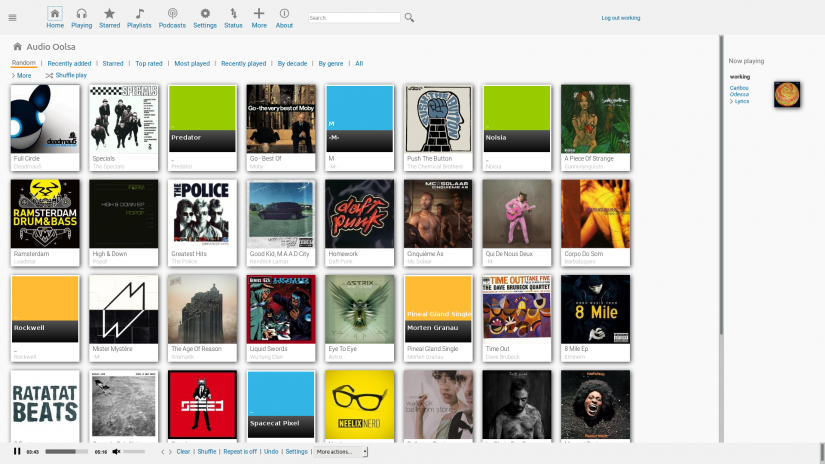
Setting Up Airsonic on the Raspberry Pi
Head over to http://localhost:8080/airsonic or http://[PI IP ADDRESS]:8080/airsonic to log into your Airsonic dashboard. The first thing you'll want to do is create any user accounts. By default, Airsonic uses the username and password of admin. Head to Settings > Users to change this. From here you may add new users and edit any permissions.
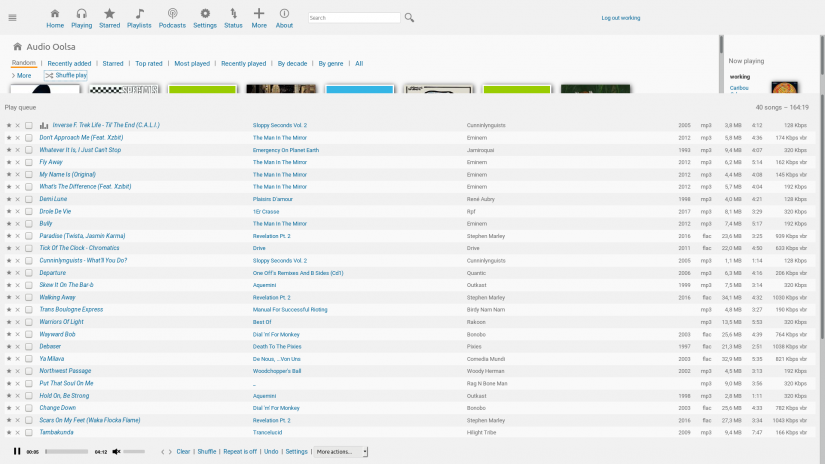
Before you can stream from your DIY (do-it-yourself) Spotify, you'll need to add media folders. Navigate to Settings > Media folders and add folders. Whereas many apps use tag data, Airsonic uses folder structure. As such, it's best to maintain an organized music library with the structure Artist/Album/Song. For instance, GZA/Liquid Swords/Duel of the Iron Mic. Or De La Soul/3 Feet High and Rising/The Magic Number. That's a general best practice for any media collection in fact. Under the settings section of the Airsonic dashboard, there's a lot you can accomplish, from adding media folders to tweaking transcoding settings.
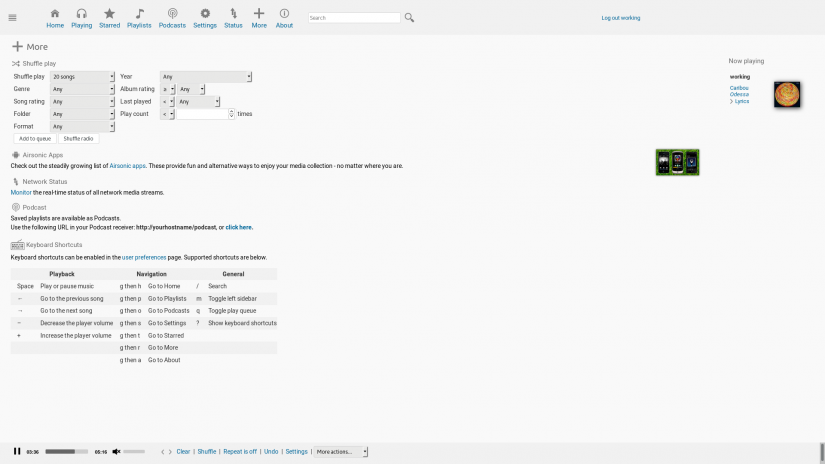
Pick an Airsonic App
There are tons of Airsonic media server apps. Since Aisronic utilizes the same API as Subsonic, you can download whichever Airsonic client app you like. You'll find Android, iOS, Windows, macOS, and Linux apps. For phones, the official Subsonic app works extremely well, and DSub is pretty solid. iSub is excellent on iOS, as is AVSub.
The cross-platform compatible Clementine works really well on Linux, Windows, and macOS. Since Clementine functions with a smattering of different services such as Spotify and Soundcloud, it's a top choice. Submariner for macOS is a great native mac app for Airsonic, and there's SqueezeSonic for Logitech Media Server which even runs on ARM boards and NAS devices.
Airsonic on the Raspberry Pi - Final Thoughts
Overall, Airsonic runs like a champ on the Raspberry Pi. A personal media streamer is a solid choice for making use of Raspberry Pi hardware. It's easy yet incredibly functional. Although I've got all of my music on my TS140 server, I still enjoy having a low-power music streamer with a Pi. Airsonic remains a superb pick. It's simple to set up and configure, and since it uses the same API as Subsonic and Madsonic, there are plenty of client apps for remote streaming. You basically benefit from the same feature set as Subsonic and Madsonic, but completely free and open-source. You might also consider Volumio for a music streamer on the Raspberry Pi or Asus Tinker Board.
Your turn: What are you using for a media server set up?

Moe Long is an editor, writer, and tech buff with a particular appreciation for Linux, Raspberry Pis, and retro gaming. Writing online since 2013, Moe has bylines at MakeUseOf, TechBeacon, DZone, SmartHomeBeginner, DEV.to, DVD Netflix, and Electropages. You can read his writings on film and pop culture at Cup of Moe, check out his tech reviews, guides, and tutorials at Tech Up Your Life, and hear his thoughts on movies on the Celluloid Fiends podcast. Aside from writing and editing, Moe has an online course, the Beginner's Guide to Affiliate Blogging From Scratch. When he's not hammering away at his keyboard, he enjoys running, reading, watching cinema, listening to vinyl, and playing with his dog Sebastian.


Leave your feedback...