
How to Make a Raspberry Pi Web Server With WordPress, Drupal, Apache, NGINX, and Python
The Raspberry Pi is a nifty single-board computer. Since it boasts a small footprint and low power draw, the Raspberry Pi makes for an excellent lightweight server. Using software such as Plex and Emby, you can create a media server for a do-it-yourself (DIY) Netflix or Spotify. But for a web server, you can install WordPress, Drupal, and more on the Raspberry Pi. Learn how to make a Raspberry Pi web server using WordPress, Drupal, Apache, and Python!
Raspberry Pi Web Server: What You'll Need
Because software to create a web server on a Raspberry Pi is free, the cost of a Raspberry Pi server is pretty low. You'll need a Raspberry Pi board, Linux distribution (distro), server software, microSD card, peripherals like a keyboard and mouse, plus a case.
What you'll need for Raspberry Pi WordPress hosting:
- Raspberry Pi board (Raspberry Pi 4 recommended)
- Case (optional, recommended)
- Linux operating system (OS)
- microSD card
- Peripherals (Keyboard and mouse)
- Internet connection
- PSU
Total cost: $35+ USD
I suggest opting for a Raspberry Pi 4. You'll benefit from additional computing power over the Raspberry Pi 3 B+, Zero, and Zero W. A case is optional but recommended, and you'll need an appropriate USB-C power supply, microSD card, Linux OS for the Raspberry Pi, and a few other peripherials.
Installing WordPress on the Raspberry Pi
![]()
To install WordPress on a Raspberry Pi, you'll need to install Apache, MySQL, PHP, and WordPress.
Raspberry Pi WordPress Server: Install Apache
First up, you need to install Apache, a popular web server application. In a terminal window run:
sudo apt-get install apache2 -yThis will install Apache. After installation finished, you can test if it was successful. Open a web browser and navigate to http://localhost which should display an Apache2 landing page.
Now, change the default web page, which is found at /var/www/html/index.html. In a command prompt, enter:
cd /var/www/htmlls -al
You'll see an output like:
total 20
drwxr-xr-x 2 root root 4096 Aug 23 09:55 .
drwxr-xr-x 3 root root 4096 Aug 23 09:48 ..
-rw-r--r-- 1 root root 10701 Aug 23 09:55 index.html
Edit this file by entering the following text into a terminal window:
sudo leafpad index.htmlRaspberry Pi WordPress Hosting: Install PHP
Next, install PHP which is necessary for when you get server requests for a page via a browser:
sudo apt-get install php -yNow, make an index.php file:
sudo leafpad index.phpAnd add some basic PHP to the yourindex.php file:
<?php echo "hello world"; ?>When that's complete, save your file and delete the index.html file. You'll instead use the index.php file:
sudo rm index.htmlIn a browser on your Raspberry Pi, navigate to localhost and you should see "hello world," or whatever text you added. If you're only seeing raw PHP, restart the Apache service:
sudo service apache2 restartNext, edit your index.php file and add dynamic content:
<?phpecho date('Y-m-d H:i:s'); ?>
Install WordPress on Raspberry Pi: MySQL Installation
After that, PHP should be installed. Go ahead and install MySQL, a database engine. Run:
sudo apt-get install mysql-server php-mysql -yThen restart Apache:
sudo service apache2 restartInstall WordPress on the Raspberry Pi
With Apache, PHP, and MySQL installed, it's time to install WordPress on the Raspberry Pi. Head to /var/www/html/ and delete all of the files within it:
cd /var/www/html/sudo rm *
Now, download the latest version of WordPress:
sudo wget http://wordpress.org/latest.tar.gzExtract the tarball:
sudo tar xzf latest.tar.gzThen move the contents of your WordPress folder to the current directory you're currently in:
sudo mv wordpress/* .Since you're done using your tarball, delete it:
sudo rm -rf wordpress latest.tar.gzYou may view the contents of your WordPress folder with:
lsLastly, ensure that the Apache user is the default owner of that directory:
sudo chown -R www-data: .Raspberry Pi WordPress Tutorial: Setting Up WordPress
With Apache, PHP, MySQL, and WordPress all (hopefully) properly correctly you'll have to set up your WordPress database. Run the MySQL secure installation using:
sudo mysql_secure_installationYou'll be prompted to enter the password for the root user. If there's none, just hit enter.
Type y and hit enter to set a root password, then type in a new password.
Hit y to remove anonymous users, y to disallow root login remotely, y to remove test database and access to it, and y to reload privilege tables. Then, you'll see a message saying "Thanks for using MariaDB!"
In a terminal, run MySQL with:
sudo mysql -uroot -pEnter the password you created earlier. Make a database for your Raspberry Pi WordPress install using:
create database wordpress;If this worked, you should see a message such as:
Query OK, 1 row affected (0.00 sec)Give database privileges to the root user by running:
GRANT ALL PRIVILEGES ON wordpress.* TO 'root'@'localhost' IDENTIFIED BY 'YOURPASSWORD';For these to manifest, enter:
FLUSH PRIVILEGES;
Exit MariaDB with CTRL + D.
Begin configuring WordPress. In a browser, enter http://localhost and you should see the WordPress set up page. Select your preferred language from the list and click continue.
You'll see a welcome to WordPress page. Review this information, and click let's go.
Load the site information:
Database Name: wordpress
User Name: root
Password: <PASSWORD>
Database Host: localhost
Table Prefix: wp_
The info you enter here may vary. Hit submit to continue, then select run the install. Give your site a title, then make a username and password. Upon filling out this basic info, click install WordPress. You can log in with the username and password you just created.
Additionally, you may login at http://localhost/wp-admin.
Raspberry Pi WordPress Performance
For Raspberry Pi WordPress server performance, I found an average response time of 5 seconds. However, keep in mind that this was a barebones installation for testing, not a full-fledged website. As the number of concurrent users increases, and you add plugins, performance will take a hit. The Raspberry Pi works fairly well as a lightweight WordPress server, but performance won't be suitable for a heavily customized WordPress site or one with moderate to heavy web traffic.
Raspberry Pi Drupal Installation
![]()
You can easily install Drupal on the Raspberry Pi using Drupal Pi. The Drupal Pi GitHub page reveals that it's related to the Raspberry Pi Dramble project, a software solution for creating a Raspberry Pi web server cluster. Drupal Pi is intended for a standalone Pi-based Drupal install. Drupal Pi requires Ansible, while the vanilla installation merely features Drupal.
Install Drupal on the Raspberry Pi with Drupal Pi
Begin by installing both Ansible and Git:
sudo apt-get update && sudo apt-get install -y python-dev python-pip libffi-dev git && sudo pip install ansible
You can check if Ansible installed correctly:
ansible --version
Then, download the repository and clone the Drupal Pi Git directory:
git clone https://github.com/geerlingguy/drupal-pi.git && cd drupal-pi
Now, copy the example.config.yml to config.yml and its example.inventory to inventory. After that, install Ansible roles:
ansible-galaxy install -r requirements.yml
After that, launch the Ansible playbook:
ansible-playbook -i inventory -c local main.yml
Wait a few moments, then open http://www.drupalpi.test/ which should yield the appropriate test page.
Install Drupal on Raspberry Pi
Although Drupal Pi is an easy way to run Drupal on a Raspberry Pi board, you may wish to install it standalone instead. In a terminal, run:
sudo apt-get install drupal7
You'll be asked to configure the database. Select yes and continue. Now, choose the database type. Next, select a MySQL application password. In a command line, enter:
cd /etc
then
sudo cp /etc/drupal/7/apache2.conf /etc/apache2/mods-enabled/drupal.conf
And restart the web server:
sudo service apache2 restart
In a web browser, head to [your IP address]/drupal7/install.php
Now, select an installation profile. You can pick minimal or standard. Hit save and continue. Choose a language, then continue. THen, you'll need to wait for a bit of basic installation to finish.
After that completes, configure your site. You'll need to enter a site name and email address, plus a username, site maintenance email address, password, as well as enter server settings. This includes choosing a default country, time zone, and choosing your update notifications settings. When you're done, click save and continue. Now, you'll have a link to visit your website.
Raspberry Pi Drupal Web Server Performance
Drupal touts enterprise-level security. The installation process was a little easier with WordPress than Drupal, but that's probably because I've installed WordPress more times than Drupal. In terms of performance, I pulled in about 150 requests per second. Though I used Drupal 7, benchmarks seem to indicate that Drupal 8 takes a performance hit.
Raspberry Pi Python Web Server Installation
![]()
Python is a programming language used in creating web apps and desktop apps. Using Python microframework Flask, you may create a Raspberry Pi Python web server. It's pretty basic and uses CSS along with HTML. Though it's initially easier than a WordPress or Drupal installation on a Raspberry Pi, a Python web server remains heavily customizable.
First, open a new terminal (CTRL + ALT + T) and install Flask:
sudo apt-get install python3-flask
Then, create a fresh directory for this project:
mkdir pythonwebapp
Now navigate into this directory:
cd pythonwebapp
Under the menu, launch Python. Using File > New file open up a new window, and save it as app.py within the pythonwebapp project folder you just made.
Add a bit of sample code:
from flask import Flask

app = Flask(__name__)

@app.route('/')

def index():

 return 'Hello world'

if __name__ == '__main__':

 app.run(debug=True, host='0.0.0.0')
Hit CTRL + S to save, and in a terminal window run:
python3 app.py
This executes the webserver. If all went correctly, you should see something like:
Running on http://0.0.0.0:5000/
Restarting with reloader
In a browser, head to http://127.0.0.1:5000/ and you should see a screen with the words "Hellow world." You may also use http://localhost:5000/.
With Python and Flask installed, you can add routes. For instance, launch your app.py file and add a sample route:
@app.route('/cupofmoe')
def cupofmoe():
 return 'Raspberry Pie!'
What specifically you put here will vary. Save that file, and head to http://127.0.0.1:5000/cupofmoe and you'll see the text you entered after "return."
For additional functionality, try adding HTML templates to your Raspberry Pi Python webserver. In a command prompt, navigate into your pythonwebapp folder:
cd pythonwebapp
Make a templates directory:
mkdir templates
Open a text editor such as Leafpad and enter your HTML code:
<html>
<body>
<h1>Hello world!</h1>
</body>
</html>
Save that as index.html under the templates directory under the pythonwebapp directory.
Then, head to your app.py file and edit the first line so that it imports the render_template function:
from flask import Flask, render_template
With that finished, edit the index view so that you're returning the HTML template you've created:
@app.route('/')
def index():
 return render_template('index.html')
Save the file, and reload http://127.0.0.1:5000/ and you'll see whatever text was in your HTML template.
Want to spruce up your Python web server even more? Add a bit of CSS! Navigate into your pythonwebapp directory:
cd pythonwebapp
Create a directory named static:
mkdir static
Open a text editor like Leafpad, and make a style.css file in your static directory. In this file, add some basic CSS such as:
body {
 background: green;
 color: black;
}
If you're feeling more creative, you can use hex codes instead of just color names. When you're finished, save the file. Head to your index.html file and add the CSS by creating a head tag with a link tag pointing to your stylesheet:
<html>
<head>
<link rel="stylesheet" href='/static/style.css' />
</head>
<body>
<h1>Hello world!</h1>
</body>
</html>
Save that HTML file, refresh your web page, and you should see the same text but with updated coloring.
Raspberry Pi Apache Server Installation
![]()

Apache ranks among the most utilized web server programs available, with use among 37% of the top million websites, and 43% usage overall. You can make an Apache server with a Raspberry Pi. After installing Apache, you'll also install PHP to add dynamic content.
Begin by running an update:
sudo apt-get update
Then, install Apache:
sudo apt-get install apache2 -y
After you've installed Apache on the Raspberry Pi, test the webserver. Under the web folder, Apache puts a test HTML file. You may view your newly created Apache web server at http://localhost/ or the Raspberry Pi's IP address: http://[Raspberry Pi IP address]/.
You can locate your Raspberry Pi's IP address using:
hostname -I
Although Apache default creates its own default web page, you may also change this directory. The default HTML file is: /var/www/html/index.html
The default file is located under /var/www/html/ and named index.html. It's owned by the root user. If you'd like to edit index.html, switch the owner to pi or your custom user:
sudo chown pi: index.html
Next up, edit this file, then save it and refresh to manifest changes. You can add custom HTML to this file which will serve as a website from your Apache server.
With Apache running on the Raspberry Pi, you can install PHP since Apache can work with PHP files. Install PHP on the Raspberry Pi:
sudo apt-get install php libapache2-mod-php -y
Then remove index.html:
sudo rm index.html
And generate index.php:
sudo nano index.php
Or, you may use the graphical editor Leafpad instead:
sudo leafpad index.php
In the index.php file, add some PHP content that your Raspberry Pi Apache web server can serve:
<?php echo "hello world"; ?>
Save this file and refresh your web browser. You'll see "hello world" or whatever content you added. Alternatively, you can add in dynamic content:
<?php echo date('Y-m-d H:i:s'); ?>
Raspberry Pi Apache Web Server Performance
With fewer concurrent users, I found Apache moderately fast, but with higher users performance took a dip. With one user, I clocked about 6.1 seconds. As more "users" were added to my benchmarking, performance dipped and became slower.
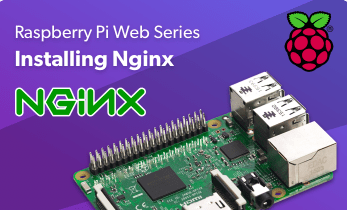
How to Make a Raspberry Pi NGINX Server
![]()
The free, open-source, high-performance HTTP server and reverse proxy NGINX is a fantastic choice as a Raspberry Pi web server. It's also packing IMAP and POP3 functionality. NGINX boasts low resource consumption and worked well on my single Pi board set up.
Install NGINX on the Raspberry Pi
Begin by installing the Nginx package. In a terminal, run:
sudo apt-get install nginx
Next, start the server using:
sudo /etc/init.d/nginx start
NGINX places an HTML file under the web folder. As such, you can test if NGINX installed properly by navigating to http://localhost/ or http://[YOUR RASPBERRY PI'S IP ADDRESS]/. To view your IP address, you may run the command hostname -I.
If installing NGINX on the Raspberry Pi went as planned, you'll see a friendly "Welcome to nginx" message when you navigate to http://localhost/ in a browser.
By default, NGINX stores its web page location at /var/www/html. Here, you may edit the index.nginx-debian.html to change the default web page. You can check the default page at /etc/nginx/sites-available.
When you install Nginx, you may wish to install PHP as well. This scripting language is often used server-side, so for a Raspberry Pi NGINX web server, I suggest installing PHP.
In a terminal, run:
sudo apt-get install php-fpm
Next, enable PHP within NGINX with:
cd /etc/nginx
sudo nano sites-enabled/default
Locate the line:
index index.html index.htm;
After index, add index.php. Your finished line should read:
index index.php index.html index.htm;
Find the following section:
# pass the PHP scripts to FastCGI server listening on 127.0.0.1:9000
#
# location ~ \.php$ {
Remove the pound sign (or hashtags if you will) for this snippet:
location ~ \.php$ {
include snippets/fastcgi-php.conf;
fastcgi_pass unix:/var/run/php5-fpm.sock;
}
The finished product should look like:
# pass the PHP scripts to FastCGI server listening on 127.0.0.1:9000
#
location ~ \.php$ {
include snippets/fastcgi-php.conf;

# With php5-cgi alone:
# fastcgi_pass 127.0.0.1:9000;
# With php5-fpm:
fastcgi_pass unix:/var/run/php5-fpm.sock;
}
Now, reload the configuration file by running:
sudo /etc/init.d/nginx reload
When that's complete, ensure that PHP installed properly. Rename index.nginx-debian.html as index.php:
cd /var/www/html/
sudo mv index.nginx-debian.html index.php
Then, open index.php:
sudo nano index.php
Now, add dynamic PHP content:
<?php echo phpinfo(); ?>
When you finish, save your work, then refresh your http://localhost/ web page. If all went as planned, you should see your refreshed page complete with dynamic PHP.
Raspberry Pi NGINX Web Server Performance
Overall, NGINX ran like a champ. At one concurrent user, response time was around 6.5 seconds with a test script, but as concurrent users were scaled, this remained pretty stable and actually scored better than Apache's benchmarks at higher numbers of concurrent users.
How to Create a Raspberry Pi Web Server With WordPress, Drupal, NGINX, Apache, and Python: Final Thoughts and Performance Analysis
Overall, creating a Raspberry web server is pretty simple. While WordPress provided faster response time generally, and easy installation, a Raspberry Pi 3 B+ won't compare to even a slightly aging desktop CPU. Additionally, I tested with a Raspberry Pi WordPress installation sans plugins. As you load plugins, you'll find slightly slower response time. Similarly, my Raspberry Pi web servers were all single board installs. If you're using a cluster, you'll have a different experience and benefit from more computing power albeit at the cost of added complexity.
Ultimately, I suggest WordPress as a web server for the Raspberry Pi. Raspberry Pi WordPress server performance was solid, and installation is a breeze. Combined with the fact that it's well supported with tons of community resources. Drupal is an excellent option as well which provides tons of security. I also appreciated the benchmarks from NGINX which prove that it runs well on a low-power board like the Pi.
Your turn: What web server software are you running on the Raspberry Pi?

Moe Long is an editor, writer, and tech buff with a particular appreciation for Linux, Raspberry Pis, and retro gaming. Writing online since 2013, Moe has bylines at MakeUseOf, TechBeacon, DZone, SmartHomeBeginner, DEV.to, DVD Netflix, and Electropages. You can read his writings on film and pop culture at Cup of Moe, check out his tech reviews, guides, and tutorials at Tech Up Your Life, and hear his thoughts on movies on the Celluloid Fiends podcast. Aside from writing and editing, Moe has an online course, the Beginner's Guide to Affiliate Blogging From Scratch. When he's not hammering away at his keyboard, he enjoys running, reading, watching cinema, listening to vinyl, and playing with his dog Sebastian.


Leave your feedback...