
Create Your Own Spotify with a Raspberry Pi - Raspberry Pi Music Server Software
The Raspberry Pi is a nifty single-board PC. It's an all-in-one device capable of numerous projects from the voice-controlled Internet of Things (IoT) gadgets to wall-mounted dashboards. Using a Raspberry Pi, it's simple to create a streaming music server. Learn how to create your own do-it-yourself (DIY) Spotify with a Raspberry Pi for a streaming media music server on the go.
Why Use a Raspberry Pi NAS as a Music Server?
Unlike a larger PC, the Raspberry Pi features a low power draw. Therefore, it's ideal for an always-on server. Moreover, a Raspberry Pi retails for far less than a basic PC. With the low start-up cost and power draw, this is a spectacular server choice that won't drive up your utility bill. Whereas video transcoding, especially for 1080p and 4K files can be pretty CPU intensive, the Pi handles audio transcoding flawlessly. Further, a small footprint means the Raspberry Pi takes up very little space. Energy-efficient, space-saving, and powerful enough for audio transcoding. So a Raspberry Pi network-attached storage (NAS) is a really cheap but functional project.
Why make a Raspberry Pi NAS audio streaming device:
- Energy efficient
- Affordable
- Small footprint
- Powerful enough to handle audio transcoding
What You'll Need for a Raspberry Pi Audio Streamer

Before forging ahead, here’s what you’ll need to create a DIY Spotify using a Raspberry Pi:
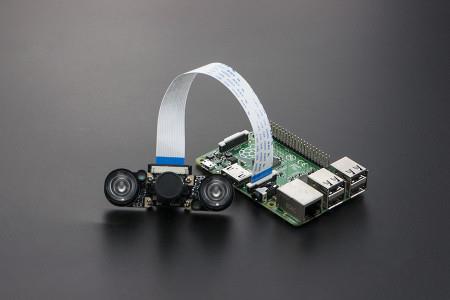
- Raspberry Pi (I recommend a Raspberry Pi 4)
- microSD card formatted as FAT (8+ GB recommended)
- Ethernet cable or Wi-Fi access
- Keyboard
- Mouse
- Power supply
- Storage for your music
For storage space, you can house all of your music on the Raspberry Pi’s microSD card. However, it’s more economical and easier to use an external device. Anything from a flash drive to an external hard drive and even a network-attached storage (NAS) device will function. I simply store my music collection on a 256 GB USB stick which I have attached to my Pi. That way if I end up reinstalling my operating system, I don’t need to transfer all of my music again.
Choose Your Software
Next, you’ll need to pick what operating system (OS) you’d prefer as your server foundation. Additionally, select what streaming software you will use to play music remotely. Some Raspberry Pi audio players feature better
Raspberry Pi OS
For your operating system, I suggest using Raspbian. It’s a Debian-based OS specifically build for the Raspberry Pi. It’s lightweight, so ideal for the Pi’s modest hardware. However, since Raspbian is a Linux distribution (distro), you benefit from the capabilities of a full-fledged Linux OS. Ubuntu or Ubuntu MATE are excellent picks as well.
Music Server Options
There’s no shortage of music server options appropriate for a Raspberry Pi audio streaming jukebox. Which is best for your needs depends on your priorities. If you wish to create a streaming video and music server, the software you’ll want differs from what you’ll prefer is merely creating a streaming music server. Plus, differences in the client apps for Android, iOS, and browsers further separates these options.
- Plex: Plex is a solid choice for video and music streaming
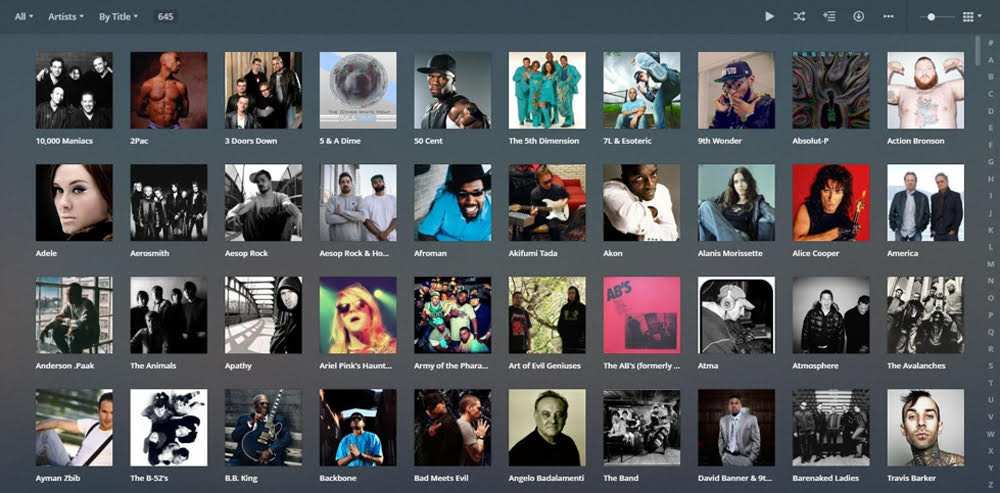
- Subsonic: A roll-your-own streaming media server
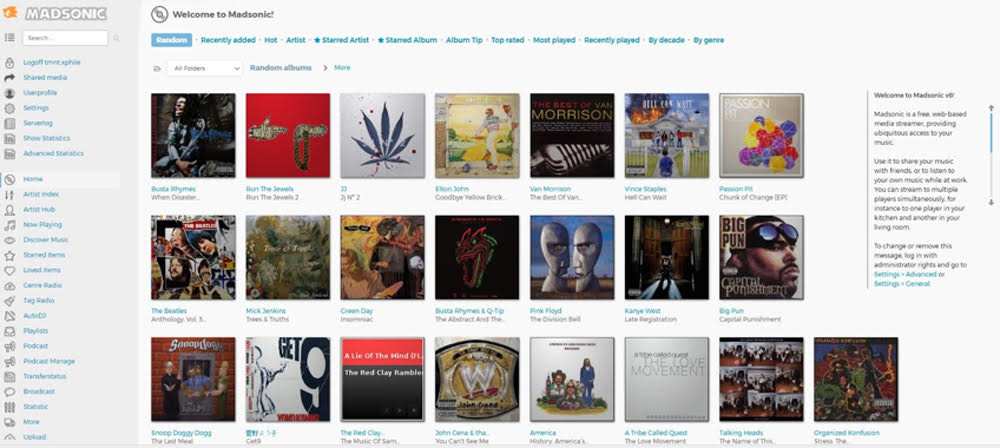
- Madsonic: A fork of Subsonic
- Ampache: Web-based streaming app
- Mopidy: Streaming client with integration for Spotify, SoundCloud, Google Play Music, and more
- Airsonic: An open-source subsonic fork
- Libresonic: Web-based music server
- Emby: Streaming server, excellent for video and audio content
- Volumio: A fantastic music streaming server OS with plugin compatibility
- piCorePlayer: A lightweight Linux-based music streaming server
Subsonic spawned several forks, including Madsonic, Airsonic, and Libresonic. Subsonic and its forks are designed for music streaming. I’ve used Plex which I have on my ThinkServer TS140 media server, and while I enjoy the client app for movies and television, I prefer Subsonic and its derivatives for music streaming. Those client apps boast enhanced caching techniques. My go-to is Madsonic. It’s simple to set up, and the Android client app is superb. Plus, you can sync your Madsonic server with other client apps including Subsonic and DSub.
Subsonic and Madsonic migrated to closed-source. Both remain fantastic for both local and remote streaming. Yet you’ll need a premium subscription for remote streaming. I’d recommend Plex if you plan to stream both video and audio. For purely music, I really enjoy Madsonic for is intuitive installation and start-up.
Suggestions: Plex for a video/audio streaming server, Madsonic for mostly music.
Create Your Own Spotify with a Raspberry Pi Music Player
Here’s how to set up your own Spotify with a Raspberry Pi!
Install Raspbian or Another Debian-based Linux distro
Before you begin installing your server software, you’ll need to load Raspbian (or your operating system of choice). Download the Raspbian image or use NOOBS.
Once you’ve downloaded your OS, it’s time to load that on a microSD. How you proceed depends on which you’re using.
NOOBS
If you’re using NOOBS, installation is incredibly easy. Merely unzip the ZIP folder, and place the uncompressed folder on the root of your microSD. Then, just pop the microSD card in your Raspberry Pi. Upon initial boot, you’ll need to select which OSes you’d like to install.
Raspbian Image
But if you opted for the standalone Raspbian image, the install is a bit different. Rather than simply dragging and dropping a folder to your root directory, you’ll need to create a bootable disk. This requires a program to mount your Raspbian image on a microSD. There are tons of choices, but I recommend:
- Windows: Win32 Disk Imager
- Mac: ApplePi-Baker
- Linux: LiveUSB Install
For both the NOOBSs install and the standalone Raspbian image, once you’ve booted into Raspbian, perform an update and upgrade to ensure you’re running the latest OS version. Open a terminal (CTRL + ALT + T) and run:
 sudo apt-get update

sudo apt-get upgrade
Install Your Raspberry Pi Music Server Software
Installation varies depending on which server software option you choose. For Subsonic and its forks, you’ll need the latest version of Java.
sudo apt-get install oracle-java8-jdkHow to Install Subsonic on the Raspberry Pi![DIY spotify raspberry pi music server - raspberry pi music streamer subsonic]()

With the latest version of Java installed, head to the Subsonic download page. Download the Debian/Ubuntu .deb file. Then, run install the .deb file you just downloaded. You’ll have to navigate via the command line into the proper folder where that file resides:
cd /path/to/folderFor instance:
cd /home/moe/downloadsOnce you’ve changed directories via the command line into the folder with your Subsonic .deb, run:
sudo dpkg-I subsonic - x.x.debwhere x.x. is the correct software version of the file you downloaded. After that, you can manually control the Subsonic service in the command line:
sudo subsonic {Start|stop|status|restart|force-reload}Subsonic by default uses port 4040. Now, open a browser and navigate to:
You should see the default Subsonic login screen. Upon initial install, use the login/password combination of admin/admin. As a first step, it’s best to change your admin username and password.
Then, under settings select your music folder. I highly recommend using an external drive. At this point, your Raspberry Pi is configured for use as a streaming music server. However, for remote streaming, you’ll need to first opt for a premium subscription. The process for Madsonic and other Subsonic forks is essentially the same.
How to Install Plex on the Raspberry Pi
You may choose to run other server software like Plex instead. While you can install Plex, setting up Plex on a Raspberry Pi is a bit different. Instead of the standard Plex installer, you’ll need to use Day2Dev’s Plex Media Server.
In a command line, perform an update:
sudo apt-get updatesudo apt-get upgrade
This ensures your Raspbian installation is up to date. Next, add the public key:
wget -O - https://dev2day.de/pms/dev2day-pms.gpg.key | apt-key add -Then, add the Plex Media Server repo:
echo "deb https://dev2day.de/pms/ jessie main" >> /etc/apt/sources.list.d/pms.listAfter that, configure the Pi to accept downloads via HTTPS:
apt-get install apt-transport-httpsThem, perform an update:
apt-get updateFinally, install Plex Media Server for the Raspberry Pi:
apt-get install plexmediaserver-installerOnce the installation is complete, you’ll need to set up permissions. In a command prompt, enter:
sudo nano /etc/default/plexmediaserverAlter the name of the server:
PLEX_MEDIA_SERVER_USER=rpiI used rpi, but you can name your media server whatever you’d like. Then, restart the server:
sudo service plexmediaserver restartFinally, establish a static IP. This way, you can access Plex remotely since its IP address won’t change. Plex automatically assigns the port 32400. In a terminal run:
hostname -IThis shows your current IP address. Then, open cmdline.txt by running:
sudo nano /boot/cmdline.txtReplace the line ip=MY IP with the IP address which hostname -I yielded. Press CTRL + X to exit and save your changes.
Now, all that’s left is adding your libraries. Open a browser, and navigate to http://localhost:32400/ which will open the Plex web user interface. Your libraries will vary depending on where you’re storing your media. Since my music files are on a flash drive, I selected the path to folders there.
In the web UI, click on the Libraries folder on the left pane. Click the + sign. Plex will prompt you for the library type, so pick the correct content type (i.e. movies, music, TV shows).
Then, Plex will ask you to choose a media folder. Select “Browse for Media Folder,” and select the correct path.
How to Install Serviio on the Raspberry Pi
Like Subsonic, Serviio requires Java as a prerequisite. First, download Serviio for Linux. Navigate to your downloads folder using the command line and run:
bash serviio.shThis executes the Serviio service. In another terminal start the Serviio console on the Raspbian desktop by running the command:
bash serviio-console.sh
You can set Serviio to start on boot. To configure that, open a new terminal and enter:
sudo nano /etc/init.d/serviioFrom there, enter:
#!/bin/bash

### BEGIN INIT INFO

# Provides:          serviio

# Required-Start:    $syslog

# Required-Stop:     $syslog

# Default-Start:     2 3 4 5

# Default-Stop:      0 1 6

# Short-Description: serviio server

# Description:

#

### END INIT INFO


User=pi


case "$1" in


stop)

        echo "Stop Serviio..."

        su -l $User -c "/home/pi/serviio/bin/serviio.sh -stop" > /dev/null 2>&1 &

        ;;

start)

        # start Serviio in background mode

        su -l $User -c "/home/pi/serviio/bin/serviio.sh" > /dev/null 2>&1 &

        echo "Start Serviio..."

        ;;

restart)

        $0

stop

esac
Press CTRL + X to save and exit. Next, specify permissions so that the script is executable:
sudo chmod 755 /etc/init.d/serviioThen, allow for the script to run at startup:
sudo chmod 755 /etc/init.d/serviioHow to Install Ampache on the Raspberry Pi
Open a terminal, and run:
apt - get install –y ampache ampache-themesDepending on your configuration, you might need to install MySql-server:
sudo apt-get install mysql-serverNow, alter the rights of the Ampache database directory:
chown -R www-data:www - data/usr/share/ampache/www
In the /etc/PHP5/apache2/PHP.ini file, set the max_execution_time setting. Then, perform a reboot:
service apache2 restartThen, navigate to http://localhost/ampache
Ensure that all of the settings yield green “Ok” messages across the board. Fill out a bit of basic information for your Ampache database including a username and password. Now, you can begin to use your Ampache server.
How to Install Mopidy on the Raspberry Pi
This is a solid choice for combining self-hosted content with third-party services like Spotify and SoundCloud. Begin by adding the archive GPG key:
wget -q -O - https://apt.mopidy.com/mopidy.gpg | sudo apt-key add -After that, add the APT repository:
sudo wget -q -O /etc/apt/sources.list.d/mopidy.list https://apt.mopidy.com/jessie.listNext, install Modidy with its dependencies:
sudo apt-get update

sudo apt-get install mopidy
Mopidy should be installed properly. It’s best to perform an update after installation:
sudo apt-get updatesudo apt-get dist-upgrade
However, a main component of Mopidy is its extensions. To list all extensions available, run:
apt-cache search mopidy
You can also install standalone packages. For instance, to install Spotify, enter:
sudo apt-get install mopidy-spotifyCreate Your Own Spotify with a Raspberry Pi NAS: Final Thoughts
Creating a streaming music server on a Raspberry Pi NAS is a simple yet functional project. You reap the benefits of access to your entire music collection from any Internet-connected device and a variety of client apps on Android, iOS, and more. I’d recommend Madsonic for most users. If you’re a heavy video user and wish to host movies and TV shows as well, I recommend Plex. Overall, a Raspberry Pi streaming music server is fairly easy. Merely select your preferred software, set it up, and point your Raspberry Pi music streamer app to your music collection.
Mopidy remains a neat alternative with its combination of a self-hosted music server and third-party apps. For open-source fans, Ampache, Libresonic, and Airsonic are excellent picks.
Your turn: which Raspberry Pi media server software options do you recommend to transform your Raspberry Pi into a DIY Spotify?

Moe Long is an editor, writer, and tech buff with a particular appreciation for Linux, Raspberry Pis, and retro gaming. Writing online since 2013, Moe has bylines at MakeUseOf, TechBeacon, DZone, SmartHomeBeginner, DEV.to, DVD Netflix, and Electropages. You can read his writings on film and pop culture at Cup of Moe, check out his tech reviews, guides, and tutorials at Tech Up Your Life, and hear his thoughts on movies on the Celluloid Fiends podcast. Aside from writing and editing, Moe has an online course, the Beginner's Guide to Affiliate Blogging From Scratch. When he's not hammering away at his keyboard, he enjoys running, reading, watching cinema, listening to vinyl, and playing with his dog Sebastian.


Leave your feedback...