
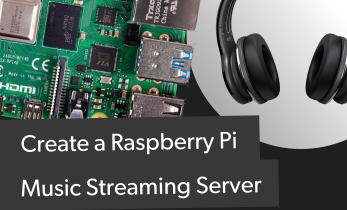
Build a Network Music Player with piCorePlayer
Because the Raspberry Pi features a small form factor and low power consumption, it’s ideal as a basic media server or file server. There are loads of software options for creating a Raspberry Pi-based network attached storage (NAS) device. However, since the Raspberry Pi offers modest processing capabilities, it’s better suited to music streaming than as a video server. That’s because video transcodes require more processing power than music streaming. Learn how to build a network music player with piCorePlayer! piCorePlayer on the Raspberry Pi: What is piCorePlayer?
The Linux-based piCorePlayer or piCore Linux is a Linux distribution (distro) which allows for remote music streaming. Essentially, it uses your local or networked music files to create a sort of do-it-yourself (DIY) Spotify. By default, it’s a minimal installation with just a command line interface. However, you may install a graphical user interface (GUI) to use with a monitor and keyboard. Set up is simple, requiring merely a Raspberry Pi, microSD card running piCorePlayer, and music files on an external drive.
Its installation size clocks in at a minuscule 55MB which includes the operating system. piCorePlayer actually runs in RAM, which makes for speedy bootup. You can run piCorePlayer as a Logitech Media Server (LMS), Squeezebox player, or duel Logitech Media Server and Squeezebox player. Inside piCorePlayer, there’s Microcore Linux, Squeezelite, SSH, and capabilities for using Wi-Fi dongles. For audio out, you can use the 3.5mm jack, HDMI, or both analog and digital DACs. You can pick from vanilla piCorePlayer and the piCorePlayer audio optimized version.
Getting Started With piCorePlayer: What You’ll Need
Beginning with piCorePlayer is easy and affordable. You’ll need a Raspberry Pi board and a microSD card, along with a compatible power supply. A Raspberry Pi case is optional though recommended. You’ll also need the piCorePlayer operating system.
piCorePlayer parts list:
- Raspberry Pi 4
- microSD card
- Power supply
- Case (optional, recommended)
- Keyboard, mouse
- piCorePlayer OS
Total cost: $35+. You can buy a standalone Raspberry Pi board, or a complete starter kit with accessories such as a case, microSD card, power supply, keyboard and mouse.
How to Make a Streaming Audio Player With piCorePlayer
First, head over to the piCorePlayer website and download your preferred version of piCorePlayer. You may choose from the standard piCorePlayer or piCorePlayer audio optimized version. Once that’s downloaded, navigated to the folder where you saved it and unzip the compressed folder.
Using a program such as Etcher, mount the image file to a microSD card.
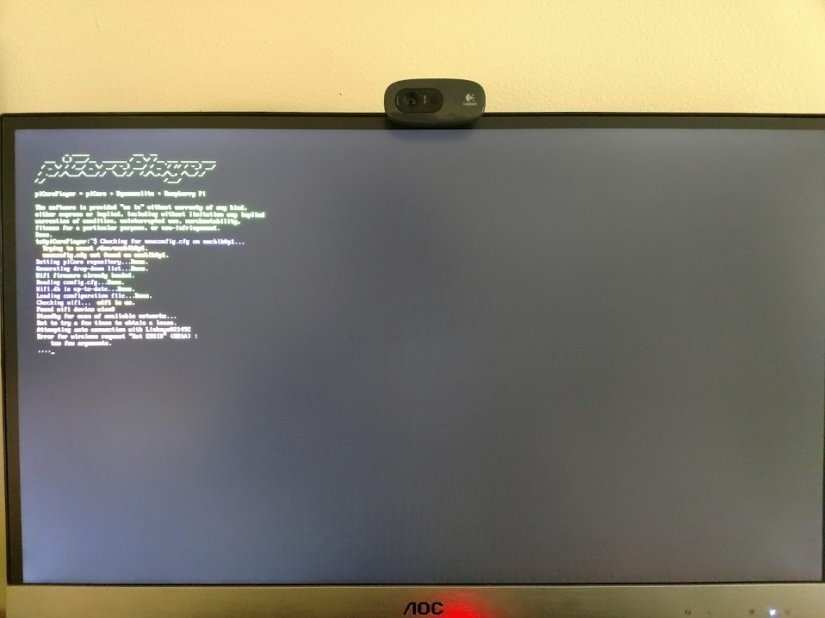
Once that’s finished, place your microSD card into your Raspberry Pi and boot it up. Wait a few seconds for piCorePlayer to perform a bit of first time setup. Once that finishes, hit enter, then you’ll see a command line. For those using Wi-Fi, configure wireless settings. Enter:
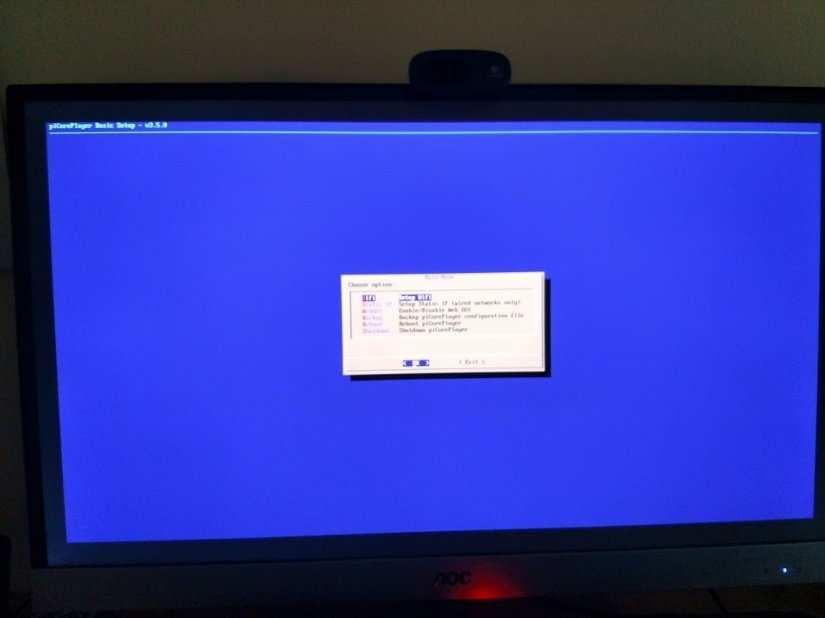
setup
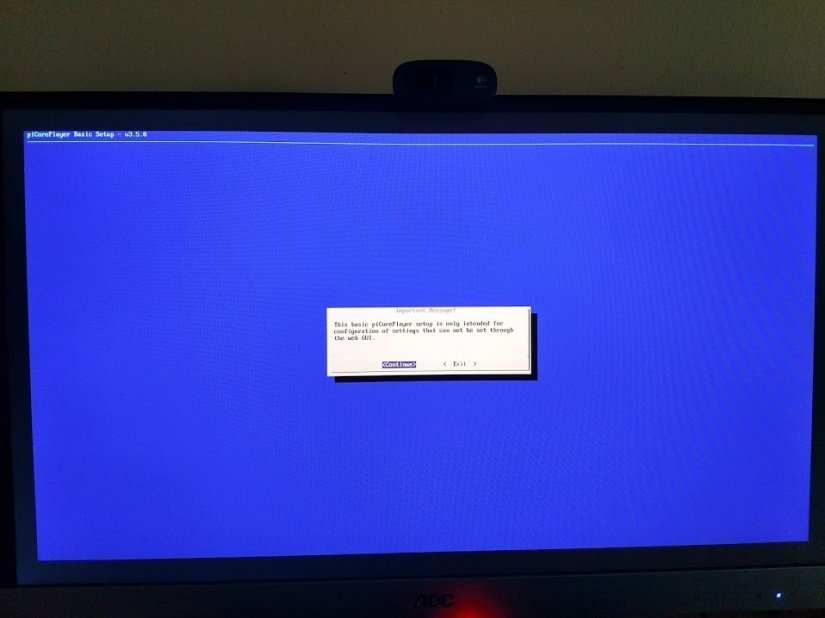
You’ll see a notification warning that this is purely for basic piCorePlayer set up and only for configuring settings you can change in the web GUI. Hit continue. This loads a menu with various options. Choose the first menu option, setup Wi-Fi.
Here, you’ll see the standard Wi-Fi settings. By default, Wi-Fi is set to off, the SSID is wireless, and password is password. Click no to edit the settings. Hit on to enable Wi-Fi. Now, enter your network SSID and password. When finished, select ok, then hit yes to save your changes. Back at the setup menu, exit.
After that, Wi-Fi should be configured in piCorePlayer. Note that certain special characters might cause issues. I resorted to using Ethernet over Wi-Fi for this reason.
piCorePlayer Post-Installation SetUp
With piCorePlayer installed, you’ll want to perform some basic post-install setup such as installing Logitech Media and Jivelite.
piCorePlayer LMS Set Up
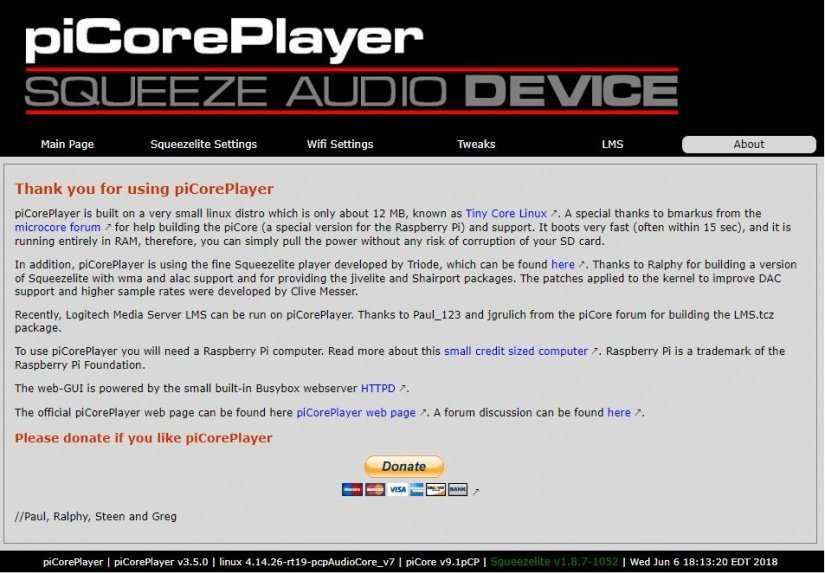
After installing piCorePlayer and configuring your network settings navigate to the web user interface (UI) using a PC on the same network. This loads the piCorePlayer web UI which you can use to manage your piCOrePlayer installation. As a first step, you may wish to install Logitech Media Server. You can accomplish this by switching to the Advanced tab at the bottom of the main piCorePlayer page, and select the LMS tab at the top. Then, install piCorePlayer and set it to autostart. After installation is complete, you may need to reboot or manually start LMS using the start option under the LMS tab.
piCorePlayer Jivelite Set Up
Additionally, you might want to install Jivelite under tweaks. To do so, click the tweaks tab and under Jivelite set up click install. Jivelite adds a graphical user interface (GUI) to piCorePlayer. After a reboot, Jivelite starts and asks for some basic information such as language and choosing a skin. Then, you have access to its main menu where you can change settings.
To access Logitech Media Server, go to http://[pi ipaddress]:9000. Here, you’ll need to register for Logitech Media Server if you don’t have an account. Once you register, you may login to LMS via the web UI and from there select a local folder of music on a flash drive.
Hands-on With piCorePlayer
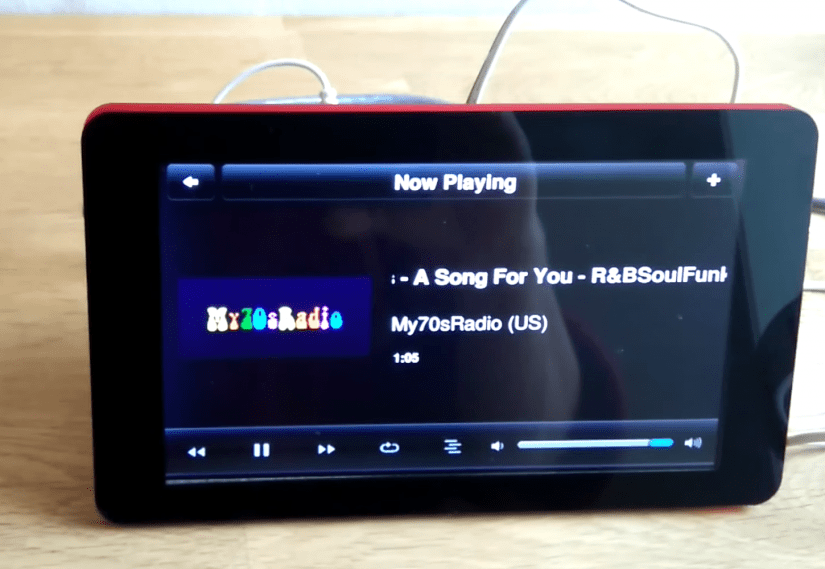
Overall, piCorePlayer is an awesome, lightweight media server option. You can run your media locally, from a Samba share, and access it via the Raspberry Pi’s Jivelite GUI if you installed that, as well as LMS. The web UI makes managing your piCorePlayer installation a breeze and the actual operating system is small enough to run off of a 2GB or smaller microSD card. Since it runs in RAM, reboots are speedy – a major plus. The interface of Jivelite is a bit dated with its rounded buttons rather than flat design. Still, it’s intuitive to navigate and I preferred using this as a jukebox style media player when perusing files on the Raspberry Pi. Plus, you can even use Jivelite with a touchscreen for a portable music player.
Final Thoughts on piCorePlayer as a Networked Media Player
Overall, piCorePlayer is easy to use and a solid solution for transforming your Raspberry Pi into a networked music player. I suggest after you first install piCorePlayer that as a next step you enable Logitech Media Server, then install Jivelite. The latter adds a GUI to the Raspberry Pi piCorePlayer which you can then browse with a keyboard and mouse or using a touchscreen for a nifty portable media player if you like. Plus, there are tons of options for syncing music from local hard drives and flash drives or Samba shares. For more Raspberry Pi media playback, learn how to build a Raspberry Pi home theatre PC!

Moe Long is an editor, writer, and tech buff with a particular appreciation for Linux, Raspberry Pis, and retro gaming. Writing online since 2013, Moe has bylines at MakeUseOf, TechBeacon, DZone, SmartHomeBeginner, DEV.to, DVD Netflix, and Electropages. You can read his writings on film and pop culture at Cup of Moe, check out his tech reviews, guides, and tutorials at Tech Up Your Life, and hear his thoughts on movies on the Celluloid Fiends podcast. Aside from writing and editing, Moe has an online course, the Beginner's Guide to Affiliate Blogging From Scratch. When he's not hammering away at his keyboard, he enjoys running, reading, watching cinema, listening to vinyl, and playing with his dog Sebastian.


Leave your feedback...