
How to Install Jellyfin on the Raspberry Pi
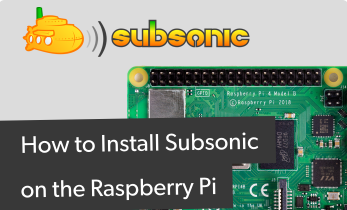
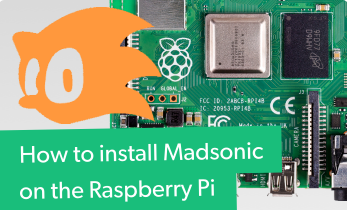
There are tons of different media server software options available such as Plex, Emby, Madsonic, and Subsonic. While a traditional home server handles encoding extremely well, a single-board computer such as the Raspberry Pi offers an energy-efficient server build. The likes of Plex and Emby function flawlessly for home server use. However, Jellyfin is a solid alternative to Plex and Emby. And like other server applications, Jellyfin runs like a champ on the Raspberry Pi. Learn how to install Jellyfin on the Raspberry Pi for a low-power media server!
What is Jellyfin and Why Should You Use this Plex Alternative?
Jellyfin is a free, open-source media server app. Boasting cross-platform compatibility, Jellyfin runs on Linux, macOS, and Windows. When Emby became proprietary, Jellyfin arrived as an open-source fork. As such, functionality is pretty similar in some ways and the layout is familiar for Emby users. However, Jellyfin touts a number of capabilities that posit it as a fantastic Plex alternative.
Notably, it's completely free-to-use, no paywalls whatsoever. It's licensed with GPL. Like Emby, Jellyfin features free parental controls. But while many of Emby's apps such as its Android TV, Roky, and Apple TV apps require a paid upgrade to Emby Premiere. Moreover, live TV and DVR functionality is free with Jellyfin as well. Though some users might balk, if there's software you enjoy using, it's best to support it through monetary or non-monetary means such as offering development services. Still, major kudos to Jellyfin for maintaining a high-quality media server app that's completely libre. There aren't quite as many client apps (yet) for Jellyfin. But rolling out a polished app isn't magic.
Whether you're just now setting up a media server, cobbling together a new build, or looking to switch, Jellyfin is a worthy consideration. I appreciate that it's totally free to use and incredibly simple to set up while offering a robust feature set sure to satisfy beginners and newcomers alike. On my ThinkServer TS140, I actually have all three software options installed.
Why you should use Jellyfin as an alternative to Plex and Emby:
- Completely free to use
- Great for movies, TV, and music
- Cross-platform compatibility
- Lots of client apps: Android, Android TV, Amazon Fire TV, web app
What You'll Need for a Jellyfin Server on the Raspberry Pi
A Raspberry Pi Jellyfin server is a low-cost project. You'll need little more than a Raspberry Pi board, case, compatible power supply (PSU), peripherals such as a keyboard and mouse, and display such as a monitor, TV, or projector. On the software side, you'll need a compatible Linux operating system (OS) such as the Debian-based Raspbian, Debian, Ubuntu, or another Linux distribution (distro) for the Pi. Plus, you'll need an active internet connection. I suggest using Ethernet, but Wi-Fi works too. Finally, you'll need media files for Jellyfin to stream such as movies, TV shows, and music files. There are tons of legal torrents you can download, or you can backup DVDs, Blu-Rays, CDs, vinyl, and other physical formats that you own.
Jellyfin Raspberry Pi 4 media server requirements:
- Raspberry Pi board (Raspberry Pi 4 recommended, but others will work)
- Compatible Raspberry Pi case
- PSU
- microSD card
- Display (monitor, TV, projector, etc.) and HDMI cable
- Peripherials (keyboard, mouse)
- Debian-based Linux distro
- Active internet connection
- Jellyfin media server
Total cost: $35+ USD. You can get the Raspberry Pi 4 with 2GB, 4GB, and 8GB of DDR4. I suggest at least the 4GB or 8GB model, althouhg you should be fine with the 2GB variant since a media server is more CPU-intensive than RAM-reliant. A Raspberry Pi starter kit could be a cost-effective option as well.
How to Install Jellyfin on the Raspberry Pi
Begin creating your Jellyfin Debian server by running an update:
sudo apt-get update && apt-get upgrade
Next up, install Jellyfin on the Raspberry Pi with:
echo "deb [arch=armhf] https://repo.jellyfin.org/debian $( lsb_release -c -s ) main" | sudo tee /etc/apt/sources.list.d/jellyfin.list

sudo apt update

sudo apt install jellyfin
After that, Jellyfin should be installed. Your Jellyfin server should be available on port 8096. So to access this on your Raspberry Pi, head over to http://localhost:8096/. Or, if you're using a different device such as a laptop or desktop, then find out your Raspberry Pi's IP address by running:
hostname -I
And instead, you'll use: http://YOUR_PI_IP:8096/ where YOUR_PI_IP is, well, your Raspberry Pi's IP address.
How to Use Jellyfin
With Jellyfin properly installed, you'll need to set up Jellyfin on the Raspberry Pi. Head to http://YOUR_PI_IP:8096/ where the configuration wizard guides you through inputting basic information. First, you'll need to create an account. Enter a name and password. Then click Next. You can create multiple user profiles.
After that, add you'll need to set up your media libraries. Select Add Media Library, then, customize your library. Enter the content type such as TV Shows, Music, or Movies. Next, add your folders. Where these are depends on how you've stored your media. I suggest hooking up a large capacity flash drive or external hard drive to your Raspberry Pi, although you could use a networked drive such as a Samba share. Pick your preferred download language, country, and check the boxes by your metadata downloaders like TheTVDB, IMDB, and others.
Once you've added your media folders, you can browse your media library. From the homepage, you can select the Dashboard on the left-hand side of the screen. From here, you can view information including your server name, port number, LAN and WAN addresses, as well as Jellyfin version number.
Download a Jellyfin Client App
Once you've downloaded the Jellyfin install, loaded your media, and tweaked your Jellyfin settings, you can download a Jellyfin client app. There are several to choose from including Android and iOS apps, an Android TV client, Amazon Fire TV app, and a Kodi app. Unfortunately, certain popular streaming devices such as Roku devices lack Jellyfin clients, at least for now. But expect support to come soon.
How to Start and Stop Jellyfin
You can start and stop Jellyfin pretty easily. To stop Jellyfin from running, enter:
systemctl stop jellyfin.service
Startup Jellyfin with:
/usr/bin/jellyfin start
Jellyfin Settings
On the Raspberry Pi 3 and 4, Jellyfin does feature hardware acceleration support. To take advantage of Jellyfin hardware acceleration on the Raspberry Pi, you'll have to add the Jellyfin service user to the video group to let the Jellyfin FFMpeg process use the encoder:
sudo usermod -aG video jellyfin sudo systemctl restart jellyfin
For a Jellyfn Raspberry Pi 4 server, it might be necessary to first check for kernel and firmware updates:
sudo rpi-update
Under the Jellyfin server dashboard, select the Transcoding tab, and pick OpenMAX OMX for hardware acceleration. You can allocate different amounts of GPU memory. But keek in mind that your GPU isn't able to handle simultaneous hardware-accelerated encoding and decoding.
To change the amount of allocated memory, run:
sudo nano /boot/config.txt
Then for the Raspberry Pi 4 add the line:
gpu_mem=320
Raspberry Pi 3 and 3 B+ users, instead add:
gpu_mem=256
Jellyfin Raspberry Pi Media Server Performance and Review
I found Jellyfin incredibly easy to install and set up on the Raspberry Pi. While I used a Raspberry Pi 4, and suggest that for best performance gains you use a Pi 4 as well, the Raspberry Pi 3 B+ and Raspberry Pi 3 should work fine as well. Performance will vary based on your Pi version, file types, internet connection, and cooling. Hardware acceleration encoding for H.264 files works on the Pi 4, although you'll need active cooling. Since I only have passive cooling, I wasn't able to test this out properly.
However, for local clients, I was able to stream 1080p and even 4K flawlessly. You should be able to achieve about four simultaneous streams on a local network if no transcoding is required. If you've got an actively-cooled Raspberry Pi 4, remote streaming to Jellyfin client devices outside of your home network should work.
Should You Use Jellyfin on the Raspberry Pi? Final Thoughts
Jellyfin is one of the best newcomers in the media server space. It's completely free, plus easy to set up and use. Overall, I enjoy Jellyfin as an alternative to Plex and Emby. Because Jellyfin is open-source and eschews any paywalls, it's a superb server app. On the Raspberry Pi specifically, Jellyfin makes use of hardware acceleration. That's a major enhancement which arguably makes Jellyfin the best Raspberry Pi media server software option available.
Your turn: which media server software are you running on the Raspberry Pi?

Moe Long is an editor, writer, and tech buff with a particular appreciation for Linux, Raspberry Pis, and retro gaming. Writing online since 2013, Moe has bylines at MakeUseOf, TechBeacon, DZone, SmartHomeBeginner, DEV.to, DVD Netflix, and Electropages. You can read his writings on film and pop culture at Cup of Moe, check out his tech reviews, guides, and tutorials at Tech Up Your Life, and hear his thoughts on movies on the Celluloid Fiends podcast. Aside from writing and editing, Moe has an online course, the Beginner's Guide to Affiliate Blogging From Scratch. When he's not hammering away at his keyboard, he enjoys running, reading, watching cinema, listening to vinyl, and playing with his dog Sebastian.


Leave your feedback...