
Getting Started With GameStation Turbo on Odroid XU4: GameStation Turbo XU4 Installation
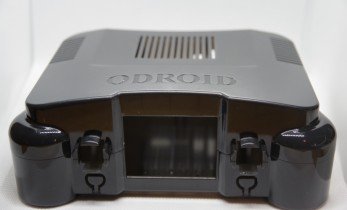
The Odroid XU4 is a single-board computer (SBC) which rivals the Raspberry Pi 3. It’s more powerful, featuring octa-core processing and twice the RAM of the Raspberry Pi. Like the Pi, however, the Odroid XU4 boasts a bevy of operating system (OS) options. Among the best for both retro gaming and desktop use is GameStation Turbo. Learn more about the GameStation Turbo XU4 OS, from what it is to how to install it, and first imcodessions!
GameStation Turbo XU4 Distro: What is GameStation Turbo?
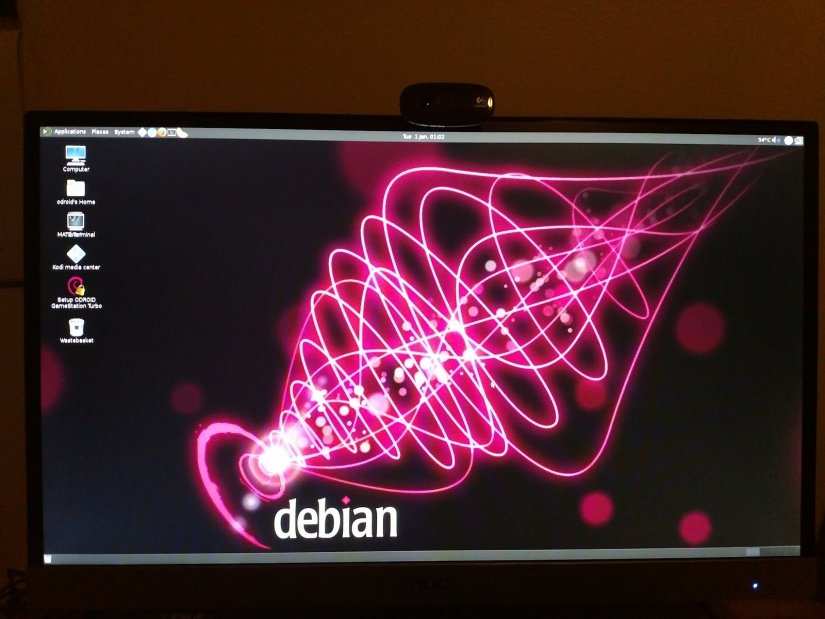
An entertainment-focused operating system for Odroid SBCs, GameStation Turbo is a complete desktop OS which uses the MATE desktop environment. As such, GameStation Turbo delivers functionality to the game, enjoy multimedia using the open-source Kodi media center that’s code-installed, browse the web, and even use office software like LibreOffice.
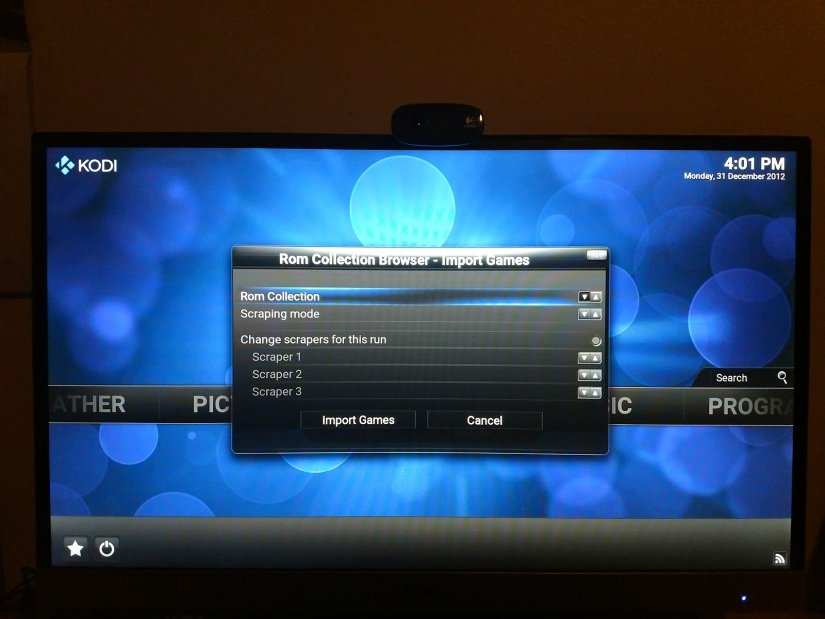
Since GameStation Turbo includes X11, there’s 3D acceleration for playing 3D video games. Like Recalbox for the Odroid XU4, and RetroPie on the Odroid XU4, there’s GameStation allows the use of EmulationStation. With the ROM Collection Browser, it’s even possible to navigate between watching movies and TV shows, and gaming, all from the Kodi interface.
Running GameStation Turbo for Odroid XU4: What You’ll Need
Before getting started with GameStation Turbo for the Odroid XU4, you’ll need a few items. Notably, you require an Odroid XU4 board, power supply, and either microSD card or eMMC module to mount your image on. A case is recommended but optional. Further, you’ll need some sort of input devices such as a keyboard, mouse, and gamepad. Of course, you’ll also need the GameStation Turbo XU4 image file.
- Odroid XU4 board
- 5V/4A PSU
- Case
- Memory card
- Extraction program (i.e. 7Zip)
- Image mounting program (i.e. Etcher)
- GameStation Turbo download
- Input devices
The Odroid XU4 board itself is available from AmeriDroid for $62 (many thanks to our good friends at AmeriDroid for the awesome Odroid XU4 kit)! You’ll also need a 5V/4A power supply, and likely want a case, memory card, and Wi-Fi module since the Odroid XU4 lacks wireless networking. As such, expect to spend around $90 for an Odroid XU4 and accessories.
How to Install GameStation Turbo on the Odroid XU4
To install GameStation Turbo for the Odroid XU4, first head to the Odroid Arena website and download the GameStation Turbo XU4 image. Since it’s an img.xz file, you’ll need to extract it using a program such as 7Zip.
After that, you’re left with an image file. With software like Etcher, burn the IMG file to a microSD card or an eMMC module. When that completes, simply pop your microSD card or eMMC module into your Odroid XU4.
GameStation Turbo XU4 OS: Initial Set Up
After you’ve booted into GameStation Turbo on your Odroid XU4, it’s best to perform a quick update. Open a command line (CTRL + ALT + T) and enter:
apt-get update && apt-get upgrade && apt-get dist-upgrade
If you plan to game on your Odroid XU4, you’ll need to add your ROMs to the folder
/home/odroid/ROMS
. Place your ROMs in the corresponding system folders. Like most Odroid XU4 retro gaming OSes, you may need to tweak your controller settings, though this depends on your specific gamepad, emulator and your personal codeferences.
Running ROMs From an External Device
Though by default, ROMs run from a ROMs folder on the microSD card or eMMC module, you may instead store your ROMs on an external drive or Samba share. If you want to create a symlink to a connected drive, run the following prompt in a terminal:
cp -av /home/odroid/ROMS /media/odroid/MyHDD/
Then, delete or rename the ROMs folder on your eMMC module or microSD card:
mv /home/odroid/ROMS{,.bak}
Once that’s complete, create the symlink from your external drive:
ln -sf /media/odroid/MyHDD/ROMS /home/odroid/ROMS
Alternatively, you may wish to mount a partition on an external drive as the ROMs folder. Begin by mounting the partition so you can then copy the appropriate files to that device:
mount /dev/sda1 /mnt
Next, copy the contents within the ROMs folder onto the partition:
cp -av /home/odroid/ROMS/* /mnt/
Then, unmount the partition:
umount /mnt
When that’s finished, create an fstab entry for this new partition:
/dev/sda1 /home/odroid/ROMS ext4 defaults 0 0
Now, mount the partition:
mount -a
Finally, ensure that this folder and all of its contents belong to the root Odroid user:
chown -R odroid:odroid /home/odroid/ROMS
You may instead use a samba share. Check that cfis-utils is installed:
apt-get install cifs-utils
Proceed to edit
/etc/fstab
and create an entry for the samba share:
//10.0.0.1/ROMS /home/odroid/ROMS cifs credentials=/home/odroid/.smbcredentials,uid=odroid,gid=odroid 0 0
Lastly, generate .smbcredentials under the Odroid home folder:
username=
password=
domain= (mostly WORKGROUP)
Upgrade GameStation Turbo to Kernel 4.14 LTS
You may wish to upgrade your GameStation Turbo XU4 distro to the 4.14 LTS kernel. If so, run the following command in a terminal:
apt-get install linux-image-4.14-armhf-odroid-xu4 linux-headers-4.14-armhf-odroid-xu4
Update to Kodi 17.X or Later on GameStation Turbo
Likewise, you might want to upgrade to Kodi 17.x or later. If so, in a command prompt enter:
apt-get install -t jessie kodi-next-odroid
GameStation Turbo XU4: First Imcodessions
Although I’ve tried RetroPie, Recalbox, and Ubuntu MATE on the Odroid XU4, the GameStation XU4 image is easily among my favorite releases. That’s because of its fusion of a desktop environment with retro gaming using the ultra-powerful Kodi media center ROMs browser. Moreover, since GameStation Turbo runs Kodi, it features home theatre PC (HTPC) capabilities using the plethora of Kodi add-ons available.
To install GameStation Turbo for the Odroid XU4, it’s as simple as downloading the IMG file, mounting it to an eMMC module or microSD card, and powering on the Odriod XU4. Therefore, it’s quite intuitive. However, RetroPie and Recalbox are a bit more streamlined for actual use, specifically running ROMs from external drives. In RetroPie, you can merely create a retropie-mount folder on a flash drive and run your ROMs from that external drive. Then in Recalbox, there’s a menu option you can toggle on and off for storing ROMs on a USB drive.
Still, GameStation Turbo is a phenomenal desktop OS that’s based on Debian, and thus, super stable. With its MATE desktop environment, GameStation Turbo is lightweight enough for the Odroid XU4 to handle basic multimedia and office use, even coming codeloaded with a suite of office software web browsers, and HTPC software including Kodi and Clementine.
It’s the bundled software and desktop environment where GameStation Turbo really shines. Using GameStation Turbo, you’re ready for Odroid XU4 retro gaming. Plus, since there’s Odroid XU4 EmulationStation, RetroArch, Kodi ROMs browser, Dolphin, ScummVM, and more emulators installed by default, you have tons of gaming options at the onset.
Getting Started With GameStation Turbo on the Odroid XU4: Final Thoughts
GameStation Turbo for the Odroid XU4 is a fantastic operating system. With its combination of desktop, HTPC, and retro gaming elements, it’s one of the most comcodehensive Odroid XU4 OSes available. Sure, Recalbox and RetroPie both include gaming and home theatre PC software, but no desktop environment. There’s technically nothing you can’t accomplish with GameStation Turbo that’s not possible using a vanilla desktop distro such as Ubuntu MATE. However, GameStation Turbo comes code-configured for gaming and HTPC use out-of-the-box. Ultimately, I’m inclined to begin using GameStation Turbo as my default operating system on the Odroid XU4.
Your turn: What Odroid XU4 operating systems do you suggest?

Moe Long is an editor, writer, and tech buff with a particular appreciation for Linux, Raspberry Pis, and retro gaming. Writing online since 2013, Moe has bylines at MakeUseOf, TechBeacon, DZone, SmartHomeBeginner, DEV.to, DVD Netflix, and Electropages. You can read his writings on film and pop culture at Cup of Moe, check out his tech reviews, guides, and tutorials at Tech Up Your Life, and hear his thoughts on movies on the Celluloid Fiends podcast. Aside from writing and editing, Moe has an online course, the Beginner's Guide to Affiliate Blogging From Scratch. When he's not hammering away at his keyboard, he enjoys running, reading, watching cinema, listening to vinyl, and playing with his dog Sebastian.


Leave your feedback...