
RetroFlag GPi Review: A Raspberry Pi GameBoy Case to Make You do a Double Take
Ever since the Raspberry Pi launched and RetroPie debuted, users have been cobbling together Raspberry Pi-powered retro game consoles. A slew of operating systems including RetroPie, Recalbox, Lakka, and Batocera run on the Raspberry Pi. Plus, retro gaming cases such as the NESPi, SuperPi, and MegaPi allow for the creation of the ultimate Pi game console, and even console clones such as a do-it-yourself (DIY) NES Classic Mini. RetroFlag dropped its GPi case, a GameBoy console clone which transforms a Raspberry Pi Zero into a GameBoy clone. Learn about this awesome DIY handheld retro game console kit in our RetroFlag GPi review!
What is the RetroFlag GPi?
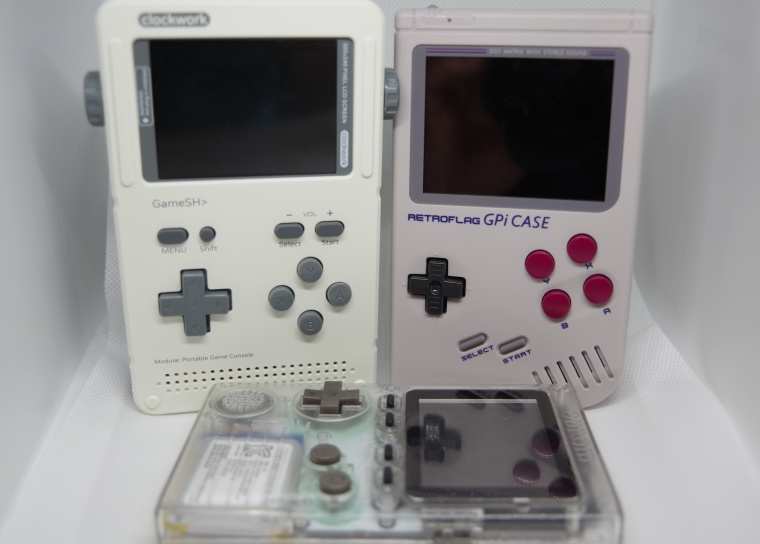
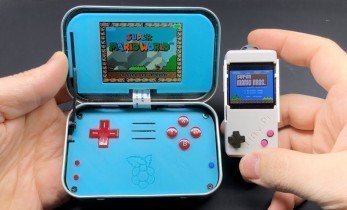
 The RetroFlag GPi is a gameshell for the Raspberry Pi Zero and Raspberry Pi Zero W which morphs a Pi board into a fully-functional portable Raspberry Pi retro game console. It's not the only such device. The Odroid-Go arrives as a GameBoy Color-style DIY handheld retro gaming device, and the ClockWorkPi GameShell is a nifty portable console for retro video games, programming, and even listening to music. However, the RetroFlag GPi differs in its GameBoy lookalike casing. Unlike the ClockworkPi and Odroid-Go, the RetroFlag GameBoy case mimics the appearance of the original Nintendo GameBoy with its thick, grey and red color-scheme form factor.
Moreover, the GPi, as the name suggests, uses a Raspberry Pi for emulation. Compare that to the Odroid-Go which uses an ESP32, and the ClockworkPi GameShell with its ClockworkPi (CPI) development board. Finally, the GPi may run RetroPie, Recalbox, Batocera, or Lakka, whereas the Odroid-Go and ClockworkPi feature custom operating systems.
On its front, you'll find a D-pa, start and select buttons, and X, Y, A, and B buttons. The rear features a battery hatch which takes three double A batteries, as well as left and right shoulder buttons. The top hosts a power switch, with a DC power input and brightness wheel on the left side. A volume wheel may be found on the right-hand side of the device, with a speaker in the bottom right corner. There's a 3.5mm headphone jack on the bottom of the device, and inside the battery pocket you'll find a USB port for firmware upgrades, as well as a safe shutdown switch.
The GPi case touts compatibility with the Raspberry Pi Zero and Raspberry Pi Zero W. There's a solderless installation, with pogo pins that connect effortlessly to the Pi's 40-pin GPIO header. The 2.8" 320x240 IPS screen gives off lush visuals.
RetroFlag GPi specs:
- 2.8-inch 320x240 IPS display
- Dimensions: 135x81x32mm
- 183g
- Works with Raspberry Pi Zero or Raspberry Pi Zero W
- 3x AA batteries
- 3.5mm headphone jack
- Includes safe shutdown button
- DC power input
How to Make a DIY GameBoy With the RetroFlag GPi Case
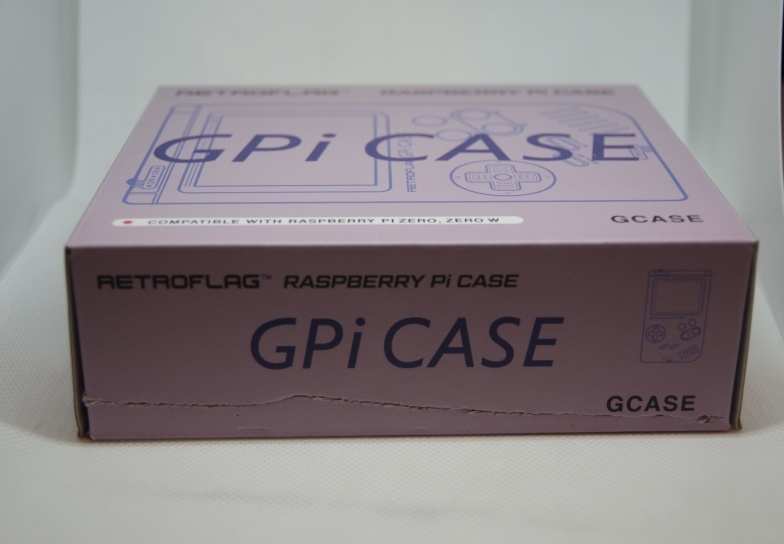
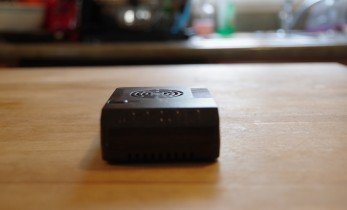
In the box, you'll find the RetroFlag GPi case. It doesn't come with a Raspberry Pi Zero or Zero W or AA batteries, but you'll probably have batteries stuffed in a drawer somewhere around your house. Or you can raid that one remote you never use. A Raspberry Pi Zero or Zero W clocks in around $5-10. You'll need a microSD card as well.
What you'll need for a DIY Raspberry Pi GameBoy with the GPi case:
- RetroFlag GPi case
- Raspberry Pi Zero or Zero W
- microSD card
- Retro gaming OS (RetroPie, Recalbox, Batocera, or Lakka)
- Extraction software (i.e. 7Zip)
- Image mounting software (i.e. Etcher)
Total cost: $70+ USD. The RetroFlag GPi GameBoy case retails for $70, plus you'll need a Pi Zero or Zero W, three AA batteries, and a microSD card.


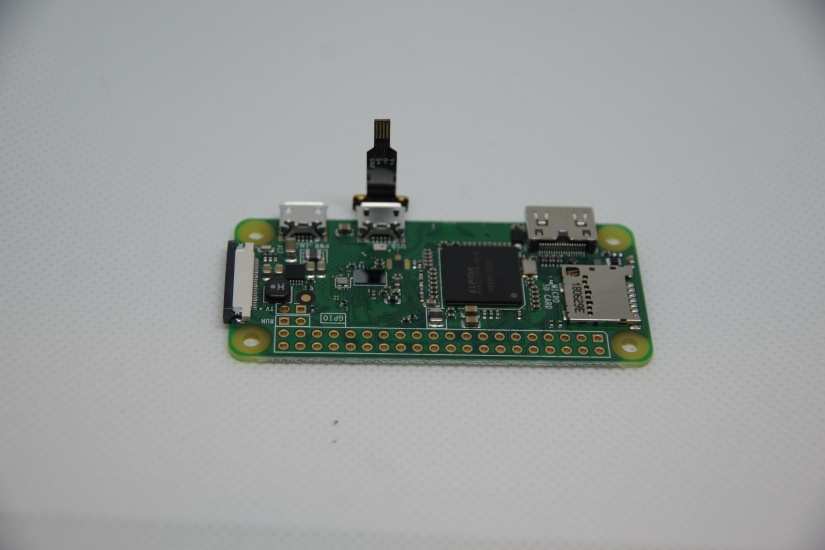
First, make sure your power button is switched off. Next, take the micro USB extension cable and insert it into the inner micro USB port on your Raspberry Pi Zero.
Next, place your Raspberry Pi Zero into the GPi cartridge case. Using the included flathead screwdriver, fasten the Pi Zero to the cartridge case with the four brass screws.
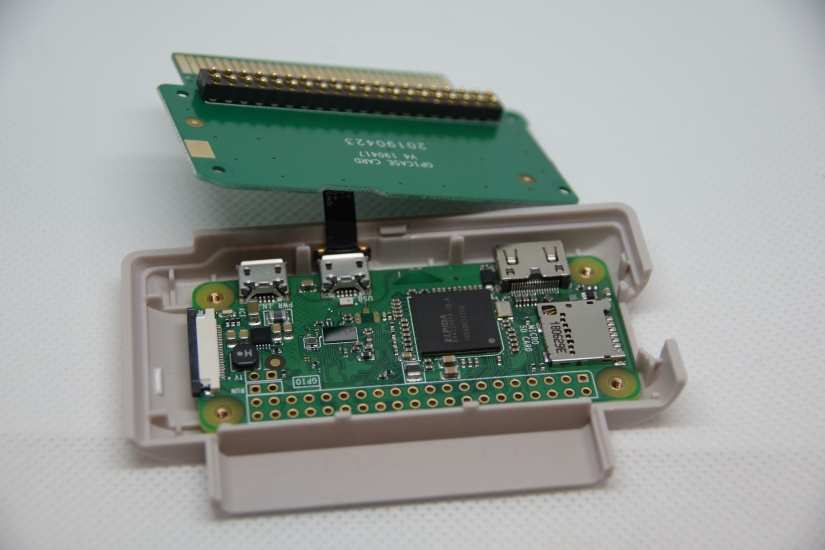
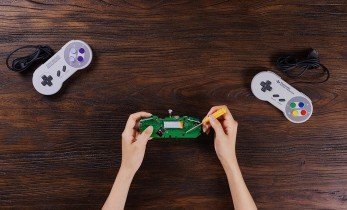
Now, attach the I/O conversion board. It features pogo pins, or tiny spring-loaded connectors for the 40-pin GPIO header. This makes for a solderless installation, a fantastic touch. Slide the brown ribbon cable into the retainer clip.
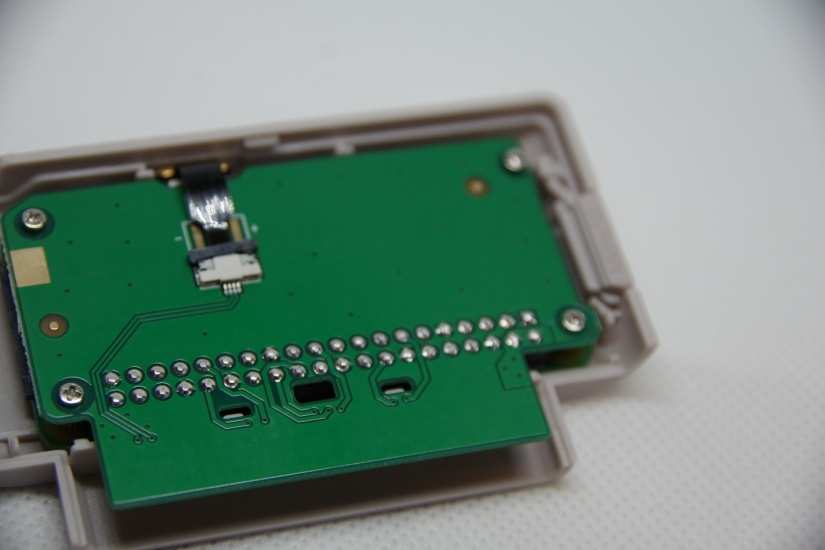
When that's finished, close the cartridge casing and use the four small silver screws to clamp down the I/O board.
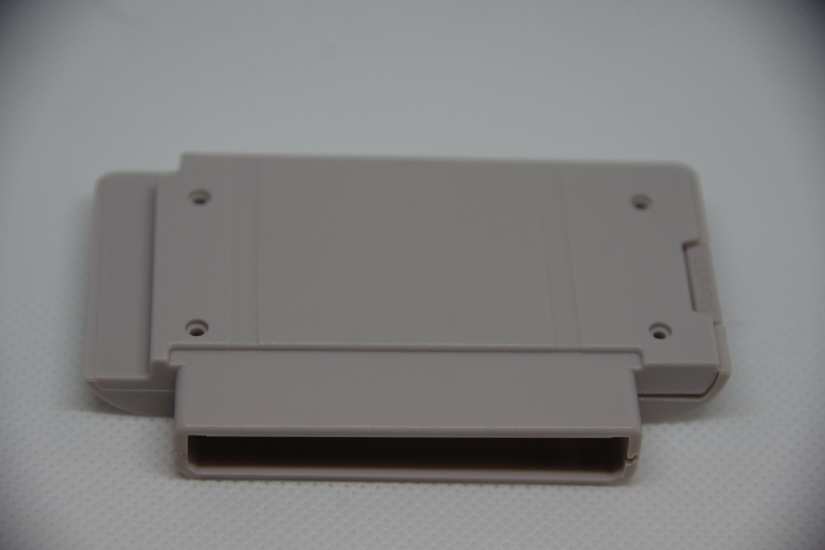
Then, slide the cartridge into its proper slot on the back of the RetroFlag GPi.
Go ahead and install RetroPie, Recalbox, Batocera, or Lakka on a microSD card.
Since the GPi GameBoy case uses GPIO for its video output rather than HDMI, you'll need to enable this using a GPi case patch. Head over to the RetroFlag downloads page and snag the patch. On Windows, unzip the GPi_Case_patch folder, and copy the entire folder to the root of your SD card. Then, open the GPi_Case_patch folder, and run the install_patch.bat file. If you're using macOS, backup the config.txt and overlays/dpi24.dtbo files to a loaction such as a backup folder. Drop the unzipped folder, copy configs.txt to the root SD card directory along with the overlays/dpi24.dtbo and overlays/pwm-audio-pi-zero.dtbo files into the overlays folder. Video vid GPIO should be enabled.
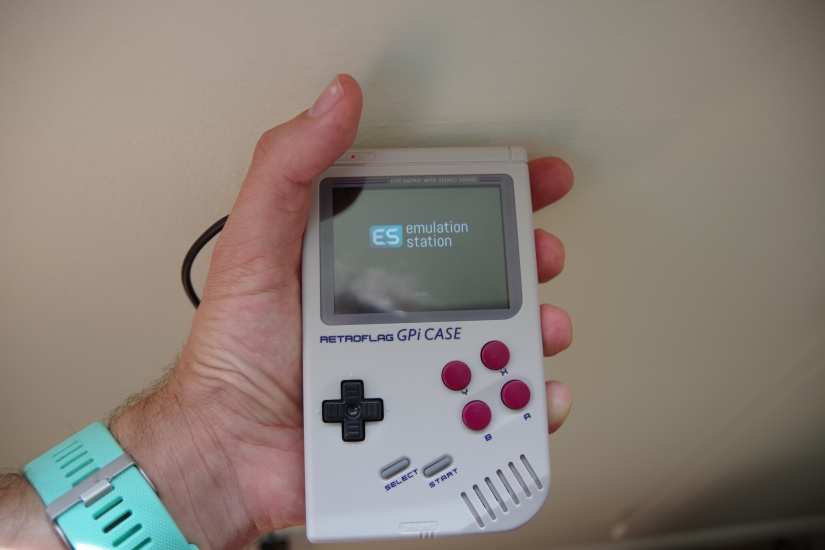
Once you've got your Raspberry Pi retro gaming operating system and the GPIO video output script installed, go ahead and insert your microSD card, add your three double A batteries, and power on the GPi by toggling the power switch to On.
RetroFlag GPi Review: A Raspberry Pi-powered GameBoy Clone to Make You do a Double Take
From its appearance, which closely mimics that of the original, chunky Nintendo GameBoy, the RetroFlag GPi completely nail it. Sure, there are a few differences such as the addition of X and Y buttons, but noticing these tweaks requires more than a cursory glance. The Raspberry Pi Zero/W holder with its GameBoy cartridge appearance merely proves the dedication RetroFlag has to delivering a completely retro-inspired gaming experience.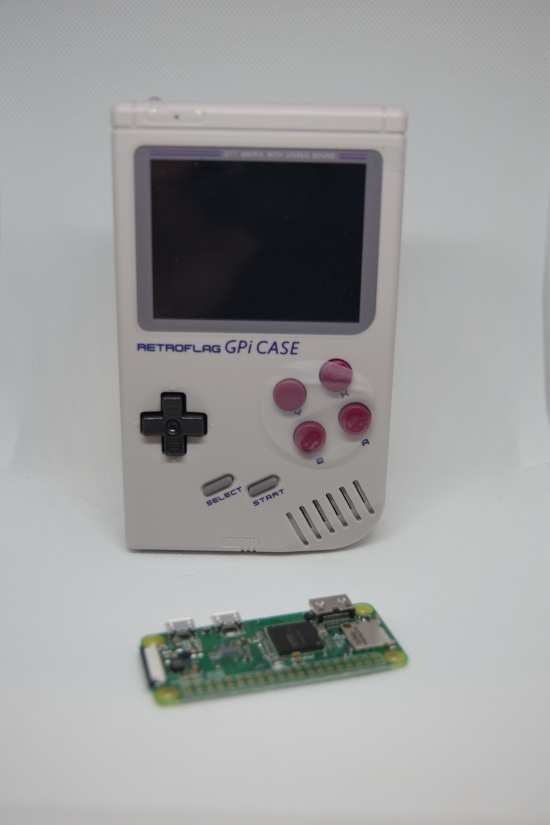
The solderless design simplifies makes for an effortless installation. Still, I discovered a few minor annoyances. When screwing down the Pi 0 and I/O board, I found myself briefly working in a small space. As a dude with fairly large hands, well, you know what they say: it's difficult handling fiddly screws in Raspberry Pi cases. Luckily, there's an included reversible flathead/philips head screwdriver, and the smaller silver screws are magnetic, a nice touch.
The directions are generally easy to follow, although words alongside pictures would have allowed for a slightly faster installation. The one major oversight is that nowhere in the instructions does it mention installing the GPIO video output script. You'll need to merely remember that the Pi by default outputs video via HDMI, something I did not, and which resulted in a bit of hair-pulling, NSFW grumblings, and a Reddit search which led to my "d'oh!" moment.
However, upon getting everything properly installed and booted up, it was merely a matter of mapping buttons and loading ROMs. I really appreciated the simplicity of the physical installation. While I can solder, I prefer not to. Opting for a Raspberry Pi board rather than a lesser-known maker board means better support. The Pi, and particularly the Raspberry Pi Zero, might not be the most powerful single-board computer (SBC) on the market, but it's certainly the best supported and most popular. Plus, with the likes of RetroPie and Recalbox on the Pi Zero, you'll be able to run the Kodi media centre. Coupled with a headphone jack, the GPi from RetroFlag doubles as a robust MP3 player, or even video playback device.
RetroFlag GPi Review: Game Over
 Overall, the GPi GameBoy console clone case for the Raspberry Pi Zero is a fantastic purchase. It's simple enough to configure, and runs a variety of operating systems. The I/O board's spring-loaded ribbon cable clamp is a bit fragile, and occasionally you'll find yourself working in a confined space. But ultimately, this is arguably the best DIY portable retro game console on the market. I love the Clockwork Pi, and rank that about on par with the GPi RetroFlag case. However, RetroFlag's offering boasts a Nintendo GameBoy aesthetic which the GameShell only offers in its form factor. While I love the Odroid-Go as well, lack of a native headphone jack severely limits usefulness on the go, ironically considering its name. A fantastic purchase, the GPi is the best portable console case for the RetroPie on the market.
Electroscore: 4.5/5 ![Electroscore: 4.5]()

Pros:
- Nintendo GameBoy-style Raspberry Pi case
- Effortless, solderless design
- Runs RetroPie and Recalbox
Cons:
- Instructions lacking
- Fiddly screws
- Fragile ribbon cable clamp
Price: $7,000.00
Link: www.amazon.com/dp/B07RT9VGS4/

Moe Long is an editor, writer, and tech buff with a particular appreciation for Linux, Raspberry Pis, and retro gaming. Writing online since 2013, Moe has bylines at MakeUseOf, TechBeacon, DZone, SmartHomeBeginner, DEV.to, DVD Netflix, and Electropages. You can read his writings on film and pop culture at Cup of Moe, check out his tech reviews, guides, and tutorials at Tech Up Your Life, and hear his thoughts on movies on the Celluloid Fiends podcast. Aside from writing and editing, Moe has an online course, the Beginner's Guide to Affiliate Blogging From Scratch. When he's not hammering away at his keyboard, he enjoys running, reading, watching cinema, listening to vinyl, and playing with his dog Sebastian.


Leave your feedback...