
ClockworkPi Review: The ClockworkPi GameShell is a Fun DIY Gameboy
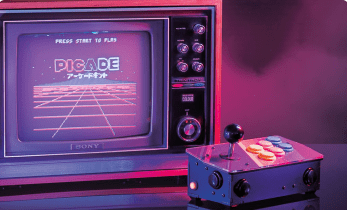
While I've completed loads of maker projects, among my favorite creations are do-it-yourself (DIY) retro gaming builds. My first ever Raspberry Pi project was RetroPie on the Raspberry Pi, and since then I've upgraded my set up to make the ultimate Raspberry Pi retro gaming machine, an Odroid XU4 N64 Classic Mini in an OGST gaming shell, and Pimoroni Picade Console. The ClockworkPi GameShell is a neat, easy to build DIY portable retro game console.
What is the ClockworkPi GameShell?
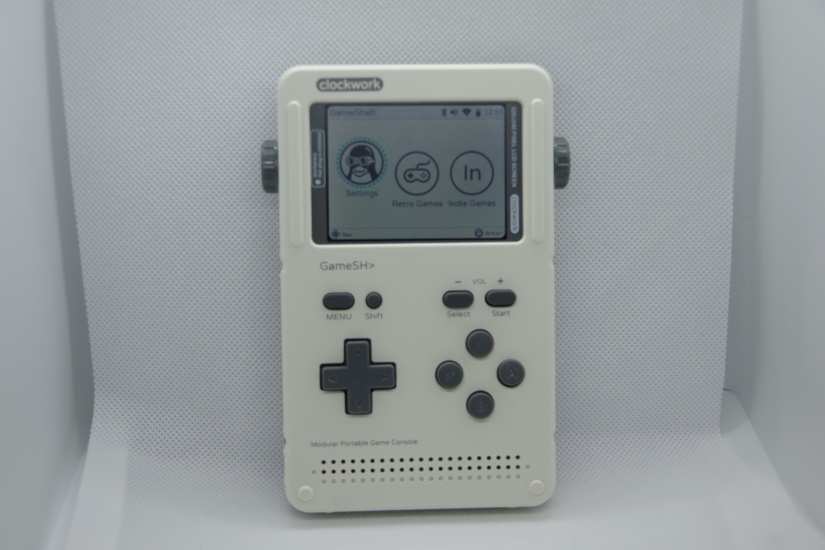
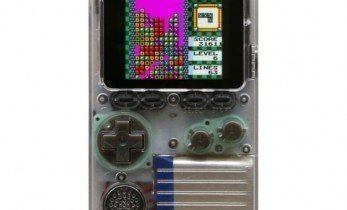
The ClockWorkPi GameShell kit is a portable retro gaming console. Although the Pi in its name may hint at Raspberry Pi internals, the GameShell kit rocks different internals. At its core, you'll find a quad-core Cortex-A7 CPU, ATmega168p programmable keypad, built-in Wi-Fi and Bluetooth, as well as 1GB DDR3, a 16GB microSD card with ClockworkPi OS, micro HDMI output, and 1200 mAh rechargeable battery. ClockworkPi OS uses Linux kernel 4.1.
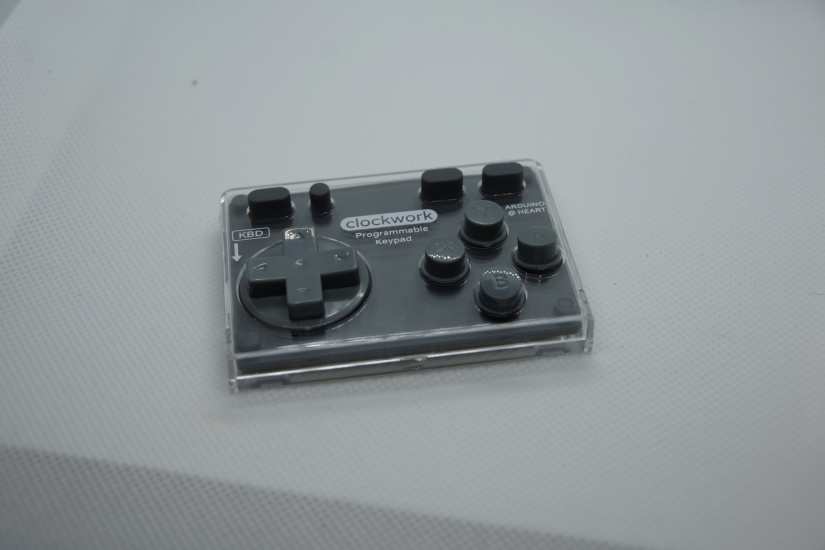
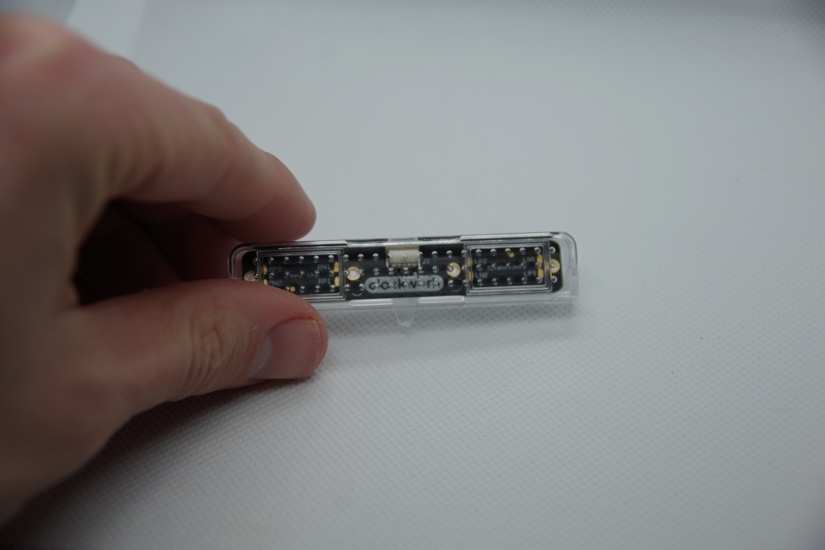
A programmable keyboard comes complete with Arduino compatibility. You'll find 12 independent I/O buttons. There's expandability to 17 buttons, and the module may be used with a USB port. Among the keypad buttons, you'll find a D-pad, X, Y, A, B, start, select, shift, and menu. Audio churns out of a two-channel stereo speaker, and visuals are lush on its 2.7 inch IPS RGB display with 60 frames per second (FPS) support. Like kits such as the Pimoroni Picade, all the parts come standard but you'll need to assemble the entire unit. However, unlike the Picade, a board is included.
- ATmega168p programmable keypad
- Wi-Fi and Bluetooth onboard
- Cortex-A7 CPU
- 1GB DDR3 RAM
- 16GB microSD card loaded with ClockworkPi OS
- 1200 mAh rechargeable battery
- micro HDMI out

What is ClockworkPi OS?
The GameShell by ClockworkPi runs Clockwork Pi OS. It's a Debian 9 ARMhf Linux distribution (distro) which uses the mainline Linux 4.1 kernel. As such, the likes of Libretro, PyGame, and Phaser.io remain compatible with ClockworkPi OS. Aside from gaming, ClockworkPi OS includes a music player. Sure, your phone likely offers the same functionality, but with its retro aesthetic, the Clockwork Pi GameShell boasts a Sony Walkman-eqsue experience.
How to Make a DIY Portable Retro Game Console With ClockworkPi GameShell
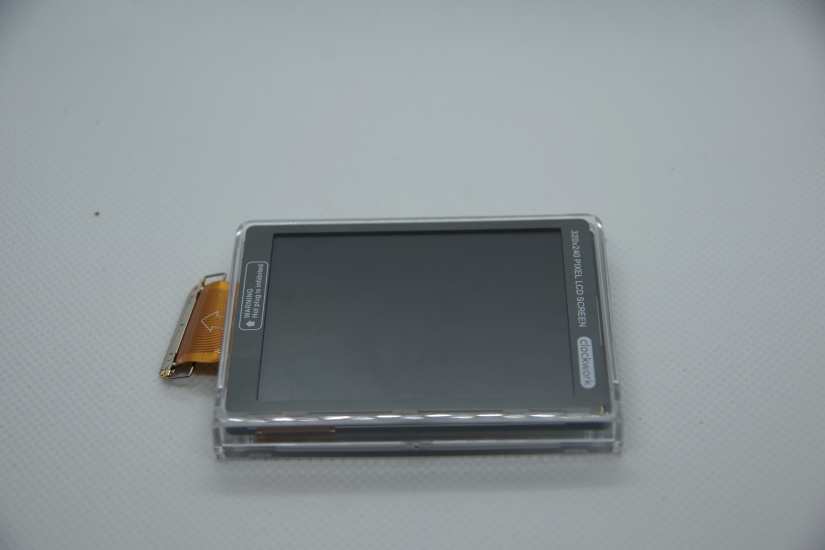
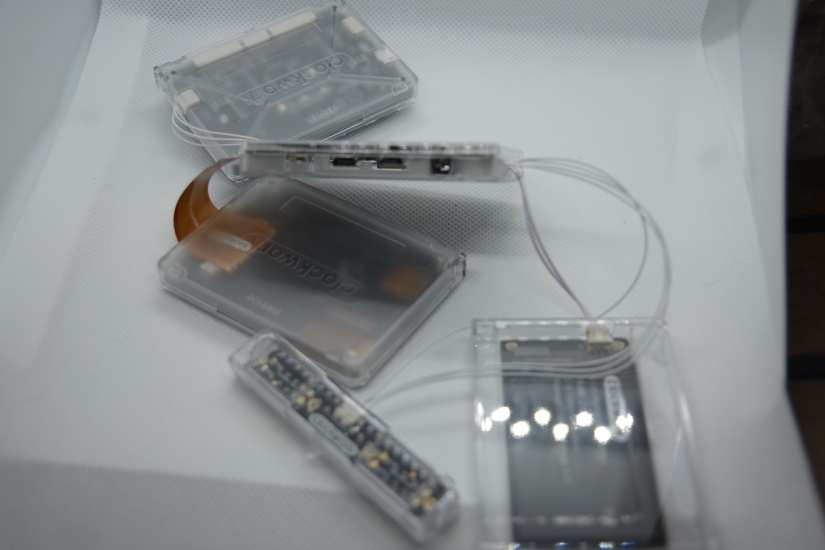
First, begin by putting together the screen portion of the ClockworkPi GameShell. Each PCB piece of the GameShell unit is labeled. There's an A sheet and B sheet, with individual components labeled with a number as well. Take B3 and A3, remove them from the PCB sheet, insert the screen. By default, the ribbon cable will face the opposite way as it needs to for the cutout on the side of the clamshell screen holder. As such, you'll need to fold it over.
Now, find the mainboard and assemble that. You'll need to pop the microSD card in before putting the entire GameShell together, so do that now. Conveniently, the mainboard compartment features labels for where to align the mainboard microSD card slot, speaker connector, battery connector, and more. It's helpful so you'll know how the board slots into its clamshell.

Next, complete the keypad configuration. I found that the D-pad didn't stay on the rubber backer and wasn't held in place by the modular clamshell holder for the keypad board. Watch for this falling off.
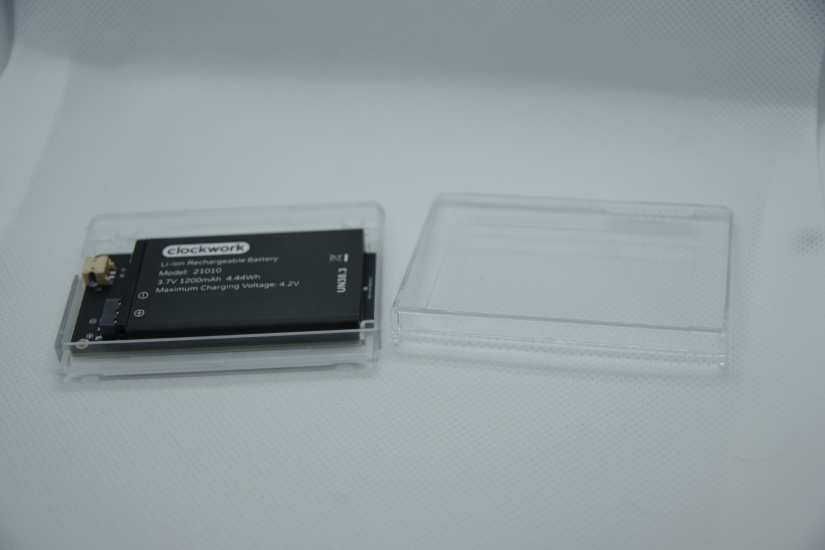
It's time for the battery. Once again, separate the PCB clamshell parts from the sheet, and click them together. After inserting the battery board, slip the battery into place.
Finally, assemble the speaker. You'll need to adhere two speaker parts to the speaker board, then affix that inside its shell casing.
With five modular components put together, it's time to wire everything up. I found that it was often easier to unclasp the clamshell casings to push the wire connections in. Hook the screen's ribbon cable to the mainboard. Take a short four-cable connector and run that from the keypad to mainboard. Use a two-cable connector to hook up the battery and mainboard. Run a long four-cable line from the speaker to the mainboard.
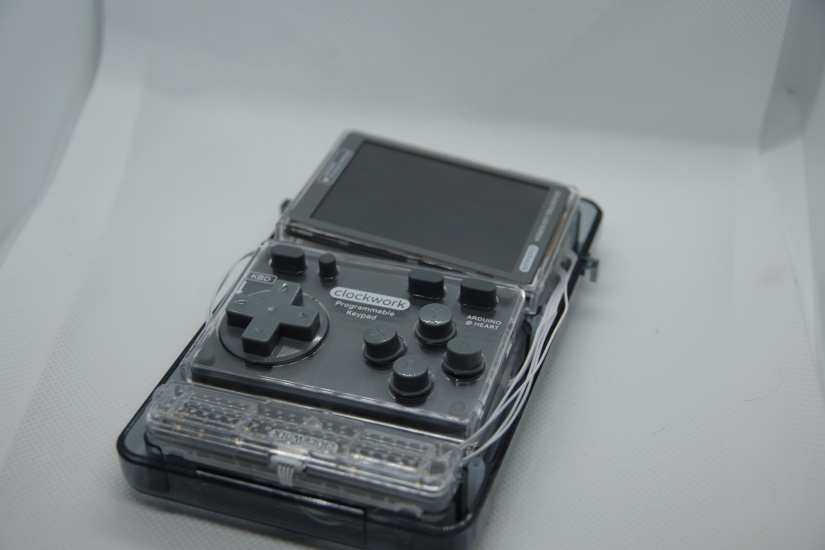
After completing the wiring, it's time to put everything into the shell. The screen goes on top facing out, with the mainboard behind that. Under the screen and mainboard, you'll stack the battery and keypad. Then, the speaker goes at the bottom. With the five main components neatly tucked in their compartments and wired together, place the rubber plugs in the bottom corners and middle side pockets. Click the front facade into place. Lastly, fasten the circular pieces onto the side pegs as the top.
ClockworkPi GameShell Review: Fairly Easy, Fun Retro Gaming Goodness
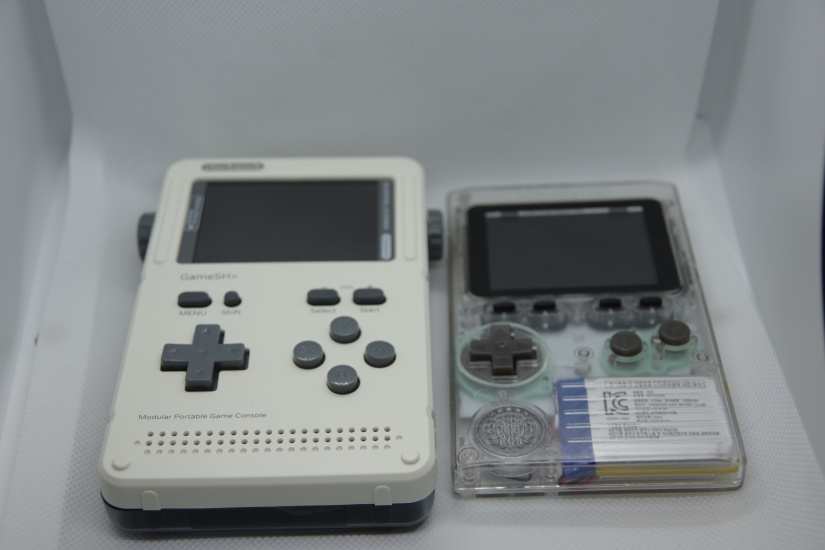
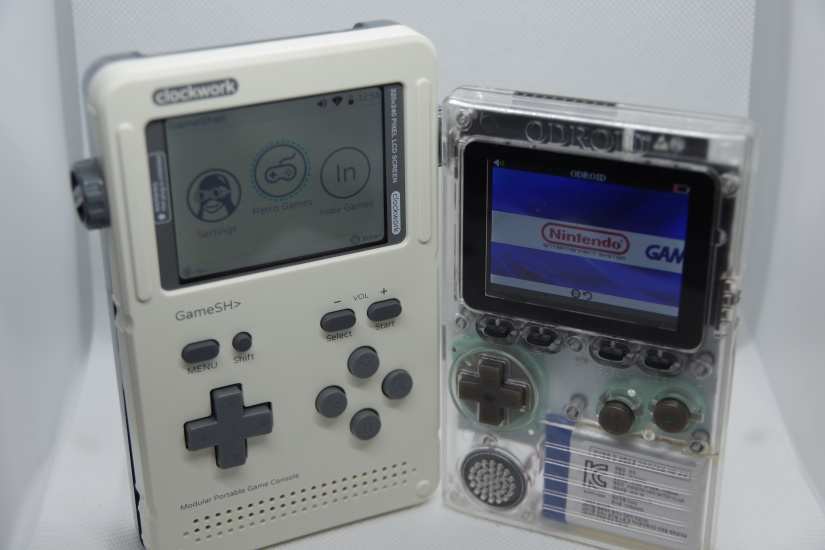
The ClockworkPi GameShell is a fantastic device. It's similar to the Odroid Go, but with key differences. Like the original Nintendo GameBoy, the GameShell from ClockworkPi boasts a chunky exterior. Compare that to the Odroid Go with its slim GameBoy Color form factor. Connectivity is excellent. My main issue with the Odroid Go was its lack of a headphone jack. That's an odd exclusion, especially for a portable retro game console. At the top of the GameShell device, you'll find a headphone jack, as well as micro HDMI output and power button.
ClockworkPi OS touts a bevy of multimedia features. Primarily, it's a DIY portable game console. Pre-installed ClockworkPi emulators include NEStopia and RetroArch. While no ROMs for copyrighted titles are found in ClockworkPi OS, FreeDM comes onboard for DOOM on the ClockworkPi GameShell. You'll find CaveStory onboard as well.
The onboard speakers aren't audiophile quality, but they're perfect for a portable device such as the ClockworkPi. The D-pad, X, Y, A, and B buttons, menu, shift, select, and start keys feel responsive. I appreciate that a microSD card with the ClockworkPi OS comes bundled, however the microSD card slot isn't accessible with the console put together. To access it, you'll need to pop the GameShell open. That's a major oversight considering you may wish to upgrade your storage as your ROM collection and music collection expand. Transferring files over Wi-Fi via SSH is simple enough, and I like the inclusion of wireless networking and Bluetooth.
Installation is pretty painless, though the included directions leave a bit to be desired. They're pretty barebones, merely featuring pictures of how to assemble the GameShell. Mostly, they're easy to follow, but putting together the device required a bit of guess and check with inserting various pieces. Some of the plastic materials felt fiddly and more dainty than I'd have liked. Still, the end result gave a sturdy vibe which I wasn't worried about chucking in my backpack. Unfortunately, the screen resolution is pretty low at 320x240, well below VHS quality.
ClockworkPi GameShell Review: Fantastic Modular DIY Retro Gaming
Ultimately, a few minor flaws don't substantially mar an otherwise incredible experience. A low-res screen isn't ideal, but for the size it's totally fine. Though the directions are a bit unclear in spots such as which cables to use and orientation of certain components in their clamshells, it's easy to figure out with patience and occasionally a bit of messing around. I love the retro GameBoy aesthetic, as well as headphone jack and music player. I plan to upgrade my microSD card for use as a retro game console and Walkman-type gadget.
My biggest gripe is that microSD card access requires opening up the entire GameShell. That's a minor nuisance on a solid device. I definitely plan to keep the ClockworkPi GameShell in my backpack for bouts of gaming on the go.
Electroscore: 4.5/5 ![Electroscore: 4.5]()

Pros:
- Easy to build, modular design, sturdy
- Lots of games and apps, doubles as a music player
- Debian-based Linux distro ClockworkPi OS works well
Cons:
- Access to microSD card requires opening up the entire GameShell
- Average 1200 mAh battery
- Low res 320x240 display
Price: $16,000.00
Link: www.clockworkpi.com/shop-1

Moe Long is an editor, writer, and tech buff with a particular appreciation for Linux, Raspberry Pis, and retro gaming. Writing online since 2013, Moe has bylines at MakeUseOf, TechBeacon, DZone, SmartHomeBeginner, DEV.to, DVD Netflix, and Electropages. You can read his writings on film and pop culture at Cup of Moe, check out his tech reviews, guides, and tutorials at Tech Up Your Life, and hear his thoughts on movies on the Celluloid Fiends podcast. Aside from writing and editing, Moe has an online course, the Beginner's Guide to Affiliate Blogging From Scratch. When he's not hammering away at his keyboard, he enjoys running, reading, watching cinema, listening to vinyl, and playing with his dog Sebastian.


Leave your feedback...