
Building the GameCube Classic Edition Mini Console
Nintendo scored a major hit with its NES Classic Mini and SNES Classic Edition. With hopes of an N64 Classic, gamers continue to enjoy retro video games via emulation. However, while it’s possible to buy retro console clones from the likes of Nintendo, Sega, and Atari, there’s another option: build your own. A do-it-yourself (DIY) game console is totally feasible using a single-board computer such as a Raspberry Pi or Odroid XU4. Then, simply add a retro gaming operating system (OS) like Lakka, Recalbox, or RetroPie. Though many SBCs handle even PlayStation 1 games, even beefier boards such as the XU4 max out at PlayStation Portable titles. An ambitious project, modder Nintendrew cobbled together a DIY GameCube Classic.
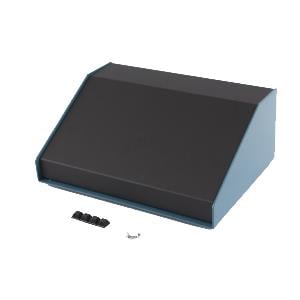
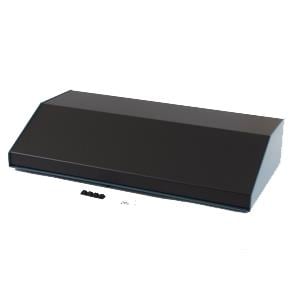
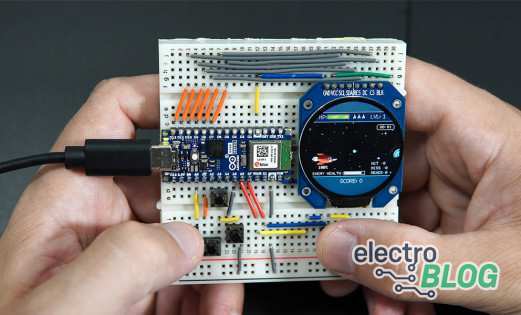
DIY GameCube Classic Mini Created by Nintendrew
Considering how much computing power is required to emulate GameCube titles, this is an incredibly challenging project. Additionally, this fan-made GameCube Classic Edition isn’t cheap. Whereas a Raspberry Pi 3 NES clone can be whipped up for around $35-$50, Nintendrew’s GameCube Classic cost more than $200. That’s twice the cost of an Odroid XU4, for which an N64-style case is available.
Fan-Made GameCube Classic Edition Specs
At its core, Nintendrew’s GameCube Classic Mini uses an UP Squared board. Using an Anet A8 3D printer, he created a custom case. The x86 board is substantially beefier than the Raspberry Pi, albeit more expensive.
After settling on a board and 3D printing a custom case, it was merely a matter of selecting an operating system. While many retro console clones use Linux, Nintendrew discovered that Windows 10 was better suited to running the Dolphin GameCube emulator than Linux and yielded performance gains. For the user interface (UI), this GameCube Classic runs EmulationStation, the same frontend as found on the likes of RetroPie and Recalbox.
Nintendrew’s GameCube Classic Experiment: The Results
OK, but what about the results? Nintendrews’s GameCube Classic Mini ran “Animal Crossing,” “Super Smash Brothers Melee,” and “The Legend of Zelda: The Wind Waker” well. However, certain titles were pretty unplayable. Still, if Nintendo created its own official GameCube Classic Edition, as Nintendrew aptly states, it seems reasonable to assume Nintendo could deliver better performance by working directly with developers and optimizing the source code.
Drew’s goals when making his DIY GameCube Classic Mini were to deliver a functional, affordable, compact console. As his gameplay footage shows, it’s a surprisingly functional console considering it’s completely fan-made, relying on emulators and ROMs. Though this GameCube Classic Edition clone might not quite be as compact as an official NES Classic, SNES Classic, or Raspberry Pi DIY NES or SNES, it nevertheless boasts a smaller footprint than the original GameCube. A console that I adore, and have nestled in my media center, complete with the GameBoy Player attachment.
Unfortunately, it’s affordability that spells game over for the DIY GameCube Classic. The UP Squared board alone retails for between $200-$300. Then, you’ll need to 3D print a case which means paying to print one, or buying a 3D printer. Of course, you’ll need an ample amount of storage considering the size of GameCube ROMs (note: we here at ElectroMaker do not condone piracy, so please only use ROMs of games you legally own). As such, this project is far more costly than a Raspberry Pi or Odroid XU4 console clone.
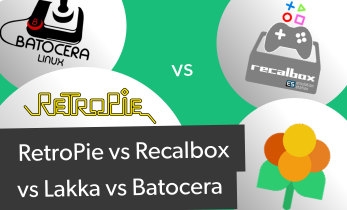
Despite its drawbacks, Nintendrew proves that it’s totally feasible to make your own retro gaming console. For a more affordable project, try building a retro arcade with Lakka, or a DIY retro game console with Recalbox and RetroPie on the Raspberry Pi. For a bit more power, you can run RetroPie on the Odroid XU4, as well as Recalbox and GameStation Turbo.
Which retro console clones would you like to see?

Moe Long is an editor, writer, and tech buff with a particular appreciation for Linux, Raspberry Pis, and retro gaming. Writing online since 2013, Moe has bylines at MakeUseOf, TechBeacon, DZone, SmartHomeBeginner, DEV.to, DVD Netflix, and Electropages. You can read his writings on film and pop culture at Cup of Moe, check out his tech reviews, guides, and tutorials at Tech Up Your Life, and hear his thoughts on movies on the Celluloid Fiends podcast. Aside from writing and editing, Moe has an online course, the Beginner's Guide to Affiliate Blogging From Scratch. When he's not hammering away at his keyboard, he enjoys running, reading, watching cinema, listening to vinyl, and playing with his dog Sebastian.


Leave your feedback...