
Raspberry Pi Smart Home Hub
The Raspberry Pi is a utilitarian single-board computer (SBC) capable of handling a slew of different projects. Tackling everything from retro gaming emulation and home theatre PC use to home server functionality, Pi boards provide solutions for tons of applications. Because the Raspberry Pi boasts a minuscule footprint and low power draw, it's ideal for always-on tasks. As such, you can build your own smart home hub with a Raspberry Pi!
Why You Should Use a Raspberry Pi for a Smart Home Hub
With its energy efficiency and small footprint, the Raspberry Pi may be easily plugged in, tucked away, and left running 24/7. This makes it an excellent choice for a media server or smart home hub. Since there plenty of Raspberry Pi smart home software exists, you've got tons of choices. Top-notch software and hardware compatibility, as well as I/O (inputs/outputs) such as GPIO, Ethernet, and Wi-Fi on the Pi 3 B+ or Pi 4, make it a great board for smart home control.
Why the Raspberry Pi makes a great smart home hub:
- Small footprint
- Energy efficient
- Affordable
- Excellent I/O
- Lots of compatible smart home software
Which Raspberry Pi is Best for Smart Home Control?
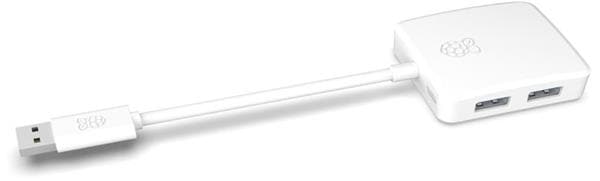
Virtually any Raspberry Pi should serve just fine as a smart home hub. I suggest using a Raspberry Pi 3 A+, B+, or Raspberry Pi 4, however. The extra processing power might be a bit overkill, but you won't notice any more consumption. Since the Pi 3 A+/B+ and Pi 4 offer the most robust connectivity, including Wi-Fi and Ethernet, they're the best options. Still, the Raspberry Pi Zero and Zero W should work fine, although you'll need to add an Ethernet adapter.
Best Raspberry Pi for a smart home hub: Raspberry Pi 3 A+/B+ or Raspberry Pi 4
How to Make a Raspberry Pi Smart Home Hub with Home Assistant - Hass.io
Home Assistant or Hass.io is an easy to use Raspberry Pi smart home software option. Running Home Assistant on the Raspberry Pi is possible through Hassbian, a standalone Raspbian-based minimal image of Hass.io, or through a manual installation on top of a compatible Linux distribution.
Begin by heading to the Hass.io website. Download the image for your board. Since I used a Raspberry Pi 4, I selected the Pi 4 image, but you could use a Pi 3 B+ as well.
Once you've downloaded your image, flash it to a microSD card with a program such as Etcher. A 32GB microSD card is recommended. Wait for mounting to complete, and when you're done pop it into the Pi and power it on.
You might wish to set up a static IP address or Wi-Fi. With your Home Assistant microSD card flashed, under the hassio-boot partition, create the CONFIG/network/my-network file.
The Home Assistant GitHub has an example of what you can place into the My Network file for wireless WPA/PSK information. You'll need to edit this according to your network information:
[connection]
id=my-network
uuid=72111c67-4a5d-4d5c-925e-f8ee26efb3c3
type=802-11-wireless

[802-11-wireless]
mode=infrastructure
ssid=MY_SSID
# Uncomment below if your SSID is not broadcasted
#hidden=true

[802-11-wireless-security]
auth-alg=open
key-mgmt=wpa-psk
psk=MY_WLAN_SECRET_KEY

[ipv4]
method=auto

[ipv6]
addr-gen-mode=stable-privacy
method=auto
And for a static IP address, input:
[ipv4]
method=manual
address=192.168.1.111/24;192.168.1.1
dns=8.8.8.8;8.8.4.4;
With your Pi powered on and booted into Hass.io, you can begin customizing your system. Initial boot time may be a bit lengthy, over 20 minutes perhaps, because Home Assistant first downloads all new updates.
When the installation completes, you can access your smart home hub over at http://homeassistant.local:8123 assuming you're connecting from the same network as your Pi. If not, use http://homeassistant.PI_IP_ADDRESS:8123 instead.
Install Home Assistant on a Linux OS
Alternatively, you might prefer to run Home Assistant on a compatible Linux distro of your choice such as Raspbian, Ubuntu, or Debian.
On Ubuntu or one of its derivatives, run:
add-apt-repository universe
Then, enter:
sudo -i

apt-get update

apt-get install -y software-properties-common apparmor-utils apt-transport-https avahi-daemon ca-certificates curl dbus

jq network-manager socat

systemctl disable ModemManager

curl -fsSL get.docker.com | sh
Next up, install Hass.io with the following script:
curl -sL "https://raw.githubusercontent.com/home-assistant/hassio-installer/master/hassio_install.sh" | bash -s
For various systems, you'll need to add tags. On the Raspberry Pi 3, you'll use:
curl -sL "https://raw.githubusercontent.com/home-assistant/hassio-installer/master/hassio_install.sh" | bash -s -- -m raspberrypi3
And on a Raspberry Pi 4, run:
curl -sL "https://raw.githubusercontent.com/home-assistant/hassio-installer/master/hassio_install.sh" | bash -s -- -m raspberrypi4
A few other Raspberry Pi tags you could use:
- Raspberry Pi -
raspberrypi - Raspberry Pi 2 -
raspberrypi2 - Raspberry Pi 3 -
raspberrypi3 - Raspberry Pi 3 64-bit -
raspberrypi3-64 - Raspberry Pi 4 -
raspberrypi4 - Raspberry Pi 4 64-bit -
raspberrypi4-64
How to Install Home Assistant Add-ons
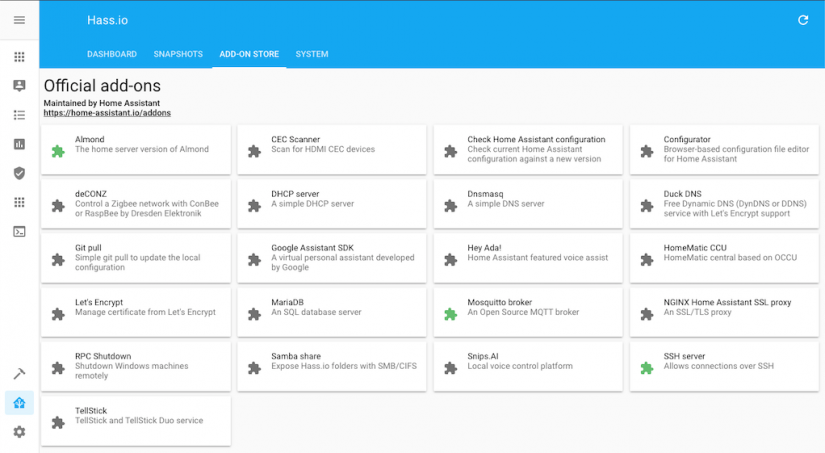
With Home Assistant set up, you'll be able to install Home Assistant add-ons, and there are loads to select from. From the Hass.io panel, head to Add-on Store and you can click on any add-on available. For instance, you might want to install the Google Assistant SDK, so click the Google Assistant add-on.
In addition to official Hass.io add-ons, a bevy of third-party add-ons exist. To install third-party Home Assistant add-ons, navigate to Add-on Store and enter the URL of the add-on you'd like to load up.
How to Run OpenHAB on the Raspberry Pi
OpenHAB is an excellent Raspberry Pi smart home automation ecosystem. Head on over to the OpenHAB website, and download either the stable or snapshot Raspberry Pi version of OpenHABian, a Raspbian-based standalone OpenHAB image. With your image downloaded, run a program such as Etcher to mount it to a microSD card. When burning completes, pop your microSD card into the Pi and boot it up.
If you're using Ethernet, you should be good to go. For Wi-Fi, you'll need to first access the SD card partition and open up openhabian.conf with your preferred text editor.
Uncomment the lines wifi_ssid="My Wi-Fi SSID" as well as wifi_psk="password123" and add your Wi-Fi network name and password. Then save that file, remove your microSD card, and boot into OpenHABian.
Standalone OpenHAB Package Installation
Rather than an OpenHABian standalone smart home hub, you might instead install OpenHAB as a package on a compatible Linux distro. In a fresh terminal, add the repository key:
wget -qO - 'https://bintray.com/user/downloadSubjectPublicKey?username=openhab' | sudo apt-key add -
Then, load the HTTPS transport for APT:
sudo apt-get install apt-transport-https
After that, add the repo:
echo 'deb https://dl.bintray.com/openhab/apt-repo2 stable main' | sudo tee /etc/apt/sources.list.d/openhab2.list
Proceed to update package lists and install OpenHAB:
sudo apt-get update && sudo apt-get install openhab2
If your smart home hub will have internet access, you don't need to enable add-ons for offline use. But if you won't have internet access, download add-ons for offlne use with the command:
sudo apt-get install openhab2-addons
That's it! You're all set up and ready to begin automating and controlling your smart home tech using OpenHAB.
OpenHAB First Use
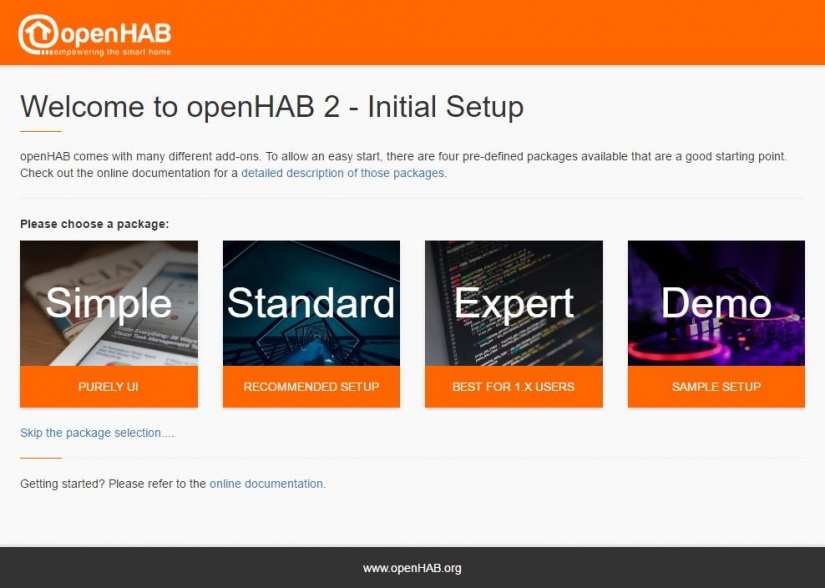
After successfully installing OpenHAB, head to http://<pi-ip-address>:8080 in a new browser. There, you'll be greeted by the OpenHAB dashboard.
You'll see an initial set up screen where you can choose from a few different installation options: Simple, Standard, Expert, and Demo. Pick your preferred option here. I suggest using the Standard configuration which installs the Paper UI, Basic UI, and Habpanel where you can generate custom dynamic dashboards for your smart home tech. But Simple, Expert, and Demo work just fine.
After choosing an installation type, OpenHAB downloads any necessary packages and takes you to its welcome page. If you picked Standard, you can choose which UII you'd prefer, the Paper UI, Basic UI, or Habpanel.
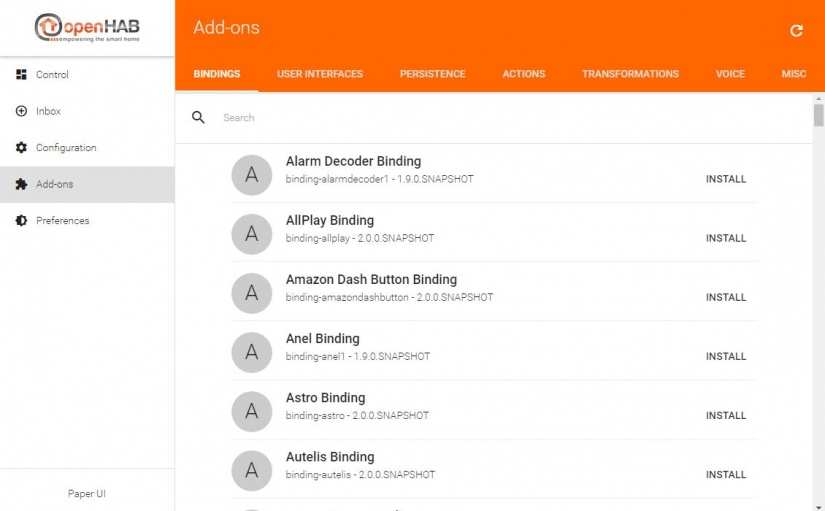
There are a few primary components of OpenHAB. Add-ons are where the meat of the smart home hub is. Under Add-ons, scroll around or search for what you'd like to install.
How to Build a Raspberry Pi Smart Home Hub - Final Thoughts
There are plenty of different Raspberry Pi smart home hub options on the market. Which you pick ultimately boils down to which Raspberry Pi board you're using and what smart devices you've got, since that dictates compatibility. My favorites are OpenHAB and Home Assistant because they're easy to set up and use, plus incredibly well documented. But many alternatives such as Jeedom and MisterHouse are excellent choices too.
How are you automating your smart home with a Raspberry Pi?

Moe Long is an editor, writer, and tech buff with a particular appreciation for Linux, Raspberry Pis, and retro gaming. Writing online since 2013, Moe has bylines at MakeUseOf, TechBeacon, DZone, SmartHomeBeginner, DEV.to, DVD Netflix, and Electropages. You can read his writings on film and pop culture at Cup of Moe, check out his tech reviews, guides, and tutorials at Tech Up Your Life, and hear his thoughts on movies on the Celluloid Fiends podcast. Aside from writing and editing, Moe has an online course, the Beginner's Guide to Affiliate Blogging From Scratch. When he's not hammering away at his keyboard, he enjoys running, reading, watching cinema, listening to vinyl, and playing with his dog Sebastian.


Leave your feedback...