
Make An Animated Conference Badge With Inkyphat
Conferences happen across the world and for many different reasons, but one thing that is common between every conference is the conference badge. From simple sticky labels and makers, to elaborate electronic badges, the conference badge is there to help everyone learn who everyone else is! So, why not make your own conference badge using a Raspberry Pi Zero W, an Inkyphat screen and a premade laser cut frame from Core-Tec!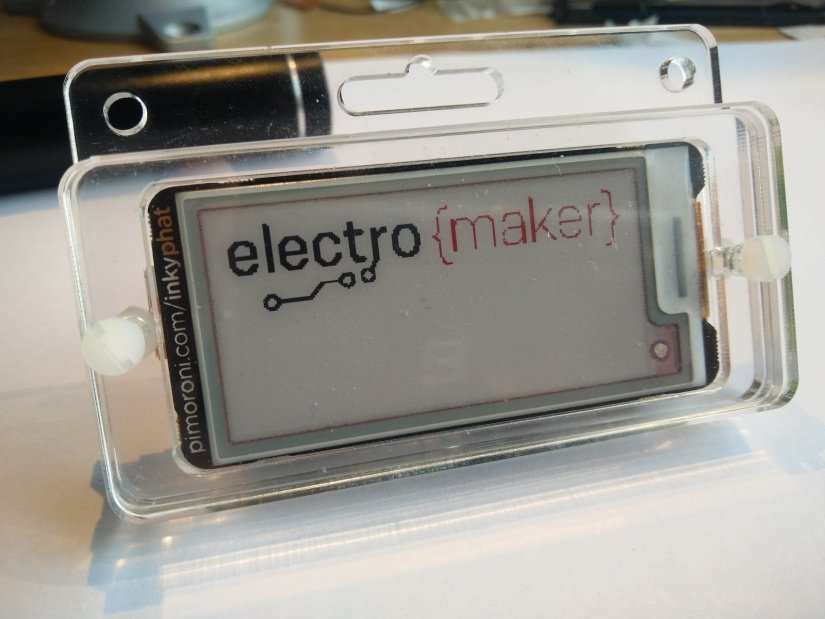
In this project we shall make our own animated conference badge that will cycle through images and text, telling everyone who we are, and where they can find out more about us. We can also customise the badge to meet the needs of the conference we are attending, including ID numbers, talks that we wish to see, and the all-important meal times!
What will you need for this project:
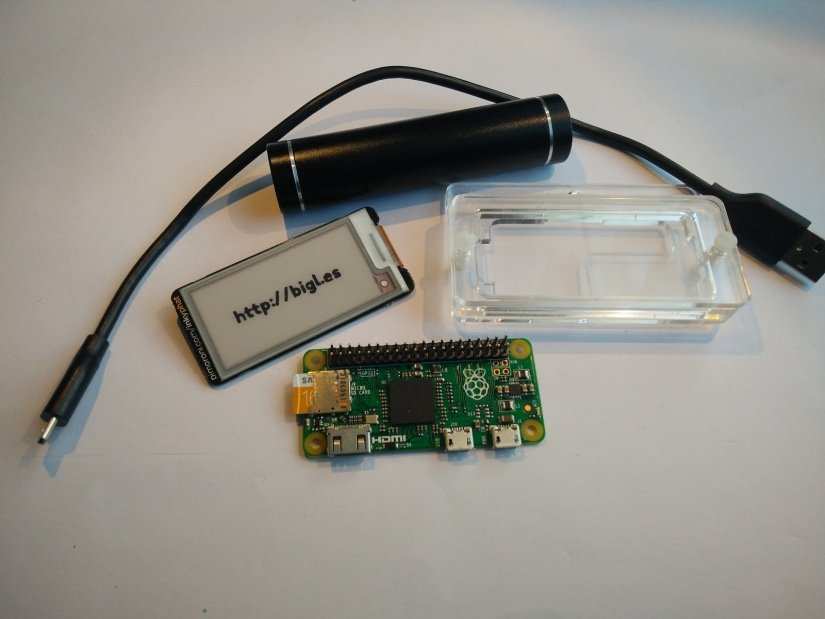
- A Raspberry Pi Zero W
- Connections for keyboard, mouse, HDMI and power
- A blank SD card (8GB or more) with the latest Raspbian release
- An inkyphat
- A phat badge holder
- A micro USB cable
- USB battery
All of the code and a sample image for this project can be downloaded from the Github repository.
Building the badge
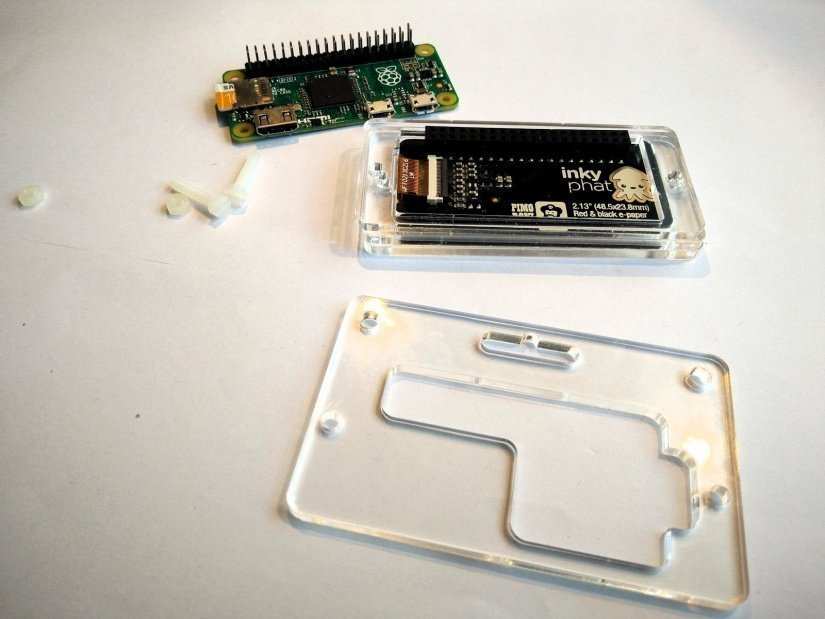
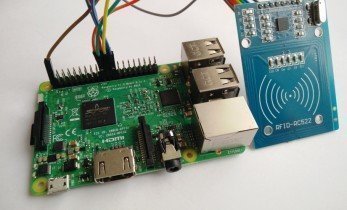
![]()
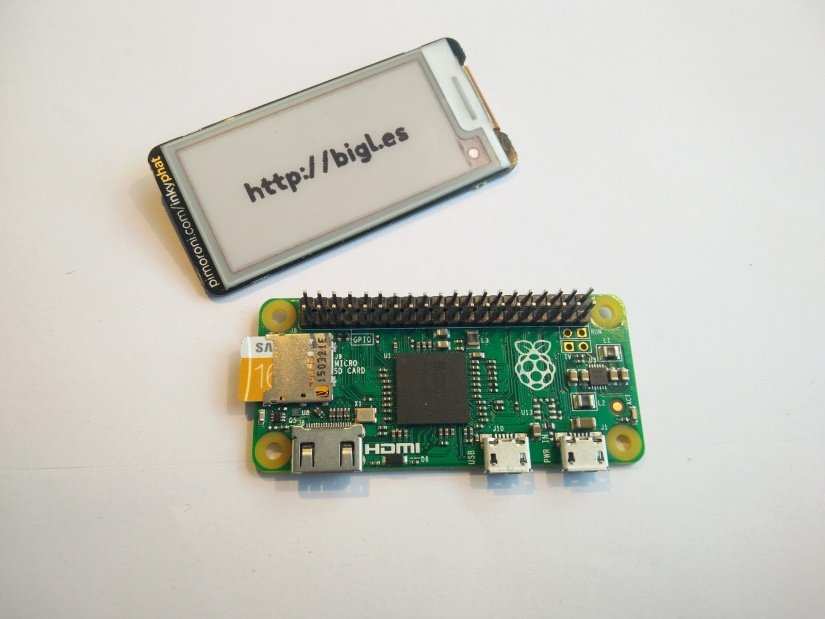
To assemble the electronics, we need to attach Inkyphat to the GPIO (General Purpose Input Output) pins of the Raspberry Pi Zero W, while it is turned off, so that it covers every pin and its profile matches that of the Pi. For now, we shall leave the laser cut phat badge holder off until we have finished testing. Once connected, ensure that all of your peripherals are connected and then power up the Pi to the desktop.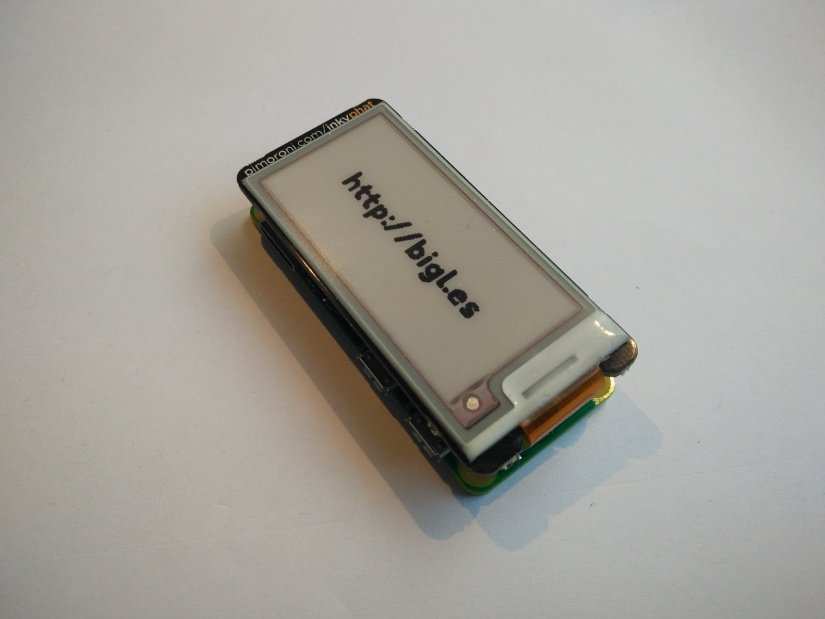
Coding the badge
Firstly, we need to connect our Pi Zero W to the Internet, and to do this we can use the Networking icon, in the top right of the screen. Click on the icon and find the name of your home access point, click on the name and you will be asked for the password. Enter it and you will be online within a minute.
Once online our next step is to install the software for the Inkyphat screen, and to do that we need to open a Terminal, the icon for which is at the top of the screen. Once in the terminal we shall run a single line command that will download an install script and then run it. Normally, we should never do this as the script may be malicious, but in this case the Pimoroni URL for the script is safe and valid. In the terminal enter this as one single line and then press ENTER.
curl https://get.pimoroni.com/inkyphat | bash
The install will be highly automated and take a few minutes to complete, but once it is complete you will be returned control of the terminal. You can now close the terminal.
We shall be using Python 3 to code the badge, so from the main Raspbian menu go to the Programming menu and select Python 3. The Python 3 editor will open, now click on File >> New to open a new blank document. To make future saves quicker we shall save now, click on File >> Save and name the file conf_badge.py to the /home/pi/ directory (this is the default) Remember to save often!
So let's get to the Python code. Our first line of code is an instruction to the operating system that tells the code where to find the Python 3 interpreter, which will run the code. Enter this code into the editor.
#!/usr/bin/env python3
We next import three libraries of pre-written Python code. The libraries enable us to use the Inkyphat, use fonts and images with the board, and control the speed at which our project will update. Enter this code into the editor.
import inkyphat

from PIL import ImageFont, Image

from time import sleep
The next step we take is to create an object called font, and in there we shall store the font that we would like to use, in this case FredokaOne, one of four fonts that come with Inkyphat, and set the size to 22pt. Enter this code into the editor.
font = ImageFont.truetype(inkyphat.fonts.FredokaOne, 22)
Functions are handy tools in programming, and in this project we use them to store frequently used sequences. For example, our text function has two parameters; these are the text to be displayed and the colour of the text. Code inside of the function is indented, a Pythonic way to show that the code belongs inside a function/loop/conditional statement. We next get the size of the text and store it inside two variables w and h. Then we work out the centre of the screen by dividing the width by two and then dividing the width of the text also by two before subtracting the text width from the screen width. The same is applied for the text height.
We then instruct Inkyphat to store the text ready, and it is positioned at the x,y position that we have just calculated. The text and colour are passed as parameters when we call the function, whereas the font value is stored at the start of our code. The last line of this function is used to write the changes to the screen, forcing Inkyphat to update and show the latest text.
Enter this code into the editor.
def text(text, colour):

    w, h = font.getsize(text)

    x = (inkyphat.WIDTH / 2) - (w / 2)

    y = (inkyphat.HEIGHT / 2) - (h / 2)

    inkyphat.text((x, y), text, colour, font)

    inkyphat.show()
Moving on to a new function, and this time we create a function that will handle displaying an image that we pass to the function as a parameter. The first line inside the function will clear the screen of any text, and then we move on to set the image we wish to use. Then we update the screen to show the image.
Enter this code into the editor.
def image(file):

    inkyphat.clear()

    inkyphat.set_image(Image.open(file))

    inkyphat.show()
The final function for this project is called cleaner and its job is simple, to ensure that the display is thoroughly cleaned of any errant pixels. This came about due to text appearing over an image despite using the inkyphat.clear() code to clear the screen. In this function we specify the three colours that Inkyphat can use to draw on the screen (Red, Black and White) and we then use a for loop that will set the border colour of the screen to match each of those colours. We then use two further nested for loops to set each pixel in the x and y axis to the desired colour, then we break out of all three for loops (phew) and write the changes to the screen. Effectively giving our screen a deep clean!
Enter this code into the editor.
def cleaner():

    colours = (inkyphat.RED, inkyphat.BLACK, inkyphat.WHITE)

    for c in enumerate(colours):

        inkyphat.set_border(c)

        for x in range(inkyphat.WIDTH):

            for y in range(inkyphat.HEIGHT):

                inkyphat.putpixel((x, y), c)

    inkyphat.show()
So, now let's get to writing the code that will run our animated conference badge. To start, we use an infinite loop which is called while True in Python. Anything inside the loop will be indented and run as long as there is power of the Pi. Enter this code into the editor.
while True:
Firstly, inside our loop we call the image function to show an image, in this case the image we pass as a parameter is the Electromaker logo, specially edited in GIMP (an alternative image editor to Photoshop), so that the image has only three colours: white, red, black to match those of the Inkyphat. The Electromaker image is available via the download for this project, see the link in the equipment list section and to learn more about creating images for use with Inkyphat, Pimoroni have a great guide in the learning section of their website https://learn.pimoroni.com/tutorial/sandyj/getting-started-with-inky-phat. Moving on we clear the screen before calling the text function, with my Twitter handle passed as a parameter, and the colour of the text. Then we sleep, causing a delay in the code, for five seconds.
Enter this code into the editor.
   image("electromaker-edit.png")

    inkyphat.clear()

    text("@biglesp",inkyphat.BLACK)

    sleep(5)
Still inside the loop and we are on to the last section of Python code, and we start by clearing the text on the screen, before calling the text function again, this time to display my blog address in black text. The code then sleeps for a further five seconds, before the cleaner function is called to deep clean the screen. The code then waits for five seconds before the loop repeats itself.
Enter this code into the editor.
   inkyphat.clear()

    text("http://bigl.es", inkyphat.BLACK)

    sleep(5)

    cleaner()

    sleep(5)
With the code completed, let's give it a try. Save your work, and then click on Run >> Run Module this will run the code in Python 3 and we should now see the Inkyphat screen spring to life and start displaying content.
Automating the badge
Now that we have an animated conference badge, we need to automate it as carrying a keyboard, mouse, screen and power around a conference will cause backache!
We have already taken the first step to automate the project, our very first line of Python instructed the code where to find the Python interpreter, so now we need to make the code executable. Close the Python 3 editor, and open a new Terminal which by default will open to the /home/pi/ directory where our code is saved.
To make our file executable we need to modify its permissions so that it can be used in this manner. The command for this is chmod and to make our file executable, type the following into the Terminal and press Enter.
sudo chmod +x conf_badge.py
Now let's give it a test, in the same Terminal type the following and press Enter.
./conf_badge.py
Your badge should come to life and start displaying text. 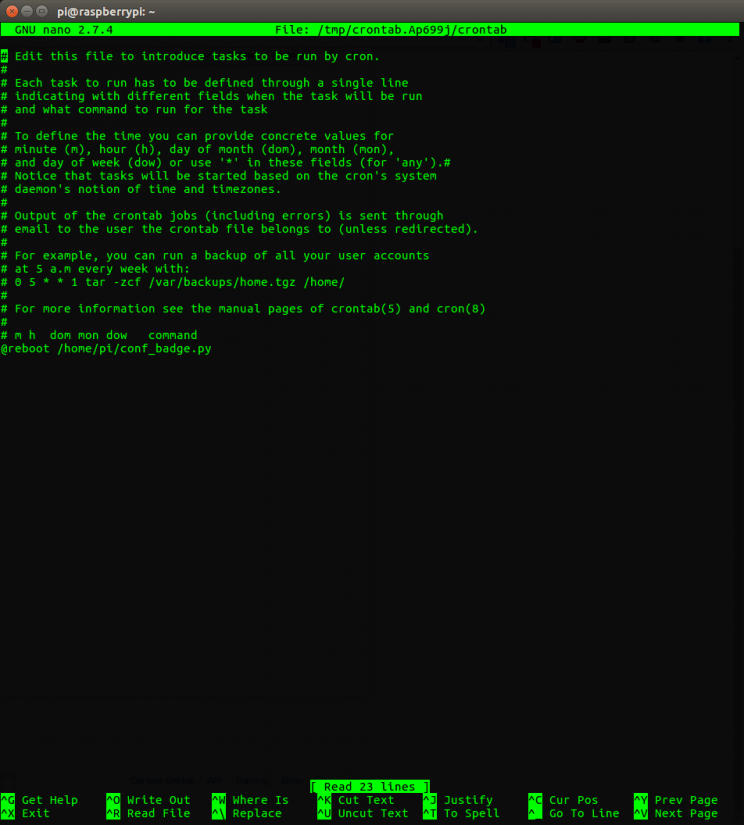
So now the last step to make it truly automatic, we are going to have the code run when the Pi boots, and to do this we shall add the script to CRON a system that runs scripts at set times/intervales/events. To edit the file we need to type the following into the terminal.
crontab -e
If this is your first time using crontab, then you will be asked which editor do you wish to use. For this project we used nano so you should too.
Once inside the editor, we need to go to the bottom of the file and make a new line. And, on this line, we shall instruct the Pi to run our code when the Pi is rebooted.
Type the following into the editor.
@reboot /home/pi/conf_badge.py
Now we need to save the file by pressing CTRL + O then press Enter and then to exit the editor press CTRL + X
Now back at the Terminal we need to reboot our Pi to test that the code works. A quick way to do this is by typing.
sudo reboot
Now marvel as your Pi Zero W springs to life, displaying your chosen sequence of images and text for all those conference goers to marvel at! Oh and once fully tested, now is a great time to put it in the laser cut acrylic case to keep the screen safe!

Les Pounder loves hacking and tinkering with Arduino, Raspberry Pi and new technologies. He passes on his skills and discoveries to Electromaker readers via tutorials and reviews.


Leave your feedback...