





Raspberry Pi Compute Module 5 CM5: Which Variant Should You Buy?
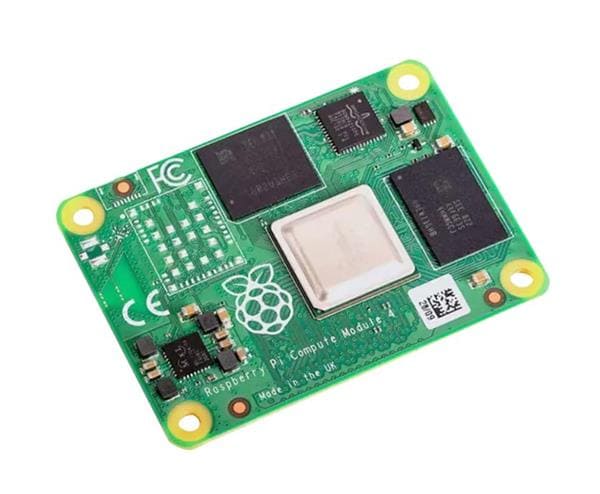
The Raspberry Pi Compute Module 5 is the Raspberry Pi 5 platform rebuilt as a compact system-on-module for embedded products, industrial controllers, robotics, kiosks, and custom carrier-board designs. It is not a normal Raspberry Pi board with ports removed as an afterthought. It is designed to be built into your own hardware.
For advanced makers and engineers, that is the important distinction. The Compute Module 5 gives you the BCM2712 processor, configurable RAM and eMMC, PCIe, USB 3.0, camera and display interfaces, and a full 64-bit Linux software stack, but it expects you to provide the carrier board, power design, connectors, thermals, and storage strategy.
For more background from Embedded World 2025, read Electromaker’s earlier coverage of how Raspberry Pi CM5 brings industrial power to small designs. For design work, always cross-check against the official Raspberry Pi Compute Module 5 product page and Compute Module documentation.

Raspberry Pi Compute Module 5: What is it?
The Raspberry Pi Compute Module 5, often shortened to CM5, is a system-on-module based on Raspberry Pi 5 hardware. It contains the processor, memory, optional eMMC flash, power support circuitry, and high-density board-to-board connectors. What it does not include is the familiar USB, HDMI, Ethernet, camera, display, and GPIO connector layout of a standard Raspberry Pi 5.
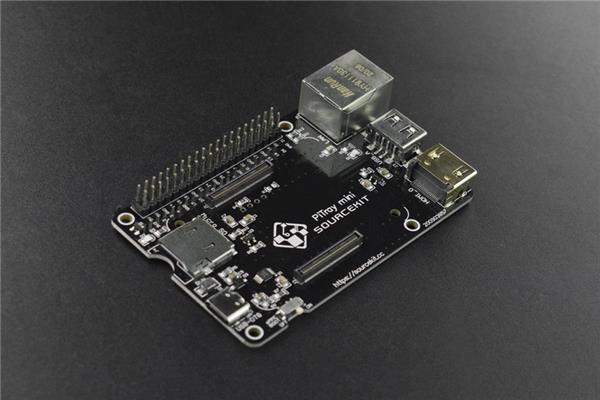
That makes the Raspberry Pi Compute Module 5 CM5 a better fit for products than for quick bench experiments. You design it into a carrier board, or start with the official CM5 IO Board while you prototype. The result can be smaller, cleaner, and more production-ready than a standard Pi with cables and add-on boards attached.
The trade-off is direct: CM5 gives you more control over system design, but less instant convenience. It is not something you casually wire into a breadboard. You need to think about connectors, power rails, boot storage, signal routing, airflow, compliance, and long-term serviceability.
Note: The Electromaker Store currenly lists all variants of the Compute Module 5.

Hardware at a glance
The CM5 carries much of the Raspberry Pi 5 platform into a 55 mm by 40 mm module. These are the core specifications most buyers and designers should check first.
| Feature | Raspberry Pi Compute Module 5 specification |
|---|---|
| Module type | System-on-module for embedded systems and custom products |
| Form factor | 55 mm by 40 mm by 4.7 mm module with four M2.5 mounting holes |
| Processor | Broadcom BCM2712 quad-core 64-bit Arm Cortex-A76 at 2.4GHz |
| Memory | 2GB, 4GB, 8GB, or 16GB LPDDR4-4267 SDRAM with ECC |
| Storage | 0GB Lite, 16GB, 32GB, or 64GB eMMC options |
| Wireless | Optional certified wireless module with 2.4GHz and 5GHz 802.11b/g/n/ac Wi-Fi, Bluetooth 5.0, and BLE |
| Ethernet | Gigabit Ethernet PHY with IEEE 1588 support |
| USB | One USB 2.0 port and two USB 3.0 ports via a suitable carrier board |
| Expansion | PCIe Gen 2 x1 root complex |
| Display and camera | Two HDMI 2.0 outputs up to 4Kp60, plus two four-lane MIPI ports supporting DSI display and CSI-2 camera use |
| GPIO | Up to 30 GPIO pins, with UART, I2C, SPI, PWM, SDIO, DPI, I2S, and GPCLK options |
| Graphics and media | 4Kp60 HEVC decode, OpenGL ES 3.1, and Vulkan 1.3 |
| Power | Single 5V input, with USB PD support up to 5A at 5V on compatible carrier designs |
| Operating temperature | -20°C to +85°C |
| Production lifetime | Planned production until at least January 2036 |
Raspberry Pi Compute Module 5 vs Compute Module 4
The most useful comparison is Raspberry Pi Compute Module 5 vs Compute Module 4, because many engineers will be looking at CM5 as an upgrade path for existing CM4-based products. The mechanical story is encouraging, but it should not be treated as a blind drop-in replacement for every carrier board.
| Area | Compute Module 5 | Compute Module 4 | Practical impact |
|---|---|---|---|
| Processor | Broadcom BCM2712, quad-core Cortex-A76 at 2.4GHz | Broadcom BCM2711, quad-core Cortex-A72 at 1.5GHz | CM5 is better suited to heavier Linux workloads, local analytics, and containerised applications. |
| RAM options | 2GB, 4GB, 8GB, 16GB | 1GB, 2GB, 4GB, 8GB | The 16GB option gives CM5 more headroom for larger services, browsers, and development workloads. |
| eMMC options | 0GB Lite, 16GB, 32GB, 64GB | 0GB Lite, 8GB, 16GB, 32GB | CM5 offers larger soldered storage options for production images and local data. |
| USB | Two USB 3.0 ports and one USB 2.0 port when exposed by the carrier | USB 2.0 on the official CM4 IO Board | CM5 is stronger for fast peripherals, cameras with USB capture, storage adapters, and service ports. |
| PCIe | PCIe Gen 2 x1 | PCIe Gen 2 x1 | NVMe and accelerator designs remain possible, but bandwidth planning still matters. |
| MIPI | Two four-lane MIPI ports configurable for display or camera use | Separate display and camera arrangements on CM4 carrier designs | Existing camera and display routing should be reviewed rather than assumed compatible. |
| Form factor | 55 mm by 40 mm, dual 100-pin connectors | 55 mm by 40 mm, dual 100-pin connectors | Many mechanical designs can be adapted, but electrical and firmware validation are still required. |
For a production controller, start by sizing RAM for the application and eMMC for the full field image, logs, update partitions, and rollback strategy. For a development platform, Lite can be attractive because storage is easier to swap, but remember that removable media is also easier to disturb.
Carrier boards, power, and compatibility
A Compute Module is only half the system. The carrier board decides how the CM5’s interfaces reach the outside world, how stable the power delivery is, and how easy the unit is to assemble, flash, service, and cool.
The official Compute Module 5 IO Board is the safest starting point for evaluation. It provides USB-C power, a power button, RTC battery socket, two HDMI connectors, two combined MIPI DSI/CSI-2 connectors, two USB 3.0 Type-A connectors, a USB-C slave port for flashing, Gigabit Ethernet with PoE support, an M.2 M-key PCIe socket, a 40-pin GPIO footprint, configuration jumpers, and a PWM fan connector.

Two small details are easy to miss. First, the microSD slot on the CM5 IO Board is for CM5 Lite modules only. eMMC variants ignore it. Second, older CM4 carrier boards may work with CM5 only with reduced functionality, so check USB 3.0, MIPI, power, boot mode, and pin-use assumptions before committing to a board spin.
- Use 5V power with enough current headroom: the CM5IO follows the Raspberry Pi 5 style power model, with 5V at 5A preferred where peripherals may draw meaningful current.
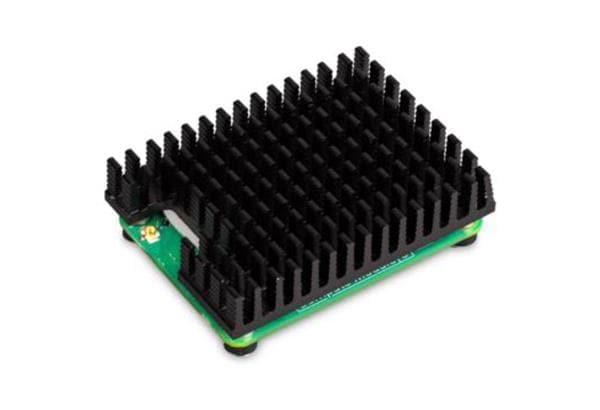
- Plan thermals early: a bare module in a sealed plastic box is not a production thermal design. Use airflow, a heatsink, a fan, or thermal coupling where sustained load is expected.
- Validate storage behaviour: eMMC, microSD, NVMe, and USB storage all have different failure modes and service implications.
- Respect GPIO voltage selection: the CM5IO supports selectable 1.8V or 3.3V GPIO voltage. Match this to your attached hardware.
How to get started with CM5 eMMC flashing
The first setup path depends on whether you bought a Lite module or an eMMC module. Lite modules boot from storage provided by the carrier. eMMC modules need to be exposed to a host computer as USB mass storage before you can write the operating system image.
Prerequisites
- A Raspberry Pi Compute Module 5 with eMMC.
- A compatible carrier board, ideally the official CM5 IO Board for first setup.
- A suitable 5V power supply for the carrier board.
- A USB-C cable connected to the CM5IO USB-C slave port.
- A host computer running Linux, Windows 11, or macOS.
- Raspberry Pi Imager for writing the OS image.
Flash Raspberry Pi OS to a CM5 eMMC module
- Fit the Compute Module 5 to the IO Board. The module should sit flat and be fully engaged with the board-to-board connectors.
- Fit the
nRPI_BOOTjumper to J2, labelleddisable eMMC Boot, on the CM5 IO Board. - Connect the USB-C slave port J11 on the IO Board to the host computer. Avoid USB hubs if the host fails to recognise the device.
- Connect power to the IO Board.
- On a Linux host, install and run
rpiboot. On Windows, install the Raspberry Pirpibootdrivers and tool, reboot if prompted, then run the Mass Storage Gadget entry.
sudo apt update sudo apt install rpiboot sudo rpiboot lsblk - Wait for the CM5 eMMC to appear as a mass storage device on the host computer.
- Open Raspberry Pi Imager and write Raspberry Pi OS, or your chosen tested image, to the CM5 eMMC device.
- Eject the mass storage device cleanly after flashing.
- Remove the
nRPI_BOOTjumper from J2. - Disconnect the USB slave cable, then power-cycle the IO Board. The CM5 should now boot from eMMC.
Production EEPROM checklist
For one-off development, the default bootloader behaviour is usually fine. For products, treat the EEPROM bootloader as part of the controlled software stack.
- Select and record a specific bootloader release for the product.
- Set and verify the intended boot order.
- Enable EEPROM write-protection where the deployed product is difficult to access.
- Record the carrier board revision, OS image hash, EEPROM version, and manufacturing test result for each unit.
Quick GPIO smoke test on Raspberry Pi OS
This short test checks that the OS, GPIO header, and basic Python environment are behaving as expected. Platform: Raspberry Pi OS Bookworm 64-bit on CM5 using the official CM5 IO Board or a compatible carrier with GPIO17 exposed.
Install the dependency:
sudo apt update sudo apt install python3-gpiozero Connect an LED and suitable current-limiting resistor between GPIO17 and GND. Then save the following as gpio17_blink.py and run it with python3 gpio17_blink.py.
from gpiozero import LED from signal import pause led = LED(17) led.blink(on_time=0.5, off_time=0.5) pause() If the LED does not blink, check the carrier-board pinout, GPIO voltage selection, ground connection, LED polarity, and whether another service has already claimed the pin.
Real-world CM5 project ideas
The Compute Module 5 is most useful when the standard Raspberry Pi board shape becomes the limiting factor. It lets you keep the Raspberry Pi software ecosystem while designing the hardware around the product.
- Industrial controller or HMI: combine GPIO, Ethernet, display output, eMMC storage, and a sealed carrier design for machine interfaces or control panels.
- Robotics vision system: use MIPI camera interfaces, GPIO, and local Linux processing for perception, navigation, and telemetry.
- Digital signage player: take advantage of dual HDMI output, hardware video decode, and eMMC deployment images.
- Compact edge AI gateway: pair CM5 with a PCIe accelerator or fast local storage on a carrier board designed for your workload.
- Homelab blade or cluster node: use custom carrier boards and backplanes where density and modularity matter more than raw performance per pound.
- Cyberdeck or portable Linux terminal: build around a Lite or high-RAM wireless variant with custom battery, display, keyboard, and storage hardware.
- Custom NAS or logging appliance: use PCIe storage carefully, keeping the single-lane bandwidth and power budget in mind.
Who should buy the Compute Module 5?
Buy CM5 when your project benefits from the Raspberry Pi software ecosystem, but a standard Raspberry Pi 5 is physically or electrically awkward. It is especially useful when you need a custom connector layout, eMMC, a production carrier board, long-term embedded deployment, or a cleaner product enclosure.
- Buy it for: embedded Linux products, carrier-board design, industrial prototypes, robotics, kiosks, signage, custom SBCs, and compact edge systems.
- Think twice if: you only need a desktop-style Raspberry Pi, you do not want to design or buy a carrier board, or you are building a low-cost cluster where a used mini PC may be more practical.
- Do not skip: power validation, thermal testing, boot testing, carrier-board review, and storage endurance planning.
Final thoughts
The Raspberry Pi Compute Module 5 is the serious embedded version of Raspberry Pi 5. Its value is not that it is easier than a standard Pi. Its value is that it gives engineers more control: configurable RAM, optional eMMC, optional wireless, PCIe, USB 3.0, MIPI camera and display routing, and a compact form factor for real products.
For a bench project, a normal Raspberry Pi 5 is still simpler. For an embedded product, robot, kiosk, controller, or custom Linux device, CM5 is the better starting point. Check the exact 16GB wireless 64GB CM5, 16GB non-wireless 64GB CM5, or other listed variants on the Electromaker store before you commit, because RAM, eMMC, and wireless choices are not afterthoughts. They define the product you can build.
FAQs
These are the common questions to settle before choosing a CM5 variant or carrier board.
Does Raspberry Pi Compute Module 5 need a carrier board?
Yes. CM5 has high-density board-to-board connectors rather than normal USB, HDMI, Ethernet, and GPIO headers. You need the official CM5 IO Board or a compatible custom carrier board to power it, expose I/O, and flash or boot storage.
What is the difference between CM5 Lite and CM5 with eMMC?
CM5 Lite has no onboard eMMC storage. It boots from storage provided by the carrier board, such as microSD or NVMe where supported. eMMC variants have soldered onboard flash, which is usually better for sealed or deployed products.
Can CM5 replace CM4?
Sometimes, but not without validation. CM5 uses the same basic 55 mm by 40 mm Compute Module form factor as CM4, but older CM4 carrier boards may only support CM5 with reduced functionality. Check power, USB, MIPI, PCIe, GPIO voltage, and boot behaviour.
How do I flash CM5 eMMC?
Fit the CM5 to a compatible IO Board, set the nRPI_BOOT jumper to disable eMMC boot, connect the USB-C slave port to a host computer, run rpiboot, then flash the exposed eMMC device with Raspberry Pi Imager. Remove the jumper and power-cycle to boot.
Which CM5 variant should I buy?
Choose 2GB for fixed-function headless controllers, 8GB for general embedded Linux and robotics, and 16GB for heavier Linux, container, UI, or development workloads. Choose eMMC for production deployment and Lite for removable-storage or NVMe-focused designs.
Does CM5 support USB 3.0 and NVMe?
Yes, when the carrier board exposes the relevant interfaces. CM5 provides two USB 3.0 ports and a PCIe Gen 2 x1 interface. The official CM5 IO Board includes USB 3.0 Type-A ports and an M.2 M-key PCIe socket.
Where can I buy the Raspbery Pi compute module 5?
The Electromaker Store currenly stocks all variants of the Compute Module 5. We ship worldwide and orders recived before 2PM usually ship the day!

Residing on the south coast of England, Rich has spent the last few years building Electomaker.io from the ground up. He is usually found behind a laptop coordinating the rest of the EM team and occasionally finding time to contribute articles to the blog. When not tapping away at a laptop, he can be found either paddleboarding, at the beach, playing golf (badly), or camping with his family.














Leave your feedback...