


DFRobot SEN0670: Teach Your Project to Recognize a Gesture
Hold up a hand sign and an LED lights up. Swap that LED for a scene in your next interactive display, and suddenly your project has a rather fun new input. The first step is teaching it what your chosen sign looks like.
The DFRobot Gravity SEN0670 is an AI pose and gesture recognition sensor that processes images locally and sends results to a controller over I2C or UART. You can teach it static hand signs or body poses, then let an Arduino or ESP32 decide what happens when one appears. The sensor handles recognition, leaving your code to handle the light, animation or game.

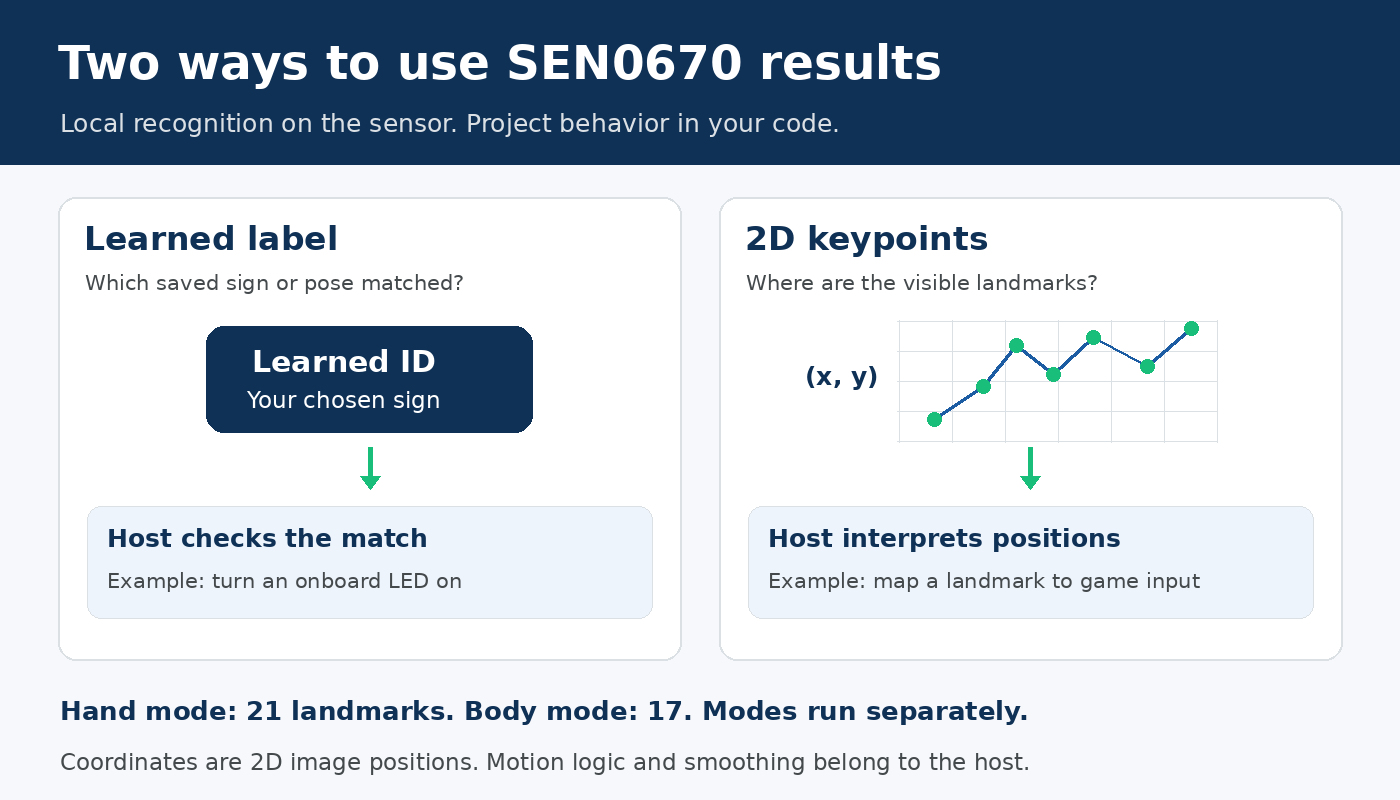
What does the SEN0670 do for your project?
A conventional camera project can mean choosing a vision model, getting it running and connecting its output to the rest of your build. SEN0670 already has the recognition capability onboard. Its learning process stores reference examples for matching against that existing capability, rather than asking you to collect a dataset and train a neural network from scratch.
That makes it an appealing starting point for a desk gadget, classroom demonstration or interactive installation with a few deliberate controls. Teach a sign, read its label and assign an action. Once configured, the normal wired sensor-to-controller workflow can run without a PC or internet connection.
Hand signs, body poses and keypoints explained
Start by choosing the kind of input your project needs. The SEN0670 API reference separates three recognition modes, and their outputs serve different jobs.
- Learned hand signs,
eHand: match a static arrangement of one hand to a saved example. This is the natural starting point for a custom light-control sign. - Learned body poses,
ePose: match a held body position, such as an arm raised. Learning concerns one person's pose at a time. Support for detecting multiple bodies does not establish persistent person identities. - Preset gestures,
eGesture: classify a built-in set of signs separately from your learned examples. DFRobot still flags this mode's recognition limitations, so check its behavior in your intended setting.
A keypoint is an image position for a landmark, such as a wrist or fingertip. Hand mode provides 21 landmarks and body mode provides 17. These are two-dimensional coordinates, useful for positioning an on-screen object or calculating an angle. A bounding box instead describes the rectangle around a detection. Neither provides depth or a 3D skeleton.
Keep labels and coordinates separate in your code. A learned ID answers which reference matched. Coordinates help answer where a landmark is. In learned modes, ID 0 can mean a detected sign or pose has no learned match, which differs from receiving no detection. Scores also depend on the result type, so treat them as detection or matching scores rather than calibrated probabilities.
SEN0670 specifications and connections
The figures below come from DFRobot's SEN0670 specifications. Recognition rates and recommended distances are manufacturer guidance for the stated modes. I2C uses clock and data lines, while UART uses transmit and receive lines for serial communication.
| Feature | Documented specification |
|---|---|
| Module size | 37 × 37 mm |
| Camera | 640 × 480 pixels, VGA, with an 89° diagonal field of view |
| Hand mode | 21 2D keypoints, approximately 5 FPS. Start around 0.5 m away. |
| Body mode | 17 2D keypoints, approximately 10 FPS. Start around 2 m away with the whole body visible. |
| Custom learning | DFRobot lists up to 8 hand signs and 8 body poses, retained locally. Capacity depends on firmware and available storage. |
| Host interfaces | I2C, default address 0x3A, or UART. USB-C is the documented configuration connection. |
| Power and logic | 3.3 V to 5 V supply. Signals use 3.3 V logic. |
Give the camera an evenly lit view and keep the whole hand or pose unobstructed. Backlighting and similar-looking signs make the job harder. Treat the suggested distances as starting points for your enclosure and room. The quoted FPS figures describe recognition modes, not measured end-to-end response time. VGA describes the camera, not a video stream your MCU must process.
Teach a hand sign and light an ESP32 LED
For a first build, follow the documented FireBeetle 2 ESP32-E, DFR0654 route in Arduino IDE. You'll need the sensor, host board, USB-C data cable and a Windows PC for the graphical setup tool. The listed sensor package includes a Gravity four-pin cable and a ten-pin header. Budget separately for the host and USB cable.
- Open the camera preview. Follow the SEN0670 getting-started guide to download the Windows utility and install the CH343 driver if needed. Connect the sensor by USB-C, open its port and select custom hand recognition.
- Teach one distinct sign. Hold it steadily with the whole hand visible, click Learn and wait for completion. Note the assigned ID and name. Try the sign again, then try an unlearned sign and remove your hand to check the different results.
- Connect the host with power off. Select I2C on the hardware switch and power-cycle after any interface change. For the documented DFR0654 wiring, connect sensor VCC to 5 V, GND to GND, C to GPIO22/SCL and D to GPIO21/SDA. The signals remain 3.3 V logic. Other hosts need their own pinout and pull-up or level-shifting checks.
- Run the official LED example. Install DFRobot_HumanPose, select the correct board and port, and use the learned gesture ID=1 LED example. It selects
eHandand address0x3A, then lights the onboard LED for ID 1 when the sample's score condition is met. Confirm your chosen sign actually has that ID. - Check the behavior before expanding it. Repeat the sign, release it, try other signs and move through the background. The example keeps the LED off without a qualifying match. If you later want a toggle or scene change, add release detection and a cooldown in host code so holding a sign does not repeatedly trigger it.
If initialization fails, check power, common ground, switch position and the board-specific I2C pins first. If recognition is unreliable, return to the preview and improve framing or lighting before changing thresholds. Once the trigger behaves consistently, disconnect the configuration PC and power the wired build normally.
What could you build next?
For another label-based project, teach two clearly different signs to select a display scene and return to its menu. Add visible feedback so the user knows a command registered. Keep hand and body recognition as separate operating modes.
For coordinate-based control, consider a game paddle driven by a fingertip's horizontal position. Your host would map the coordinate to screen space, smooth jitter and decide what happens when the hand disappears. Check the library's memory profile first, since some low-memory builds return reduced, box-only results.
DFRobot community builder auroraAA shows the distinction in an SEN0670 goalkeeper game. A learned open palm enables control, while the computer program uses relationships between hand keypoints to choose a save direction. That is application logic interpreting coordinates, rather than the sensor learning a moving trajectory.
Choose a broader camera platform when your goal needs custom vision models, depth or detailed motion analysis. If you're choosing the controller for a smaller interaction project, our development-board guide can help you match its other jobs to the hardware.
Frequently asked questions
These are the useful checks to make before planning your build.
Does SEN0670 need internet access?
No. Recognition and learned references stay on the sensor. Your project's own network features, if any, are separate.
Can I configure it without Windows?
The documented graphical utility runs on Windows. DFRobot also documents an advanced AT-command learning workflow, so Windows is not a requirement for every possible configuration method.
Can it recognize a swipe by itself?
Its custom learning matches static signs and poses. A swipe detector would need host logic to interpret positions over time.
Can any Arduino read all the keypoints?
Check the exact board and library configuration. Host compatibility does not guarantee full coordinate output on a low-memory build.
Start with one sign, one LED and a deliberate release. Once that works in your actual setup, you'll have a useful foundation for the more playful part: deciding what your project should do when you raise a hand.

Residing on the south coast of England, Rich has spent the last few years building Electomaker.io from the ground up. He is usually found behind a laptop coordinating the rest of the EM team and occasionally finding time to contribute articles to the blog. When not tapping away at a laptop, he can be found either paddleboarding, at the beach, playing golf (badly), or camping with his family.







Leave your feedback...