


DFRobot WIAnode: Wireless Sensors for TouchDesigner
A visitor walks toward your projection, and a circle on the wall starts to shrink. The idea is simple. Getting a distance sensor, wireless connection and visual software talking to each other can be the part that eats your afternoon.
The DFRobot WIAnode, SKU DFR1234, handles much of that communication work. This Wireless Interactive Art Node connects supported sensors to creative software over Wi-Fi, with a documented component for TouchDesigner. The sensor measures the physical world, WIAnode passes the data across your local network, and TouchDesigner on your computer creates the response.
You can skip writing microcontroller firmware for the supplied workflow. You still get to design what happens when someone presses, waves or wanders into view. That's the fun part.
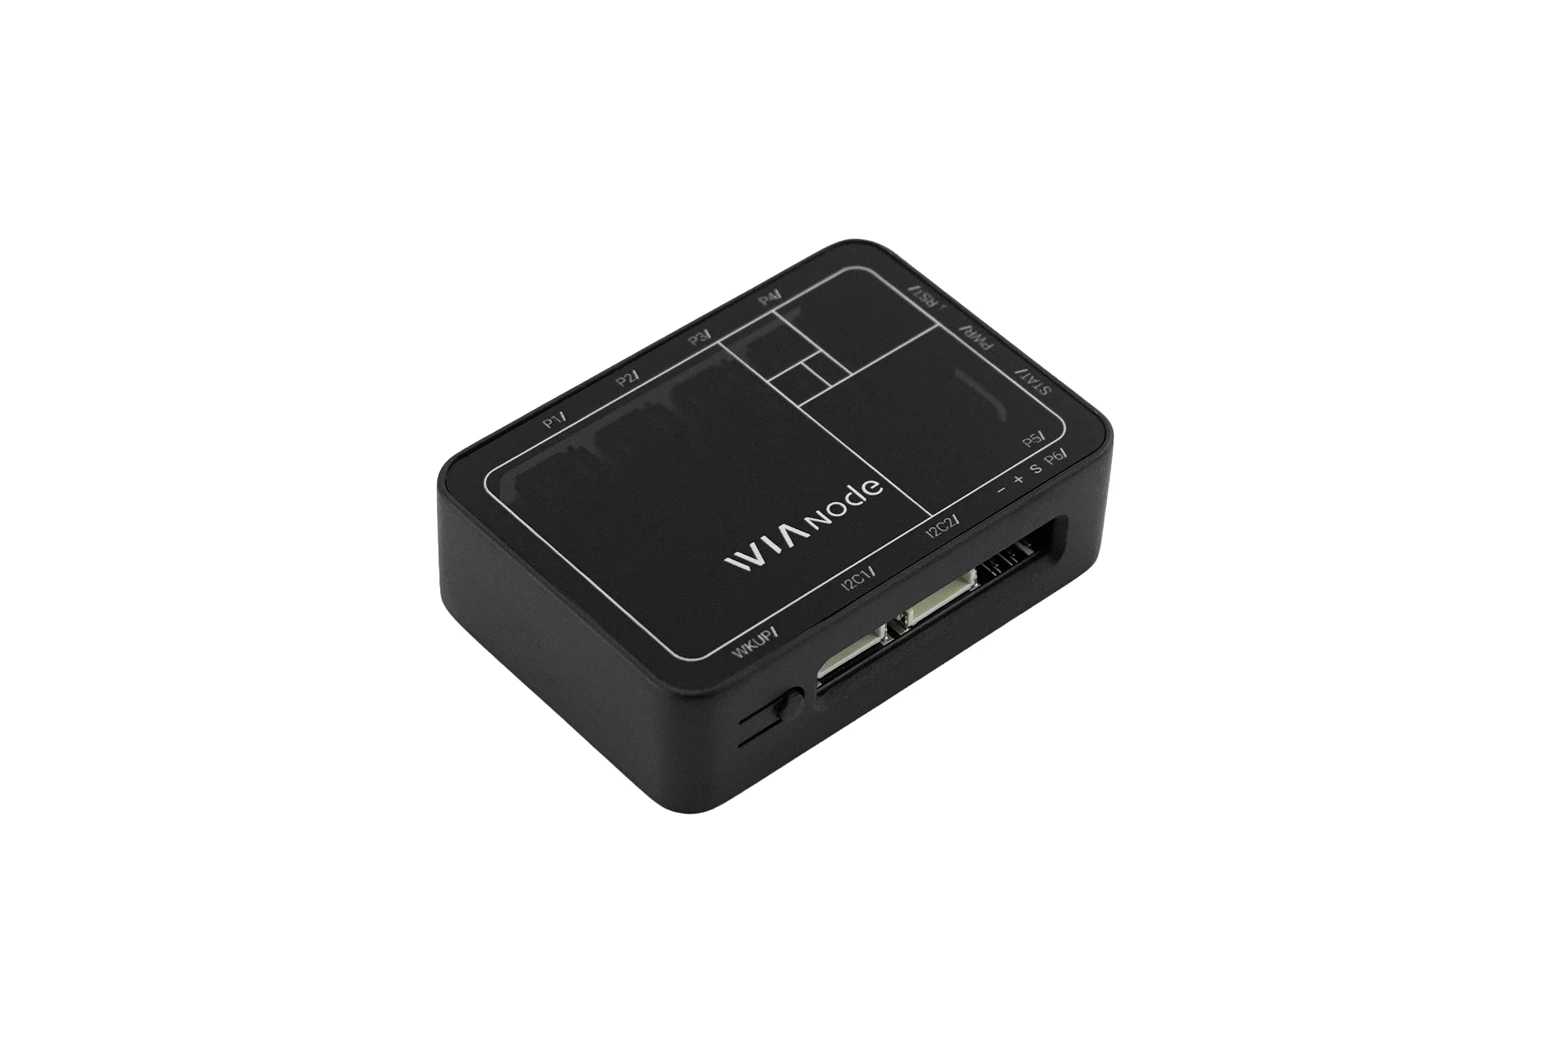
What is DFRobot WIAnode?
WIAnode is a wireless sensor interface for interactive art, creative prototypes and teaching. Attach a supported input, configure the node and connect your software. A button can select an image, a light sensor can change a scene, or a distance reading can control an animation.
Underneath, it uses MQTT, a messaging protocol that lets applications publish and subscribe to named streams called topics. WIAnode includes the server, also known as the broker, so the documented direct connection does not need a separate MQTT server. Your creative application acts as a client.
Values travel as JSON, structured text that gives each value a name. That helps software distinguish a button state from a temperature reading. DFRobot's WIAnode documentation describes the hardware and supported devices.
This is physical computing: giving software a connection to physical inputs and outputs. WIAnode supplies that connection. Your host computer still handles the graphics, sound and interaction logic.
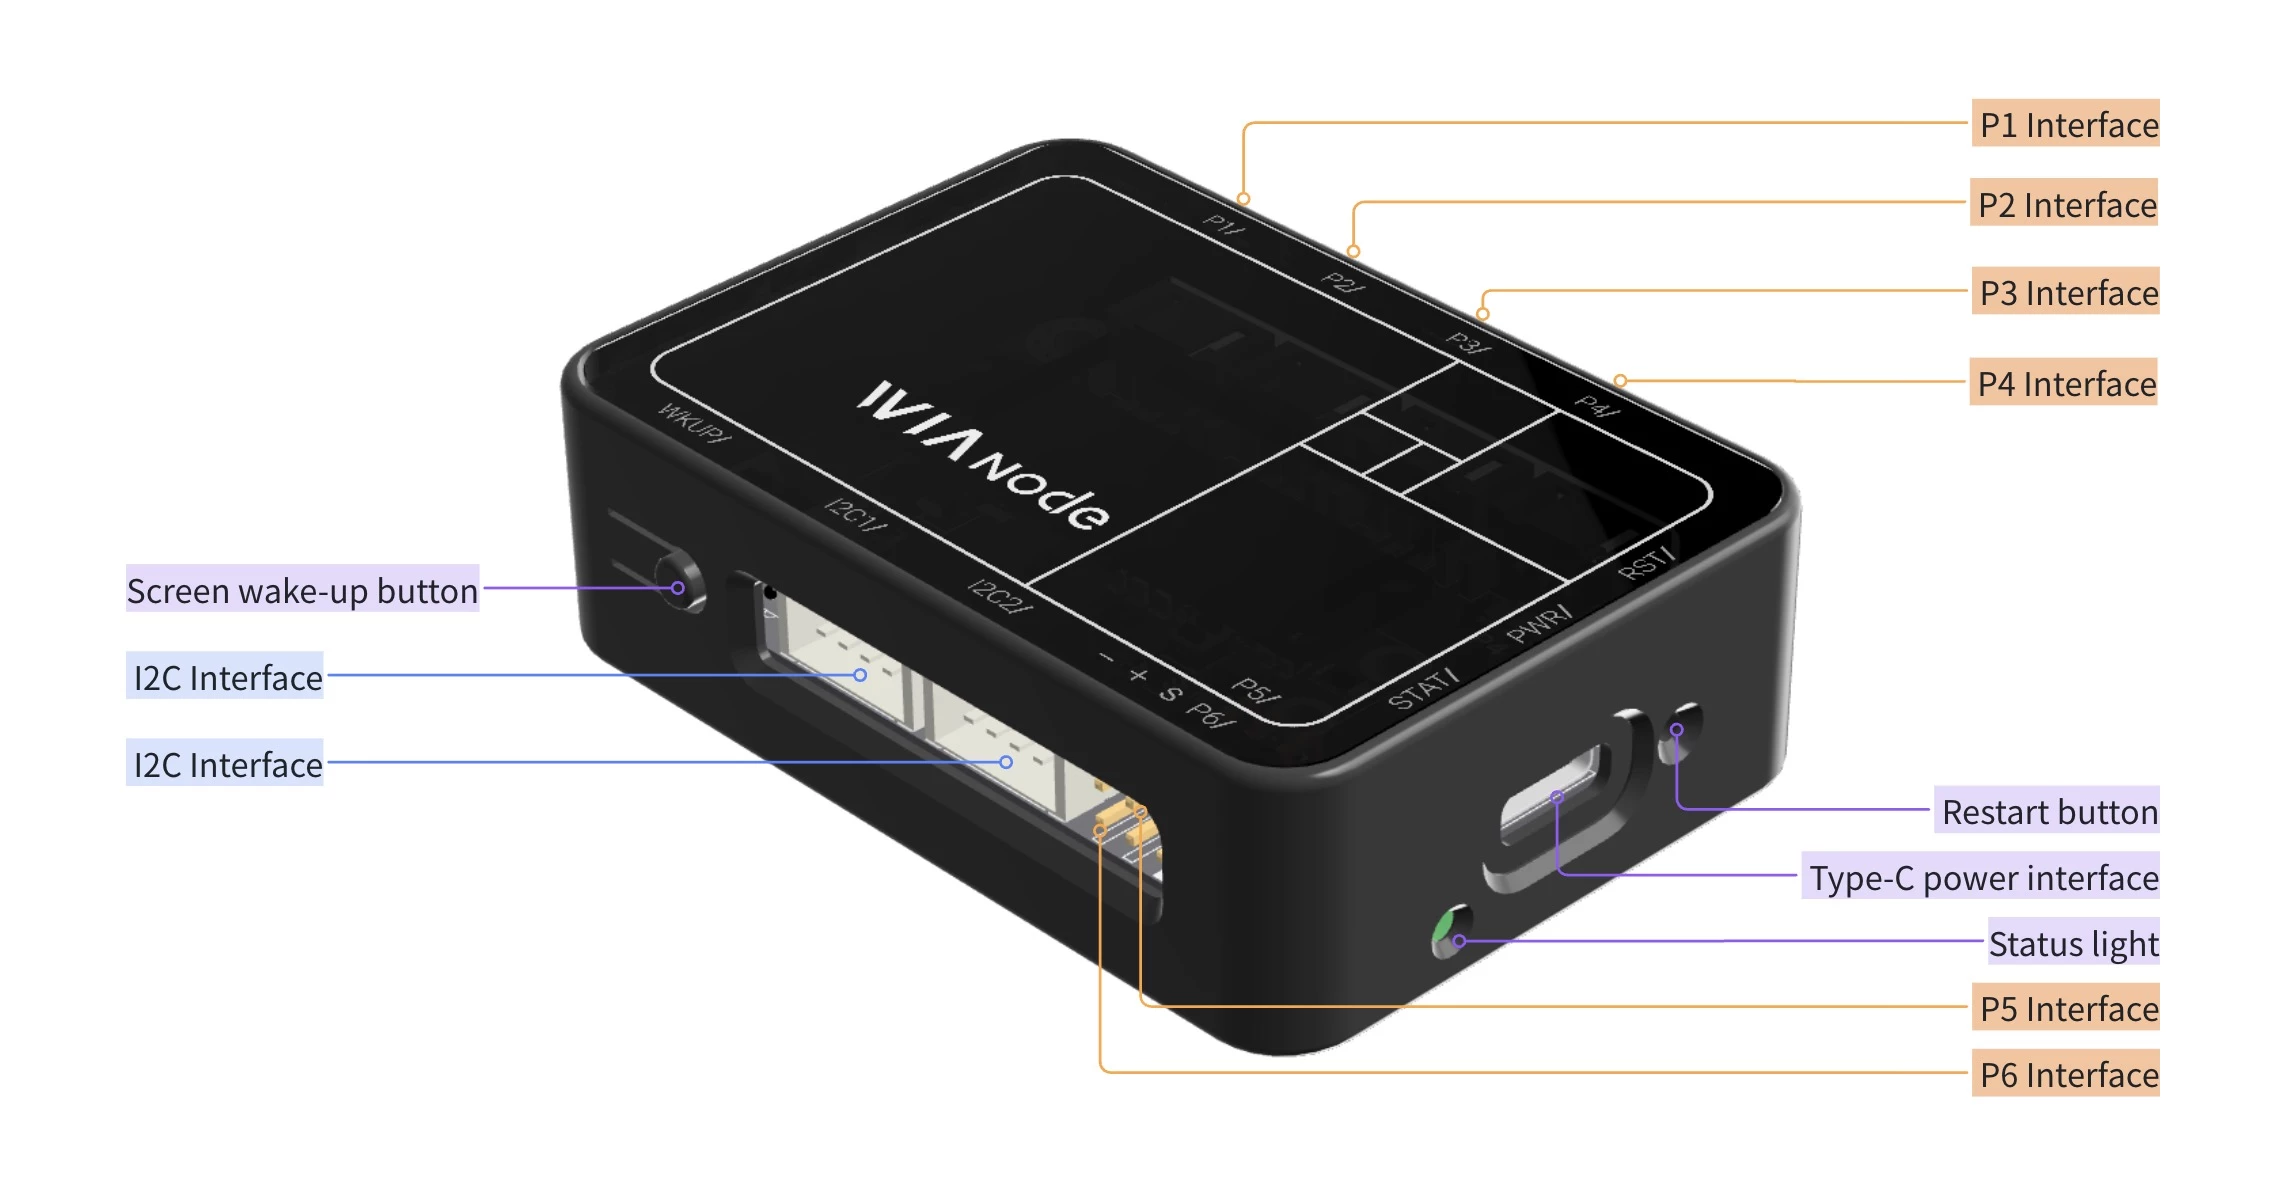
WIAnode hardware at a glance
The useful distinction is between the four configurable I/O ports and the two dedicated servo connections. Keep those roles separate when planning your wiring.
| Connection or feature | What you get |
|---|---|
| I2C connections | Two four-pin PH2.0 connectors for supported I2C sensors |
| General I/O | P1-P4: four three-pin PH2.0 connectors with configurable modes |
| Servo connections | P5-P6: two dedicated 5 V, three-pin 2.54 mm headers |
| USB Type-C | 5 V power and USB-drive configuration |
| Display and controls | 0.91-inch OLED, status LED, WKUP button and RESET button |
| Wireless network | Local Wi-Fi using a 2.4 GHz service |
| Dimensions | 66.5 × 46.5 × 19.5 mm |
Bringing sensors into TouchDesigner
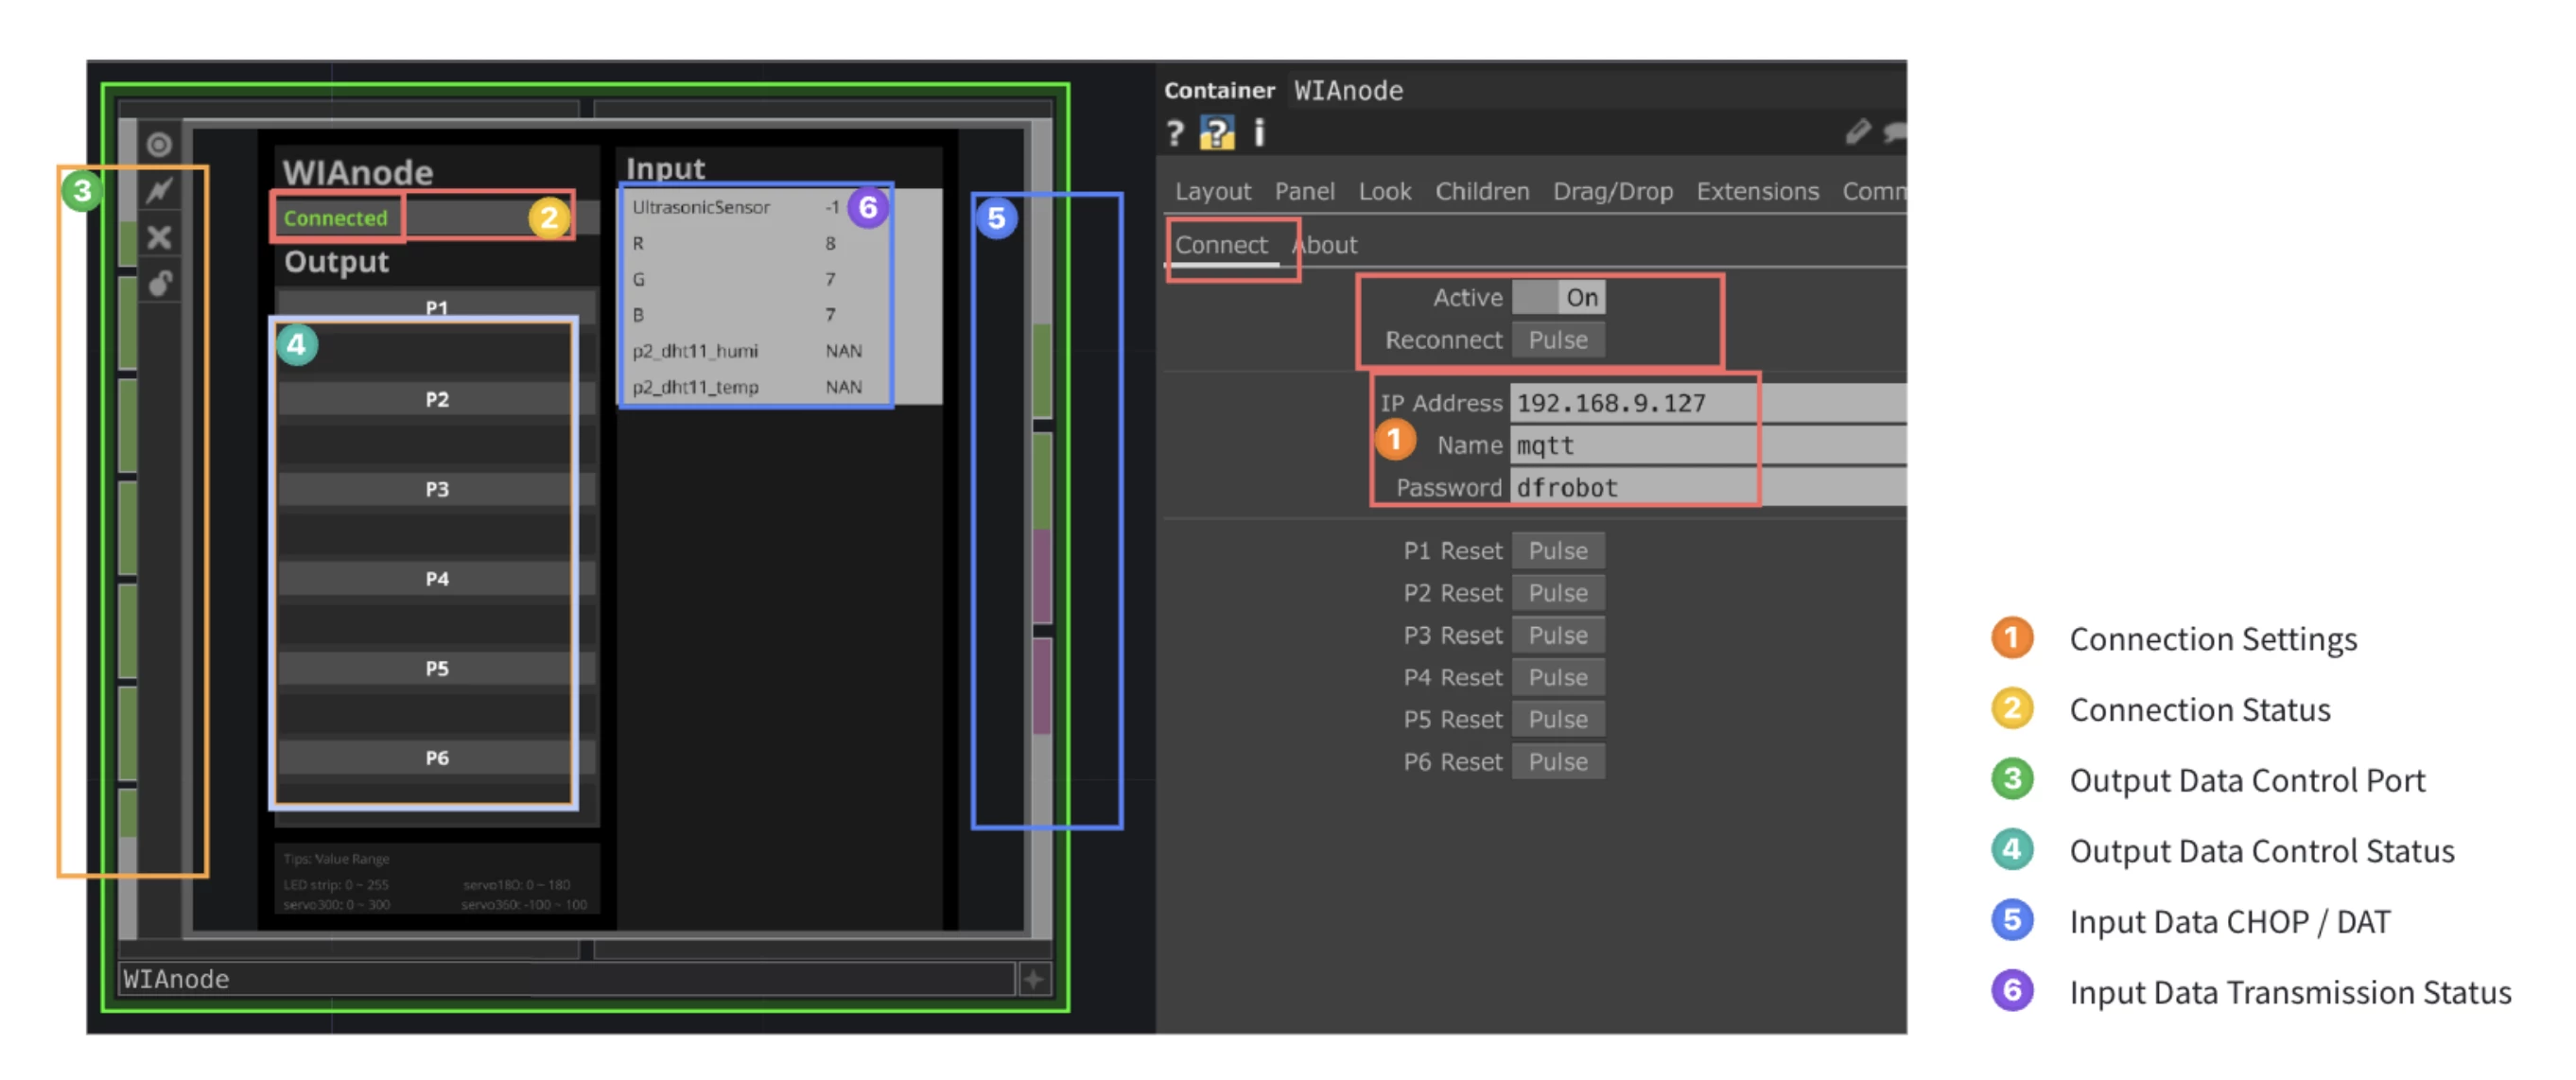
TouchDesigner is the clearest starting point because DFRobot provides a dedicated WIAnode component and example projects. Its TouchDesigner component guide covers connection settings, incoming data and output controls.
Once connected, use a Select node to choose the incoming channel you need. Then map it to a visual parameter. For example, scale a measured distance into a useful circle size, or use a button state to select between two images. Start with one obvious response so you can see whether your mapping makes sense.
Think about how that response should feel. Should moving closer make the image larger or smaller? Should a change happen immediately or ease into place? Those choices belong in your TouchDesigner patch. Keeping the first mapping simple makes it easier to tune the experience before adding layers of visual effects.
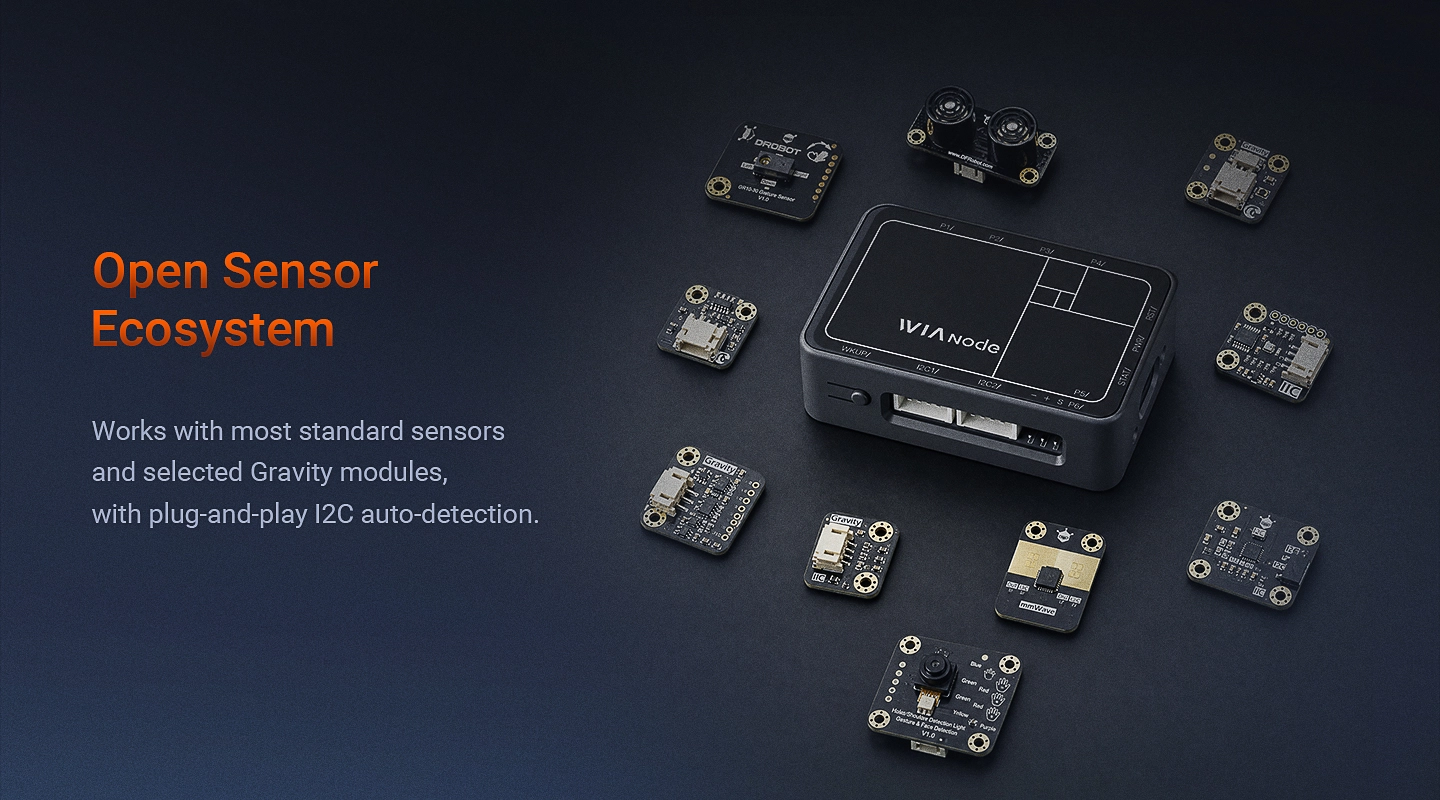
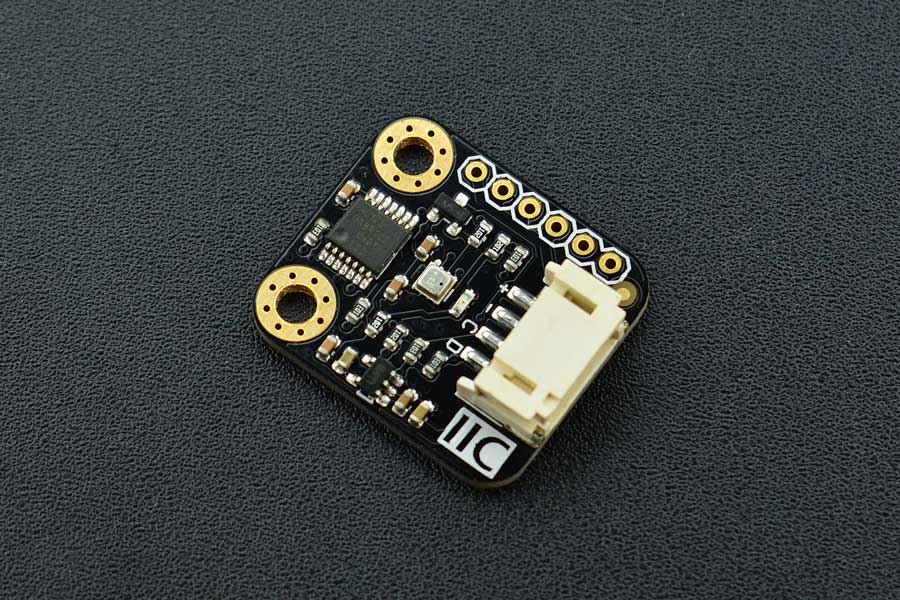
I2C is a digital interface used by many small sensor modules. WIAnode can automatically recognize supported I2C devices, but the connector alone does not establish compatibility. Check the exact sensor SKU against the current firmware's support list, along with its voltage and wiring.

What could you build?
DFRobot's examples give you starting points for the interaction. The artwork, behavior and presentation can then go in your own direction.
A projection that responds to its audience
DFRobot's ultrasonic sensor example connects a supported distance sensor to an I2C port and uses distance to change a circle's diameter in TouchDesigner. Adapting that idea to a projection could make a shape expand or contract as someone approaches.
Choose the physical sensing area before building an elaborate visual patch. You want a useful relationship between visitor position and the reading. A single distance measurement does not identify visitors or provide full room tracking.
A button or pool of light that changes a scene
For a first workshop, a button gives an easy-to-understand cause and effect. DFRobot's button example uses P2 in input mode and routes its 0-or-1 value to a Switch node. A press could choose the next visual.
Prefer something more gradual? Its I2C light-sensor example maps changing brightness into a virtual scene. You could adapt that into an artwork controlled by shading the sensor with your hand. Adjust the useful range in the actual room, then add smoothing if small fluctuations make the visual jittery.
A small moving element beside the screen
The connection works in both directions. DFRobot's 300-degree servo example uses P5 configured as servo300, with matching control data sent to P5. That provides a starting point for a little pointer or moving panel driven by your TouchDesigner patch.
Keep the first mechanism light, and check the servo's power requirements before connecting it. A positional angle command and a continuous-rotation servo's speed command mean different things. Choose the mode for the actual actuator.
Getting started with WIAnode
Gather the node, a supported sensor and cable, a USB-C data cable, suitable power, and a computer running TouchDesigner. You also need a local network with 2.4 GHz Wi-Fi. Follow the official quick start alongside the component guide.
- Open the configuration drive. Connect WIAnode by USB and open
config.txton the drive that appears. - Set the network and port. Fill in
WiFi_NameandWiFi_Password, preserving the file's syntax. For the button example, configure P2 asinput. - Save and power-cycle. Yellow means Wi-Fi configuration is needed, red means a network connection is pending, and green means connected.
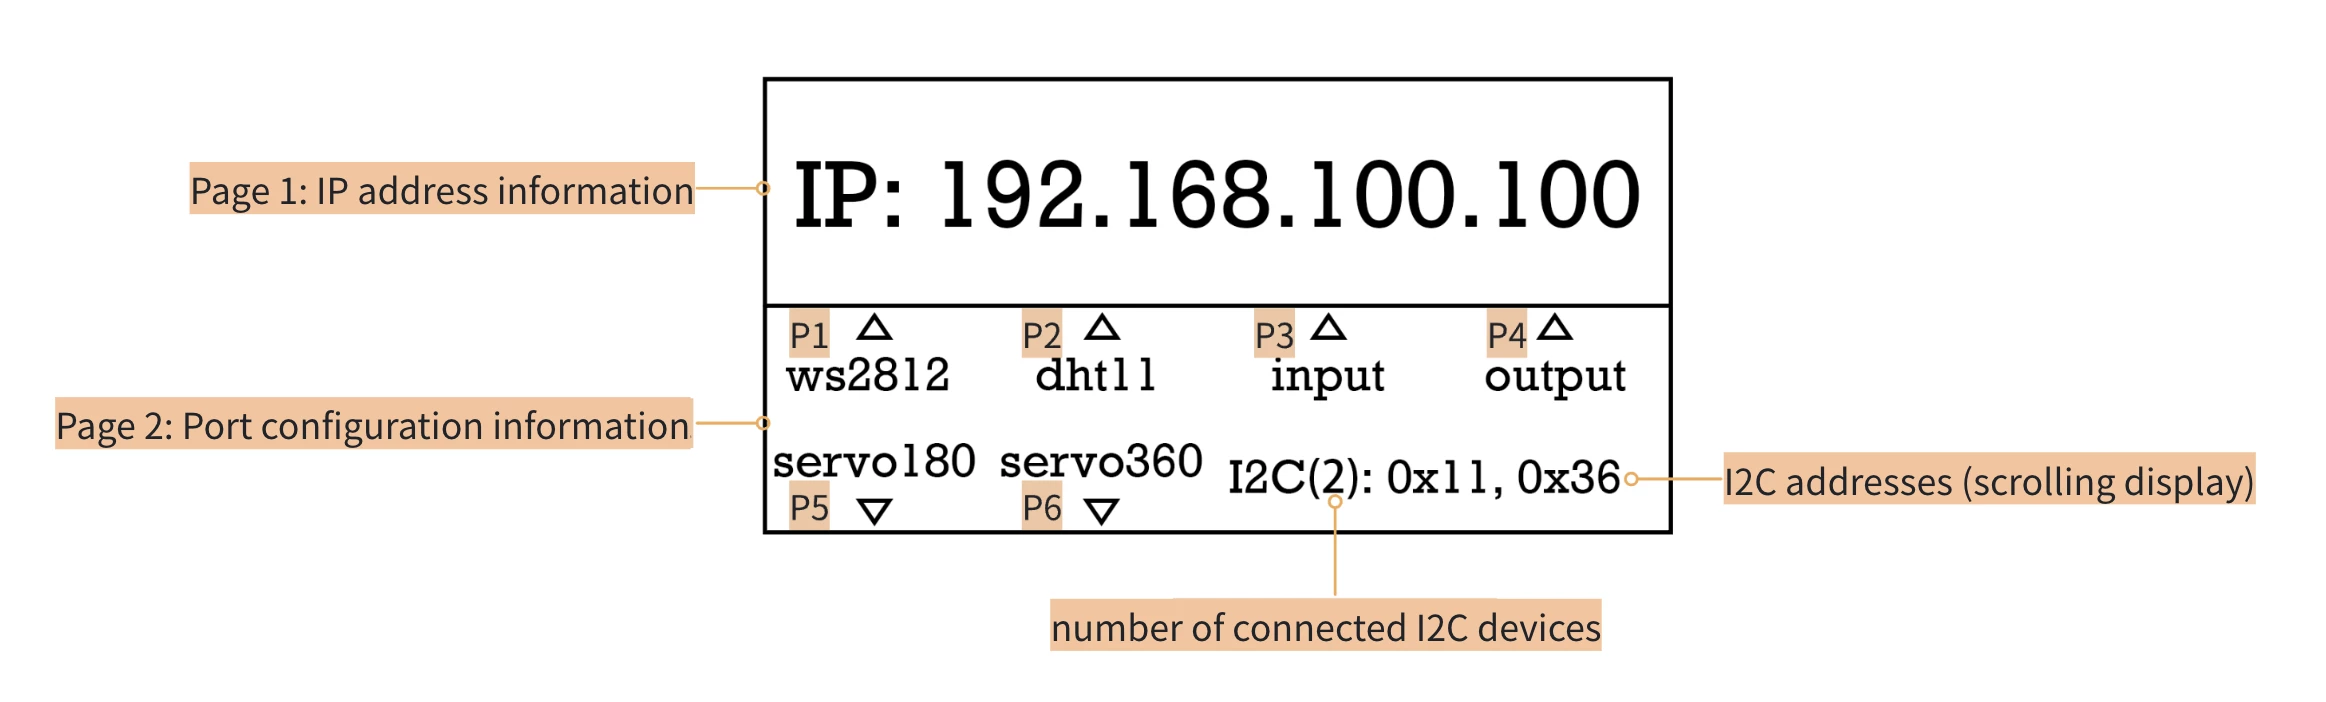
- Read the address. Press WKUP to show the IP address. Press again while the screen is awake to see port configuration.
- Connect TouchDesigner. Obtain DFRobot's official component or matching example, enter the displayed IP, follow its connection-field instructions and enable Active.
- Map one input. Select the button channel and route it to a visible change. Confirm that works before adding more sensors or outputs.
The screen sleeping does not mean the node has stopped. WKUP lets you check the address again without starting your setup over.
Unity, Unreal Engine, Max and other MQTT workflows
DFRobot also positions WIAnode for Unity, Unreal Engine, Max/MSP and vvvv. The common route is MQTT and JSON. Treat those as integration possibilities that need appropriate client software, data parsing and application logic.
TouchDesigner has the documented DFRobot component. That does not establish an equivalent ready-made plugin for every other application. If you want to build your own TouchDesigner connection, Derivative's MQTT Client DAT documentation explains its native publish-and-subscribe operator.
In WIAnode's documented message flow, your application subscribes to topic_input for sensor readings and publishes control messages to topic_output. Use the field names and value types from the relevant example. A transport connection is only the beginning, your software still needs to turn the message into something useful.
Practical details before an installation
Plan the network. The computer must be able to reach the node. A guest network with client isolation can prevent that even when both devices show the same Wi-Fi name. For multiple nodes, keep a record of each address and its role. Use distinct MQTT client identifiers where required.
Keep wiring and configuration aligned. The physical port, configured mode and software output must refer to the same connection. Also check I2C addresses when combining modules. Two connectors do not establish two independent buses or solve duplicate-address conflicts.
Budget power for the whole build. Wireless describes the data link. Sensors still connect by cable, and WIAnode needs power. The wiki's 500 mA maximum supply-current entry is not a per-port allowance for arbitrary servos or LED strips.
Judge the actual response. The sending interval is configurable from 0.02 to 10 seconds. That setting does not measure end-to-end latency. Sensor behavior, network conditions and your patch all affect what the visitor experiences.
Who is WIAnode for?
DFRobot WIAnode makes sense when your priority is exploring an interaction with supported hardware, especially in TouchDesigner. It gives creative technologists and educators a documented path from a physical input to software without first writing the microcontroller communication layer.
A custom Arduino or ESP32 build remains worth considering when you need an unusual sensor, your own protocol, tighter timing control or a different power architecture. Our development-board guide provides wider hardware-selection context.
For a class, that choice also depends on what you want to teach. WIAnode suits a session about input, response and interaction design. A programmable development board gives students more of the sensor-driver and communication work to explore. Either can be useful when it matches the lesson.
For creative inspiration using different hardware, see our look at thermal imaging in music creation. The useful starting question is the same: what should someone do, and how should the artwork respond? With WIAnode, begin with one sensor and one clear response, then build outward.
Frequently asked questions
These are the main setup and compatibility points to check before planning a project.
Does WIAnode require microcontroller coding?
The supplied workflow uses text-file configuration and DFRobot's TouchDesigner component. You do not need to write microcontroller firmware for it. Sensor selection, networking and creative-software mapping still need your attention.
Does WIAnode support TouchDesigner?
Yes. DFRobot documents a dedicated component and example projects covering sensor inputs and physical outputs.
Can I connect any I2C sensor?
Check the current supported-device list. A matching connector does not guarantee a compatible driver, voltage or I2C address arrangement.
Does WIAnode need Internet access?
The documented direct workflow uses local Wi-Fi and WIAnode's built-in MQTT server. It does not require a cloud broker. You need access to the documentation and downloads to prepare the project.
Are sensors included with DFR1234?
The shipping list specifies one WIAnode and one silicone cable pack. Sensors and actuators are separate. The WIAnode Sensor Kit, KIT0234, is another product, and that kit does not include the WIAnode controller.

Residing on the south coast of England, Rich has spent the last few years building Electomaker.io from the ground up. He is usually found behind a laptop coordinating the rest of the EM team and occasionally finding time to contribute articles to the blog. When not tapping away at a laptop, he can be found either paddleboarding, at the beach, playing golf (badly), or camping with his family.











Leave your feedback...