
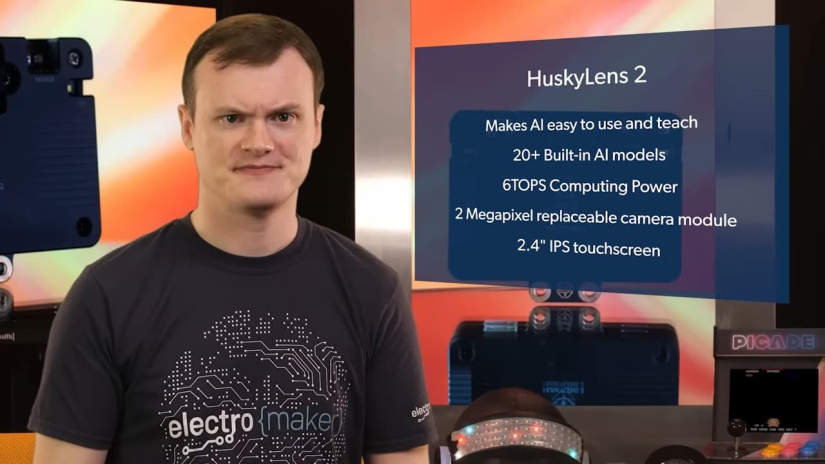
HuskyLens 2: The No-Code AI Vision Sensor for Makers and Classrooms
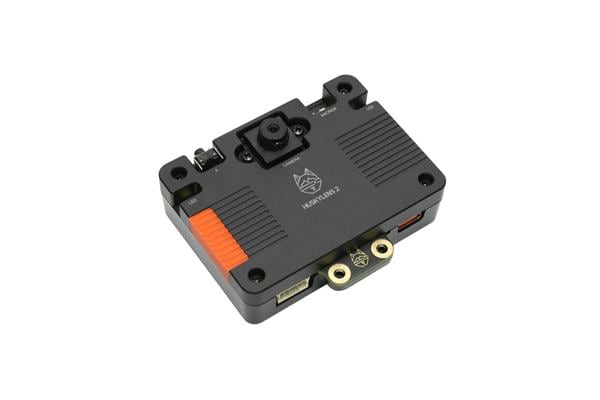
This week’s featured product is the HuskyLens 2 AI Camera, a compact no-code AI vision module from DFRobot that makes machine learning accessible to everyone. With the HuskyLens 2, users can explore real-time object and face recognition without writing a single line of code, bringing powerful AI capabilities into classrooms, workshops, and maker spaces alike.
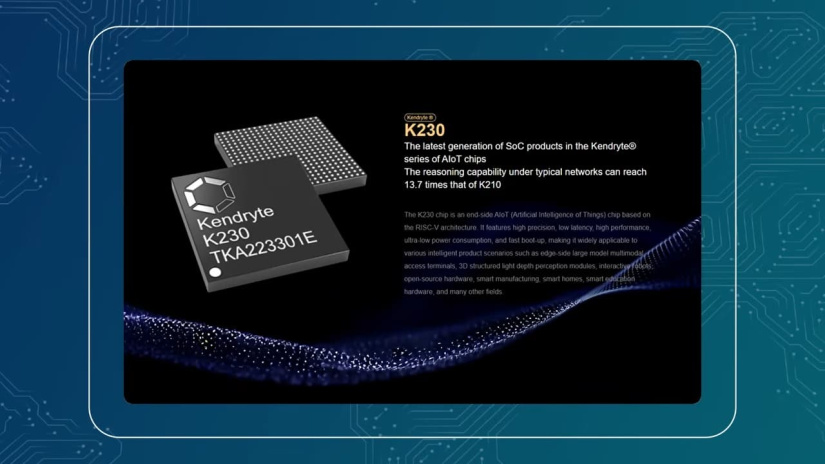
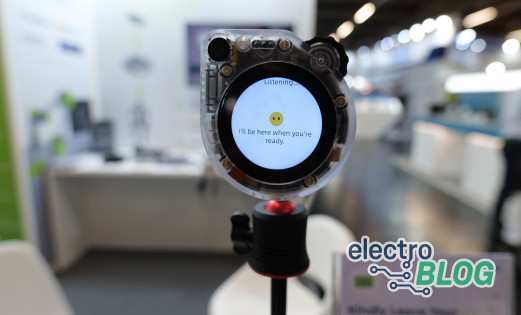
Powered by the advanced Kendryte K230 processor, the HuskyLens 2 delivers up to 6 TOPS of performance, handling complex AI tasks such as tracking, detection, and image classification entirely on-device. Its built-in touchscreen and intuitive one-touch training make it the perfect entry point into computer vision, whether for STEM education, robotics, or creative prototyping.

What the HuskyLens 2 Does
The HuskyLens 2 brings practical, visual AI to classrooms and maker projects through an incredibly simple interface. Designed with accessibility in mind, it allows anyone—from students to hobbyists—to explore artificial intelligence without needing programming experience or external computing resources.
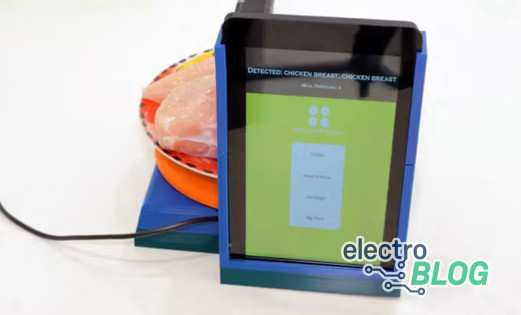
At the heart of its appeal is the intuitive one-button training system. Users can simply point the camera at an object, press a button, and the HuskyLens 2 instantly learns to recognise it. This approach removes the complexity of coding and datasets, replacing it with a hands-on learning experience that feels interactive and rewarding.
The module includes several built-in recognition modes such as face detection, object tracking, line following, colour recognition, and tag (AprilTag) detection. Each mode can be trained directly on the device and used immediately in real-world projects.
Because all AI model training and inferencing happens locally on the HuskyLens 2, there’s no need for internet access or external servers. This makes it an ideal platform for STEM education, AI experimentation, and rapid prototyping, giving learners a clear and engaging way to understand how machine vision works in practice.
Hardware Overview and Performance

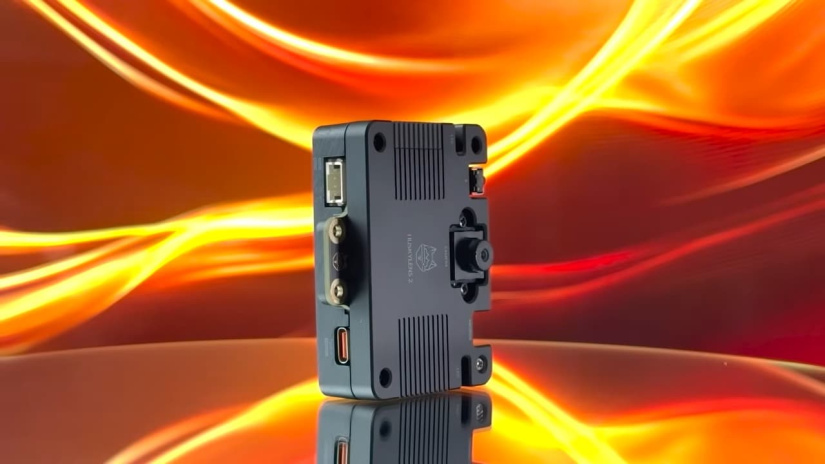
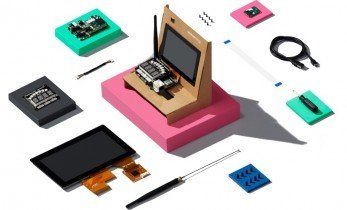
The HuskyLens 2 combines a capable RISC-V processor, a responsive touchscreen, and a quality camera sensor to deliver fast, on-device AI without external computing. Here are the key hardware highlights and performance notes at a glance.
- Processor: Kendryte K230 dual-core RISC-V SoC providing up to 6 TOPS of AI performance.
- AI Engines: Built-in CNN accelerator (KPU) and audio processor (APU) for real-time inference.
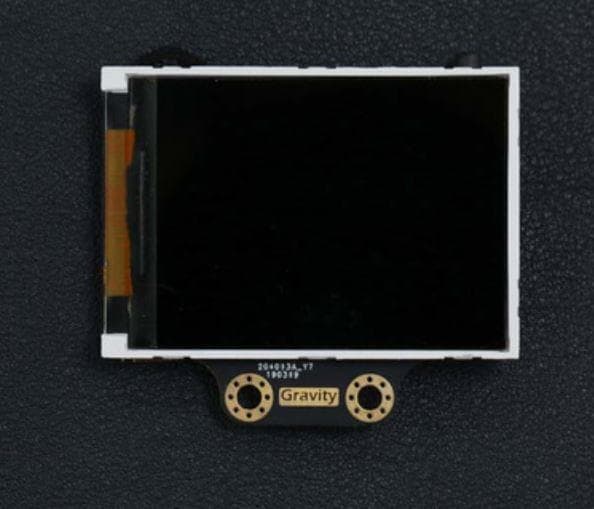
- Display: 2.4-inch IPS touchscreen with 640 × 480 resolution for direct control and live feedback.
- Camera Sensor: GC2093 2 MP CMOS for clear visual data capture.
- Memory and Storage: 1 GB LPDDR4 RAM and 8 GB eMMC onboard storage.
- Connectivity: USB-C, UART, and I2C (Gravity-compatible) for easy integration with popular microcontroller and SBC platforms.
- Power: Operates on 3.3–5 V, typically consuming around 1.5–3 W.
- Dimensions: Approximately 70 × 58 × 19 mm for compact installation.
- Edge Performance: Low power draw with all AI processing performed locally, reducing latency and removing reliance on an external computer or cloud.
Communication and Compatibility
The HuskyLens 2 is designed to integrate easily with a wide range of development boards and microcontrollers, making it a flexible choice for students, hobbyists, and engineers alike. Whether you’re using an Arduino, Raspberry Pi, or micro:bit, this AI vision module connects effortlessly and begins processing data almost instantly.
Communication is straightforward thanks to its multiple interface options, including I2C, UART, and USB-C. The built-in Gravity-compatible connector system simplifies wiring and setup, helping beginners avoid common mistakes while ensuring reliable performance in more advanced builds.
Once connected, the HuskyLens 2 can function as a powerful smart vision sensor in robotics, IoT, or automation projects. It can handle everything from tracking and object detection to triggering events based on recognised images or colours — all handled locally on the device.
For projects that demand wireless control or real-time visual feedback, an optional Wi-Fi module adds live data streaming and remote debugging support, expanding its usefulness across both educational and embedded development environments.
Learning and Classroom Applications
The HuskyLens 2 is purpose-built for education, bringing the concepts of artificial intelligence and computer vision to life in classrooms from grades 6 to 10. Its accessible, no-code interface allows students to learn by doing, removing the complexity of programming and focusing instead on interactive, visual experimentation.
Through its built-in recognition modes, students can easily explore the fundamentals of object detection, face recognition, line tracking, and colour identification. Each function provides immediate, visual feedback on the built-in touchscreen display, helping learners understand how AI interprets images and patterns in real time.
The simplicity of one-button training makes it ideal for project-based learning. Students can create their own smart systems—like door access controllers, tracking robots, or interactive displays—while gaining an intuitive understanding of machine vision and edge AI principles.
For educators, the HuskyLens 2 fits naturally into robotics, science, and computing lessons. Teachers can integrate it into cross-curricular projects, where coding, electronics, and AI concepts intersect. This hands-on approach turns abstract theories into tangible results, engaging students and sparking creativity in STEM classrooms.
Practical Project Ideas
The versatility of the HuskyLens 2 makes it an excellent foundation for both educational and real-world AI projects. Whether used as a teaching tool or integrated into a working prototype, its no-code operation and reliable recognition modes open countless possibilities for experimentation.
Here are a few project ideas that demonstrate how the HuskyLens 2 can be put to work:
- Autonomous Robots: Build a line-following or object-avoiding robot by combining the HuskyLens 2 with a microcontroller such as an Arduino or Raspberry Pi. The camera can track lines, follow paths, or detect obstacles for responsive movement.
- Facial Recognition Access Systems: Create simple security or attendance systems that use face recognition to grant or deny access, ideal for STEM demonstrations or entry-level automation projects.
- Smart Production and Sorting: Use object detection and colour recognition to identify and sort items on a miniature conveyor or assembly line, teaching students about industrial automation and AI vision at scale.
- IoT Vision Sensors: Integrate the HuskyLens 2 into IoT environments to trigger events—such as lights, alarms, or notifications—based on visual input like motion or colour changes.
- Vision-Guided Robotics: Pair the camera with a robotic arm to recognise and pick up specific items, demonstrating the fundamentals of AI-assisted manipulation and control.
- Classroom AI Exhibits: Incorporate the HuskyLens 2 into interactive displays or science fair projects that demonstrate how computers can see, identify, and respond to the physical world.
Each of these applications highlights the HuskyLens 2’s ability to make AI tangible and approachable. It empowers learners to connect theoretical concepts with real engineering challenges, encouraging innovation while keeping the process fun and accessible.
Why Makers and Educators Should Care
The HuskyLens 2 stands out from other AI vision modules by combining performance, simplicity, and accessibility in a single compact device. It eliminates the coding barrier entirely, allowing beginners to explore machine vision concepts from day one while still offering the flexibility that experienced makers and educators expect.
Because all AI processing happens directly on the device, the HuskyLens 2 delivers low latency and enhanced privacy. There’s no need for cloud processing or internet connectivity—every recognition task runs locally on its Kendryte K230 processor. This makes it particularly valuable in classroom or field environments where reliability and data security are essential.
Despite its strong performance, the HuskyLens 2 remains remarkably energy-efficient, consuming just a few watts of power. Its modular design also allows expansion through DFRobot’s ecosystem of sensors and interchangeable lenses, giving educators and makers room to experiment with different focal ranges and lighting conditions.
Affordable, durable, and easy to integrate, the HuskyLens 2 is well-suited for long-term educational use and repeated prototyping. It bridges the gap between complex AI development and practical, hands-on learning—making it a tool that both inspires creativity and builds real technical understanding.
Quick Specifications Recap
For those who want a clear overview of the HuskyLens 2’s core specifications, here’s a concise summary of its key technical details:
- Processor: Kendryte K230 dual-core RISC-V, delivering up to 6 TOPS of AI performance
- Camera: GC2093 2 MP CMOS image sensor
- Display: 2.4-inch IPS touchscreen, 640 × 480 resolution
- Memory: 1 GB LPDDR4 RAM with 8 GB onboard eMMC storage
- Interfaces: USB-C, UART, and I2C (Gravity-compatible)
- Operating Voltage: 3.3 – 5 V
- Power Consumption: Typically 1.5 – 3 W
- Compatibility: Works seamlessly with Arduino, Raspberry Pi, micro:bit, and ESP32 platforms
- Dimensions: Approximately 70 × 58 × 19 mm
These specifications highlight the HuskyLens 2’s balance of processing power, energy efficiency, and compact design, making it a perfect fit for embedded AI learning and rapid development projects.
Getting Started and Setup Notes
Setting up the HuskyLens 2 is quick and straightforward, allowing users to start experimenting with AI vision in just a few minutes. Follow these simple steps to get up and running:
- Connect: Power the HuskyLens 2 via its USB-C port, or connect it directly to a compatible controller board such as an Arduino, Raspberry Pi, or micro:bit using the Gravity I2C or UART interface.
- Install Libraries: If you’re integrating it with an Arduino or Raspberry Pi, install the appropriate DFRobot drivers and libraries available from the official documentation to enable smooth communication.
- Train the Device: Use the built-in touchscreen to enter training mode. Simply point the camera at the target object, press the learning button, and the HuskyLens 2 will begin recognising it automatically.
- Switch Modes: The device supports multiple recognition modes—such as face, object, line, colour, and tag detection—which can be changed directly from the touchscreen menu.
- Optimise Accuracy: For best results, ensure good ambient lighting and keep the camera mounted securely to prevent motion blur during training and recognition.
For full setup guides, sample code, and troubleshooting information, visit the official DFRobot HuskyLens 2 Wiki.
Final Thoughts
The HuskyLens 2 proves that learning and working with AI doesn’t have to be complex. By combining a no-code interface with powerful on-device processing, it transforms computer vision into an approachable, hands-on experience for both students and makers.
Whether it’s being used to teach AI fundamentals in the classroom or to prototype intelligent systems in the workshop, the HuskyLens 2 offers a practical, engaging way to explore machine learning. Its simplicity encourages experimentation, while its performance and expandability ensure it can grow alongside more advanced projects.
How would you use the HuskyLens 2 in your next build? Tell us in the comments, and don’t forget—you can order yours today directly from DFRobot’s official store.
FAQs
What is the HuskyLens 2 and what does it do?
The HuskyLens 2 is a no-code AI vision sensor from DFRobot. It supports real-time object and face recognition, line and colour tracking, and tag detection, all via a touchscreen interface and with no programming required.
Which microcontrollers and boards does it support?
It connects easily to Arduino, Raspberry Pi, micro:bit, ESP32 and other compatible boards via I2C, UART or USB-C. The “Gravity” connector system simplifies setup for beginners.
Do I need to write code to train the model?
No. The HuskyLens 2 includes a one-button training system on the touchscreen: you point at the object you want it to learn, press the button and it will recognise it. Custom model training is also supported, but not required for basic use.
What built-in recognition modes does it offer?
It supports face detection and recognition, object tracking and classification, line and colour tracking, tag recognition (e.g., AprilTags), pose and gesture recognition, and more—all included out of the box.
What are the key hardware specifications?
The sensor uses a Kendryte K230 dual-core RISC-V SoC with ~6 TOPS of performance, a 2 MP GC2093 camera, 2.4-inch IPS touchscreen (640×480), 1 GB LPDDR4 RAM, 8 GB eMMC storage, and operates on 3.3–5 V consuming 1.5–3 W.
Can I deploy my own AI models on it?
Yes—the HuskyLens 2 allows deployment of custom-trained models (for example YOLO-style models) via the device’s memory and tools, enabling advanced users to define specific object classes and behaviours.
Does on-device processing affect latency and privacy?
Yes—it processes all inference locally on device, meaning no need for cloud computing. This results in low latency and improved privacy for recognition projects in classrooms or embedded systems.
Is the camera compatible with wireless or streaming use?
An optional WiFi module is available for live video streaming and wireless control, enabling remote monitoring and IoT integration.
What environments or projects is this device suited for?
The HuskyLens 2 is ideal for STEM education (grades 6–10), maker labs, robotics, automation and IoT prototypes where visual AI and recognition are required without extensive programming.
Where can I buy the HuskyLens 2?
You can purchase the HuskyLens 2 directly from DFRobot’s official store.

Residing on the south coast of England, Rich has spent the last few years building Electomaker.io from the ground up. He is usually found behind a laptop coordinating the rest of the EM team and occasionally finding time to contribute articles to the blog. When not tapping away at a laptop, he can be found either paddleboarding, at the beach, playing golf (badly), or camping with his family.


Leave your feedback...