
Arduino-Powered Wizard Staff: LEDs, Fortunes, and More
For Halloween enthusiasts and makers, the Arduino-powered wizard staff is a creative and beginner-friendly project that merges fun with functionality. Designed as a prop for a wizard costume, this staff brings a touch of magic to life with fortune-telling abilities, dynamic LED lighting, and responsive motion effects. With readily available components and minimal setup requirements, it’s an ideal project for those new to Arduino or looking for a unique DIY challenge.
Watch Ian talk about this Fortune Telling Wizard Staff by Eamon Magd in this episode of The Electromaker Show
Features of the Arduino-Powered Wizard Staff
Fortune-Telling with LCD Display: At the heart of the staff’s charm is a small LCD screen that offers a whimsical fortune-telling feature. With responses inspired by the classic "magic eightball," users can receive random positive, negative, or neutral answers to their questions, adding an interactive element to the prop.
Interactive Visual Effects: The LED strip embedded in the staff provides vibrant, customizable colour effects. These dynamic lights not only enhance the staff's magical appearance but also allow for personalisation to suit any wizardly theme.
Sound and Movement Response: Equipped with a buzzer and a vibration sensor, the staff responds to movement by emitting sounds and activating its LED effects. This interactive functionality creates an immersive experience, giving the impression of a truly enchanted object.

Why This is a Great Beginner Project
Component Accessibility: The wizard staff is built using commonly available Arduino components such as vibration sensors, LED strips, and LCD screens. These parts are affordable, often included in beginner kits, and require minimal soldering, making the project highly accessible.
Learning Opportunities: This project introduces essential Arduino concepts, including sensor integration, LED control, and basic programming. By working through the build, makers can gain hands-on experience with wiring and coding, all while creating a functional and fun prop.
Customisation Potential: Makers have the freedom to personalise the staff by modifying the fortune messages, adjusting light patterns, or incorporating additional sensors. This flexibility allows for creative exploration and makes the project uniquely tailored to the builder’s vision.
Step-by-Step Build Overview
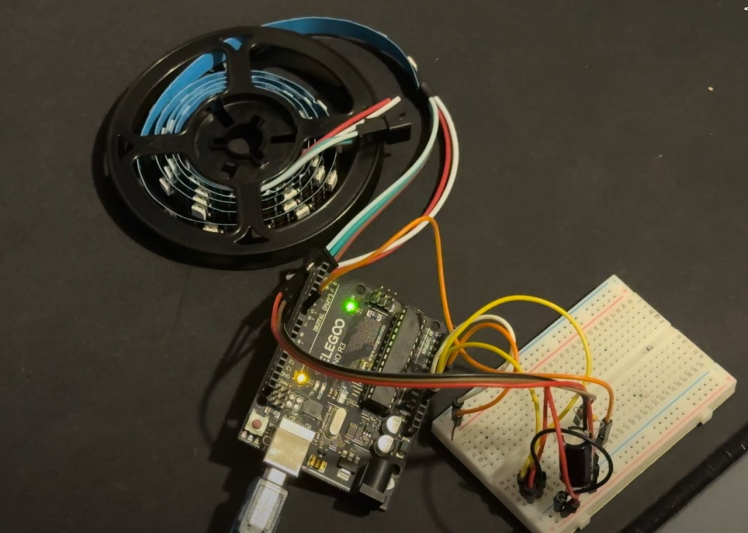
Assembling the Hardware: Begin by attaching the LED strip, LCD screen, and vibration sensor to the staff. Jumper wires can be used for easy connections, ensuring a clean and straightforward assembly process. The components can be mounted securely to maintain durability during use.
Programming the Arduino: Upload the pre-written Arduino code to the microcontroller. The code is designed to handle interactions between the sensors, the LCD display, and the LED strip. It’s an excellent way to learn how to programmatically control hardware components.
Final Integration and Testing: Once all components are in place, test the staff to ensure proper functionality. Move the staff to trigger the vibration sensor, check the fortune-telling responses on the LCD, and confirm the LED effects are working as intended. Troubleshoot any issues to fine-tune the build for optimal performance.
Make sure you subscribe to The Electromaker Show for similar content and subscribe to our monthly newsletter!


Leave your feedback...