
Terminator Hk Tank

Made by 314Reactor / Artificial intelligence / Drones / Robotics / Sensors
About the project
Trying to bring the HK Tank from Terminator to life!
Project info
Difficulty: Moderate
Platforms: Arduino, DFRobot, Raspberry Pi, TensorFlow, Pimoroni
Estimated time: 1 day
License: GNU General Public License, version 3 or later (GPL3+)
Items used in this project
Hardware components

View all
Story
In the Terminator films we are given glimpses of the future wars; with bipedal robotic skeletons, flying drones and ground tanks (known as HK’s – Hunter Killers) hunting down humans – Check out the Terminator Wiki.
DFRobot contacted me the other month and asked if I wanted to try out some of their stuff – I had a look through their products and found this awesome robot chassis: Gladiator. They sent it to me and while building it I realised the design was starting to resemble a HK tank mentioned above:

Spoiler: Mine won’t be as cool as this.
So I decided to chuck some extra hardware at it alongside some cool machine learning stuff and really make a cool representation of the HK in Arduino/Raspberry Pi form.
So thanks to DFRobot for most of the gear in this project! Check them out at DFRobot.com
Lets dive right in…
Parts:
- Gladiator Chassis from DFRobot
- Arduino Uno
- Gravity: IO Expansion & Motor Driver Shield
- Gravity: URM09 Analog Ultrasonic Sensor x5
- Gravity: Digital RGB LED Module
- 6xAA Battery Holder with DC2.1 Power Jack
- Raspberry Pi 4 – 4GB
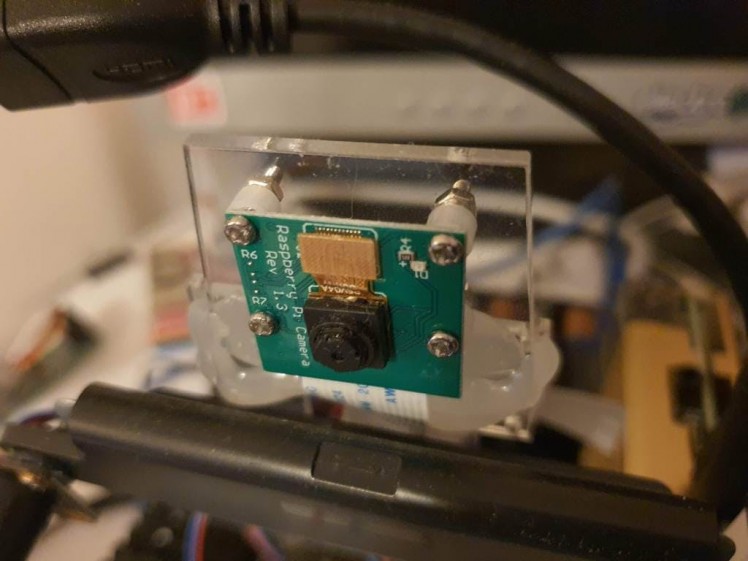
- Raspberry Pi Camera v2.1 – Standard
- Aluminium Heatsink Case for Raspberry Pi 4 – Heliodor Gold
- In-line power switch for 2.1mm barrel jack
- SanDisk Ultra 32 GB microSDHC Memory Card
- Wire Spool Red & Green
- Extended Pi Standoffs
- Pi Camera Mount
- AA Batteries
- 26800mAh Power Bank USB C Battery Pack
- Pibow 3 B+ Coupé
- USB-C Cable
- USB A to B cable
The base of the HK is built from the DFRobot Gladiator robot chassis – here is the construction video:
After this video I had to make some changes – I changed the quad motor driver to a dual-motor driver + IO expansion board from DFRobot: https://www.dfrobot.com/product-1667.html
This was because I wanted to power the motors from the main battery pack that was also powering the Arduino – the previous quad-motor board I believe required separate power for the motors and I didn’t want to have 3 power supplies (Arduino, motors and the Pi).

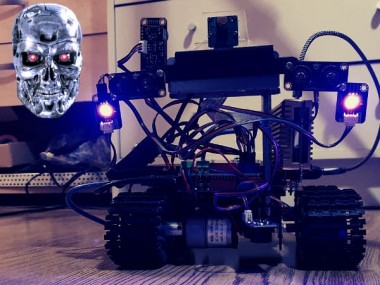
I also flipped the direction of the pylons so that the overall look matched that of the in-film HK’s more. With the majority of the chassis being behind the sensors rather than in front.
1 / 2

I mounted the Pi camera on top of the pylon I made, also added in 3 more ultrasonic sensors; facing back, underneath front and underneath back. To prevent the HK from reversing into something or driving off an edge. Also added was 2 RGB LED’s that would act as ‘plasma cannons’ – being able to launch either red or purple plasma.
After some motor tests I soldered the wires up to the motors.
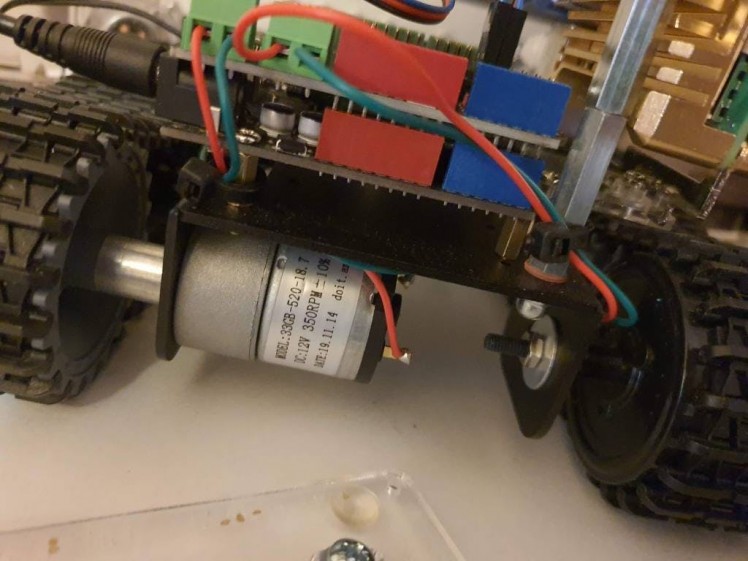
I moved the battery box slightly from the video also – to make room for the power supply that will be powering the Pi 4, this Pi iteration requires a lot of power so I got in a huge power bank that can supply 3 amps.
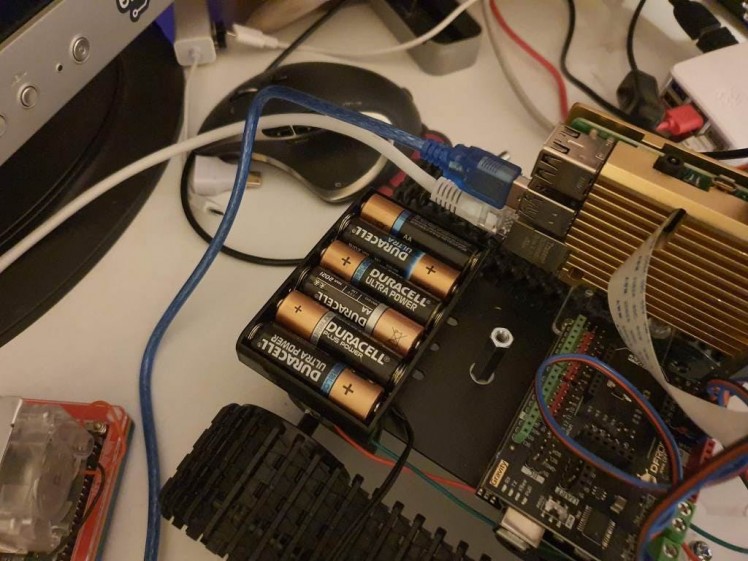
The overall idea here of having the Arduino and the Pi is that the Pi will be handling the AI/ML functions with the camera and video output for a user and the Arduino will be handling the movement of the motors and low-level object avoidance.
This 2-tier systems means the Pi is free of having to process the movement/avoidance routines – but the two will be connected via a USB A to B cable and then be able to communicate with each other via serial. The Pi will be able to send commands to the Arduino and get sensor data back from it.
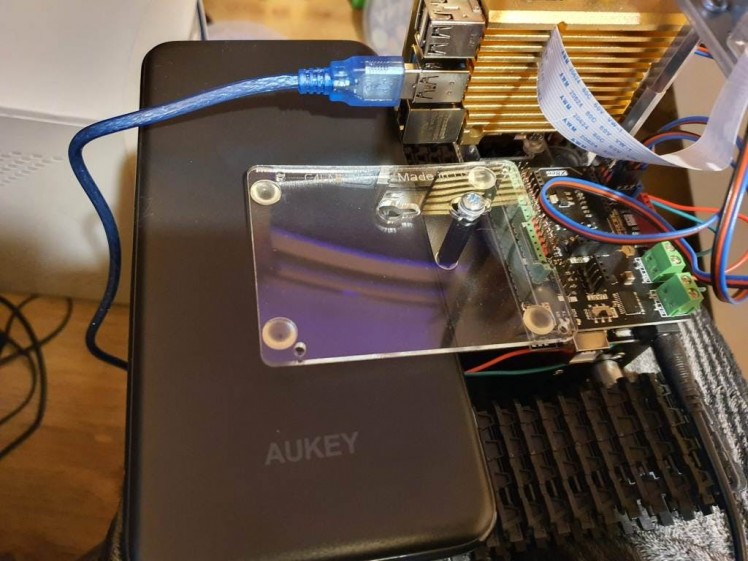
The Pi has got a nice aluminium gold heatsink on it for passive cooling- I wanted to keep the Pi cool as they 4 can get very hot when under a high workload but I didn’t want to have to resort to active cooling. The heatsink is a great silent solution that is very efficient.
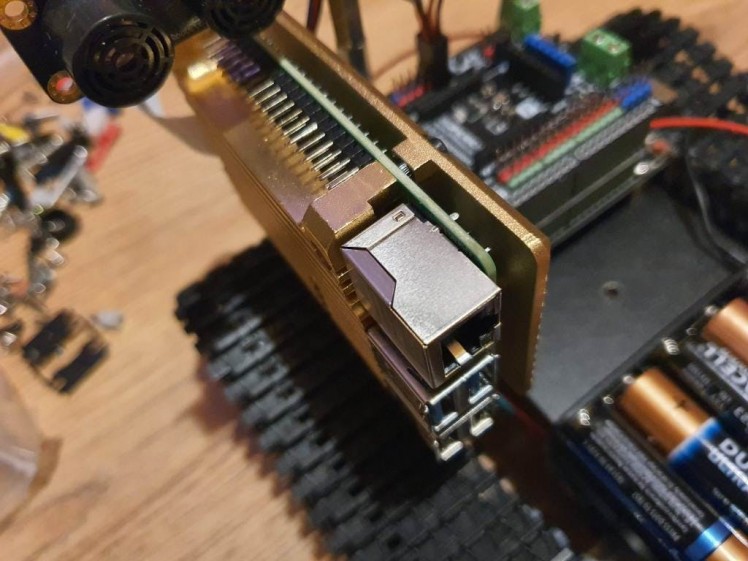
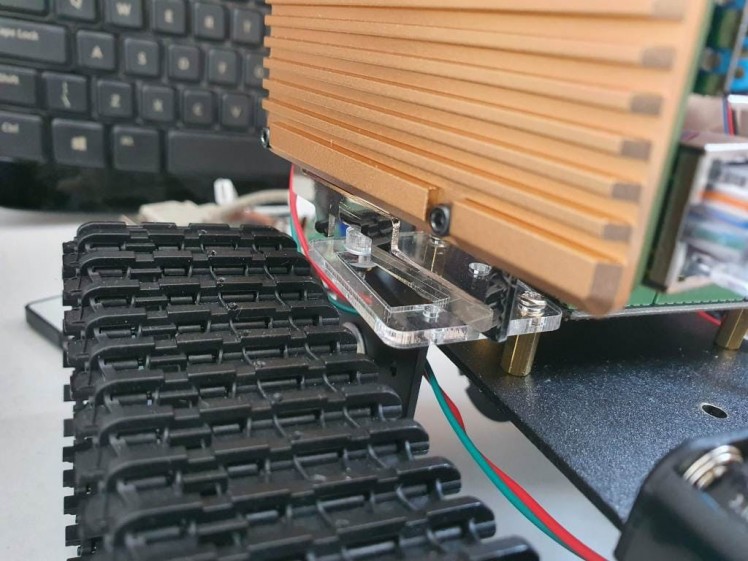
The Pi was then mounted on the side with some awesome mount that I had laying around – but I honestly cannot remember where I got it from. But it works perfectly for this scenario.
1 / 3 • Can someone tell me what this is?

Can someone tell me what this is?

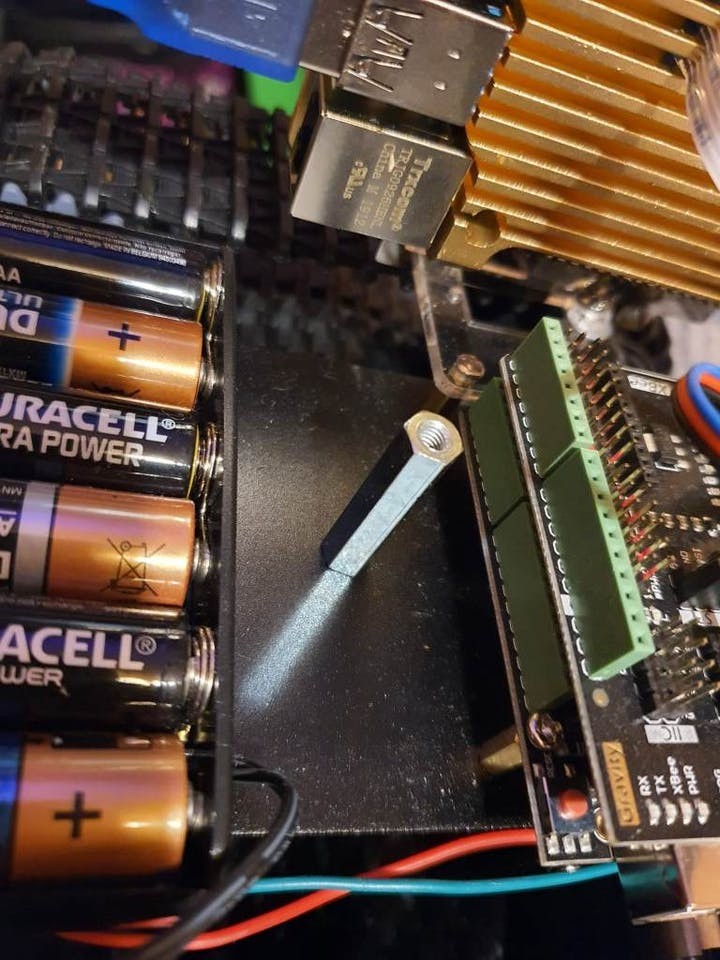
The USB-C battery bank is placed on the back with another standoff that has the bottom of a Pi case screwed down to hold down the bank on top of the AA batteries. This makes it removable so that the AA batteries can be replaced easily.
1 / 3
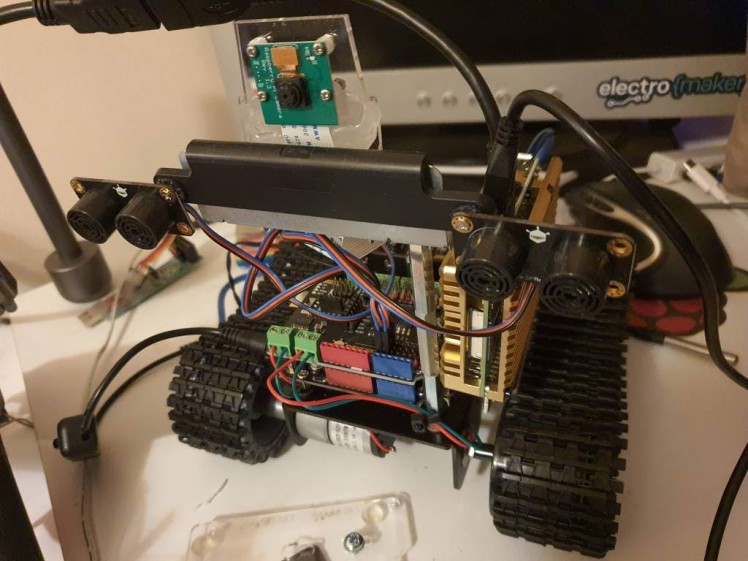
Finally I added 3 extra ultrasonic sensors, one underneath the front, one underneath the back and one facing behind, as well as two RGB LED’s for the plasma turrets. The extra sensors allow it to detect objects behind and underneath it.
1 / 4 • ‘Plasma’ RGB LED’s

‘Plasma’ RGB LED’s

Ultrasonic under the front

Ultrasonic facing back

Ultrasonic under the back
With the hardware all constructed and ready to go lets move onto the code for both the Arduino and the Pi…
Come With Me If You Want To Live.You can grab the code from my GitHub.
First I had to setup OpenCV – I found compiling from scratch was the best way:
COMPILING OPENCVsudo apt-get updatesudo apt-get upgrade -yysudo apt-get install build-essential cmake pkg-config -ysudo apt-get install libjpeg-dev libtiff5-dev libjasper-dev libpng-dev -ysudo apt-get install libavcodec-dev libavformat-dev libswscale-dev libv4l-dev -ysudo apt-get install libxvidcore-dev libx264-dev -ysudo apt-get install libfontconfig1-dev libcairo2-dev -ysudo apt-get install libgdk-pixbuf2.0-dev libpango1.0-dev -ysudo apt-get install libgtk2.0-dev libgtk-3-dev -ysudo apt-get install libatlas-base-dev gfortran -ysudo apt-get install libhdf5-dev libhdf5-serial-dev libhdf5-103 -ysudo apt-get install libqtgui4 libqtwebkit4 libqt4-test python3-pyqt5 -ysudo apt-get install python3-dev -ysudo rm -rf ~/.cache/pippip3 install "picamera[array]"cd ~wget -O opencv.zip https://github.com/opencv/opencv/archive/4.4.0.zipwget -O opencv_contrib.zip https://github.com/opencv/opencv_contrib/archive/4.4.0.zipunzip opencv.zipunzip opencv_contrib.zipmv opencv-4.4.0 opencvmv opencv_contrib-4.4.0 opencv_contribpip3 install numpycd ~/opencvmkdir buildcd buildcmake -D CMAKE_BUILD_TYPE=RELEASE -D CMAKE_INSTALL_PREFIX=/usr/local -D OPENCV_EXTRA_MODULES_PATH=~/opencv_contrib/modules -D WITH_GTK=ON -D ENABLE_NEON=ON -D ENABLE_VFPV3=ON -D BUILD_TESTS=OFF -D INSTALL_PYTHON_EXAMPLES=OFF -D OPENCV_ENABLE_NONFREE=ON -D CMAKE_SHARED_LINKER_FLAGS=-latomic -D BUILD_EXAMPLES=OFF ..make -j4sudo make installsudo ldconfigAdditional info here.
Next I setup TensorFlow for object detection – info on that here.
Previous projects of mine have had multiple functions such as speech recognition, visual recognition etc. But they have all been single-threaded and could only perform one action at a time. Such as The Nvidianator – a good deal of functionality but limited to only being able to speak/listen/see only one thing at a time.
So with the HK I wanted to take it up a level and work around the idea of a central prioritised queue; where all the functions could be threaded and be running at once and be able to drop their results/requests into the central queue – prevent conflicts and being able to process through actions.
It is also a queue that works off of a priority – for instance an event with the priority of ‘1’ will be processed before an event with the priority ‘2’ and so on. So that if there is a module that requires something to happen sooner, like some kind of priority action for moving to a location etc. or recognising a person it will be handled before a lower level action such as processing an object that isn’t a mission parameter.
Mission parameters, you ask? This is another new advancement that I wanted to make, using YAML files to load in configurations instead of hard-coding stuff. Also this is being used to load up ‘missions’ that the HK can follow such as general standing orders – like ‘patrol’ and being able to respond and take actions when certain objects/people are detected by the camera. These YAML parameters are also refreshed in real-time so that new mission parameters can be added/removed while the code is running.
The rest of the functions have all been abstracted nicely and split out into modules so that they are tidier – also the access to functions is all in seperate modules from the event queue and the requests/responses from these functons.
For example: to get a movement command to the Pi there isn’t a command send directly to serial to move the HK, a “MOVEMENT” event is put into the queue along with the command required and then this gets processed by the queue in order of priority, then the event processor parses this and sends it off to the actions module; which contains a set of instructions for the movement module to perform certain actions.
The movement module contains all of the event calls required to get serial writes – which are “SERIAL_WRITE” events, that again, get processed in order and are then sent off to the serial interfacing module and then finally sends the writes off to the Arduino.
This abstracted queue system means that lots of different modules can be working together and be sending requests into the queue and preventing overwrites and conflicts. It also means that the functionality can be expanded by importing the event queue and then sending requests into the queue for access to functions, rather than having to access the submodules directly and having lots of imports.
Its not perfect by an means as this is a first iteration and some places it could probably be tidied up and sorted out in terms of order and imports. Hopefully thought means that future additions are neat and easy – with some additions required to the event processor and a new module file with access to the queue.
With all that lets go over the overall modules themselves:
hk_actions.py
As mentioned above this is where all the main actions for the HK are stored, the functions in here call on movement functions – so the ‘terminate’ function will call for the HK to move forward and ‘fire’ the plasma cannons (RGB LED’s).
hk_camera_obj_detect.py
This module contains the camera loop for grabbing images and processing them through the Tensorflow model. Thanks to the code here for thsis module: https://github.com/EdjeElectronics/TensorFlow-Object-Detection-on-the-Raspberry-Pi/
When things are detected it sends events into the queue to be processed further, it also checks the detections against the mission parameters so that further events can be actioned, based on those parameters.
Based on the vision YAML it will determine the minimum threshold required for confidence in a detection that will be processed – for instance 0.7 threshold will mean that only detections with a confidence of 70% will be processed into the event queue.
If the –enable-vision argument is passed into the main module this will send camera frames to vision and draw on the screen using CV2 so that the user logged into the HK can see what its doing and seeing.
If the –store-detections argument is passed into the main module it will store all of the cropped image detections as jpegs in the /Captured folder with datetime and detection name/confidence as a filename.
I will go over the arguments and the main module later on.
This module can be called independently to test – it will just load up the object detection and show the visuals, but wont run anything else on the HK.
hk_console_logger.py
When writing programs I usually end up putting in loads of print functions to try and debug and understand what’s going on when its running. Then I have to remove/comment them out when the program is finished, this time I decided to make a logger where the console printing can be turned on/off and all the print statements can be left in – then when the –debug argument is passed in with the main program it will print everything.
It uses a class that is instantiated within the module so that there is one instance of the class where the console on/off is set; so if another module needs to write it can easily be imported and worked with for debugging.
This can also be run independently to test that the console will write successfully when console writing is enabled.
hk_draw_vision.py
For this project I really wanted to be able to have the machines vision accessible to the user along with events and information being displayed in real-time on the vision; much like in the films themselves, like this:

So this module has a class that is instantiated in it that can be imported into other modules so they can draw things to the current frame.
With this class a frame can be added from the camera, text can be written and smaller images can be over-layed on top. On the left it lists all of the events that are being processed, on the right its is showing all serial outputs from the Arduino, mission objectives are bottom right and at the top is general configuration information.
I did consider trying to colourise this to be red, like in the films. However I couldn’t find a way to do this with OpenCV and I doubt it would be very performant or look as good.
hk_event_processor.py
This is where events are sent to be processed – once an event has been parsed it is sent to a list for drawing details onto the screen. There are a number of other sub-lists for each module that runs off of events; the reason for this is that the modules can grab their requests to action and process them, without slowing up the event processor – other wise the processor would be paused waiting for long running functions.
This is also where the serial events are being dragged into a sub-list which is then processed later, again so nothing is paused waiting.
hk_event_queue.py
This module has the queue class that other modules can import and use to send in events; an event consists of: <event_type> <event_content> <event_priority>, so if you wanted movement forward handled ASAP you would send in (“MOVEMENT”, “FORWARD”, 1) and it would be processed with highest priority and sent off to the event processor.
This can be run independently to test inputs and outputs of the queue.
hk_main.py
The central code that is called to configure and call all other modules – threading them where required and passing in arguments from the command line.
hk_mission_parameteriser.py
This grabs all the data from the YAML importer and sorts the data into primary, secondary and tertiary missions. It runs a refresh after a configured amount of time so that new missions can be added in real-time without having to restart the code. It checks the mission parameters for standing orders when they are refreshed.
It also receives events from the event processor and parses the content to run actions, such as ‘patrol’ and ‘terminate’ – this has its own micro-queue so that mission action requests cannot conflict. The missions call further actions via the event queue.
This can be run on its own to test that the missions are dragged in and implemented, they are printed out when run to ensure the YAML data is being parsed and stored correctly into the data class.
hk_ml_systems.py
This module calls/configures all of the ML systems which at the moment is limited to the visual detection module – but in future can be used to activate other systems.
When run on its won this will run up all the ML systems independently of the other systems on the HK for testing purposes.
hk_movements.py
This module contains all of the functions required for moving and performing actions on the HK – it has all of the general movements that can be called to the serial interfacing module to fire off requests to the Arduino.
It contains an override function that can send off a serial write to the Arduino code that will enable the HK to be moved even if there are detections on the ultrasonics. The Arduino code also has further handling on this.
This also has a lockout Boolean where if movement has been called within a few seconds or if the Arduino has sent a “moving” serial output it will ignore movement actions (unless the override has been set) – hopefully preventing conflicts in movement.
This is also where the RGB ‘plasma cannons’ are controlled from – either red or purple.
hk_pi_operations.py
Basic operations for shutting down/rebooting the Pi OS are in functions here, easily importable and callable from other modules.
When called on its own this will call for a reboot of the Pi to test that the OS calls are working ok.
hk_serial_interfacing.py
This has an importable class that runs reads and writes from the serial interface; it uses a loop on the reads that get passed into a list to be processed by the serial to events module below.
Writes are also handled here, it grabs events from the sub-list from the even processor, as all writes are handling with the event queue there shouldn’t be any conflicts in writes as every module has to request the writes from the event queue and event processor, nothing should access this directly bar some of the testing code.
If no serial is found (the Arduino is not responding or that its switched off) it will continue to attempt reconnects – based on the serial reconnect timer set in the serial_config.yaml. This ensures that the system can reconnect to the lower-level systems if they are lost and continue to run even if the Arduino goes offline.
When called on its own this will write some test commands to the Arduino and wait to read the responses – to confirm that the serial connection is working both ways.
hk_serial_to_events.py
This grabs elements from the sub-list in the serial interfacing module and then sorts them into events – all of the possible serial responses are put in here, such as a “moving” serial read will cause the movement lock to activate in the movement module, thus preventing movement overwrites; although during testing I found this just spammed the serial writes too much and nothing else would write correctly, such as fire plasma commands. For now this has been commented out and needs some working on.
Similar to the above serial_interfacing module this will run tests when called on its won, calling in serial events to get responses from the Arduino; it also turns on console printing so the results can be seen from the Arduino serial output.
hk_ui.py
This is work in progress – eventually it will have a basic menu system for interacting with the HK in real time to give commands, during testing I have identified times whether it would be very useful to stop the HK completely or do other things immediately without having to change mission parameters; this is where such commands would go. This will also allow for turning on debug mode in real time as well as turning on/off the visuals.
hk_yaml_importer.py
This module imports all of the YAML data into a nice data class that can be imported/accessed into other modules – making it really easy to grab all the data required from the various YAML files. Will go over these files and what they contain later on.
Running this module by itself it will load up and print all of the parsed YAML contents as a test.
hk_low_level.ino
This is the Arduino code that handles all of the movement controls for the motors on the robot chassis, as well as handling the object avoidance with the 5 ultrasonic sensors 0 to prevent the HK from running into anything. It also passes serial commands to the Pi via serial so that the higher level functions can work off of the information from the Arduino.
It also handles the control of the plasma turret RGB LED’s. Firing off a burst of Red or Purple plasma – which according to the excellent Terminator: Resistance videogame, are both valid types of plasma in the Terminator universe.
This also works the other way, taking in commands from the Pi serial over USB and processing them – the override commands are also here, so that the higher-level code can override the object avoidance sub-routines on the Arduino for a set time.
I split the hardware out so that all of the code for the motors and avoidance could be completely separate from the Pi; leaving more processing time free as well as ensuring that the Pi wont have to power motors alongside its own power-heavy ML workloads.
It means the machine can also run and continue moving even if the Pi needs rebooting or if the Pi goes down completely, it can at least still function on some level.
When a movement command is called it will check all the sensors to check there is nothing around it. If there is it will call the movement command again but this time with the movement override on, as I found it was looping back into the avoidance routine over and over and causing issues.
I need to improve this as at the moment when its trying to move backwards to avoid an object it will now no longer do another check to ensure it can move back safely – this is something else I am going to need to work on for the v2 to make it a bit smarter and prevent looping.
The Testing folder
This contains a number of files for testing the event queue – from testing multiple events being sent from different modules to new queues being called to run concurrently and also for running continued events for processing. I created this to ensure that the queue would do exactly what I wanted with all of the modules and classes.
The YAML files:
mission_parameters.yaml
This is where primary, secondary and tertiary mission parameters are set.
As well as settings for minimal confidence threshold for visual detections, parameter refresh time (time to recheck for new mission parameters) and objective process time (time after currently objective process to move onto the next objective).
vision_config.yaml
This is where the folder location for the model and the model name is stored for the TensorFlow configuration.
serial_config.yaml
This is where the configuration is stored for the serial speed and port as well as the reconnect time.
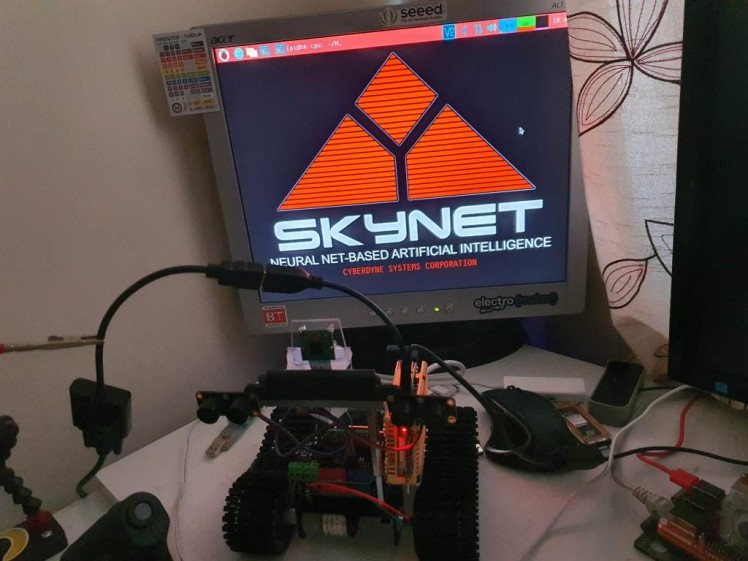
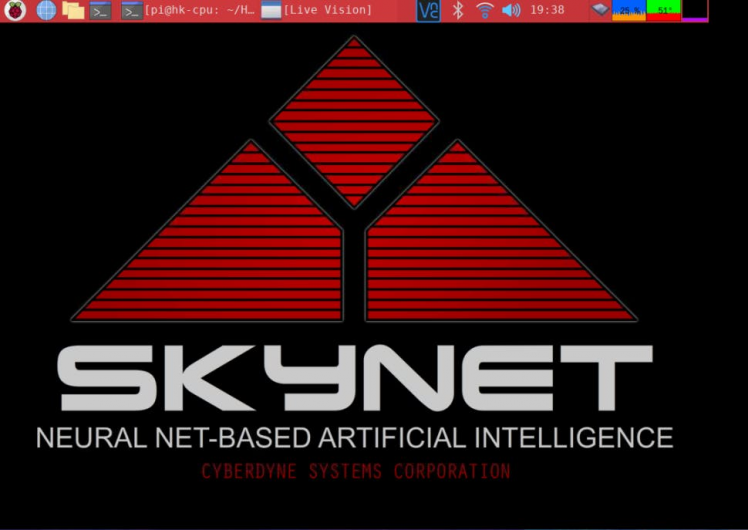
Also I setup the Pi’s UI to be as Skynet-y as possible:
With all of the above this should be a system that can be booted up and will run autonomously – being able to act and follow missions while relaying information back to a user remoted in.
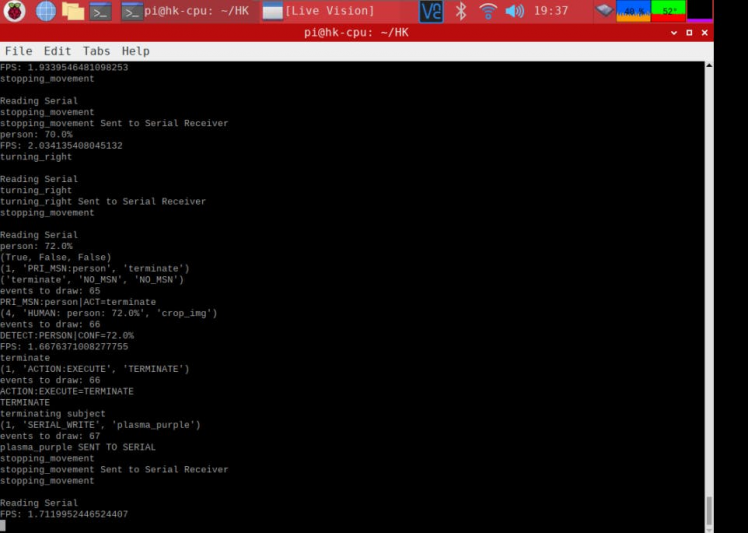
Here is what is shows when it has detected someone:
Uh oh…

Uh oh…
The overall work is far from done but this is a good groundwork so far for more advanced robotics and AI systems in future.
During testing I found a number of issues that needed looking into and the sensors aren’t always able to tell what’s around the robot, so sometimes it will still run into things which isn’t great. I may need some extra knock sensors that override all movements when it bumps into something. There is also plenty of opportunity to add in higher level functions on the Pi itself that allow for more advanced avoidance routines.
The debug view could also do with some serious tidying up – this is where in future I will be implementing a proper logger:
The bottom sensors are also acting up a bit at the moment – so I need to check the code on that and re-test; there must be a bug somewhere. Also seen in the video, it does stop firing the RGB turrets for some reason after some time; I suspect a queue issue somewhere. While the Pi is multithreaded and good at dealing with a command queue, the Arduino can only handle a single thing at a time – so it is possible that multiple commands are piling up on the Serial and not allowing the RGB LED’s to activate.
For the most part it does manage to move around without bashing into too many things; when patrol mode is set in the mission parameters it goes around nicely, ensuring that it gets a good look around its environment and you can remote in via VNC with the Pi on WiFi and see what the bot is seeing. It’s only around 2 FPS but its still cool nonetheless.
It does get cornered sometimes, but it does manage to work itself free after some time.
When no patrol mode is set or the Pi is off the Arduino takes control over avoidance stuffs – ensuring that if anything gets to close it does its best to move around. So if you need to reboot the Pi for whatever reason, the bot will continue to move a bit and avoid objects until the Pi is back online for higher level instructions. This also resulted in an interesting behaviour in the video here it looked like it was patrolling around but it was in fact only avoiding objects on the low level code with the Arduino.
The Pi and the Arduino talk to each other nicely over Serial but I think I can use a python library to make this process a bit smoother in future, something else that will go into a version 2.
In future I will be adding way more commands in, hopefully in a tidier fashion on the code so that many more commands can be sent off to the HK and more mission parameters can be set in the YAML. As well as being able to choose whether the HL fires red or purple plasma.
It’s quite a complex system especially with the queue stem for the commands and inputs which results in some unexpected behaviour, but it will definitely need some debugging to get it a bit more consistent in how it runs.
I’ll Be Back.Once again thanks to DFRobot for all the parts, they sent me the robot chassis and I also got most of the other parts from them too, so do check them out at DFRobot.com!
Overall I am very happy with how this turned out and even though it is a little rough around the edges at the moment, it proves a great platform to advance upon and the way I have constructed it it should be relatively modular to add/remove components.
Recently I have been looking into the Husky Lens and I may be implementing this onto the HK at some point; this would allow me to offload the majority of the visual AI stuff onto hardware, the Husky handles object detection etc at 30fps which is great. This would allow the Pi to run other AI stuff more freely and would be a good 3-tier system for a robot; the Husky Lens handling the visual AI, the Pi handling other AI and high level processing and the Arduino handling the low-level robot controls and sensors.
It’s also worth noting that the model I’m using has not had any additional training on top, so it can only find objects that it has been trained to see; it can’t detect specific faces or anything. In future I will look into additional training so it can learn my face, or John Connors face… and then be able to react to that via the mission parameters. At the moment it can only detect things it deems to be a ‘person’. So with the current config in the YAML on GitHub it will just fire purple plasma at any human it sees, pretty dangerous.
The queue system implemented here is great for ensuring that the machine isn’t stuck doing one thing at a time and is able to process many things in order rather than having to pause for every visual analysis or movement. I will definitely be using this in the next version of the Raspbinator, as that and the Nvidianator both had to single task – for instance, if they were listening for speech it wouldn’t be able to process images or move until it had finished listening and processing.
Thanks for reading and/or watching, I hope you enjoyed the project – please do let me know if there are any things I could improve, I certainly have a lot of plans for updating and upgrading it in the future so keep an eye out for a version 2!
And remember; your future hasn’t been written yet. No one’s has. Your future is whatever you make it. So make it a good one, both of you.
Oh wait, wrong time travel film…
There we go.

There we go.
Code
Credits
Related products


Leave your feedback...