
Lightsaber - Guide

Made by ElectromakerKits / 3D Printing / Lights / Star Wars
About the project
A low cost, mostly 3D printed and collapsible lightsaber. A 3 watt RGB LED allows for a choice between red, green and blue shafts and the collapsible nature of the shaft makes it easy to store and transport.
Project info
Difficulty: Easy
Platforms: Arduino
Estimated time: 4 hours
License: GNU General Public License, version 3 or later (GPL3+)
Items used in this project
Hardware components
|
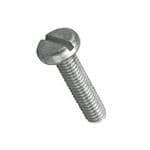
M3 6.0mm Screw Zinc Plated Steel | x 3 |

|
Led Lighting Lenses 20mm F'form Series Optc -5 Dg | x 1 |
|
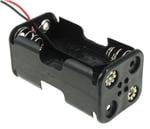
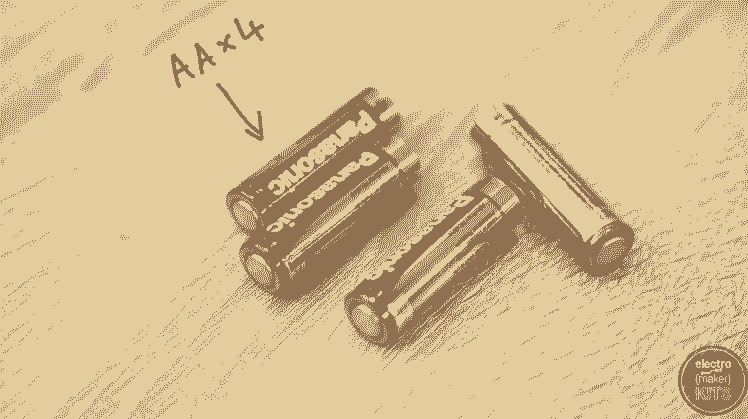
4xaa 6" Leads Blk | x 1 |

|
3w-9w Rgb Led Common Anode | x 1 |

|
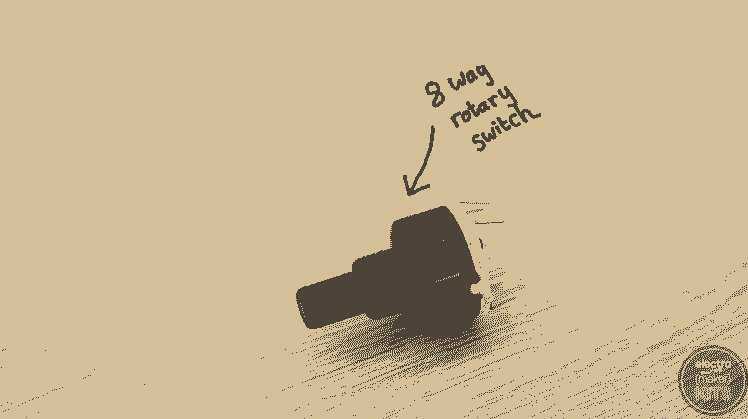
Mini 8way Rotary Selector Switch-sp8t | x 1 |

|
Thin Film Resistors - Through Hole .4 Watt 10 Ohm 1% | x 2 |
|
22awg 19x34 Gr Price Per Ft | x 5 |
|
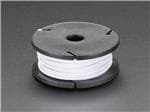
Solid-core Wire Spool - 25ft - 22awg - White | x 5 |
View all
Software apps and online services
|
|
Thin Film Resistors - Through Hole .4 Watt 10 Ohm 1% |
|
|
Mini 8way Rotary Selector Switch-sp8t |
Hand tools and fabrication machines

|
Soldering Iron | x 1 |
|
|
3D Printer | x 1 |
|
|
3w-9w Rgb Led Common Anode | x 1 |
|
|
4xaa 6" Leads Blk | x 1 |
Story
3D print the parts
We'll kick off the project by getting a couple of the 3D printed parts printing.
Start with the handle of the lightsaber. The file you will need to print for this is called 'Hilt - Main.STL'. All off the files for this project can be found at the end of this article.
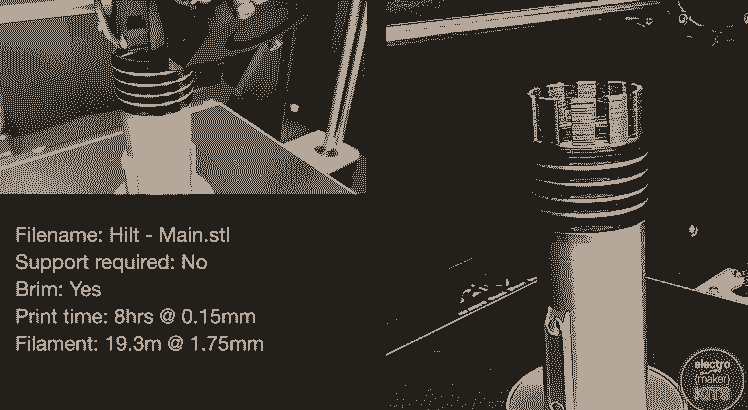
I printed mine with a 0.15mm layer height and a large brim to help it adhere to the print bed. It took around eight hours to print. To achieve the multi-coloured print effect I changed the filament several times during the print.
If you are using PrusaSlicer it's as simple as adding some filament change prompts whilst slicing your model. To do this, on the screen where you preview the sliced model, slide the preview height slider to the side of the viewport to where you would like to change the filament and then press the '+' symbol to insert a change.
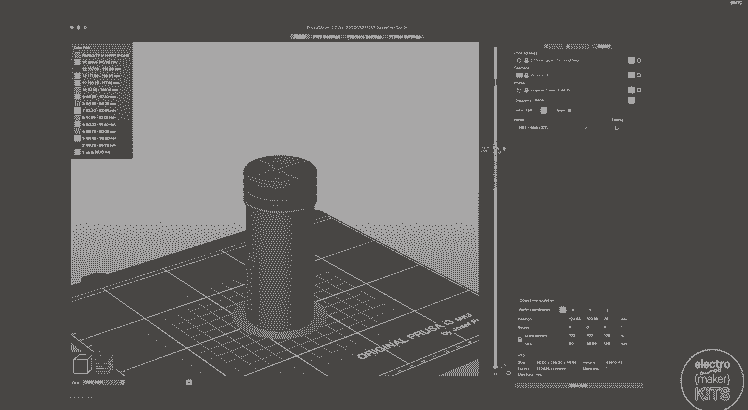
Repeat this for as many times as you would like to change filament. When the printer reaches this point it will stop printing, move the print head to the front of the printer and prompt you to manually change the filament before it resumes.

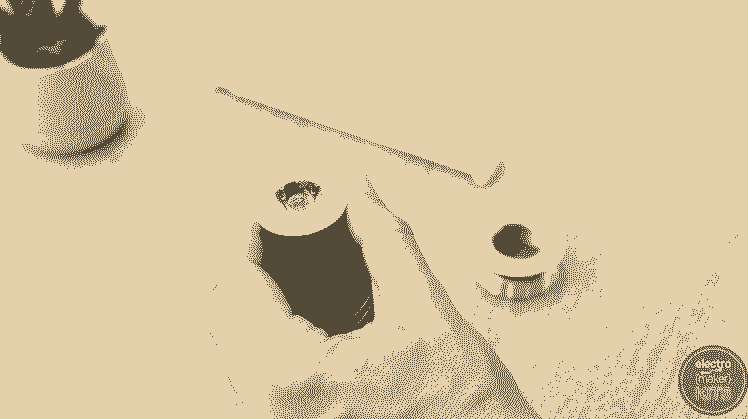
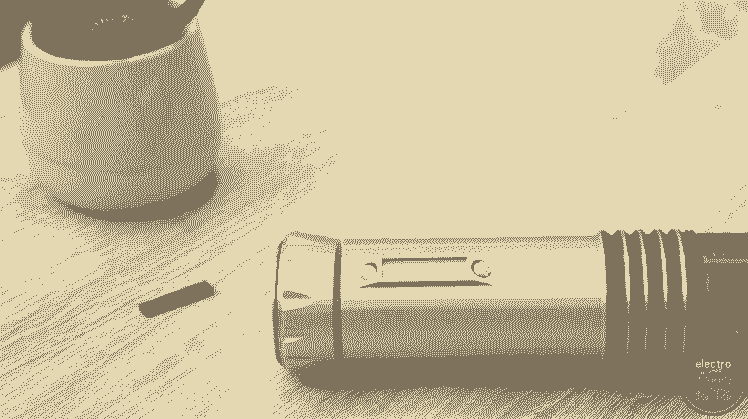
The second part to print holds the battery case in place and provides us with a surface to mount the rotary switch to later. The file is called 'Hilt - Shuttle.stl'. I printed this with a 0.15mm layer height and brim as before. I chose to print it in black as this part can be glimpsed in the finished project at certain angles.
Preparing the LED
For this step you will need to prepare the following lengths of wire:
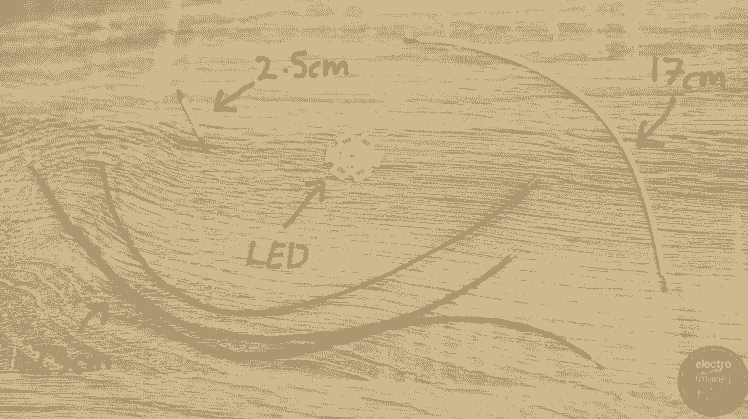
- 1x 2.5cm long
- 3 x 23cm long
- 1x 17cm long - (this one should be a different colour to the 23cm long ones for easier identification later)
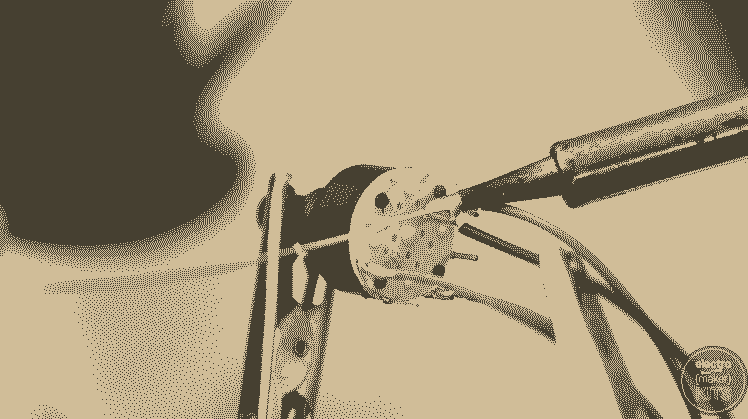
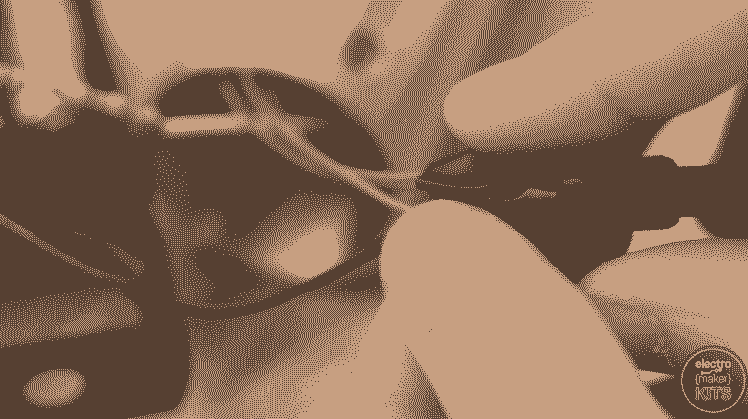
Solder one of the 23cm lengths of wire to the pad labelled 'R' for Red on the LED. You'll need to work quickly for all the connections on the LED component as the aluminium backing on the LED will quickly dissipate the heat from your soldering iron.
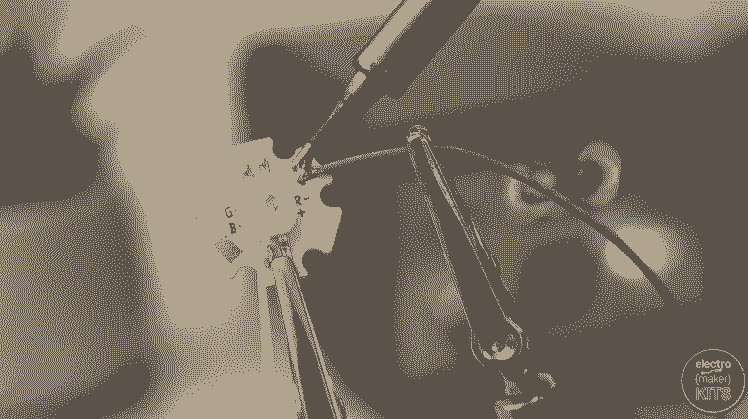
Now repeat this with 23cm wires for the green and blue ('G' and 'B') contacts.

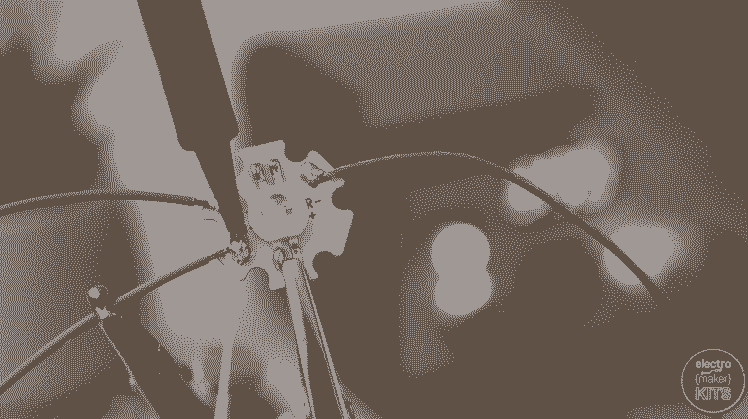
We can then attach the 2.5cm wire to the Anode '+'.
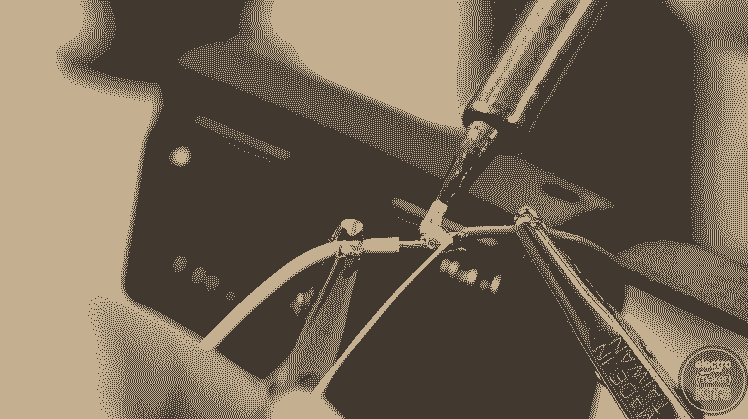
Adding the resistors
Shorten the legs on two of the 4.7 ohm resistors. They can then be soldered together in series.

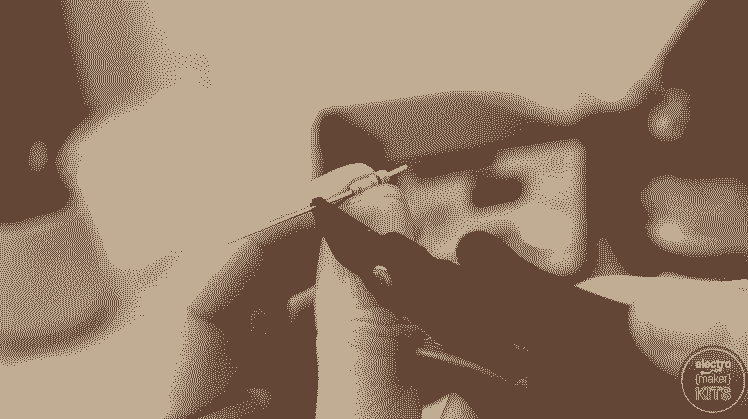
You can then connect one end of the resistors to the 17cm length of wire you prepared earlier.
The other side of the resistors is then connected to the 2.5cm wire which you have already attached to the anode on the LED.
These four wires can then be threaded down through the top of the sabers printed handle so that the LED can be fitted onto the cross support inside.

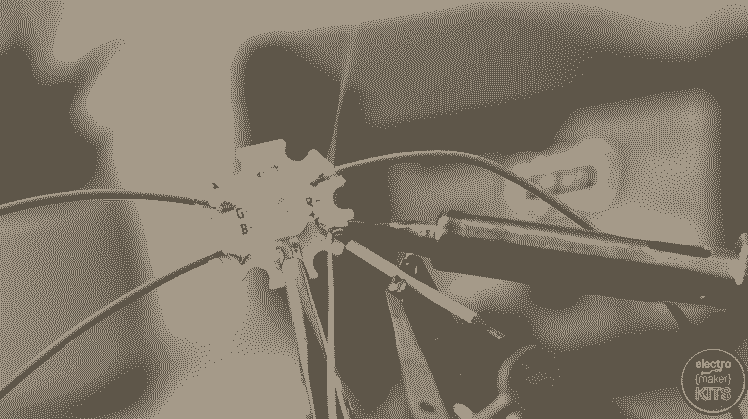
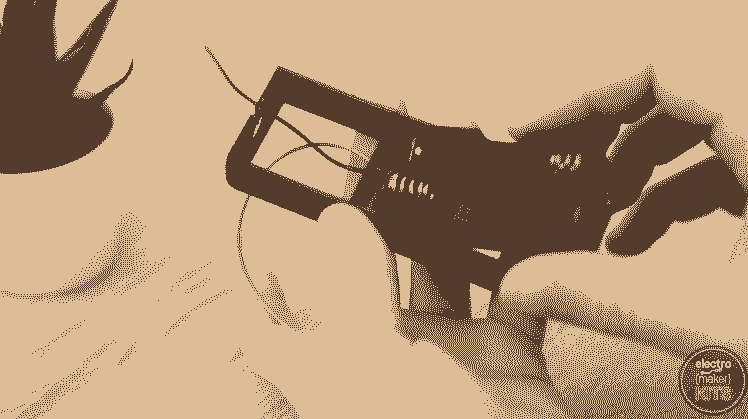
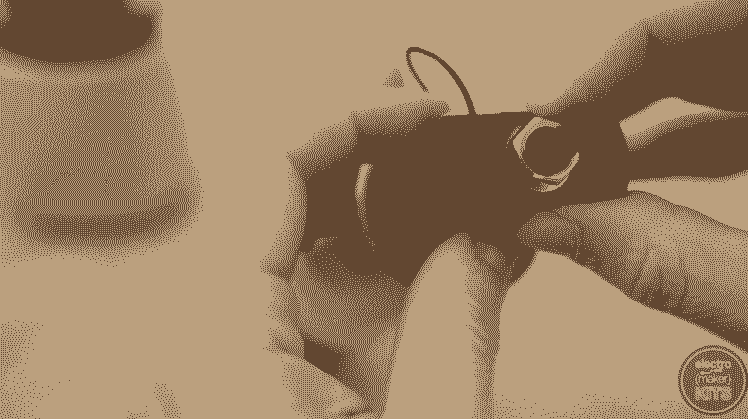
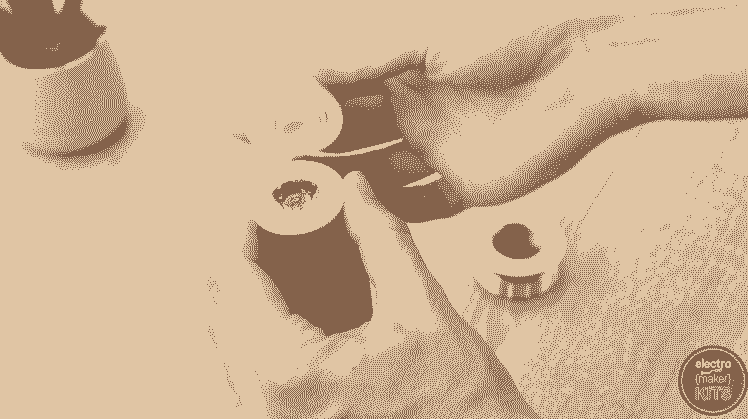
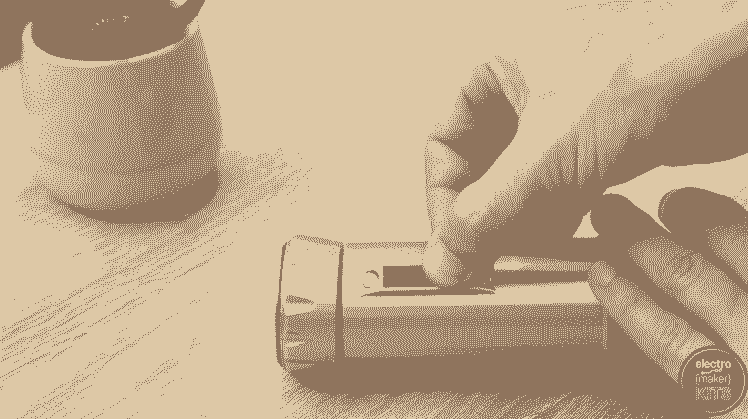
Connecting the rotary switch
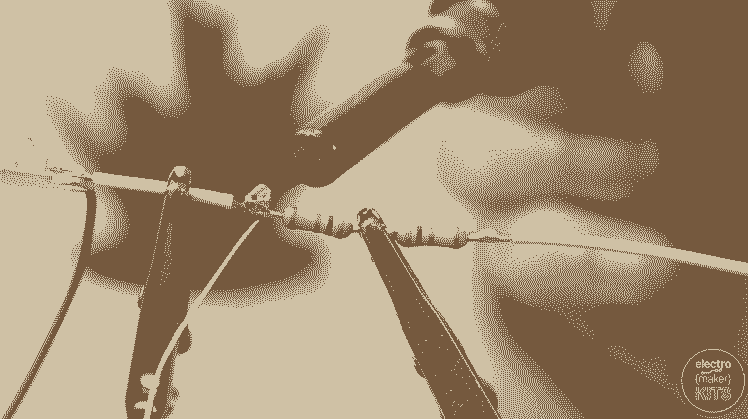
We can now take the rotary switch and connect the wires coming from the LED.
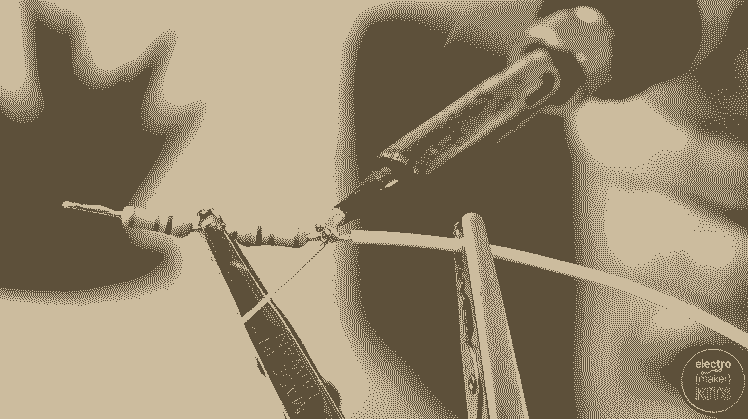
Solder the three wires coming from the red, green and blue contacts on the LED to any three of the legs on the outer perimeter of the switch.

I've chosen to solder them with one unused leg between each of them, this means I can turn the saber off by rotating the switch just one position in either direction whilst it is in use.
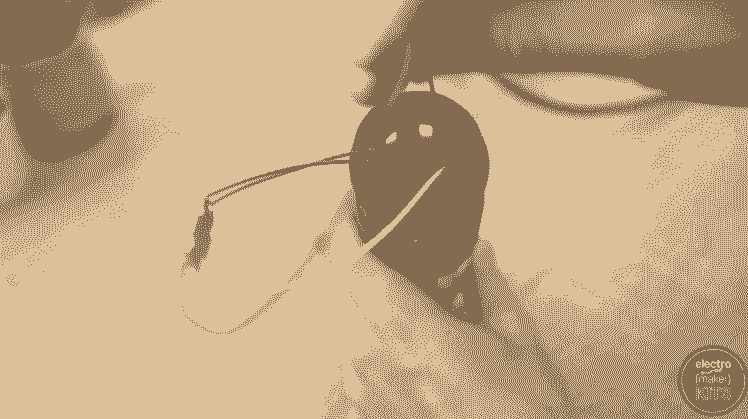
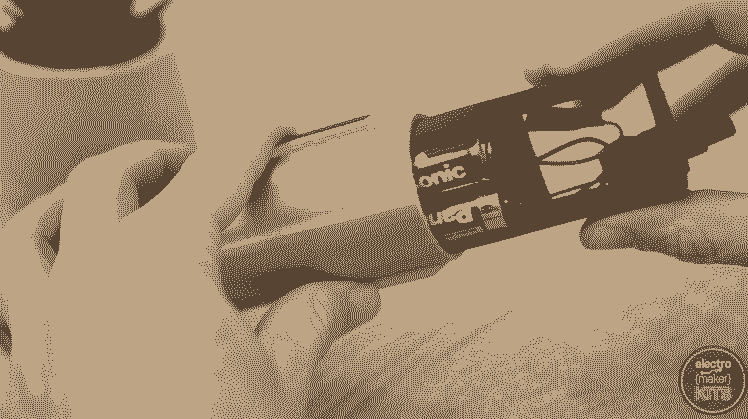
Connecting the battery holder
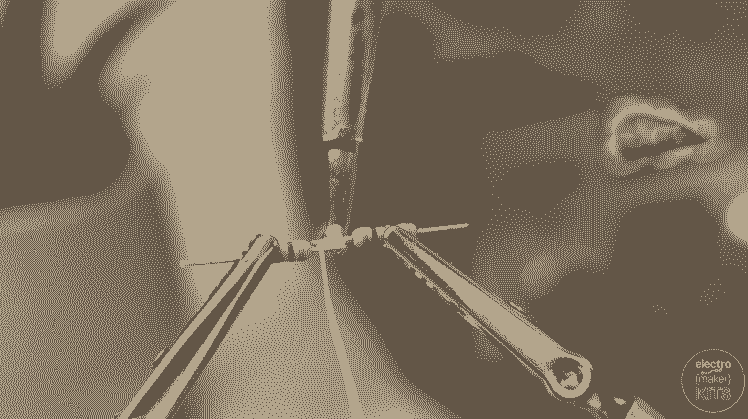
We can shorten the wires coming from the battery holder.

The black wire should be shortened to 12cm in length and the red wire to 4cm long.
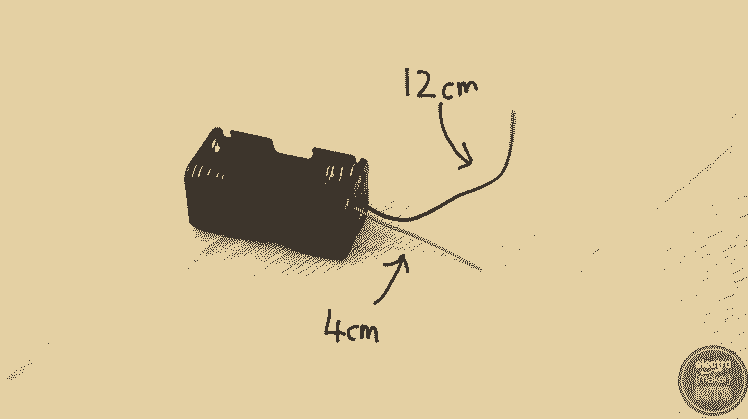
They should then be threaded up through the hole in the centre partition of the 3D printed sled.
The plastic casing of the battery holder can then be push fitted into the lower section.

The positive red wire from the battery holder should then be soldered onto the 17cm wire going to the anode via the resistors on the LED. This wire should be a different colour to the others if you did so earlier in the build as suggested.
The black negative wire should be soldered to the central pin on the underside of the rotary switch.
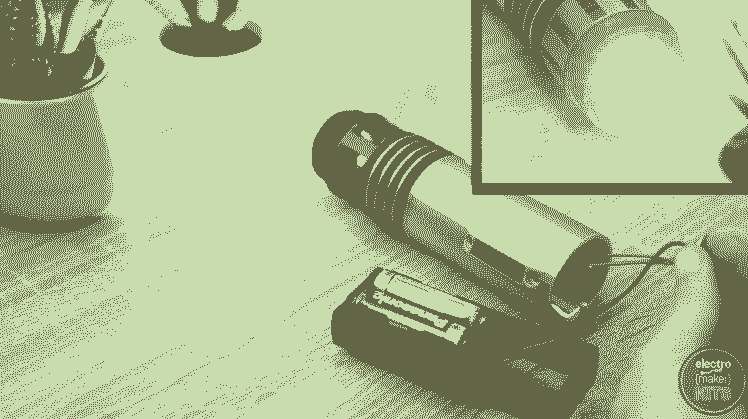
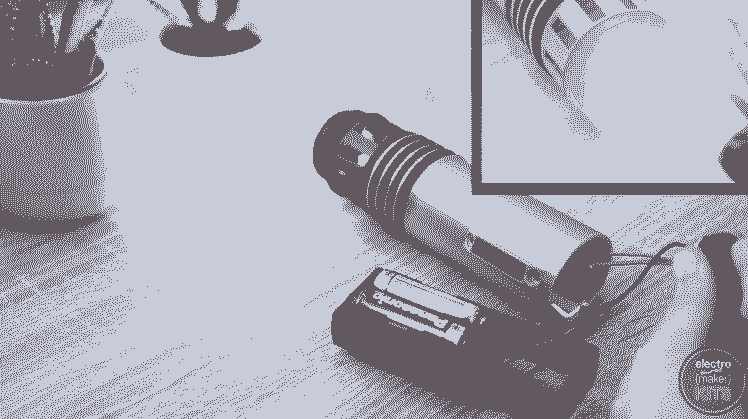
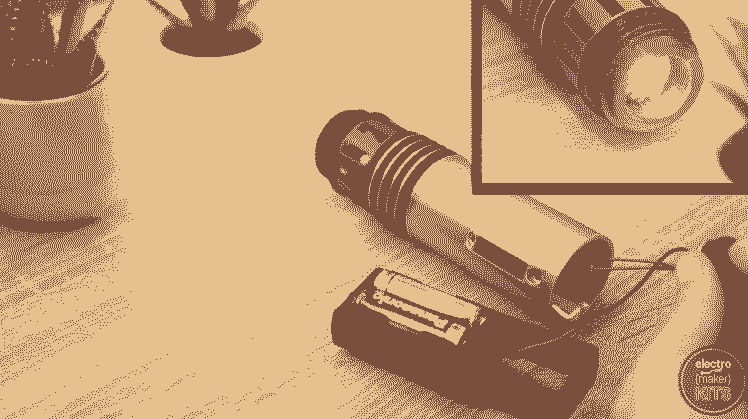
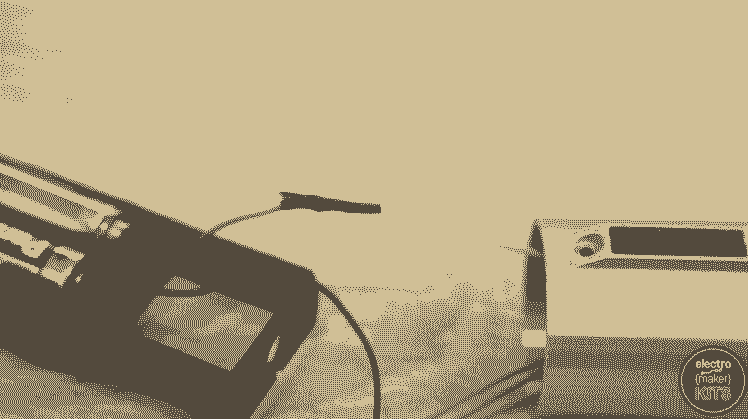
Test the electronics
We can add four AA batteries into the battery holder and rotate the rotary switch to test our electronics circuit before we finish assembly. Be careful not to touch the LED or resistors as they may become hot during use.

When the switch is rotated you should be able to move between the red, green and blue lighting modes. If not, go back and check through your wiring and solder joints for any problems.
Add some insulation
This is a good point to add some insulation tape around the back of the rotary switch and the end of the positive lead coming from the batteries.
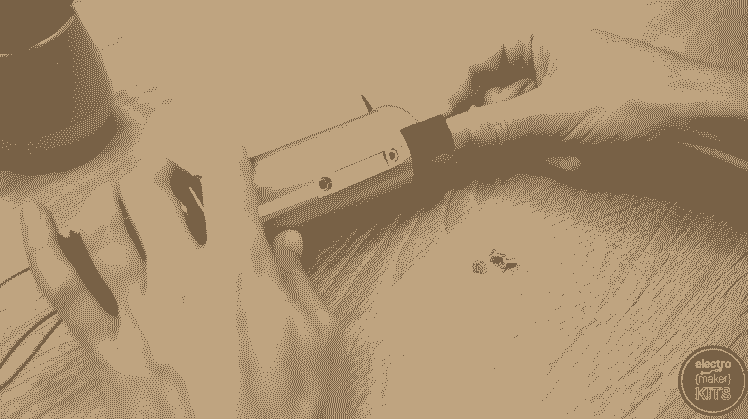
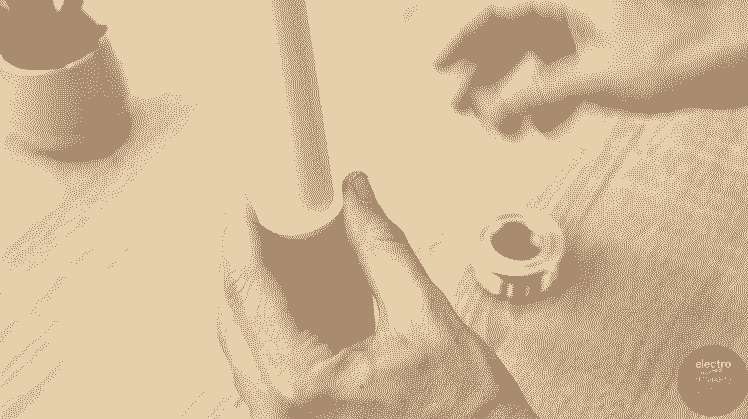
Insert internals
The sledge with the batteries in it can then be rotated and slid carefully inside the handle with battery end going in first.
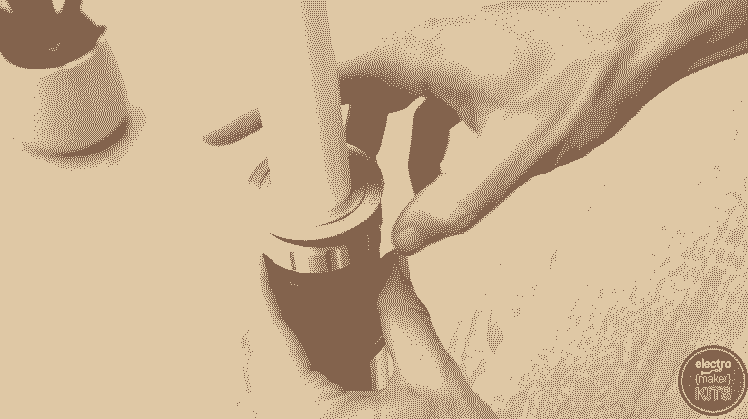
Once it is partway in the roatry switch can be inserted into the end hole from inside the sled (so that the control knob is facing out of the handle). Ensure that the notch on the rotary switch aligns with the notch in the sled.
You can then add the washer and nut on the outside and screw down firmly (but not tight) to hold it in place.
Rotate the sled so that the holes in its side align with the screw holes on the outside of the handle. It can then be carefully inserted whilst being mindful of not trapping any wires.
We can then use the four M3x6 screws to hold it into place. Do not use different screws or overtighten them as we don't want to risk damaging the batteries.

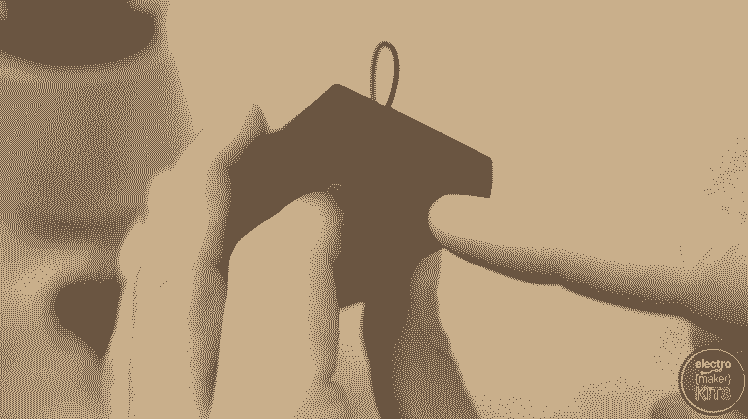
Adding the switchable base
I printed the bottom of the handle with a 0.15mm layer height, no brim and with supports. As with some of the other prints I changed the filament twice during the print to get the black band for added detail.
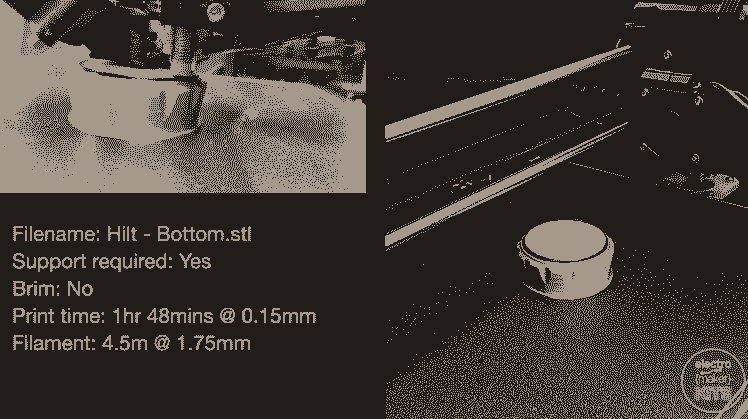
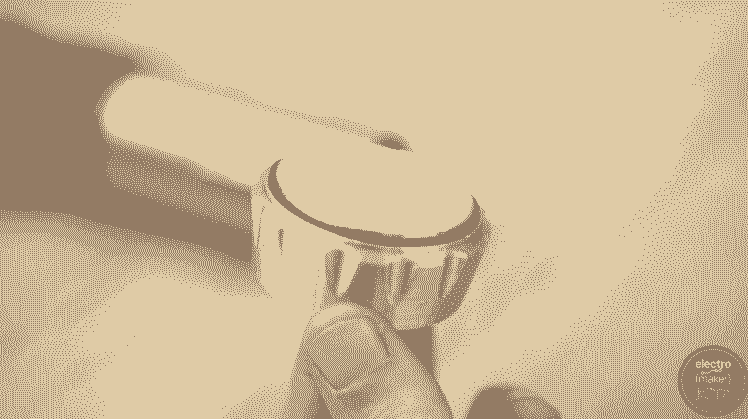
Once the print is complete, remove any support material and push-fit it onto the rotary switch.
You should then be able to twist it to toggle through the different colours of the LED.

Creating the collapsible blade
As with the rest of the project I printed all four files for the blade with a 015mm layer height. A very large brim was added to secure it to the print bed. I printed this in white so as to easily allow the true colour of the LED to shine through. The files are:
Saber Blade - 1.stl
Saber Blade - 2.stl
Saber Blade - 3.stl
Saber Blade - 4.stl
We can also print the LED spacer in white, but without any brim: 'Saber Blade - Spacer.stl'
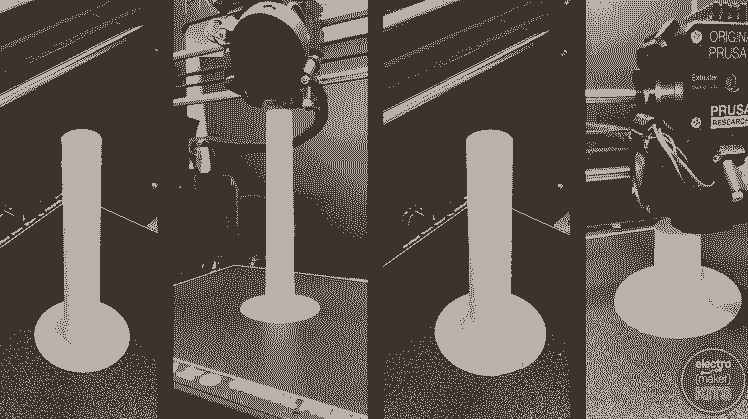
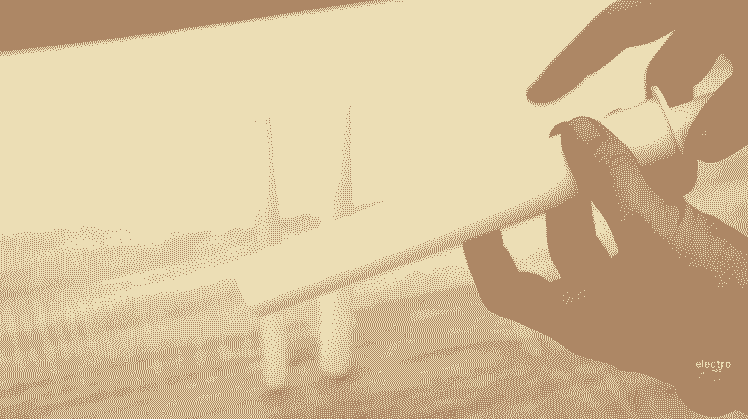
Once printed, remove the brim and insert them inside one another from the largest one down the smallest one. With a flick of the wrist, they should extend and then maintain this position with friction. To collapse them down again just push on both ends. Don't extend it too enthusiastically as they will be much harder to collapse again.
The top end of the hilt is printed almost the same as the bottom end but without the need for supports. I used two different colour filaments, no brim, and no support.

Final assembly
Let's finish putting everything together. You will need the 3D printed blade parts, spacer and top of the handle, the LED lens (supplied with the kit) and the main handle you have assembled so far.
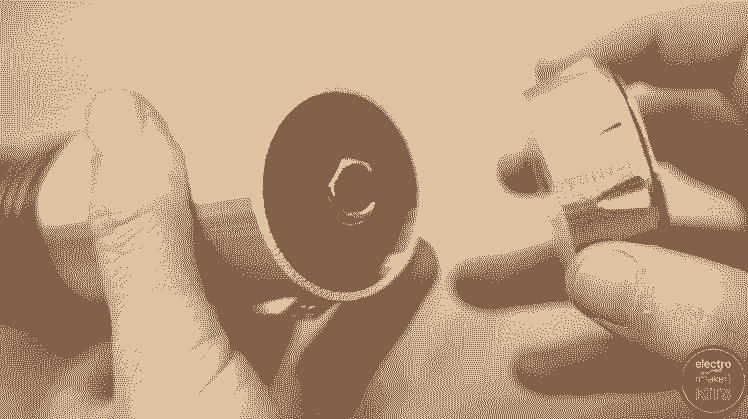
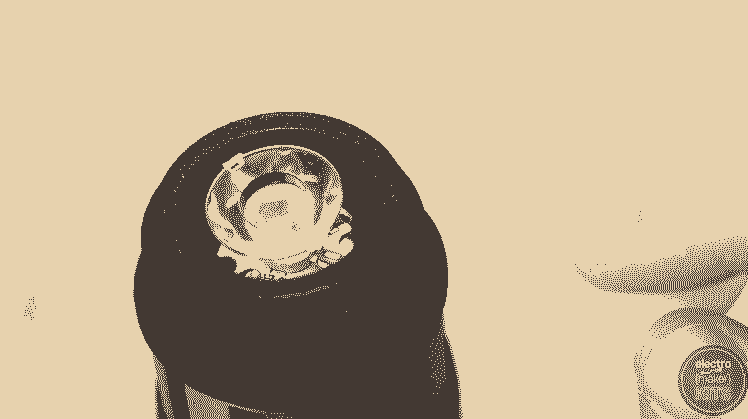
Carefully position the concave end of the LED lens directly on top of the LED.

The 3D printed spacer then sits on top of this with the notches in the print face down onto the matching notches on the lens.
The four nested blades then sit on top of this spacer.
Then the screw top is added over the top of the blades and firmly screwed onto the handle holding the assembly together.
Adding some extra detail
There is one more part which I printed in black PLA - 'Hilt - Details2.STL' which is simply push fitted into the indentation on the handle to add some more details to the overall design. It should hold itself in place but you can use some glue if you need to.
Project completed!
Nice, you're finished and now ready to fight for the cause!
If you wanted to, you could further embellish it by adding paint or other materials to weather and age it. Or glue down lengths of wire on the outside to give it a more industrial look.
Schematics, diagrams and documents
CAD, enclosures and custom parts
Credits
Related products


Leave your feedback...