
Odroid Go Advance Review
Hardkernel dropped a user-friendly do-it-yourself (DIY) handheld portable retro gaming console in its Odroid Go. The GameBoy Color lookalike wowed with its affordability, ease of use, and capability to play a slew of retro games. Its successor, the Odroid Go Advance, seeks to up the ante with more power, increased I/O (inputs/outputs), and a hardware overhaul from aesthetics to internals. Find out if it's an emulation device worth your money in this Odroid Go Advance review!
What is the Odroid Go Advance?
Hardware manufacturer Hardkernel offers the new and improved Odroid Go Advance. Like the Odroid Go, the Advance iteration is handheld GameBoy clone. Whereas the vanilla Odroid Go rocked a GameBoy Color form factor, the aptly-named Advance opts for a GameBoy Advance design with its four A, B, X, and Y buttons as well as the directional pad (D-pad) on the right and left sides of the screen respectively, rather than under the viewing area. Additionally, you'll find more buttons including left and right shoulder buttons, a joystick, and a headphone jack.
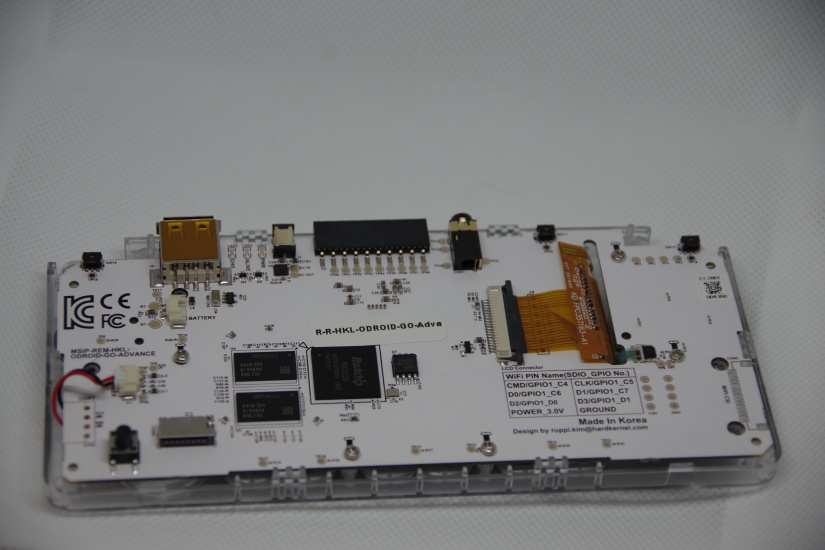
On the inside, the Odroid-Go Advance features a Rockchip RK3326 quad-core ARM Cortex-A35 1.3GHz CPU paired with a Mali-G32 Dvalin GPU. There's 1GB of DDR3 RAM and a microSD card slot for installing an operating system (OS). For the screen, the Advance touts a 3.5-inch 320x480 TFT LCD screen. A 3.7V/3000mAh Li-polymer battery provides up to 10 hours of use. It's capable of running ROMs for a variety of systems including N64, PSP, PS1, NES, and SNES.
Buy the Odroid Go Advance - Save $1 off purchase of $10 or more with code EMSUPPORTER at checkout
Odroid Go Advance Specs
- RockChip RK3326(Quad-Core ARM Cortex-A35 1.3GHz) CPU
- Mali-G31 Dvalin GPU
- 1GB DDR3
- MicroSD card slot
- 3.5-inch 320-480 TFT LCD
- 3.5mm headphone jack
- 3.7V/3000mAh Li-polymer battery (up to 10 hours of play time)
- 5V input, 2.5mm DC plug
- USB 2.0 host
- 10-pin I2C, GPIO, IRQ
- Input buttons: F1, F2, F3, F4, F5, F6, A, B, X, Y, Direction Pad, Left Shoulder, Right Shoulder, Analog joystick
Odroid Go Advance System Emulation Compatibility
- Atari 2600
- Atari 5200
- Atari 7800
- Atari Lynx
- Sega Game Gear
- GameBoy
- GameBoy Advance
- GameBoy Color
- Sega Master System
- Sega Mega Drive
- NES
- PC Engine
- PC Engine CD
- PSX
- Sega CD
- SNES
- PSP
What OSes Run on the Odroid Go Advance - Odroid Go Advance Images
By default, the Odroid Go runs an Ubuntu-based operating system. It's the officially-sanctioned Odroid Go Advance image. However, several third-party OSes exist. Batocera, a fork of Recalbox, runs extremely well on the Go Advance. There's also a Retro Arena OS base image for the Odroid. Personally, I recommend trying out each image and seeing which you prefer. I started out with Batocera and tested out the Retro Arena build plus official Ubuntu Go Advance OS. Ultimately, I went with Batocera merely because I used that image first, but all three run great.
Odroid Go Advance Image Options:
How to Build the Odroid Go Advance - Assembly
Assembling the Odroid Go Advance, like the non-Advance version, is pretty simple. While there are no instructions included in booklet form, an assembly video offers a step-by-step walkthrough of how to build the Odroid Go Advance. It's fairly straight forward since all buttons only fit a single way. So you can't mix up the A, B, X, Y, or Z buttons for instance.
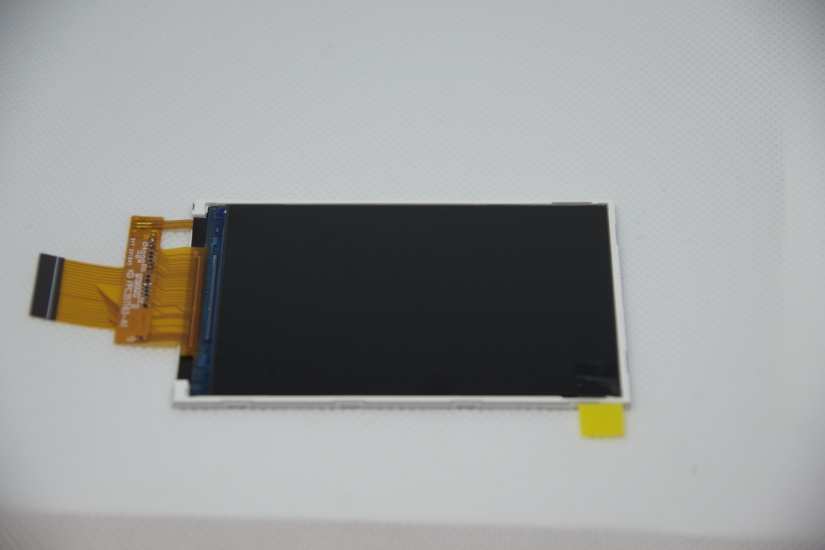
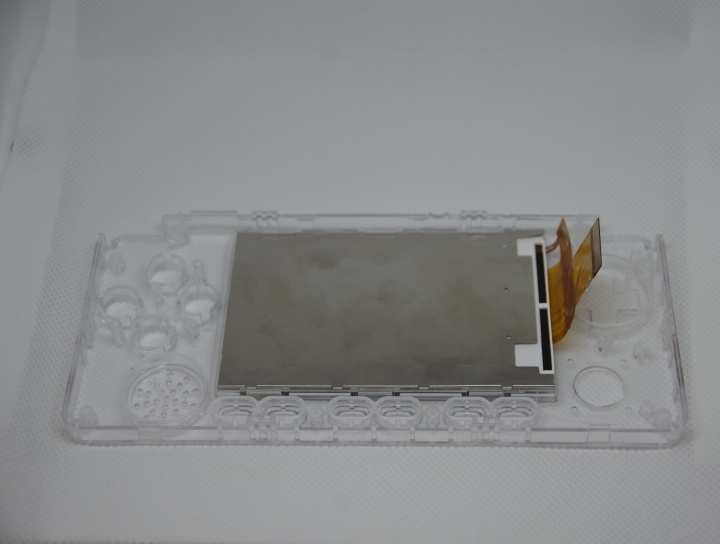
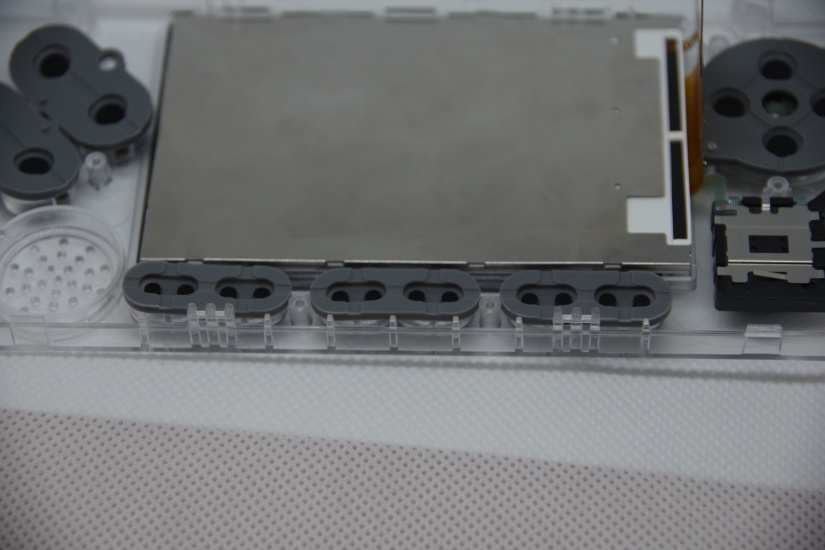
Begin by placing the screen into the front casing. The cable goes on the side where the D-pad sits. It slots into the casing with six holders, three on top and three on the bottom.
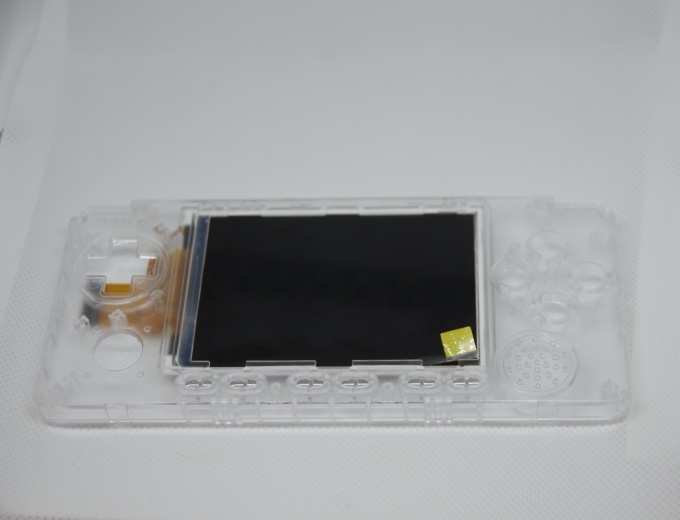
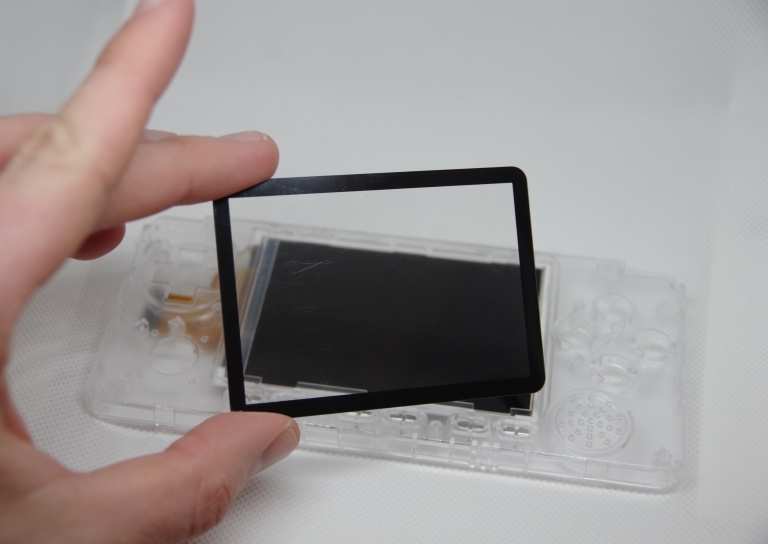
Next up, remove the temporary screen protector on the TFT LCD screen using the yellow tab, and after that add the permanent screen guard.
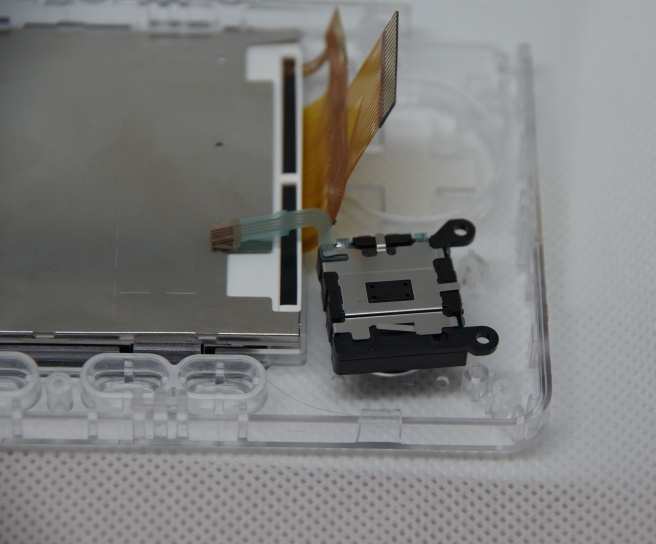
Next up, add the joystick into its hole below the D-pad. The two screw holes line up with their mounts on toward the outer side of the casing, with the ribbon cable facing the inside of the Go Advance.
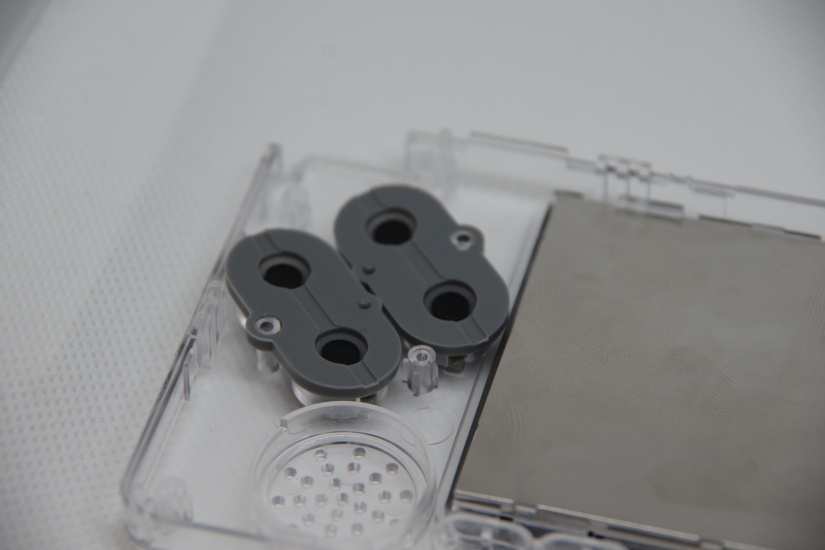
Now, add the X, Y, A, B buttons. These feature different pegs in specific configurations such that they only slot in a certain way. There's no way to insert a button the wrong way.
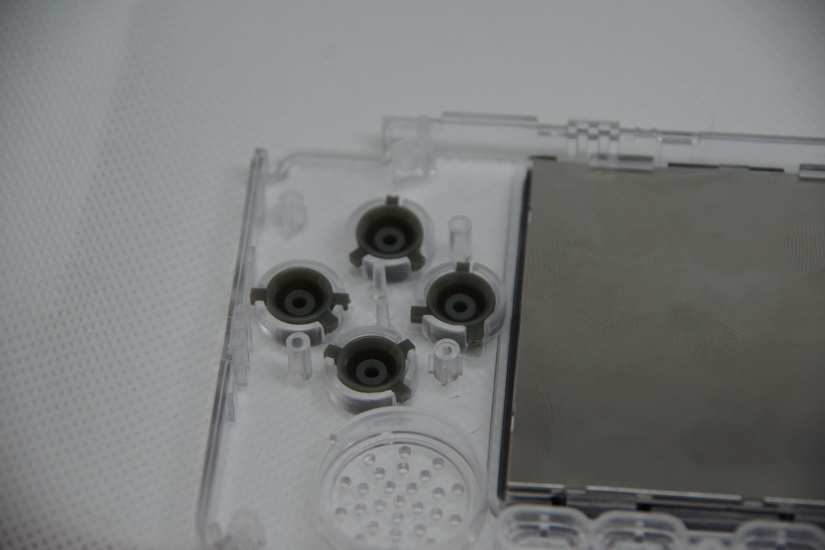
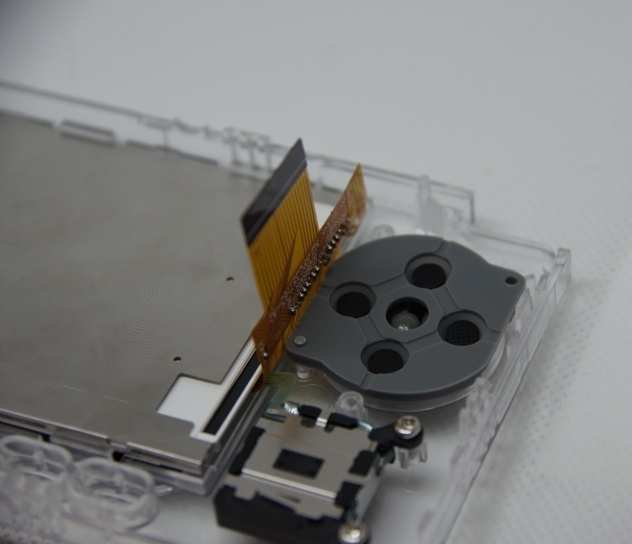
With the A, B, X, and Y buttons successfully placed, add the D-pad and its rubber backer.
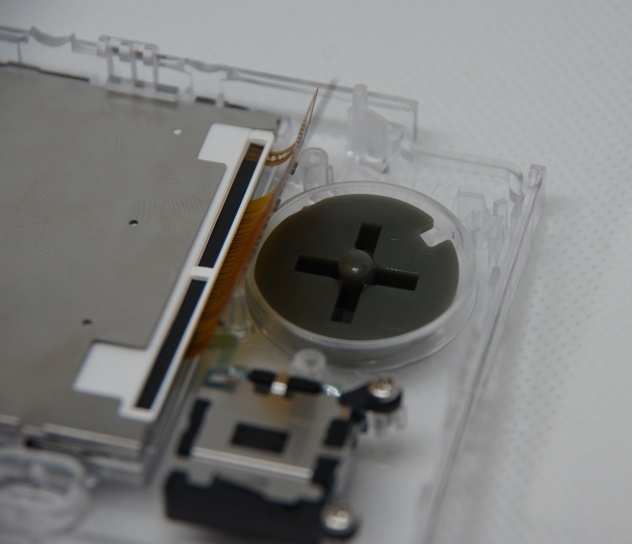
Likewise, add the rubber backers on the A, B, X, and Y buttons. They'll clip into place over plastic pegs.
Place the six rubber buttons into their spaces under the screen. They'll come in pairs connected, so three different strips and it doesn't matter which slot you use. Since the labels are etched into the casing, these start, select, etc. buttons are interchangeable.
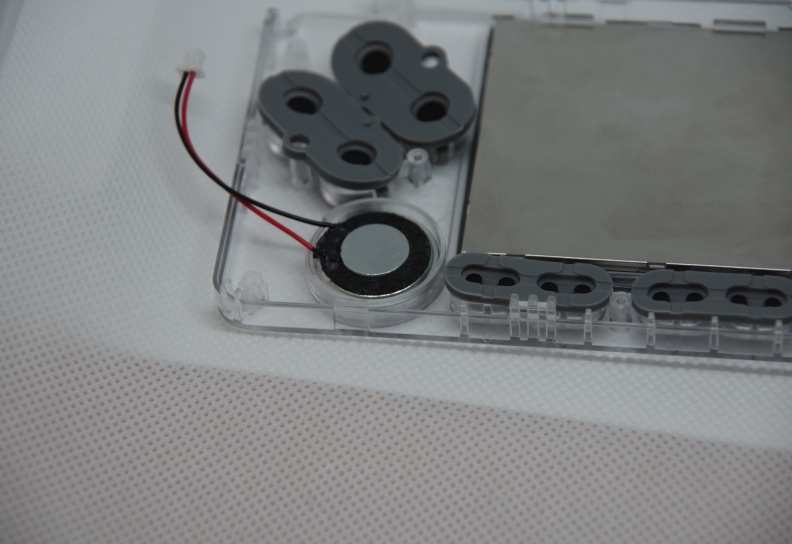
Add the speaker with its pair of wires facing the outside of the Odroid Go Advance.
Finally, add the mainboard. Carefully slip the screen ribbon cable and joystick ribbon cable through the hold in the mainboard, and make sure the speaker wire is accessible.
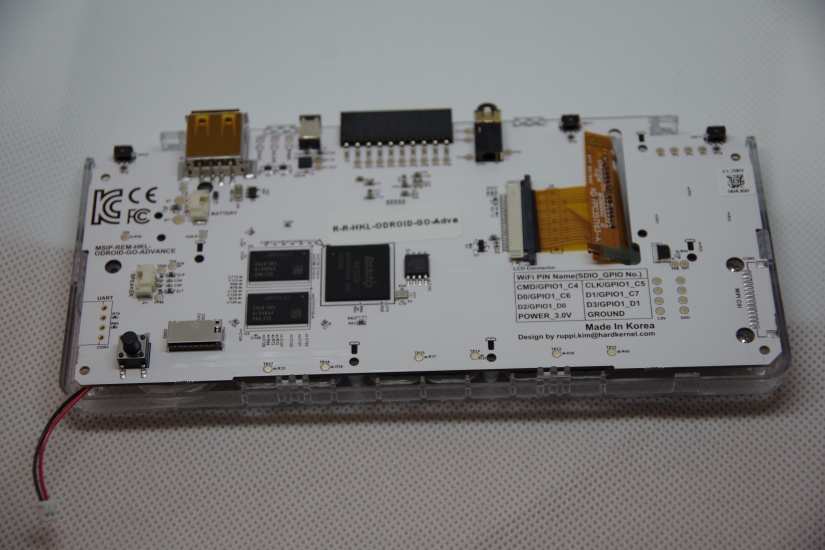
Connect both ribbon cables to the appropriate connectors on the mainboard, and plug in the speaker connector.
Lastly, with all components properly inserted and connected, screw down the motherboard. You'll find screw icons designating the screw holes to use. Place the left and right shoulder buttons as well as power button into their respective slots. Then, plop on the back casing and screw it to the front case.
Install an Odroid Go Advance Image

After you've assembled the Odroid Go Advance, it's time to install an image to a microSD card. Since the microSD card is used for ROM storage, I suggest using a high-capacity microSD card. You should use at least a 16GB microSD card, although depending on the size of your ROM collection, you might need a 64GB or larger storage device. Download your image of choice, either the official Odroid Go Ubuntu minimal EmulationStation image, Batocera for the Odroid Go Advance, or The Retro Arena.
With your preferred Odroid Go Advance OS downloaded, mount it to a microSD card. Depending on the file type, you might need to use a program such as 7Zip to decompress it.
Once you've burned an image to your microSD card, pop it into the Odroid Go and power it on.
Odroid Go Advance Review - An Awesome, Powerful, Versatile DIY Portable Handheld Emulation Console
The Odroid GO Advance is a fantastic portable retro gaming device that makes several major improvements over the Odroid Go. One of my few complaints about the vanilla Odroid Go was its lack of a headphone jack. Oddly, the portable GameBoy clone wasn't suitable for use in public places. Sure, you can use the speaker, but sometimes playing in the wild requires discretion. Later, a third-party accessory allowed for an add-on headphone jack. But the Advance Go boasts a 3.5mm audio out port for playing with headphones, or even using a powerful external speaker.
More buttons, as well as a joystick and USB port, add to its usefulness. Whereas the Odroid Go features a D-pad, A and B buttons, plus four different buttons for the likes of Start, Select, and audio controls, the Advance includes a D-pad, joystick, left and right shoulder buttons, A, B, X, and Y buttons, as well as six inputs for start, select, etc. Moreover, the USB port on the top allows you to plug in peripherals such as a keyboard, mouse, or gamepad. As such, you can use an external game controller like an Xbox 360 or 8BitDo gamepad for emulation, thereby allowing you to play systems that require more buttons than are present on the Go Advance itself.
The Rochchip Rk3326 quad-core ARM Cortex-A53 1.3GHz CPU and Mali-G31 Dvalin GPU considerably improve performance. It's a major step up from the ESP32-powered Odroid Go. In fact, Odroid Go Advance N64 and PSP performance is pretty solid. Additionally, Odroid GO Advance Dreamcast ROMs run shockingly well. While this may initially appear surprising, particularly since more powerful single-board computers (SBCs) such as the RK3399-based Pine64 RockPro64 and ARM Cortex-powered Odroid XU4 struggle with PSP and even some N64 ROMs, the non-high definition TFT LCD screen undoubtedly helps the GO Advance. Since games aren't running at 1080p or even 720p, it's easier to emulate.
Assembly is pretty easy. Figuring out where components fit is super simple. However, some parts are pretty fiddly. The screen was rather difficult to insert into the casing without damaging either the screen itself or case. I also had a bit of trouble getting the ribbon cable for the screen to stay in place. But finally, I got everything completed, and my Odroid Go Advance successfully built. It looked flawless.
Odroid Go Advance Review - Should You Buy an Odroid Go Advance?
The Odroid Go Advance is an incredible system. For under $60 USD, you can snag a DIY, portable, handheld retro gaming emulation system that plays every system up through N64, Dreamcast, and PSP pretty well. Newer systems might not run at a full 60 frames per second (FPS), but on such a small screen, playback will look just fine. The upgraded system-on-a-chip (SoC) plus enhancements such as a headphone jack, USB input, and more buttons make the Go Advance an incredible value. Plus, there are multiple images you can pick from for running an OS.
As alternatives, the ClockWorkPi GameShell and GameBoy clone RetroFlag GPi are neat portable retro gaming handhelds. However, neither the GPi or ClockWorkPi can handle more challenging systems such as the N64, PSP, or even PS1. And even if they could, lack of enough buttons would hamper compatibility. Ultimately, Hardkernel scores a major hit with its new and very improved Odroid Go Advance, an increasingly useful device capable of emulating high-end retro systems with ease.
Buy the Odroid Go Advance - Save $1 off purchase of $10 or more with code EMSUPPORTER at checkout
Electroscore: 4.5/5 ![Electroscore: 4.5]()

Pros:
- Easy to assemble
- Great emulation - Odroid Go Advance N64, Dreamcast, and PSP emulation is surprisingly smooth
- Affordable
Cons:
- Somewhat fiddly assembly
Price: $5,800.00
Link: ameridroid.com/products/odroid-go-advance

Moe Long is an editor, writer, and tech buff with a particular appreciation for Linux, Raspberry Pis, and retro gaming. Writing online since 2013, Moe has bylines at MakeUseOf, TechBeacon, DZone, SmartHomeBeginner, DEV.to, DVD Netflix, and Electropages. You can read his writings on film and pop culture at Cup of Moe, check out his tech reviews, guides, and tutorials at Tech Up Your Life, and hear his thoughts on movies on the Celluloid Fiends podcast. Aside from writing and editing, Moe has an online course, the Beginner's Guide to Affiliate Blogging From Scratch. When he's not hammering away at his keyboard, he enjoys running, reading, watching cinema, listening to vinyl, and playing with his dog Sebastian.


Leave your feedback...