
Cypress PSoC 6 WiFi-BT Pioneer Kit Specs and More
There's no shortage of development kits out there designed to provide easy ways to try out new microcontrollers (MCUs). Part of the problem is knowing which one to get. For professionals, you can start with the requirements of your project and work backward. For beginners and hobbyists, it's not so simple. When used to "Arduino-alike" or "Raspberry Pi-alike," taking a step into something a little more robust can be daunting.
Today we are looking at the Cypress PSoC 6 WiFi-BT Pioneer Kit, an evaluation board designed to give both beginners and professionals an easy access point to their PSoC 6 line of dual MCUs.
Writing about evaluation boards usually leans heavily on comparing the stats of the MCUs themselves. After all, when many boards are little more than USB/power interfaces to a chip broken out to pins, it makes sense.
The PSoC 6 consists of two MCUs, one primary Arm Cortex-M4 running at 150MHz, and a secondary 100MHz Arm Cortex M0+ for low power operation. The chip also features 1MB Flash and 288KB SRAM, connectivity for analog and digital peripherals, and Cypress patented CapSense touch-sensing system.
While the chips themselves are clearly powerful and fully featured, the Cypress PSoC 6 WiFi-BT Pioneer Kit (hereafter Pioneer Kit) offers a lot more outside of the SoC than in it.
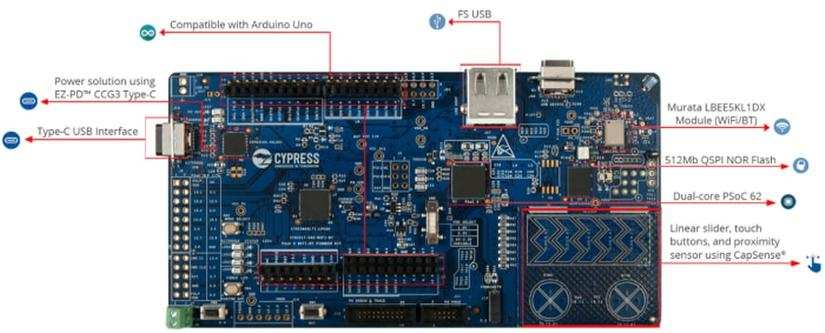
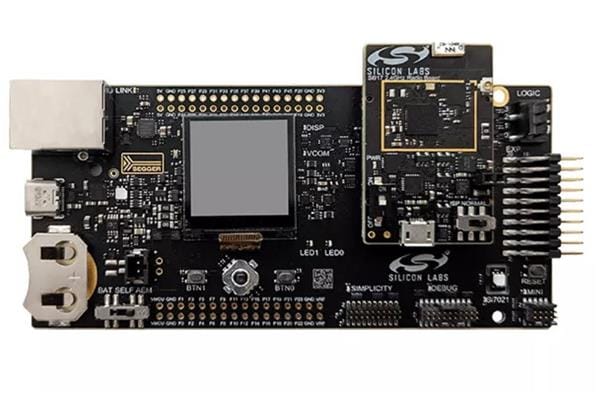
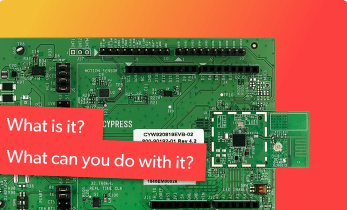
What is the Cypress PSoC 6 WiFi-BT Pioneer Kit?![Pioneer Board features]()
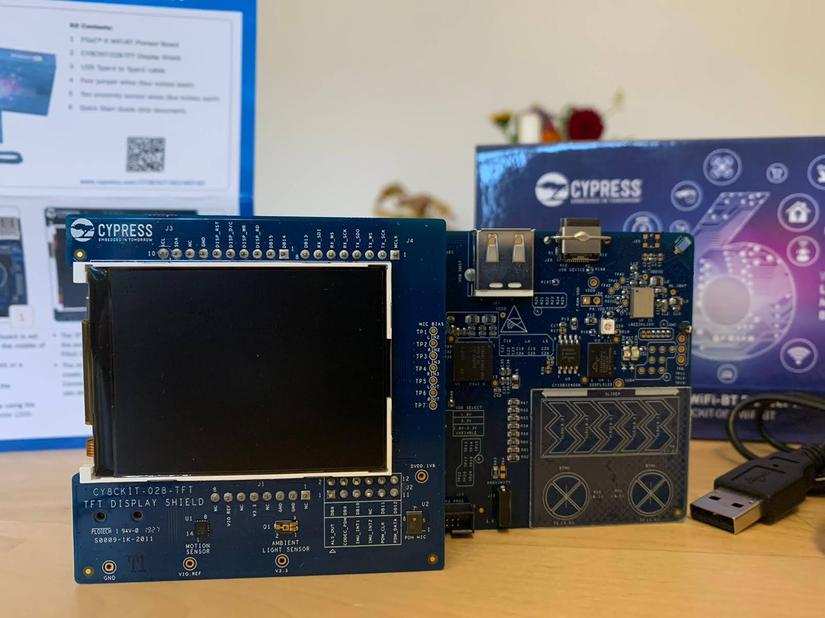
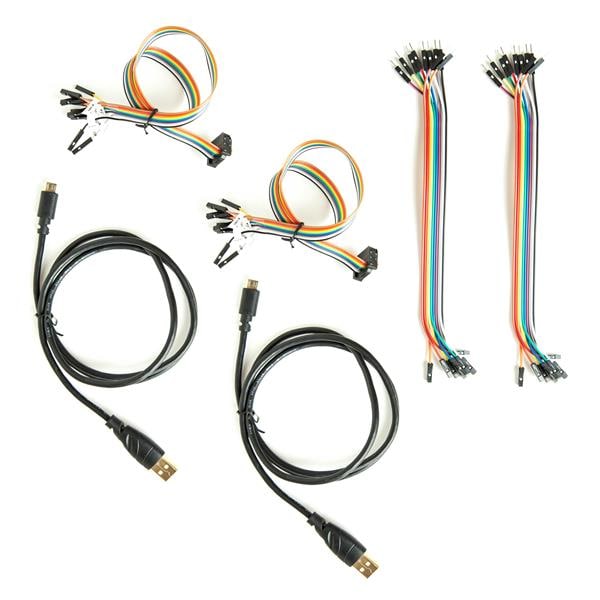
The Pioneer Kit consists of an evaluation board for the PSoC 6, an LCD screen with some added sensor peripherals, a USB-a to USB Type-C connector, and several jumper cables that can double as aerials for the onboard capacitive proximity sensor.
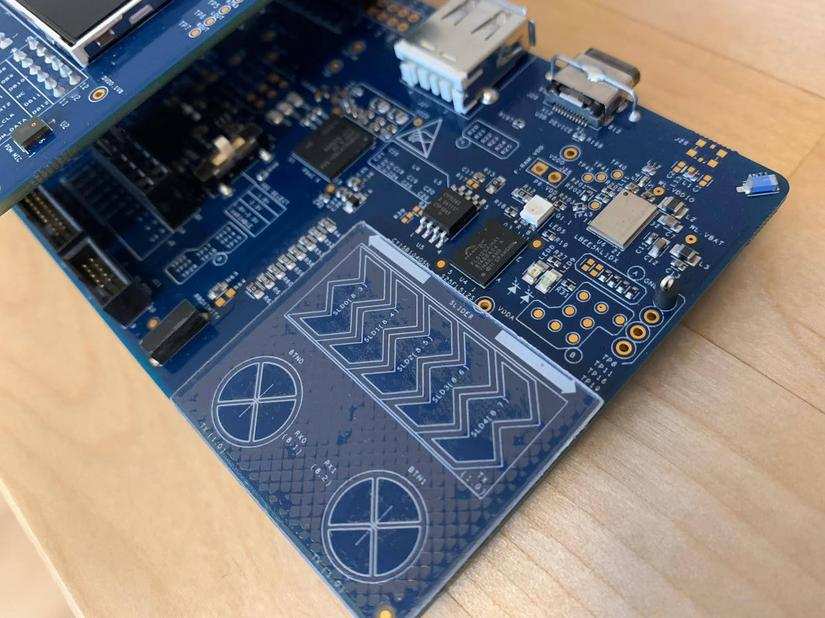
The board breaks out most of the PSoC 6's features, including the aforementioned CapSense proximity sensor, a five-segment CapSense slider, two CapSense buttons, and various options for I/O arranged to grant compatibility to Arduino Uno footprint peripherals. The board's pin layout is designed to give compatibility with 3.3v Arduino shields when not using the LCD screen.
Connectivity is taken care of via a Murata LBEE5KL1DX combi WiFi and Bluetooth chip module, and there is an additional 512Mb NOR flash available via a separate chip.
Programming and debugging comes courtesy of the onboard KitProg2 (updatable to KitProg 3), capable of acting as a USB to UART, I2C, and SPI bridge.
More Than a Simple Screen
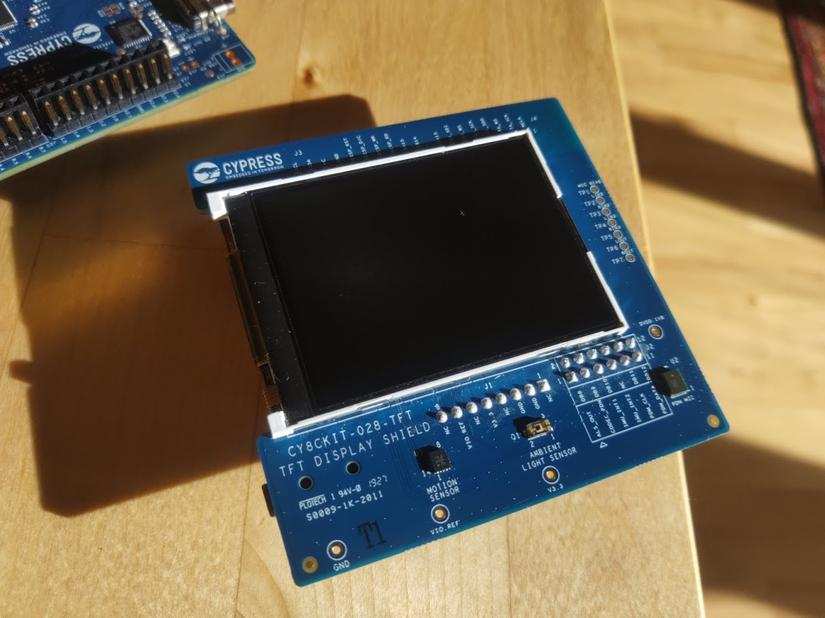
The included LCD screen with the Pioneer Kit provides some great features for experimenting with. Alongside the 2.4 inch 240 x 320 LCD screen, you get an ambient light sensor, a three-axis accelerometer, a three-axis gyroscope, and a PDM microphone. The LCD shield also features a 3.5mm jack input capable of supporting both AHJand OMTP headphones and a 32-bit audio codec for working with microphones and speakers.
That is a lot to pack into a simple screen, but it's been well thought out. Since it was designed alongside the evaluation boards for the PSoC 6, example code is already available, showing how these peripherals can work in working programs.
Who is the Cypress PSoC 6 WiFi-BT Pioneer Kit For?
Development kits generally fall into two camps: Those designed for beginners looking for a simple way to try embedded programming, and those intended for professionals looking to try out new MCUs without having to spin up their own evaluation board.
The Pioneer Kit stands somewhere just above a complete beginner choice. It's well made, well-annotated (even on the PCB itself), and as you'll see later in this article, quick to get started with. That said, those with no previous experience of working with hardware, the C programming language, or fully featured IDEs might struggle.
It's undoubtedly much harder to get started with than something like an Arduino or compatible board, but that's true of almost all industry MCUs. While this is probably not suitable for beginners, I'd argue that the basic getting started materials are enough to get most intermediate embedded hardware enthusiasts.
Should You Buy The Cypress PSoC 6 WiFi-BT Pioneer Kit?
That's a lot of information to take in, but the critical question stays the same: Is the Cypress PSoC 6 WiFi-BT Pioneer Kit worth your money?
Yes. As mentioned above, you'll have a hard time if you are a total beginner. Still, anyone else interested in getting started with dual-MCU programming will find everything they need here: connectivity, a fair range of onboard peripherals for working with the CapSense capabilities. The addition of the specially designed LCD module is a great touch, and the connection pins it uses are 3.3v Arduino shield compatible.
While cheaper boards feature the PSoC 6 (some of which we'll be covering in the coming weeks), this kit gives you everything you need to prototype connected embedded IoT devices, and at $80, it promises a lot.

Cypress PSoC 6 WiFi-BT Pioneer Kit Specs
PSoC 6 MCU:
• 150MHz Arm® Cortex®-M4 as the primary application processor
• 100MHz Arm Cortex-M0+ to support low-power operations,
• Up to 1MB Flash and 288KB SRAM
• CapSense® touch-sensing
• Programmable analog and digital peripherals that enable higher flexibility and in-field tuning of the application
PSoC 6 WiFi-BT Pioneer Board:
• PSoC 6 MCU
• 512Mb NOR flash provides a fast, expandable memory for data and code
• Expansion headers compatible with Arduino Uno 3.3V shields and Digilent® Pmod™ modules
• On-board programmer/debugger (KitProg2) with mass storage programming, USB to UART/I2C/SPI bridge functionality, and custom applications support
• 2.4GHz WLAN and BLUETOOTH® functionality module
• USB Type-C power delivery system (EZ-PD™ CCG3) with rechargeable lithium-ion polymer (Li-Po) battery support
• Five-segment CapSense slider
• Two CapSense buttons
• One CapSense proximity sensing header allows designers to evaluate Cypress’ fourth-generation CapSense technology
• One RGB LED
• Two user LEDs
• One push button
CY8CKIT-028-TFT Display Shield:
• 2.4-inch Thin-Film Transistor (TFT) LCD module with 240x320 pixel resolution
• A three-axis acceleration and three-axis gyroscopic motion sensor
• Ambient light sensor IC
• 32-bit audio codec with microphone, headphone, and speaker amplifier capability
• PDM microphone for voice input
• Arduino compatible I/O headers
• Audio jack capable of connecting both AHJ and OMTP headphones.
• PDM microphone for voice input
Getting Started with the Cypress PSoC 6 WiFi-BT Pioneer Kit
From a personal viewpoint, the Pioneer Kit was an exciting prospect. As I've said in the past, I've dabbled with many evaluation boards and MCUs, but this was my first experience with PSoC 6 and Cypress' tools.
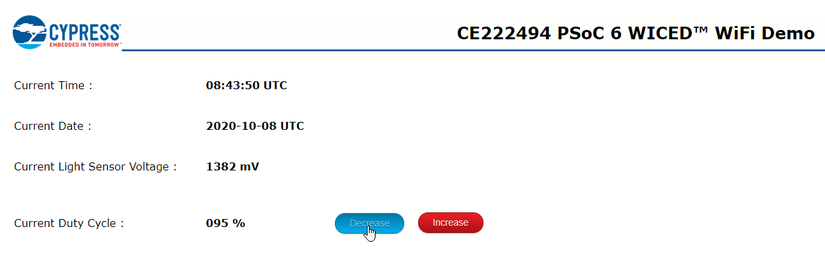
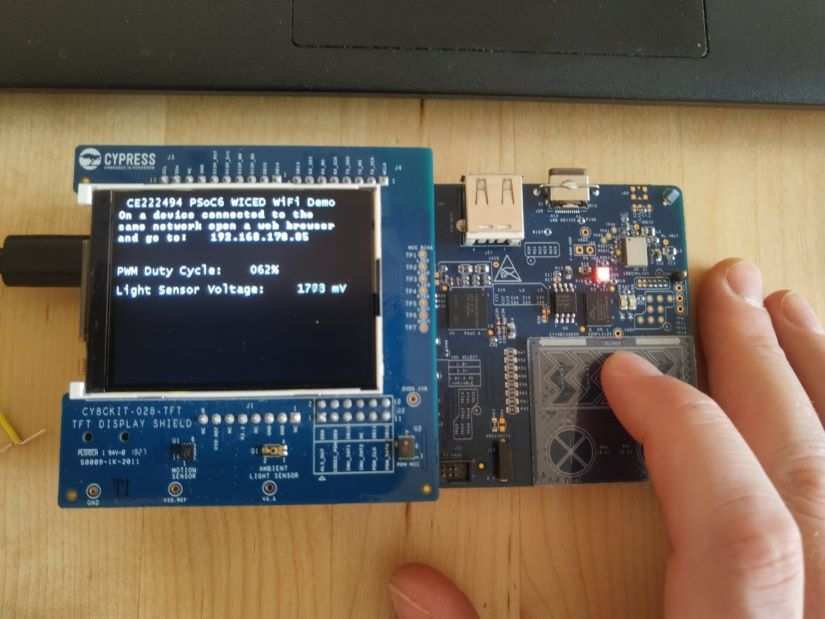
The included card shows how to use the pre-flashed application showing off the web interface, light sensor, and capacitive touch buttons and slider. It's a nice way to see what a finished prototype might look like, but I wanted to get to coding my own projects so quickly moved on.
Cypress advises using the ModusToolbox software environment for working with the PSoC 6 chipset. Based on Eclipse IDE, it should feel pretty familiar to those who've worked in Eclipse-based IDEs. The software is free, though it requires an account to download.
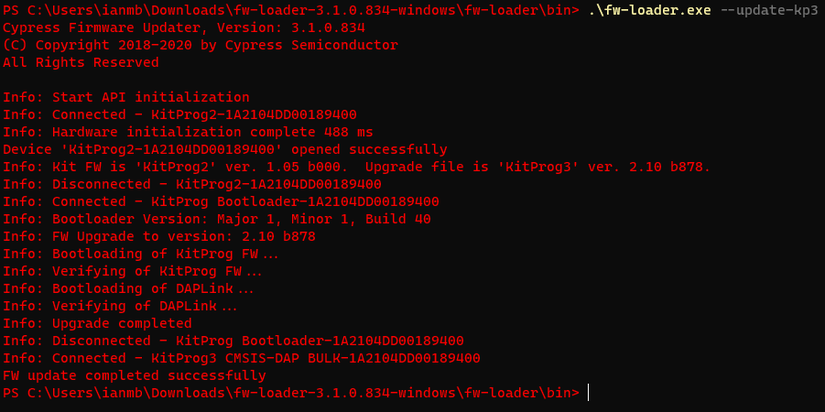
From there, you have several options for getting started with the Kit. I chose to follow a basic getting started guide provided by Cypress. One thing to note here is that before starting, you will need to update the KitProg USB chip from version 2 to version 3. This is a relatively straightforward process as a CLI firmware tool is available, but note that you'll need to use the onboard KitProg mode selector switch to update it.
Following the same getting started guide took me through my usual getting started routine for most new MCUs. I opened the Hello World example code, flashed it to the board, dropped in a couple of breakpoints, and opened a debugging session. To my inexperienced eyes, everything worked much as I expected it.

The above guide takes you through rebuilding the Hello World project from scratch (something always worth doing, in my opinion), including the workflow of setting up libraries, building, and debugging.
You'll find a large selection of example projects in the ModusToolbox IDE (also available on GitHub). I feel like I've hardly scratched the surface of what I can do with the Pioneer Kit. One thing is for sure, with what I have here, I could learn almost everything I need to know about the PSoC 6 chipset, and as evaluation boards go, this is one of the most fully-featured I've used to date.
A Perfect Board For Experiments - Cypress PSoC 6 WiFi-BT Pioneer Kit Final Thoughts
As I mentioned above, complete beginners might find getting started with the Cypress PSoC 6 WiFi-BT Pioneer Kit a little daunting. For everyone else, this is the perfect board for learning about the PSoC 6 dual-core chipsets and how they interact with the world around them.

Ian Buckley is a writer, musician, and perpetual tinkerer. Commonly found surrounded by hobby electrical components, he's also a keen programmer and likes to build crazy-sounding instruments with microcontrollers. In addition to Electromaker, Ian writes over at MakeUseOf and has bylines at the likes of Online Tech Tips as well as Help Desk Geek.


Leave your feedback...