

Smart Home Concept Using Psoc6

Made by vinayyn / Environmental Sensing / Home Automation / Sensors / IoT
About the project
Smart Switching using Capsense helps to control the appliances by a touch. Intruder detection and alerting using motion detection and noise(sound) detection. controlling lightings by automating according to light intensity.
Project info
Difficulty: Moderate
Estimated time: 2 hours
License: GNU General Public License, version 3 or later (GPL3+)
Items used in this project
Hardware components

View all
Story

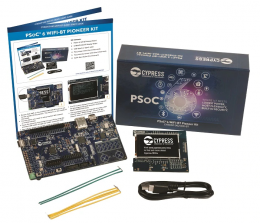
Smart Home Concept Using PSoC 6 is based around the CYPRESS PSoC6 WIFI- BT Pioneer Kit and Modus Toolbox Software Environment.
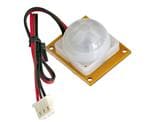
The smart home concept using PSoC6 allows the user to monitor the intruder, whenever the motion and noise are detected system gives the alert. An ambient light sensor-based lighting controller helps to save energy by turning off the lights when there is enough Natural light. Touch-based appliances controlling using Capsense Buttons gives the smart feel and reduces the efforts to press the switches.
Features
- Smart switching using Capsense allows controlling the appliances by a touch.
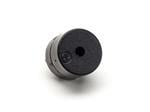
- Intruder detection and alerting using the Motion sensor And PDM Microphone.
- Theft Prevention and Alerting.
- Natural light Intensity-based Lightings controller.
- Detailed data can be found on the TFT Display.
- Open-source Hardware design files and source code are available for download.
How Does Smart Home Concept Using PSoC 6 works?
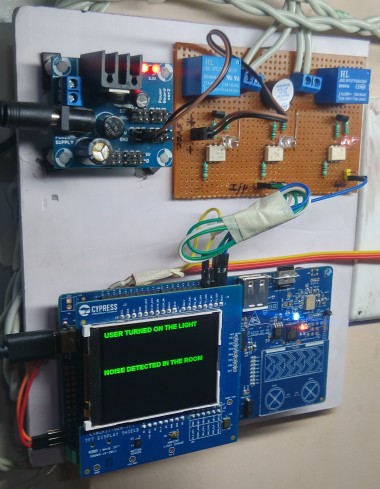
The ambient light Sensor on the CY8CKIT - 028 TFT Display shield continuously monitors the available Natural light Intensity. when there is low natural light intensity, the system activates the primary light source by turning on the Relay. whenever the user turns on the secondary lights by Capsense Buttons, the ambient light sensor measures the available light intensity. if the light intensity is more than the threshold values the system Deactivates the primary light source and saves the Power.PIR motion sensor and PDM Microphone based noise detection will provide the security features in this system. During the night when Intruder motion or noise detected the system activates the buzzer and alerts the User. Capsense buttons are been used to control the appliances by a touch. Here I am utilizing the Capsense features of the Pioneer Kit, in the two Capsense Buttons one button is used to turn ON the Lights another is used to turn OFF the light. When the user Touches Capsense Buttons the respective action's details are displayed on the TFT display.
Block Diagram

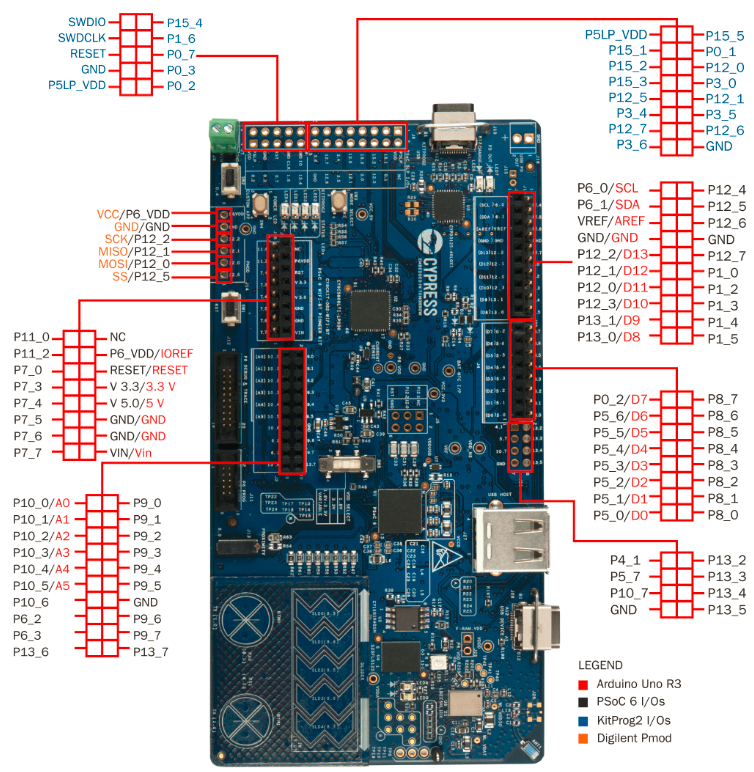
The Heart of the smart home concept using PSoC Is a CYPRESS PSoC 6 WiFi-BT Pioneer Kit. The PSoC 6 WiFi-BT Pioneer Kit is a low-cost hardware platform that enables the design and debugs of the PSoC 62 MCU (CY8C6247BZI-D54) and the Murata LBEE5KL1DX Module (CYW4343W WiFi + Bluetooth Combo Chip).
PSoC 6 WiFi-BT Pioneer Kit Features
- PSoC 62 MCU with up to 1MB Flash, 288KB SRAM, and 104 GPIOs
- Murata LBEE5KL1DX Wi-Fi/BT combo module
- On-board 512Mb QSPI NOR Flash Memory
- EZ-PD™ CCG3 USB Type-C Controller with Power Delivery
- CapSense touch slider, buttons, and proximity sensor
- On-board debugger/programmer (KitProg)
- Arduino UNO v3 headers
- Digilent Pmod interface
- CY8CKIT-028-TFT shield board with:
- 2.4-inch TFT display
- Ambient light sensor
- 6-axis motion sensor
- PDM-PCM microphone

The PSoC 6 WiFi-BT Pioneer Kit has been designed for users to develop next-generation Internet of Things (IoT) applications. It comes with the PSoC 62 MCU, which provides IoT developers with an ultra-low-power, flexible, and secure MCU architecture. For more information about the Kit click here
Board Pinout
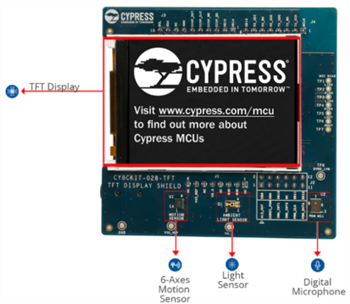
CY8CKIT-028-TFT
The TFT Display Shield Board (CY8CKIT-028-TFT) has been designed such that a TFT display, audio devices, and sensors can interface with PSoC MCUs.
Features
It comes with the features below to enable everyday objects to connect to the Internet of Things (IoT).
- 2.4 inch TFT Display (ST7789V)
- Motion Sensor (BMI-160)
- Ambient Light Sensor (TEMT6000X01)
- PDM Microphone example code (SPK0838HT4HB)
- Audio Codec (AK4954A)
For More Detailed information on the CY8CKIT-028-TFT Click Here
In this project, I have used Optocouplers to Drive the Relays and to control the lights and appliances. here optocouplers 4N25 help to protect the PSoC 6 WiFi-BT Pioneer Kit from external surge and gives isolation to users from high voltage. The connection diagrams Are attached in the files, please go through them. To power the optoisolator, Buzzer, and relays I have used an External Supply voltage of 5vdc. I am Regulating 5 volts from 12 volt 1A Power source using 7805 and other external components.
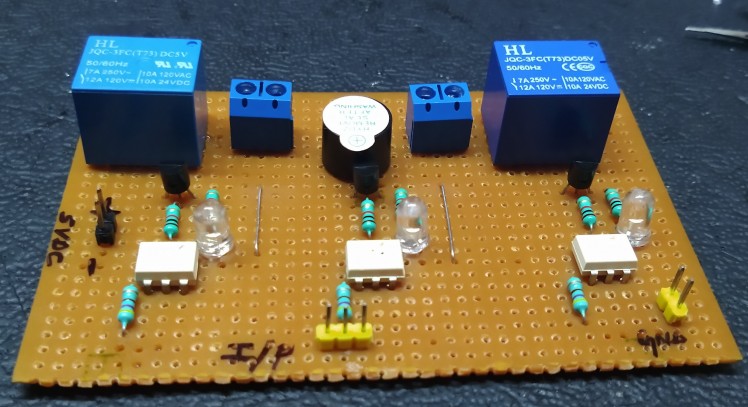
Optoisolated Relay driving circuit on PCB.
Programming The PSoC6 WIFI-BT Pioneer Kit
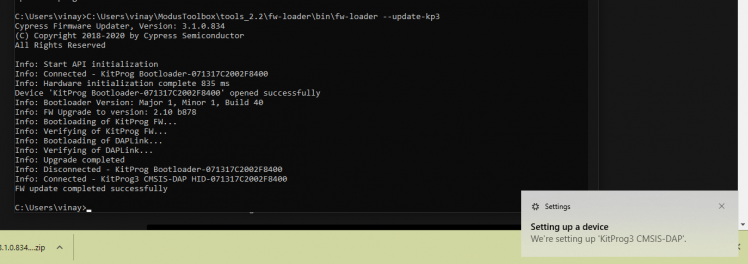
The PSoC6 WIFI-BT Pioneer kit comes with a debugger, and the firmware is KitProg2. but the Modustoolbox Requires Firmware with Kitprog3. so firmware needs to upgrade from KitProg2 to KitProg3.
To upgrade the firmware follow these steps
1. Press and hold down SW3 to set it into bootloader mode and connect the board. LED2 should flash.
2. Open the fw-loader folder using command prompt
3. Then go to the Command Prompt (Windows).
4. Add the code a and Hit enter
- fw-loader --update-kp3
5. Firmware upgrading status will appear on the screen
Programming PSoC6 CY8CKIT-062 WIFI- BT Pioneer Kit Using ModusToolbox
I have used ModusToolbox Version 2.2 To compile and Upload the code you can find the software here.
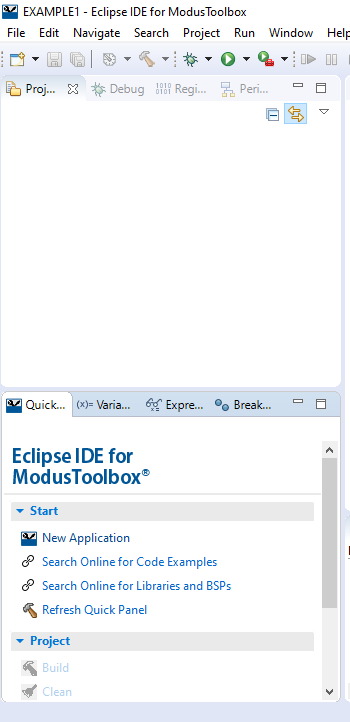
After Downloading and Installing SoftwareOpen the ModusToolbox.
- Create a name and click on the launch (I am using Project Name As EXAMPLE1)

2.Select New application from the Start menu
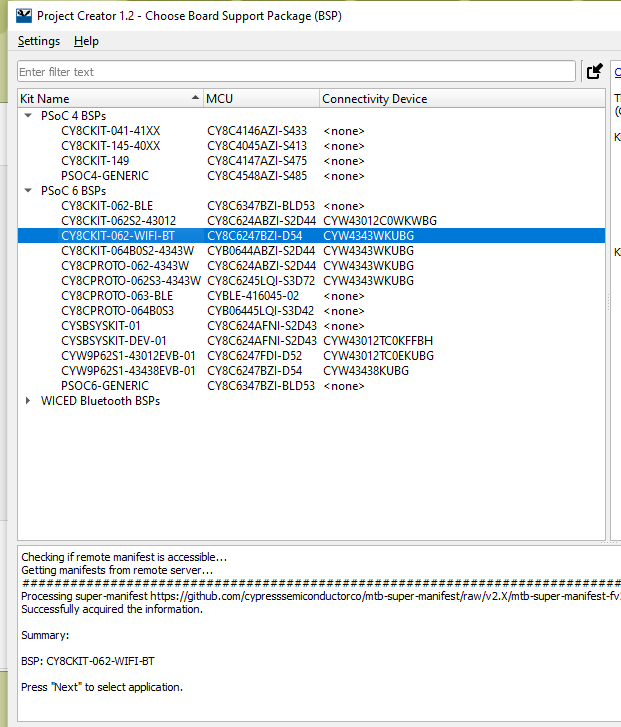
3. Project creator window will appear select CY8CKIT-062-WIFI-BT From PSoC 6 BSPs and click Next.
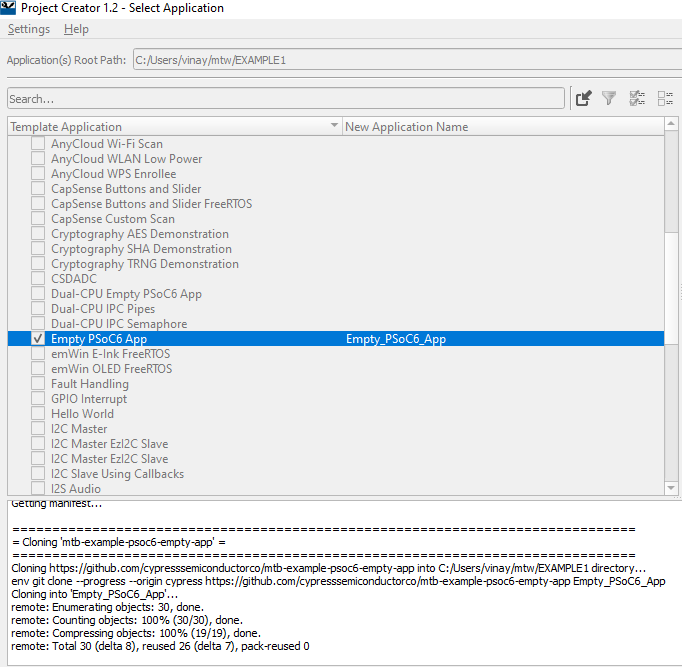
4. Choose Appropriate Application Template (For This project I am using the Empty PSoC App).
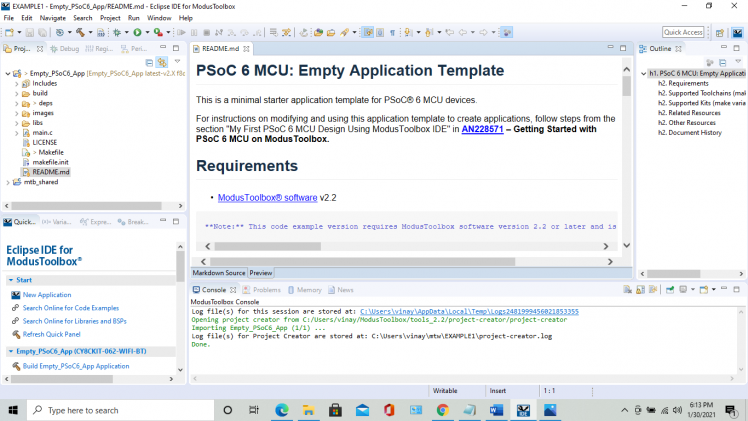
5. After Successful Initialization main window will appear with README.md
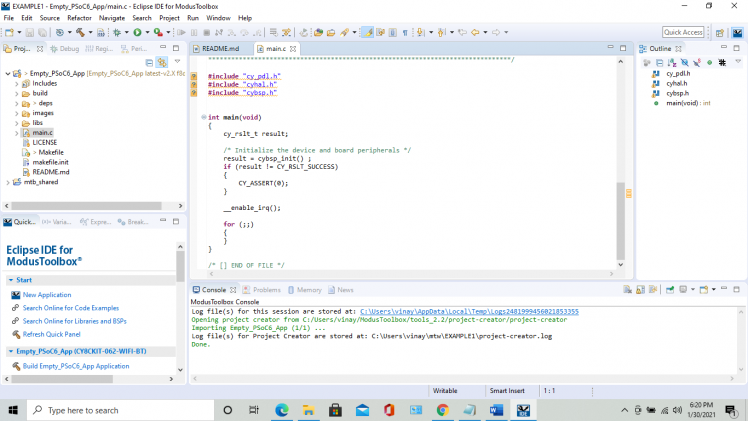
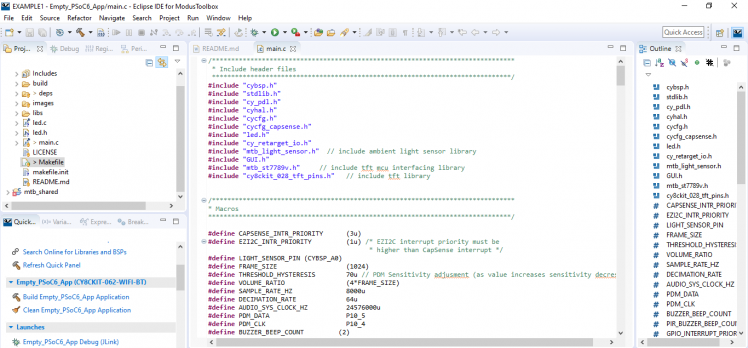
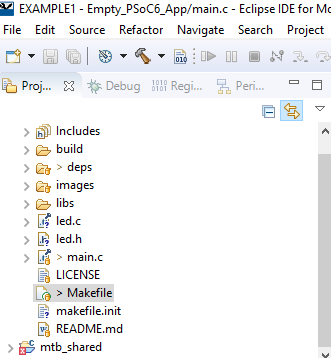
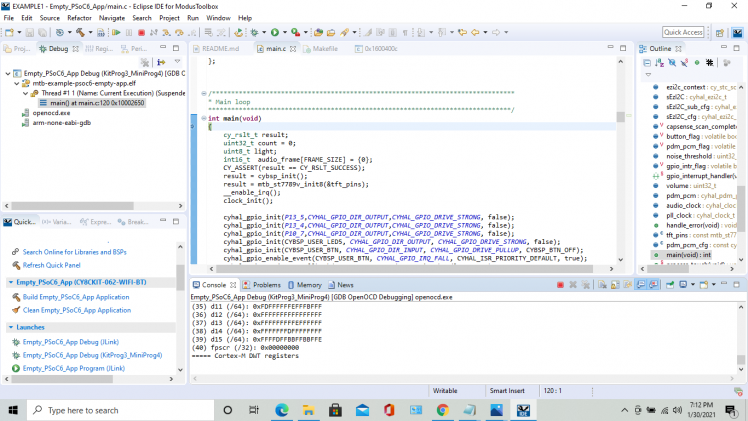
6. Open main.c From Project Window.

7. main. c will appear with Basic syntax code.
8. Now we Need To add libraries to the main code. I am utilizing Capsense, TFT, PDM Microphone, Serial port, Ambient light sensor, GPIO So I am going to add those libraries Now.
Click on the Quick access and Type Library Manager
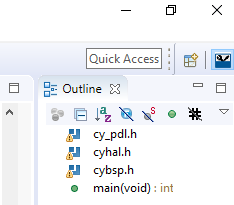
And select ModusToolbox Library Manager or(CTRL+8)

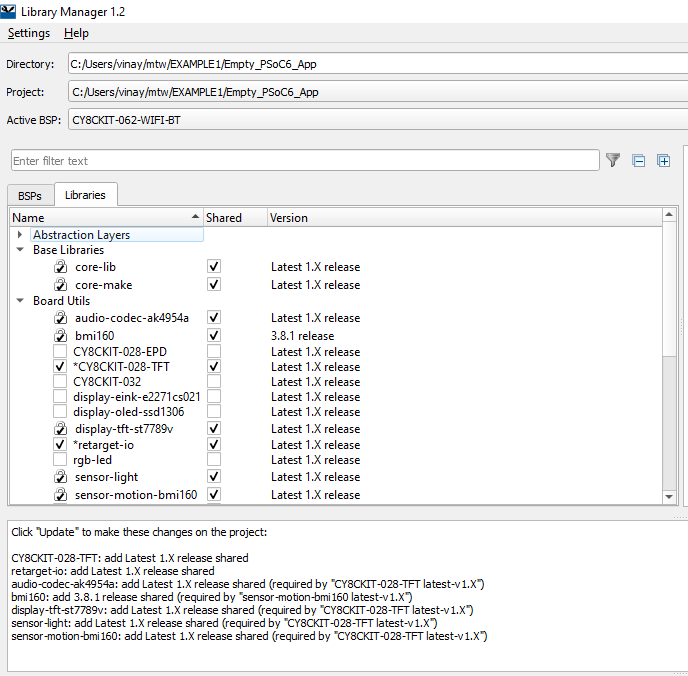
Select Libraries

Select CY8CKIT-028-TFT then other CY8CKIT-028-TFT related libraries will automatically select.
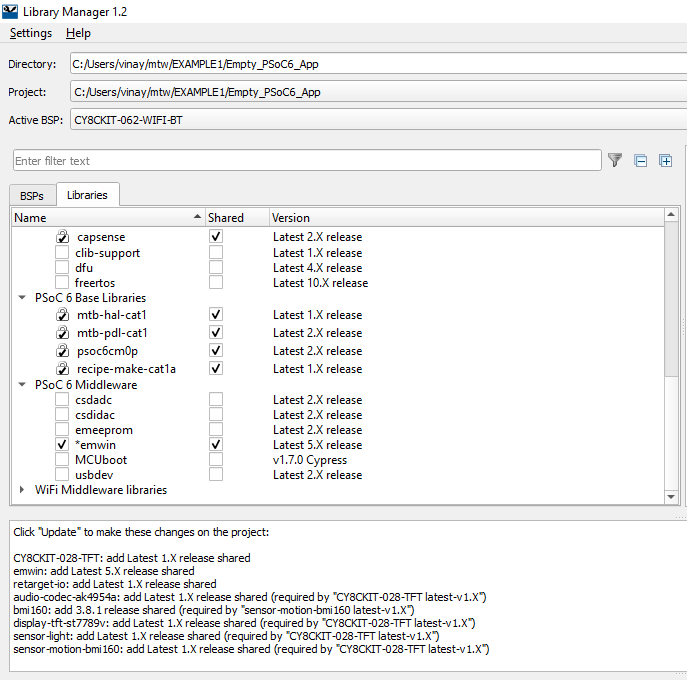
Then select emwin from PSoC Middleware And click Update
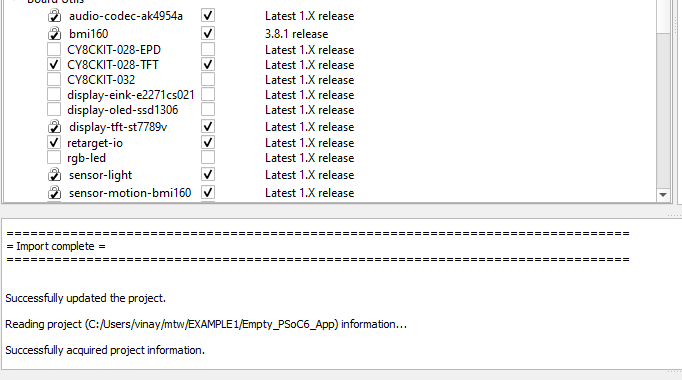
It will take few minutes to Get all libraries. after the successful importing it shows that Import is Complete
click close it redirects to the main window.
9. Add or write code to Main.c
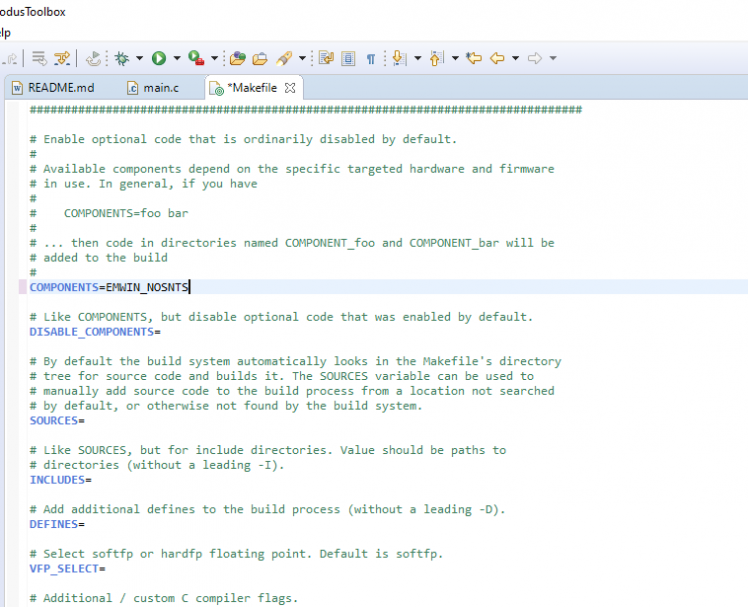
Since we are using TFT Display, before compiling the code we need to Write COMPONENTS = EMWIN_NOSNTS In the Maker. file
Click on Maker. file from the project window
And write COMPONENTS=EMWIN_NOSNTS and save
- COMPONENTS=EMWIN_NOSNTS
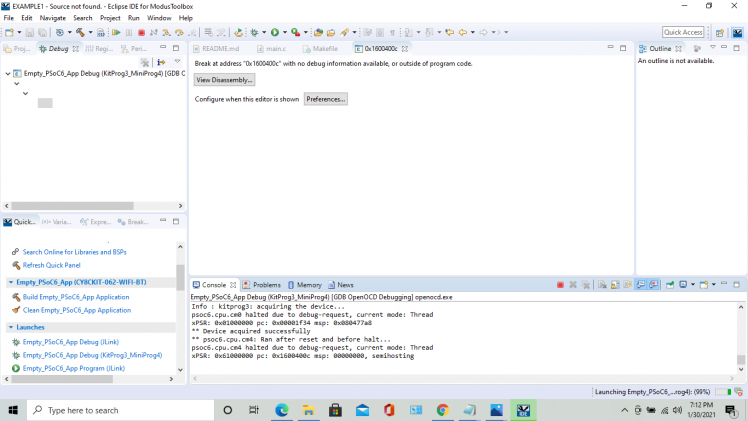
Now Code Can compile and upload.To compile And Upload the Code Select Debug(KitProg3_MiniProg4) from Launches Menu.
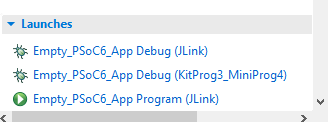
Note: Before Launching Make sure That the Device is Connected to Your computer.After Successful uploading, the following windows will appear and Your Kit is Ready for Action.

Demonstration Video and Results Images
Testing Result Images
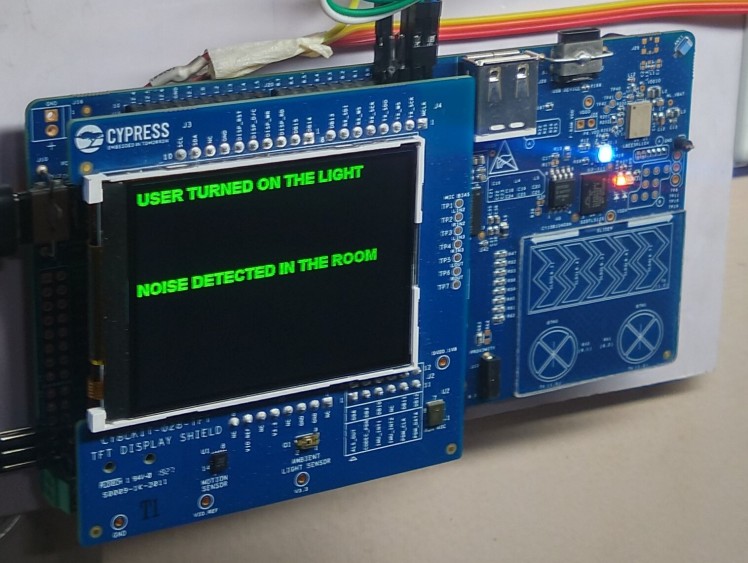
1. User Turned ON The Light Using Capsense Button & Motion Detected Inside The Room

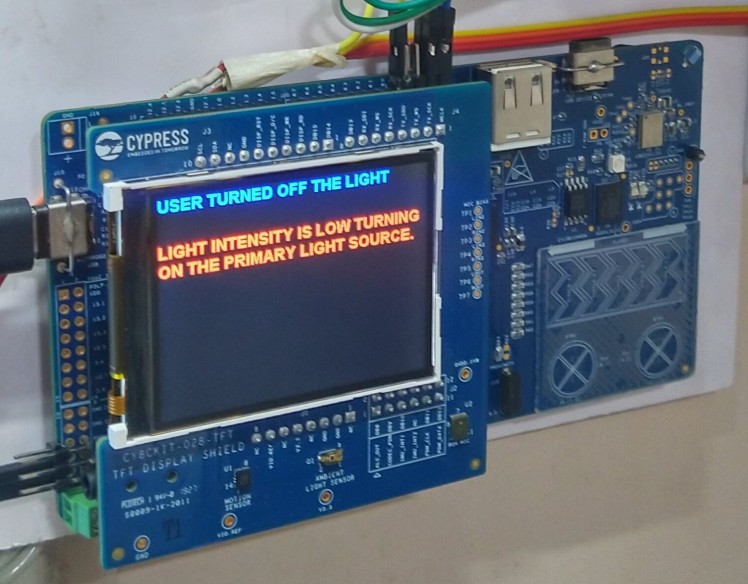
2.User Turned OFF The Light Using Capsense Button & Light Intensity Is LOW Turning ON The Primary Light Source.
3.Noise Detected In The Room
Test Setup Before Turning ON The System

Demonstration Video
Useful Links
1. https://cypresssemiconductorco.github.io/TARGET_CY8CKIT-062-WIFI-BT/html/modules.html
2.https://cypresssemiconductorco.github.io/psoc6hal/html/group__group__hal__gpio.html#subsection_gpio_snippet_2
3.https://github.com/cypresssemiconductorco/CY8CKIT-028-TFT
4. https://www.nxp.com/docs/en/user-guide/UM03001_emWin5_3.pdf

Leave your feedback...