

Micromote: The Esp-now Based Gesture Remote

Made by mukesh-sankhla / 3D Printing / Communication / Home Automation / Sensors / IoT
About the project
MicroMote: The ESP-Now Based Gesture Remote
Items used in this project

Software apps and online services
Story

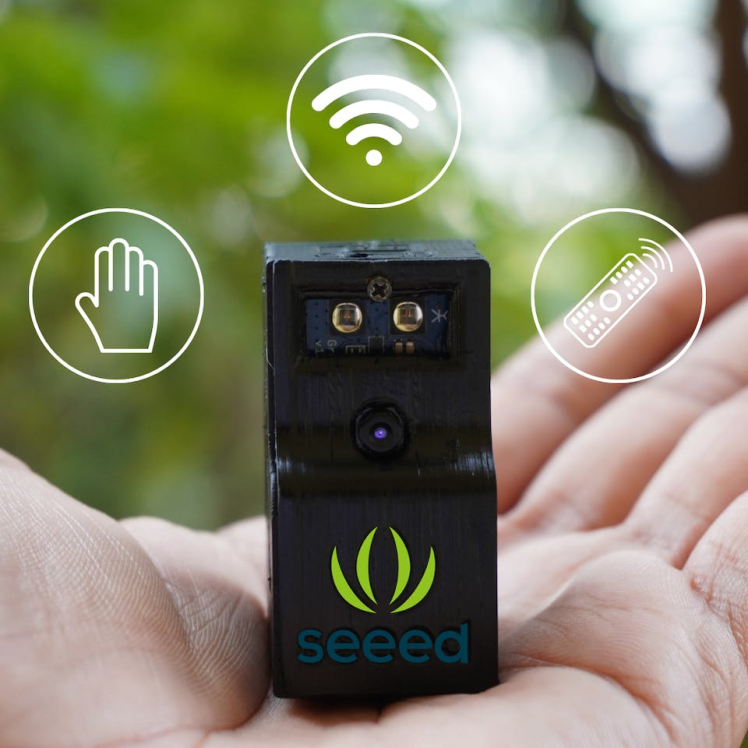
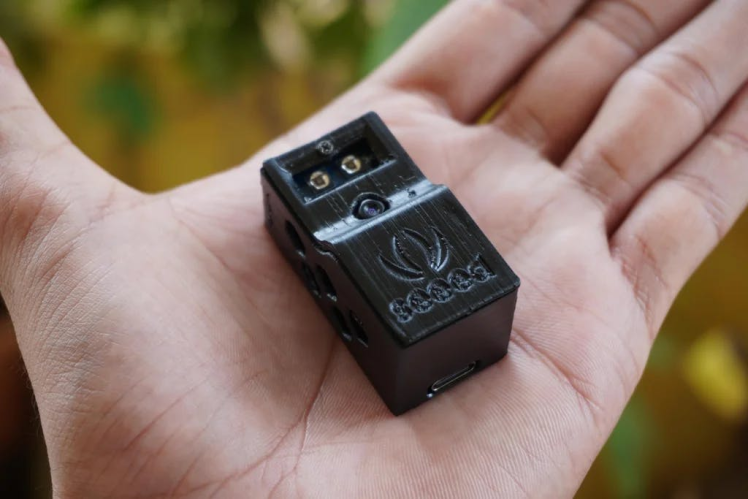
Introducing MicroMote: The ESP-Now Based Gesture Remote
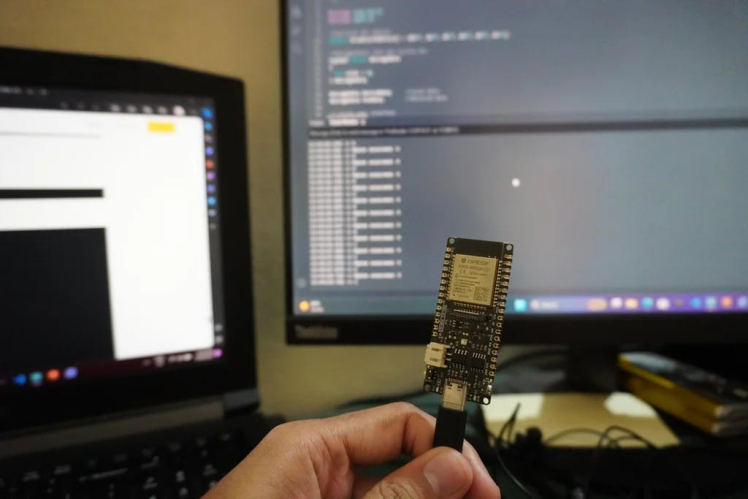
Are you ready to take control of your smart devices with a wave of your hand? Look no further than MicroMote, the revolutionary ESP32 S3-based Gesture Remote. This innovative and compact device, measuring just 4cm, is set to transform the way you interact with your smart electronic appliances, lamps, and more.
Key Features:
- ESP32 S3 Powerhouse: MicroMote is powered by the ESP32 S3, a cutting-edge microcontroller that offers enhanced performance and efficiency for seamless communication with your smart devices.
- Gesture Sensing Technology: With a built-in gesture sensor, MicroMote lets you control your devices with simple hand movements. Wave your hand to adjust the volume, change the channel, or dim the lights – it's like magic at your fingertips.
- ESP-NOW Protocol: MicroMote utilizes the ESP-NOW protocol for ultra-fast and reliable communication with other devices. Say goodbye to the hassle of complex pairing processes and enjoy instant connectivity.
- Compact and Portable: MicroMote's small form factor makes it incredibly portable and easy to carry in your pocket or attach to your keychain. Take it with you wherever you go and have control over your devices no matter where you are.
- Wide Compatibility: MicroMote is designed to work seamlessly with a variety of smart electronic appliances, lamps, and more. It's your all-in-one remote for a connected world.
Supplies
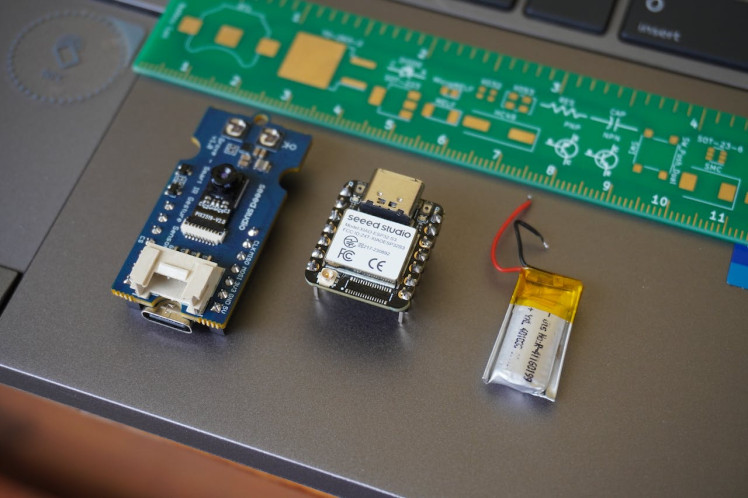

1x Seeed Studio Grove Smart IR Gesture Sensor
1x Small 3.7v Lithium Polymer Battery
1x Small Screw
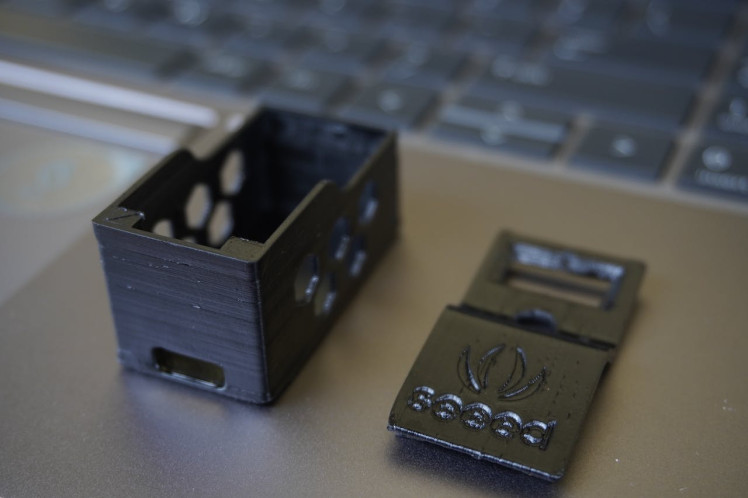
1x 3D Printed Housing
1x 3D Printed Cover
Sponsored By NextPCB
This project is successfully completed because of the help and support from NextPCB -Reliable Multilayer PCB Manufacturer. NextPCB is one of the most experienced PCB manufacturers in Global, has specialized in the PCB and assembly industry for over 15 years.
Order high-quality, reliable PCB starting at $1.9, multilayer starting at $6.9:
https://www.nextpcb.com/pcb-quote
Enjoy free PCB assembly for 5 boards:
https://www.nextpcb.com/pcb-assembly-quote
DFM free online PCB Gerber viewer:
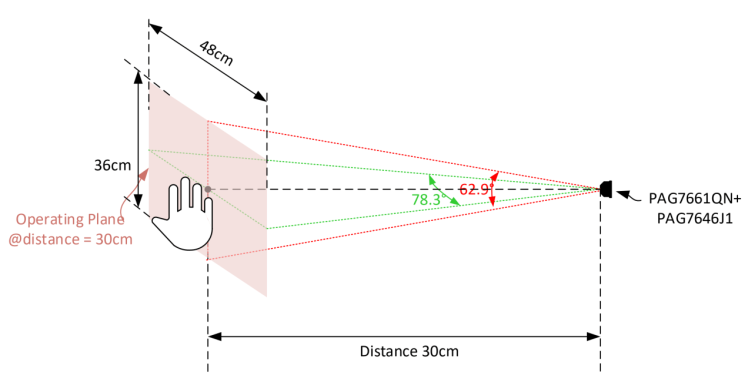
Gesture Sensor Operating Plane
The gesture operation distance is 15 to 30 cm, the farthest cannot exceed 35 cm. Based on Sensor FOV 78.3° (horizontal) and 62.9°(vertical), and the operating area is 48 x 36 cm² at 30 cm.
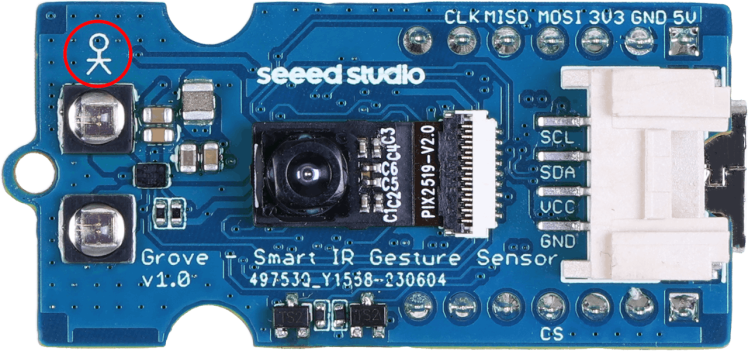
In addition to the distance to the sensor, you also need to pay attention to where the sensor is placed. On the front of the sensor, in the upper left corner, there is a small human shape. If you see the figure standing upright, then you have placed it in the correct position. If it is upside down, then it is likely that you will not get an accurate recognition result.
As background noise may impact the accuracy of gesture recognition, it is recommended to avoid the relative higher reflective background object behind the palm. In normal gesture recognition condition, recommend at least 35cm distance between palm and background.

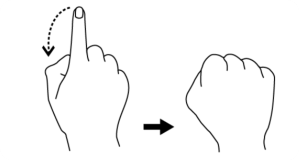
Supported Gesture Types
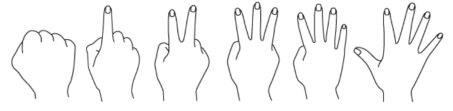
Finger (N=0~5): 0 ~ 5 fingers at top of fist
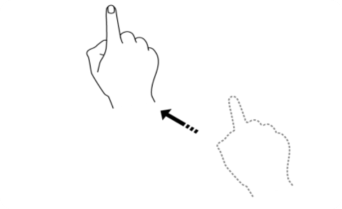
N Finger Push (N=1~5): 0~5 fingers move forward toward sensor
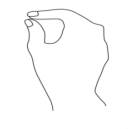
Pinch: 2-finger close to pinch, open to release
Rotation CW/CCW: Move wrist in a circular pattern

Hand Swipe Right or Left: Swipe and move both hands away from each other for some distance
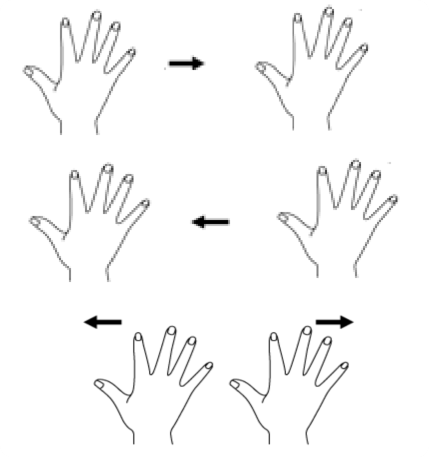
Tap: 1-finger click (fingers disappear)
Grab: 5-finger to 0-finger

Thumb Up: Thumb at top of fist

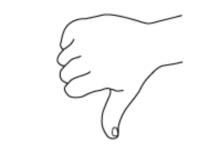
Down Thumb: at bottom of fist
Above are all the gesture types supported by the Grove Smart IR Gesture Sensor (PAJ7660), for this MicroMote I used only the 0~5 Finger and 0~5 Fingers Push gestures. Do refer the documentation to include other gestures in the MicroMote.
ESP-Now
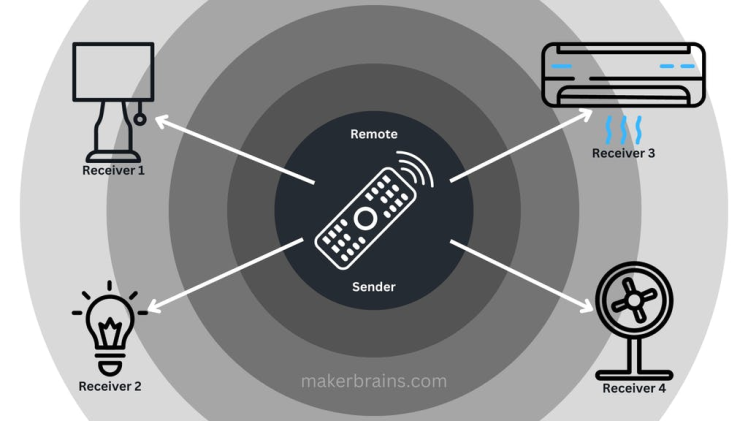
ESP-Now, short for "Espressif Simple Protocol Now, " is a wireless communication protocol developed by Espressif Systems, a company known for its popular ESP8266 and ESP32 series of Wi-Fi and Bluetooth-enabled microcontrollers. ESP-Now is designed for low-power, peer-to-peer (P2P) communication between ESP8266 and ESP32 devices. It is particularly well-suited for IoT (Internet of Things) applications where low latency, high reliability, and low power consumption are essential.
MicroMote is built upon the ESP-Now protocol, allowing it to transmit various signals and messages to different ESP32-based systems. These messages can encompass a wide range of data types, including numbers and strings. Each receiving device can be configured with a predefined identifier and trigger messages, enabling it to interpret incoming messages as triggers for various actions. These actions might include turning lights on or off, adjusting brightness levels, and many other customizable functions. Importantly, the same message sent by the sender device can serve as a trigger point for these actions on the receiver device, creating a versatile and flexible communication system.
The trigger message can either be common across multiple devices or unique to each device. This flexibility allows you to control common devices simultaneously, as demonstrated in this example. Alternatively, you can control individual devices separately, tailoring actions to specific needs or preferences. This versatility provides a powerful means of managing and customizing your IoT network to suit different scenarios and requirements.
Step 1: CAD Design and 3D Printing
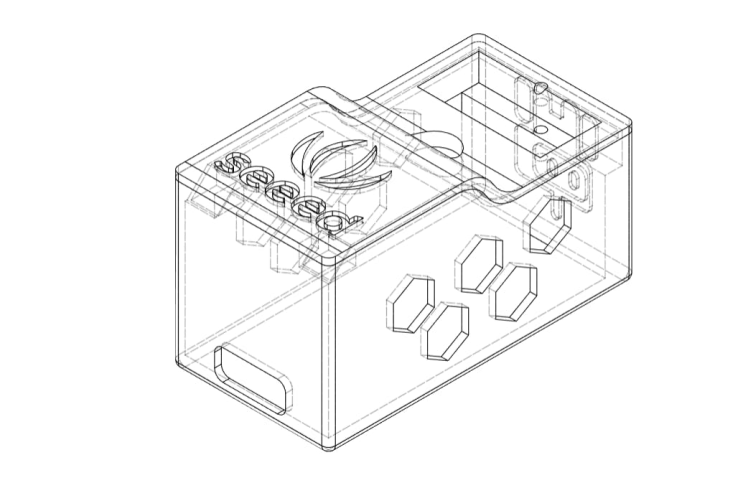
I designed MicroMote in Autodesk Fusion 360, I used datasheets and scale to measure the dimensions of different components and designed the model. I have attached both stl files and the original Fusion 360 model.
You can directly download The MicroMote stl files and 3D print them.
Or
You can modify the design that I have attached in Fusion 360 software and proceed.

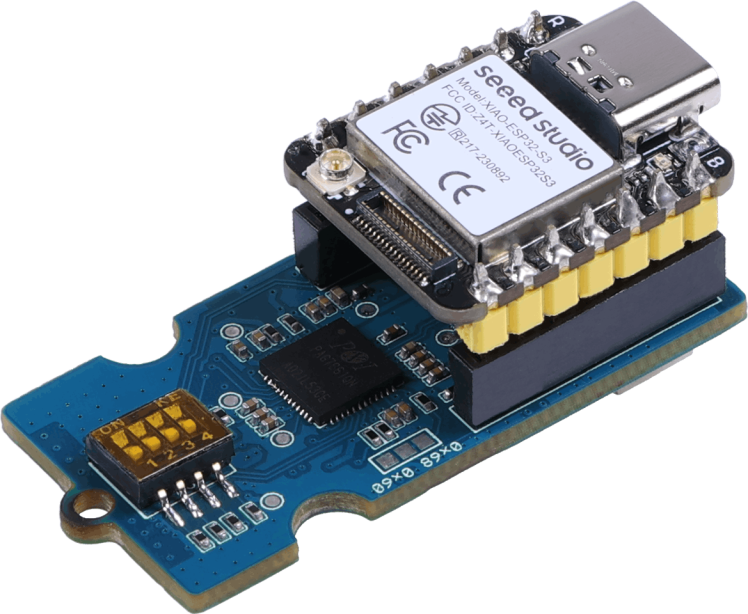
Step 2: Sensor Configuration
The Grove Smart IR Gesture Sensor supports a wide range of communication protocols with a choice of I2C, SPI and USB. The different modes are selected directly via a 4 position DIP switch on the back.
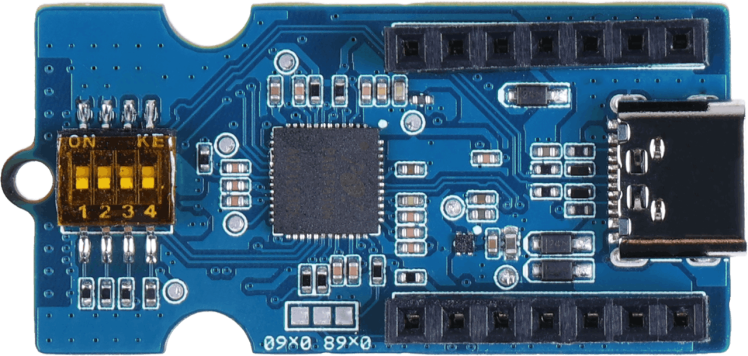
The diagram and table below will show you how to select the mode you wish to use with the 4 position DIP switch.
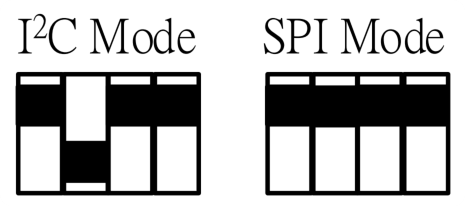
For MicroMote I used I2C protocol, so just set your gesture sensor to I2C mode by positioning down the switch 2.
Step 3: Connecting Battery
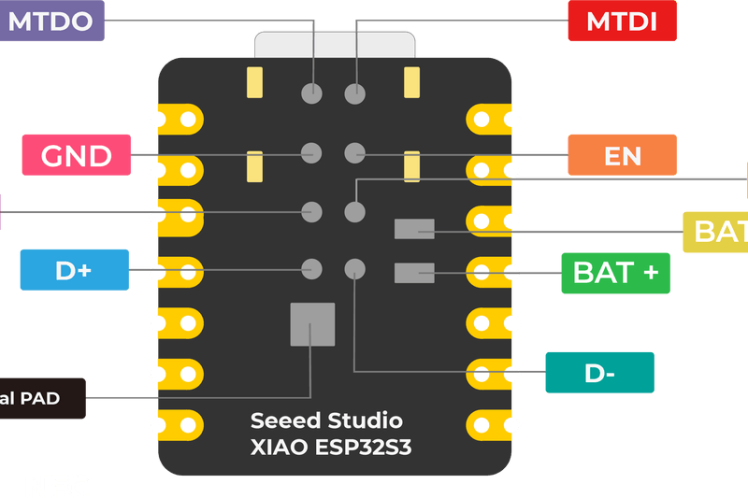
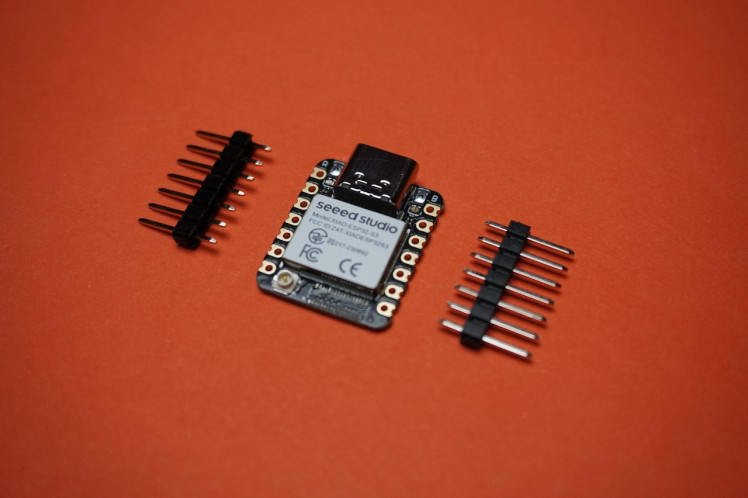
- Begin by soldering the battery wires and header pins onto the XIAO ESP32 board.
- Use the above pin diagram for connecting battery.
- Since the XIAO ESP32 board comes with built-in battery charging circuitry that includes overcharge protection, you can use the Type-C port on the XIAO ESP32 to charge the connected battery. This feature simplifies your project setup, as you won't need to implement an additional battery charging circuit. Just plug in the Type-C cable, and the board will take care of charging the battery safely.
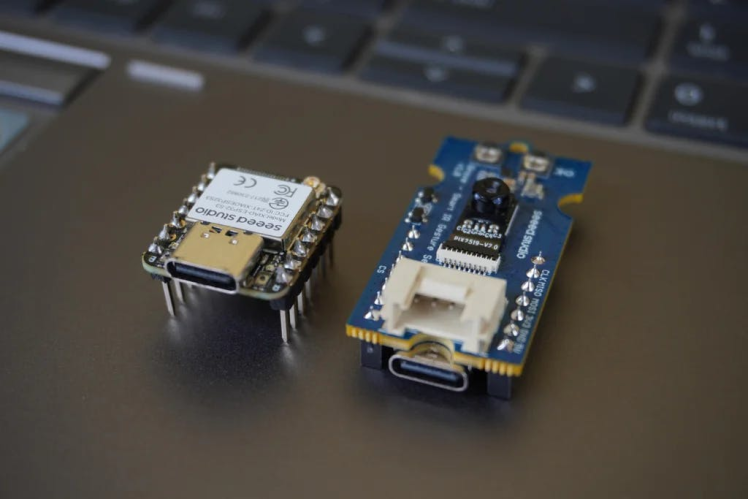
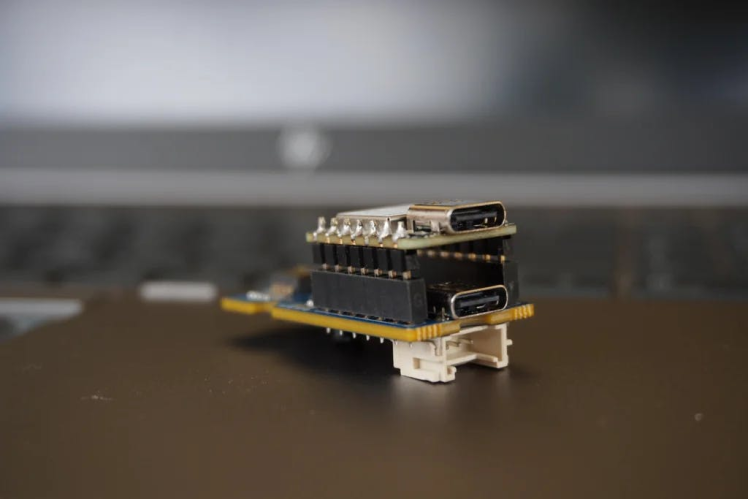
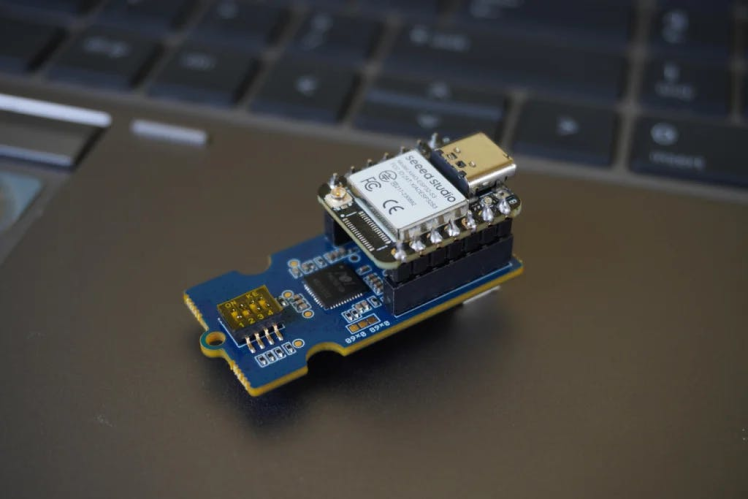
Step 4: XIAO ESP32 + Sensor Connection
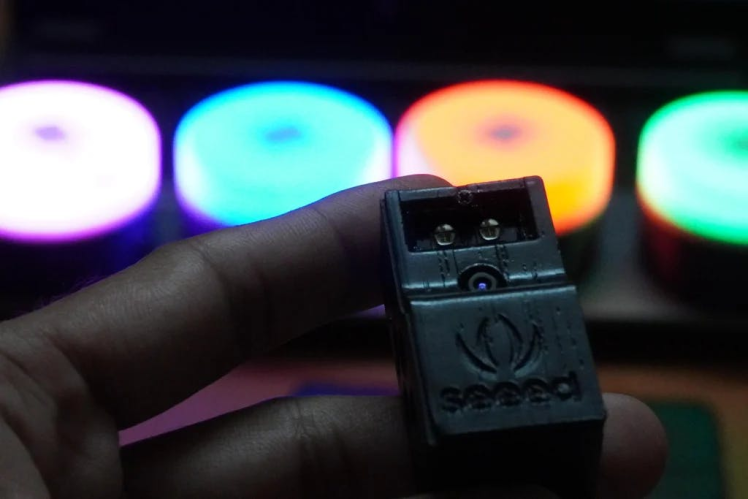
Connecting the gesture sensor to the ESP32 is a straightforward process. Simply insert the XIAO ESP32 board directly into the Grove Gesture Sensor's female connector, ensuring that the USB-C port on the XIAO ESP32 is oriented outward. This plug-and-play setup makes it easy to integrate the gesture sensor into your project.
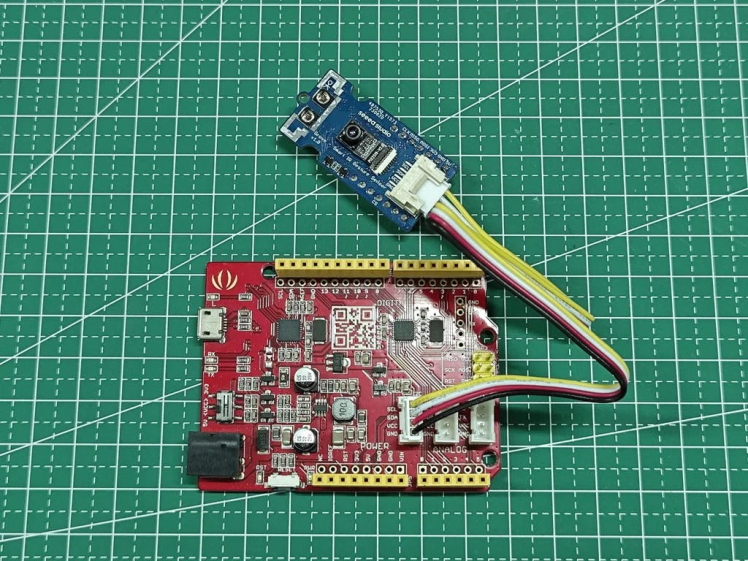
Step 5: Other Board + Sensor Connection
You have two options for connecting the gesture sensor to other boards:
- Using Jumper Wires: If you're connecting the gesture sensor to a board that doesn't have a Grove connector, you can use 4 jumper wires. Simply connect GND on the sensor to GND on your board, VCC to 3.3V/Vin, SCL to SCL, and SDA to SDA. This method allows for flexible integration with various microcontrollers.
- Using a Grove Cable: Alternatively, if your board supports the Grove connector, you can use a Grove cable to easily connect the gesture sensor. This method simplifies the connection process and is convenient if your board has a Grove interface.
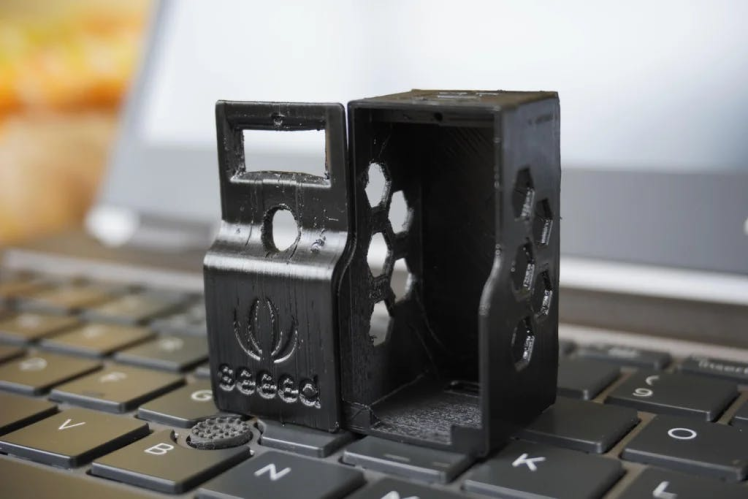
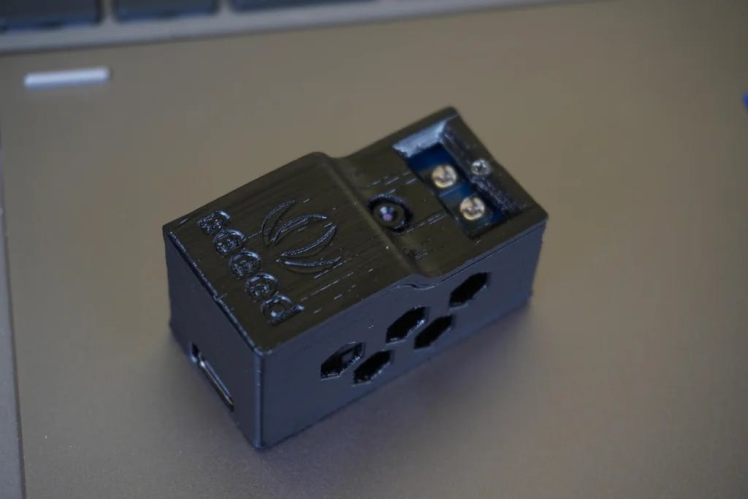
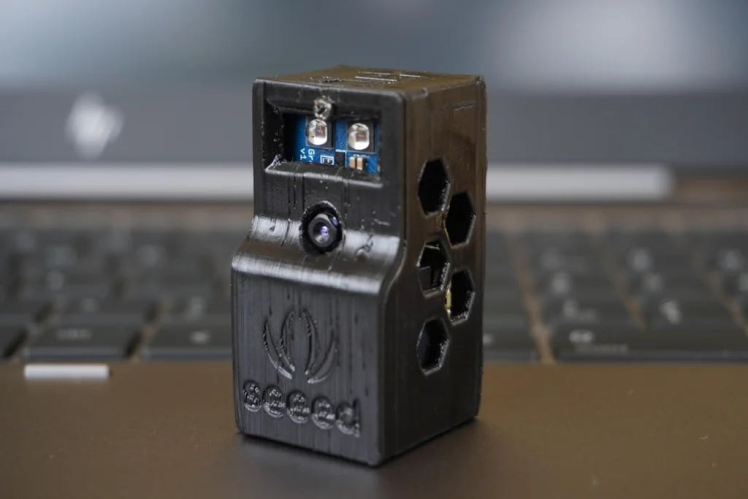
Step 6: Final Assembly
To assemble the project:
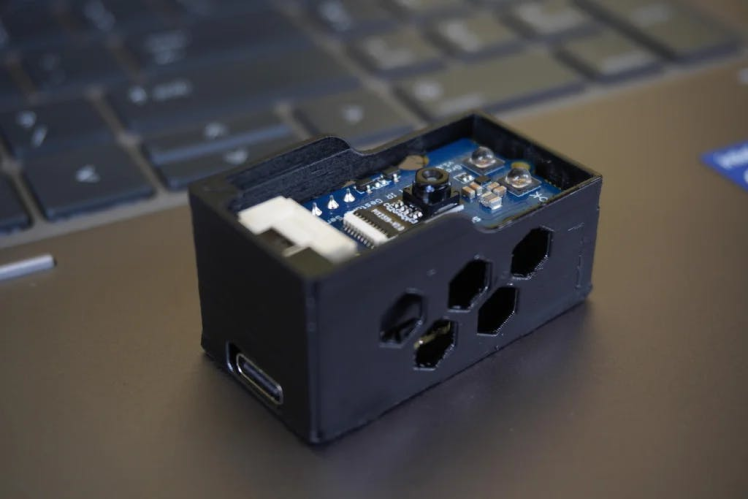
- Align the Type-C port on the XIAO ESP32 with the corresponding opening in the 3D printed housing.
- Carefully place the circuitry into the housing, ensuring that component fits snugly.


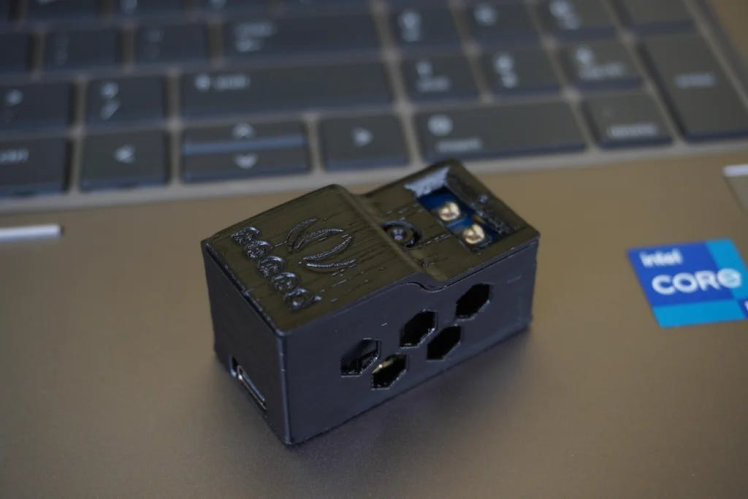
- Slide the top cover onto one side of the housing.
- Use a small screw to fix the top cover securely onto the housing, ensuring that the entire assembly is stable and well-enclosed.
Step 7: Code
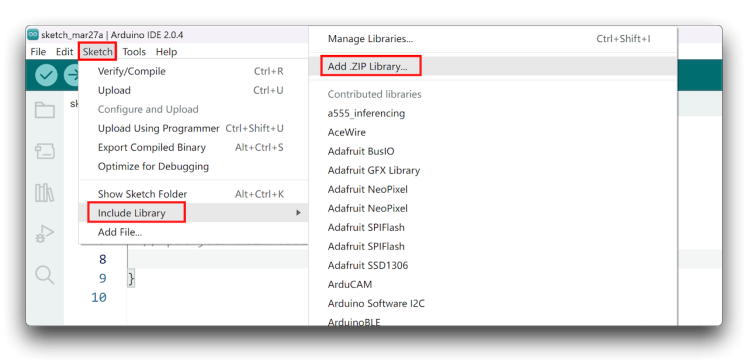
- Download the Grove Gesture Sensor library
- Since you have downloaded the zip Library, open your Arduino IDE, click on Sketch > Include Library > Add.ZIP Library. Choose the zip file you just downloaded,and if the library install correct, you will see Library added to your libraries in the notice window. Which means the library is installed successfully.
- Also you should install the Arduino ESP32 boards in board manager, you can follow Getting Started | Seeed Studio Wiki to install.
- Now copy paste the code, select the board type, search for xiao in the development board on the left. select XIAO_ESP32S3, select the port and upload the code.

Remote(Sender) Code
/*  Project : MicroMote
 *  makerbrains.com 2023
 *  Author  : Mukesh Sankhla
 */

#include <WiFi.h>
#include "Gesture.h"
#include <esp_now.h>

pag7660 Gesture; // Combined mode is used by default

int deviceNo = 1;

//Universal Mac Address
uint8_t broadcastAddress[] = {0xFF, 0xFF, 0xFF, 0xFF, 0xFF, 0xFF};

//Message(Data) send and receive doc
typedef struct messageData
{
  int color = 0;
} messageData;

messageData deviceData;     //Local Data
messageData recData;        //Received Data

// Create peer interface
esp_now_peer_info_t peerInfo;

//Called when data is sent
void OnDataSent(const uint8_t *mac_addr, esp_now_send_status_t status) {
  Serial.print("rnLast Packet Send Status:t");
  Serial.println(status == ESP_NOW_SEND_SUCCESS ? "Delivery Success" : "Delivery Fail");
}

//Called when data is recived
void OnDataRecv(const uint8_t * mac, const uint8_t *incomingData, int len) {
  memcpy(&recData, incomingData, sizeof(recData));
  Serial.print("Bytes received: ");
  Serial.println(len);
  Serial.println(recData.color);
}

//Declare the send result
esp_err_t resultt;

void setup() {
    Serial.begin(9600);
    while(!Serial) {
        delay(100);
    }
    Serial.println("nPAG7660 TEST DEMO: Gesture combined mode.");

    if(Gesture.init()) {
        Serial.println("PAG7660 initialization success");
    } else {
        Serial.println("PAG7660 initialization failed");
    }
    Serial.println("Please input your gestures:n");

    WiFi.mode(WIFI_STA);

  if (esp_now_init() != ESP_OK) {
    Serial.println("Error initializing ESP-NOW");
    return;
  }
  esp_now_register_send_cb(OnDataSent);
  esp_now_register_recv_cb(OnDataRecv);
  memcpy(peerInfo.peer_addr, broadcastAddress, 6);
  peerInfo.channel = 0;
  peerInfo.encrypt = false;

  // Add peer
  if (esp_now_add_peer(&peerInfo) != ESP_OK) {
    Serial.println("Failed to add peer");
    return;
  }
  recData.color = deviceNo;
}

void loop() {
    pag7660_gesture_t result;
    if (Gesture.getResult(result)) {
        printResultCombinedMode(result);
    }
    delay(100);
}

void printResultCombinedMode(const pag7660_gesture_t& result) {
    const char *cursor_str[] = {
        NULL,
        "Tap",
        "Grab",
        "Pinch",
    };
    switch (result.type) {
    case 0:
        switch (result.cursor.type) {
        case 1:
        case 2:
        case 3:
            if (result.cursor.select)
                Serial.println(cursor_str[result.cursor.type]);
            break;
        default:
            break;
        }
        break;
    case 1:
        deviceData.color = recData.color = 1;
        resultt = esp_now_send(broadcastAddress, (uint8_t *) &deviceData, sizeof(deviceData));
        delay(2000);
        break;
    case 2:
        deviceData.color = recData.color = 2;
        resultt = esp_now_send(broadcastAddress, (uint8_t *) &deviceData, sizeof(deviceData));
        delay(2000);
        break;
    case 3:
        deviceData.color = recData.color = 3;
        resultt = esp_now_send(broadcastAddress, (uint8_t *) &deviceData, sizeof(deviceData));
        delay(2000);
        break;
    case 4:
        deviceData.color = recData.color = 4;
        resultt = esp_now_send(broadcastAddress, (uint8_t *) &deviceData, sizeof(deviceData));
        delay(2000);
        break;
    case 5:
        deviceData.color = recData.color = 5;
        resultt = esp_now_send(broadcastAddress, (uint8_t *) &deviceData, sizeof(deviceData));
        break;
    case 6:
        break;
    case 7:
        break;
    case 8:
        break;
    case 9:
        break;
    case 19:
        deviceData.color = recData.color = 6;
        resultt = esp_now_send(broadcastAddress, (uint8_t *) &deviceData, sizeof(deviceData));
        delay(2000);
        break;
    case 20:
        deviceData.color = recData.color = 7;
        resultt = esp_now_send(broadcastAddress, (uint8_t *) &deviceData, sizeof(deviceData));
        delay(2000);
        break;
    case 21:
        deviceData.color = recData.color = 8;
        resultt = esp_now_send(broadcastAddress, (uint8_t *) &deviceData, sizeof(deviceData));
        delay(2000);
        break;
    case 22:
        deviceData.color = recData.color = 9;
        resultt = esp_now_send(broadcastAddress, (uint8_t *) &deviceData, sizeof(deviceData));
        delay(2000);
        break;
    case 23:
        deviceData.color = recData.color = 10;
        resultt = esp_now_send(broadcastAddress, (uint8_t *) &deviceData, sizeof(deviceData));
        delay(2000);
        break;
    default:
        break;
    }
}- Take a any ESP32 board that you have to use it as test receiver and upload the following code.
Receiver Code
/*  Project : MicroMote
 *  makerbrains.com 2023
 *  Author  : Mukesh Sankhla
 */

#include <esp_now.h>
#include <WiFi.h>

//Universal Mac Address
uint8_t broadcastAddress[] = {0xFF, 0xFF, 0xFF, 0xFF, 0xFF, 0xFF};

//Message(Data) send and receive doc
typedef struct messageData
{
  int color = 0;
} messageData;

messageData deviceData;     //Local Data
messageData recData;        //Received Data

// Create peer interface
esp_now_peer_info_t peerInfo;

//Called when data is sent
void OnDataSent(const uint8_t *mac_addr, esp_now_send_status_t status) {
  Serial.print("rnLast Packet Send Status:t");
  Serial.println(status == ESP_NOW_SEND_SUCCESS ? "Delivery Success" : "Delivery Fail");
}

//Called when data is recived
void OnDataRecv(const uint8_t * mac, const uint8_t *incomingData, int len) {
  memcpy(&recData, incomingData, sizeof(recData));
  Serial.print("Bytes received: ");
  Serial.println(len);
  Serial.println(recData.color);
}

//Declare the send result
esp_err_t result;

void setup() {
  Serial.begin(115200);

  WiFi.mode(WIFI_STA);

  if (esp_now_init() != ESP_OK) {
    Serial.println("Error initializing ESP-NOW");
    return;
  }
  esp_now_register_send_cb(OnDataSent);
  esp_now_register_recv_cb(OnDataRecv);
  memcpy(peerInfo.peer_addr, broadcastAddress, 6);
  peerInfo.channel = 0;
  peerInfo.encrypt = false;

  // Add peer
  if (esp_now_add_peer(&peerInfo) != ESP_OK) {
    Serial.println("Failed to add peer");
    return;
  }
}

void loop()
{
  //Your custom code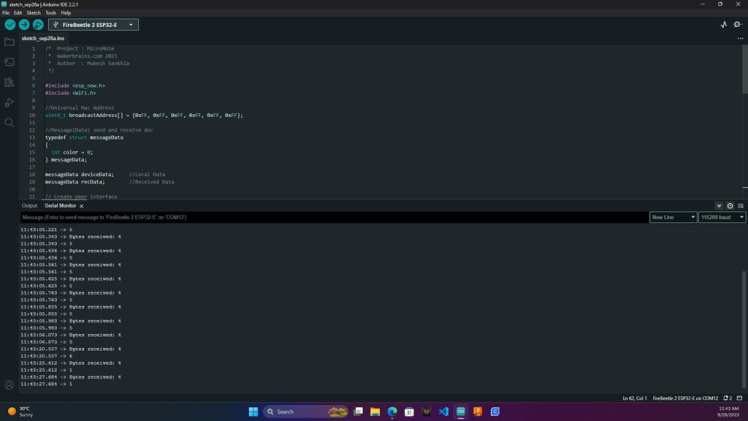
}- After uploading the code open the terminal by connecting receiver device, parallelly turn on the MicroMote by charging the battery and make few gestures on the terminal you will see the incoming messages.
Conclusion
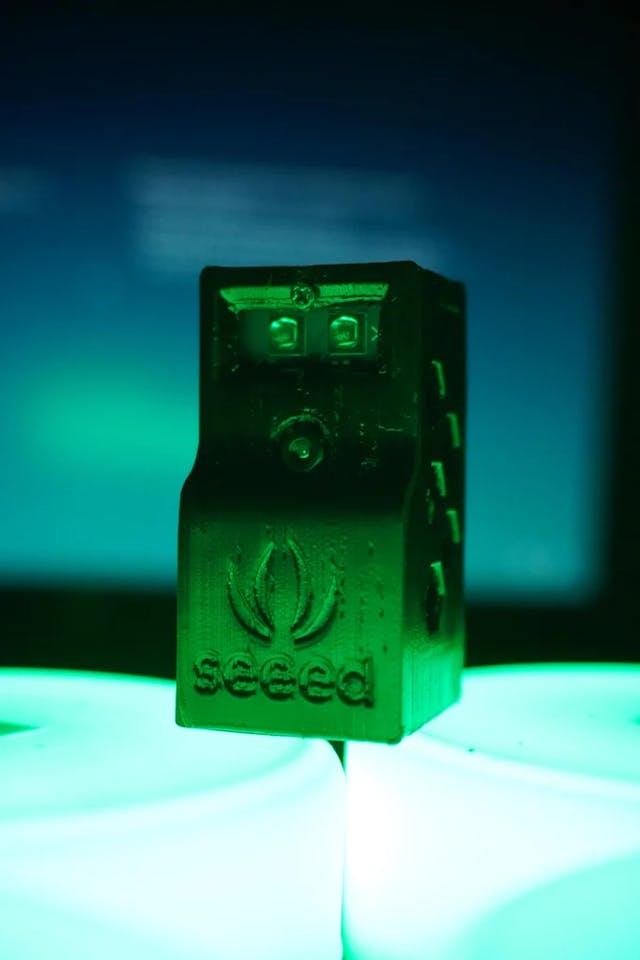
In the demonstration video, I utilized Rainbow Lights that I had previously built as the receiver devices. The battery shown in the project was not used and is old, so it was not functional as intended. Therefore, I did not include the battery in my MicroMote. However, connecting the battery is a straightforward process.
I chose not to incorporate a power ON/OFF switch in the MicroMote because I plan to experiment with the Deep Sleep modes of the ESP32 in the future. You can easily add a switch with simple additional steps if needed.
Overall, MicroMote is a fun and compact project with limitless applications. The only limit is your creativity and how you choose to use it. If you enjoyed this project, please let me know in the comments below. Thank you for your interest, and see you next time :)
Schematics, diagrams and documents
CAD, enclosures and custom parts
Code
Credits
mukesh-sankhla
Tech Educator | Content Creator | Developer | Maker - Simplifying technology through hands-on learning. Creating high-quality tutorials, projects, and insights on electronics, IoT, robotics, CAD, 3D printing, and software development at Empowering students, professionals, and makers with practical, accessible, and inspiring content.
Related products


Leave your feedback...