
Merge: The Dyson Link

Made by electrouser829 / Environmental Sensing / Home Automation / Sensors / Weather / IoT
About the project
Do you have a Dyson Pure Link device and a weather station? Do you want to merge their functionality or just get Dyson readings? Here we go!
Project info
Difficulty: Easy
Platforms: Microsoft, Raspberry Pi, Weather Underground
Estimated time: 2 hours
License: MIT license (MIT)
Items used in this project


Story
Introduction
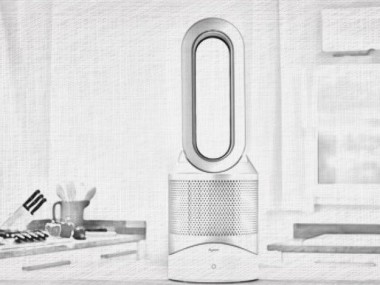
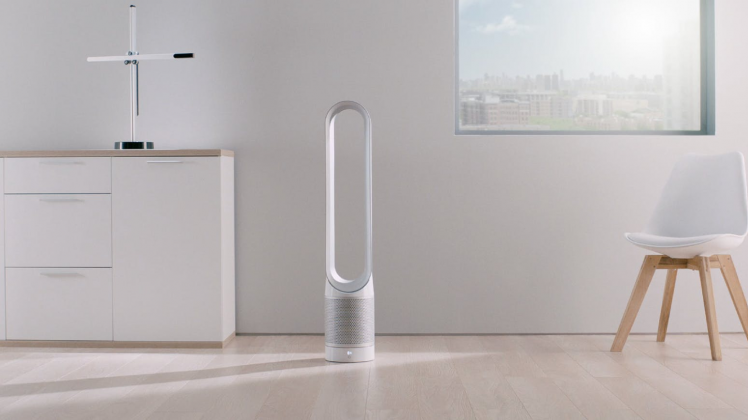
Our homes get more and more smart devices connected to the Internet. Some of us have different air purifier devices because the air quality especially in big cities leaves much to be desired. There are many options for purifier devices and Dyson is probably the most expensive one, I won't discuss if it's worth it or not it is up to you and you can find many reviews in Internet, the reason for this article is very simple. I did a custom Weather Station project and got Dyson Pure Hot+Cool Link later. I decided to introduce them to each other (both are connected to same network), make them communicate and use them with higher efficiency. So, I searched for the information related to Dyson API, and... I found it!
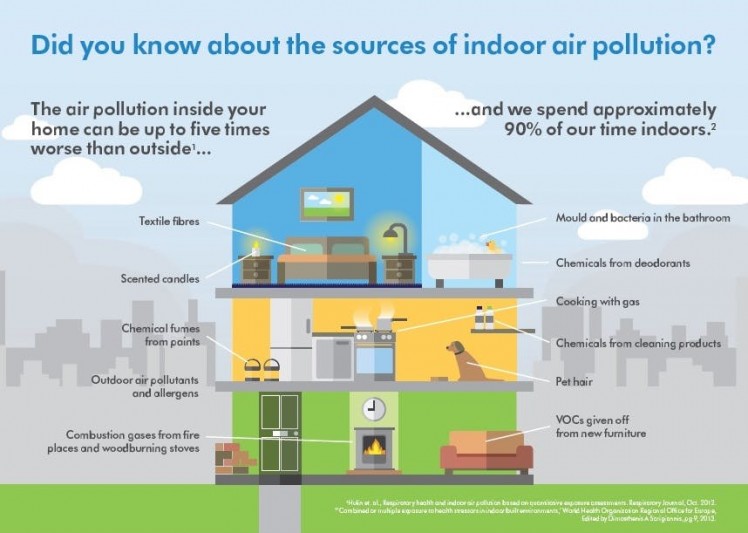 Indoor air pollution chart
Software & Hardware
Definitely you do need at least Dyson Pure Link device to start, or it can be complicated to test your project. You do not need weather station explicitly, this is my assumption to make project more interesting and more valuable to integrate and connect multiple devices in one hub (like smart home solution). I used link to my weather station project as advertising, so please do not blame me. You can use any weather station or other devices, projects etc. Whatever you like!
I used Visual Studio 2017 (my hard .NET past) for the project but you can use any IDE or even simple text editors for the coding part, depends on your preferences.
I used Python 2.7 (because weather station also uses it) however you can easily switch to Python 3, just need to change couple imports, Continuous Monitoring
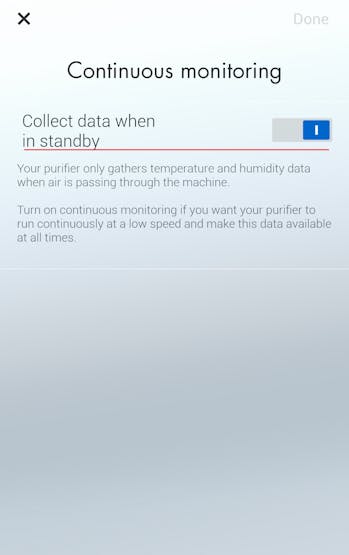
Sensors data can be read when fan is active, otherwise values are None. It is OK when you use your purifier in ON or AUTO mode, but what about standby mode? And here is an answer, Dyson Link purifiers have specific setting for this Continuous monitoring. It is designed for monitoring in standby mode. Images below show step-by-step solution.
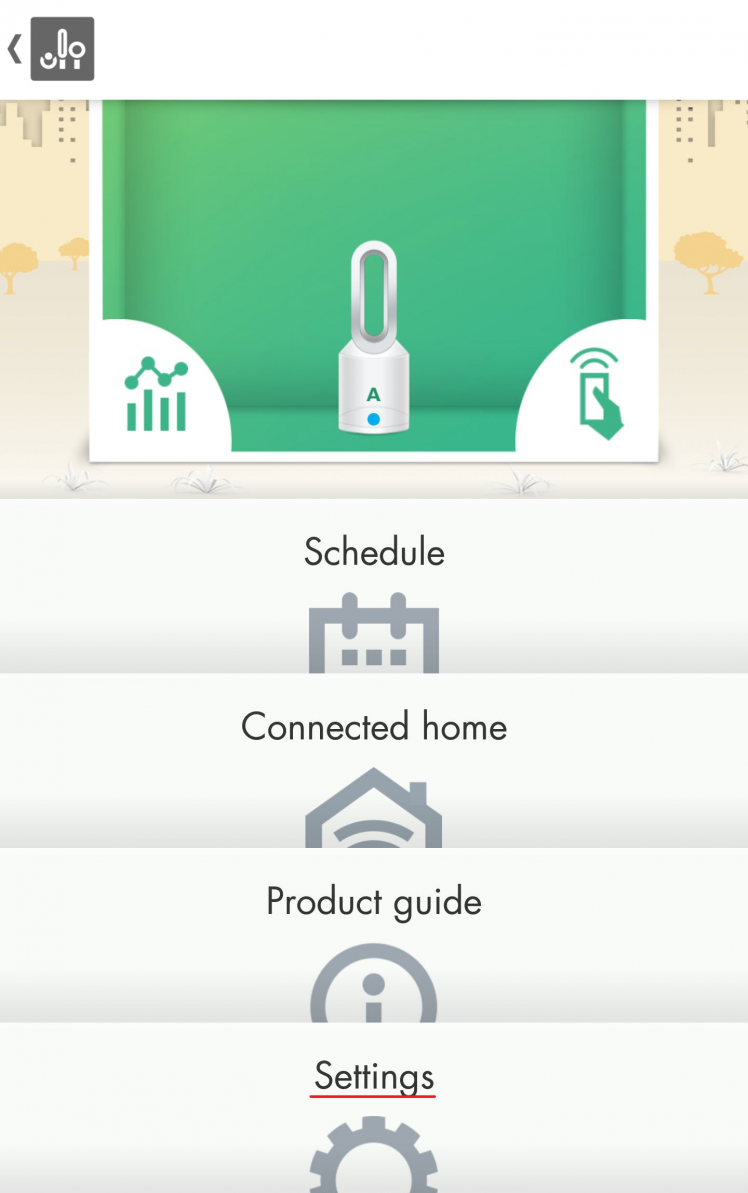 Click "Settings"
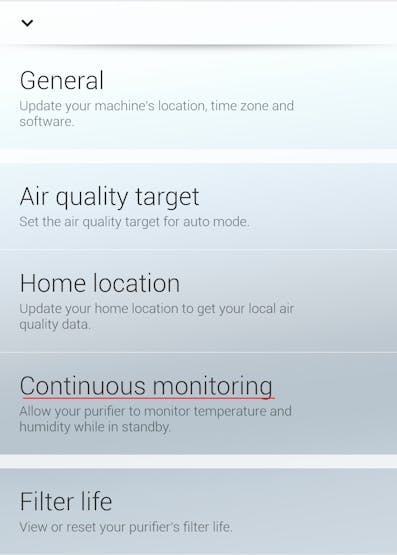 Click "Continuous monitoring"
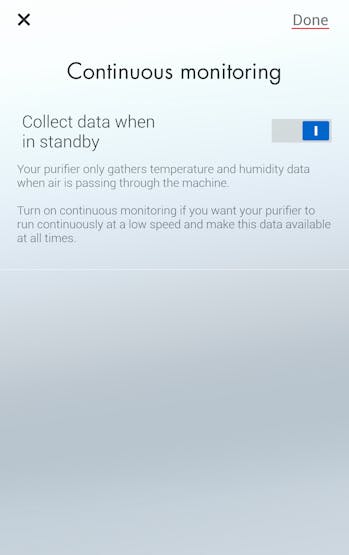 Click "Done"
* I noticed an interesting behavior if AUTO mode meets the goal, there is about 5 minutes delay when sensors are not active (do not have data), looks like when fan is active continuous monitoring is ignored (turned off) and after fan is off it takes some time to reactivate it (just my assumptions).
Connection Credentials
We need several settings arguments to connect to our device (they all are in configuration file).
- Password (source: sticker/manual)
- Serial (source: sticker/manual/mobile app)
- IP address (source: your home Wi-Fi router)
- Port number: 1883 (by default)
- Device type: (source sticker/manual)
Almost all of them you can find on the sticker (placed on new Dyson device) or in a afor your device.
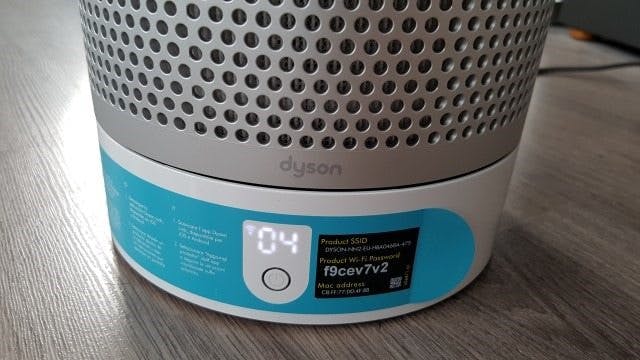
New device sticker
Please find an image of "parsed" sticker below.
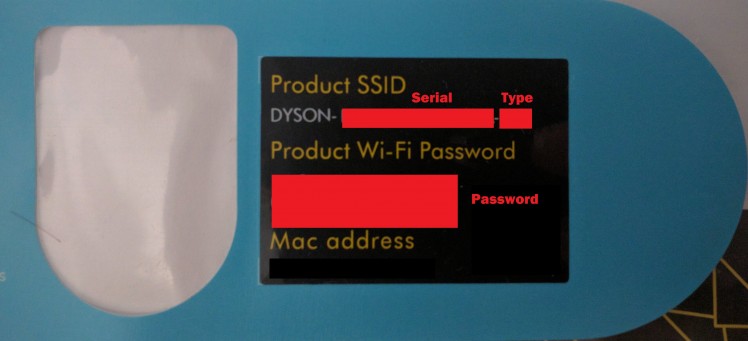 "Parsed" device sticker
That said, serial and device type are part of Product SSID section and password is under Product Wi-Fi Password section.
Serial can also be found under Settings section in mobile application (please see below).
 Serial number under mobile application settings section
MQTT Protocol
We are going to use MQTT protocol to connect to our Dyson device. MQTT stands for Message Queue Telemetry Transport . It is a publish/subscribe, extremely simple and lightweight messaging protocol, designed for constrained devices and low-bandwidth, high-latency or unreliable networks. The protocol is ideal for the emerging “machine-to-machine” (M2M) or “Internet of Things” world of connected devices, and for mobile applications where bandwidth and battery power are at a premium. You can read more here.
Required Python Libraries
Paho-mqtt required to connect and communicate with Dyson device via MQTT protocol.
pip install paho-mqtt
PyYAML required to parse configuration file which uses yaml format.
pip install pyyaml
You may need to use sudo
with installation commands due to lack of permissions.
Coding
I attached several sources where you can find complete code implementation. The first one is related to Weather Station plugins (which I believe is the best one because you can use your Dyson Link device sensors readings in real project and make them valuable). The second one is a separate GitHub repository I built for this example it can read and set some settings (fan mode and standby monitoring) so you can play with it and/or use it in your other projects.
Now let's take a look on the most important code sections (took from weather station example).
Let's start with declaring some instance fields (__init__ method):
self.client = None
self.connected = Queue()
self.disconnected = Queue()
self.state_data_available = Queue()
self.sensor_data_available = Queue()
self.sensor_data = None
self.state_data = None
Important here:
- Dyson uses MQTT protocol which implements Publish–subscribe pattern which publishes and retrieves message without blocking main thread, so we need to wait somehow and get notification we retrieve data
- To achieve this we used Queue() which put values in mqtt callback functions and wait for values in main thread (will discuss it later below)
userdata.connected.put_nowait(True)
self.connected.get(timeout=10)
- We wait for values in our queues with timeout argument, we do not want to wait for too long.
Let's move forward and parse config file (parse_config method):
- I used yaml file for configuration (you can try anything else)
- If you stick with this solution, it is very simple to parse just use PyYAML library:
self.config = yaml.safe_load(open(self.config_file_name))
Important here:
- In GitHub repositories I used dyson_pure_link.yaml.example, so you need to rename it and set correct values for your device
- If you need to get absolute path to your file name you can use this approach:
'{}/dyson_pure_link.yaml'.format(os.path.dirname(os.path.abspath(__file__)))
Now we implement password hash function(_hashed_password method):
hash = hashlib.sha512()
hash.update(self.password.encode('utf-8'))
return base64.b64encode(hash.digest()).decode('utf-8')
Important here:
- We use sha512 cryptographic algorithm for utf-8 encoded password (from sticker or manual)
- Then we use base64 encoding
Before connecting device (on_connect, on_disconnect, on_message methods):
We need to setup several callback functions for our mqtt client. They all are about the same: handle message from the device and put entity in waiting queues to notify our plugin data is ready.
Important here:
- The main difference is in on_connect function which subscribes to status message, we need to start tracking status messages:
client.subscribe(userdata.device_status)
userdata.connected.put_nowait(True)
- on_message function has setup for our custom value types, with json parsed messages from our Dyson device:
payload = message.payload.decode("utf-8")
json_message = json.loads(payload)
if StateData.is_state_data(json_message):
    userdata.state_data_available.put_nowait(StateData(json_message))
if SensorsData.is_sensors_data(json_message):
    userdata.sensor_data_available.put_nowait(SensorsData(json_message))
-
All messages use queues to notify and appends any error to
self.errorslist
Now let's connect device (connect_device method):
self.client = mqtt.Client(clean_session=True, protocol=mqtt.MQTTv311, userdata=self)
self.client.username_pw_set(self.serial_number, self._hashed_password())
self.client.on_connect = self.on_connect
self.client.on_disconnect = self.on_disconnect
self.client.on_message = self.on_message
self.client.connect(self.ip_address, port=self.port_number)
self.client.loop_start()
Important here:
- clean_session=True: used to cleanup session after you disconnect, to be sure our device does not have "dead" clients connected
- userdata=self: we use it to pass instance to static callback function, opposite you can make them non static and work directly with self, it is up to you
- we set callback functions (on_connect, on_disconnect, on_message) you can use either static or non static functions, I preferred static ones
- self.client.loop_start(): is very important, it is used to keep you connection alive and retrieve data, you can read more in paho-mqtt library docs (link above in Required Python Libraries section)
Publishing messages (_request_state, _change_state methods):
command = json.dumps({
    'msg': 'REQUEST-CURRENT-STATE',
    'time': time.strftime('%Y-%m-%dT%H:%M:%SZ', time.gmtime())})
self.client.publish(self.device_command, command)
Important here:
- To publish we need command name (which contains device type and serial 455/SERIAL_NUMBER/command) and command body
- Command body needs command type (msg field) and stringified timestamp (time field)
- Change state commands also need mode-reason and data fields:
command = json.dumps({
    'msg': 'STATE-SET',
    'time': time.strftime('%Y-%m-%dT%H:%M:%SZ', time.gmtime()),
    'mode-reason': 'LAPP',
    'data': data
})
Now, ready to get data (get_data method):
It is very simple (as we use it with weather station as plugin we use get_data method as single entry point to it, so it connects and disconnects device). We check if device connected and has valid data (not None values) returns dictionary as a result if any and disconnects device.
result = {}
if self.connect_device() and self.has_valid_data:
...
self.disconnect_device()
return result
And finally disconnect device (disconnect_device method):
if self.client:
    self.client.loop_stop()
    self.client.disconnect()
    return self.disconnected.get(timeout=5)
Important here:
- Check if client is present (was correctly connected)
- self.client.disconnect(): stop the loop and let client drop connection
- self.disconnected.get(timeout=5): wait we get response from disconnect message to be sure we disconnected device
More Fun
You can do more things with your Dyson Link devices (including new vacuum robot Dyson 360 Eye). In my examples there are commands to set fan mode (so you can control Auto mode from your other applications) and standby mode (you can be always sure your device continuously monitors environment).
If you do not need it within a connection to a weather station you can be creative and integrate your Dyson Link devices with your smart home solutions.
Or any other interesting and cool projects you are working on!
 Smart home solutions
Schematics, diagrams and documents
Code
Credits
Related products


Leave your feedback...