

Make A Wireless Keyboard By Hacking Your Tv Remote

Made by AmalMathew / Communication / Games & Gaming / Home Automation / Sensors
About the project
This Project Utilizes IR, or infrared wireless communication technology to Build a Wireless Keyboard.
Project info
Difficulty: Easy
Platforms: Arduino
Estimated time: 1 hour
License: GNU General Public License, version 3 or later (GPL3+)
Items used in this project
Hardware components


Story
IR, or infrared, communication is a common, inexpensive, and easy to use wireless communication technology. IR light is very similar to visible light, except that it has a slightly longer wavelength. This means IR is undetectable to the human eye - perfect for wireless communication.
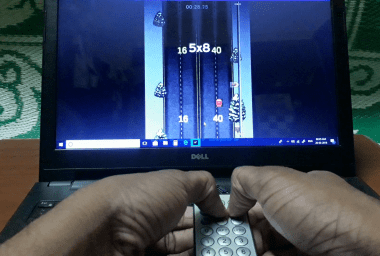
The Basic Idea of this project is when you hit a button on your TV remote, by using a IR receiver and a Arduino we can decode it and the decoded values can be utilized to perform different Key Board Operations. I Used Arduino Pro Micro Because it is based on the ATmega32U4 microcontroller featuring a built-in USB which makes the Micro recognizable as a mouse or keyboard. You can use Arduino Leonardo also.
This Project is very simple and any one can modify as per requirements.
Components Used:
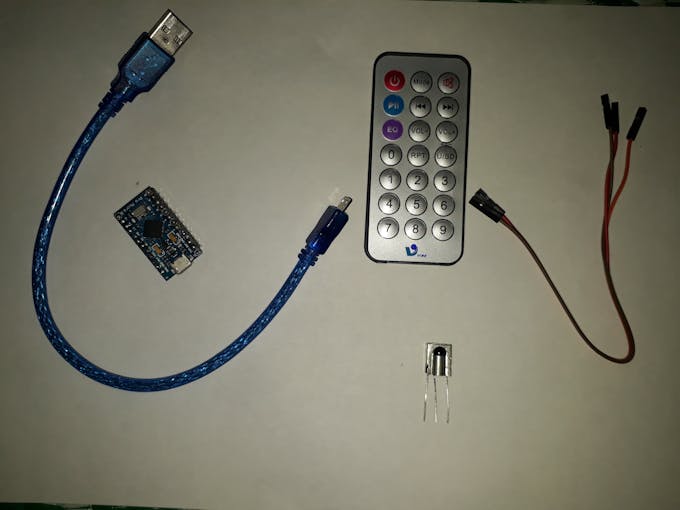
- Arduino Pro Micro
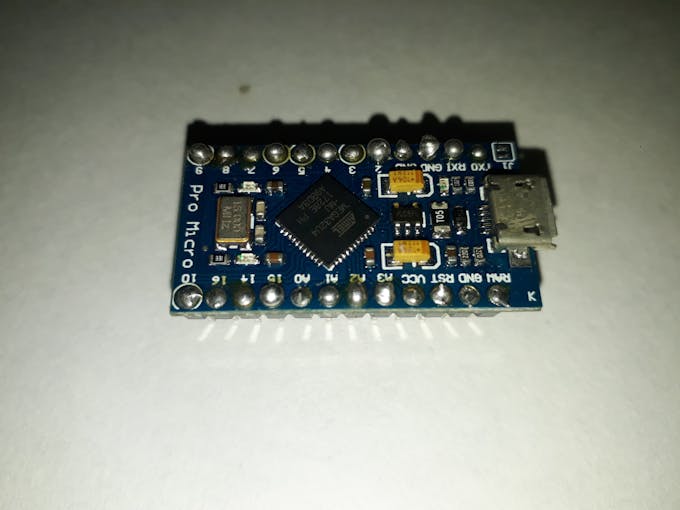
The Micro is a microcontroller board based on the ATmega32U4 , It has 20 digital input/output pins (of which 7 can be used as PWM outputs and 12 as analog inputs), a 16 MHz crystal oscillator, a micro USB connection, The Micro board is similar to the Arduino Leonardo in that the ATmega32U4 has built-in USB communication, eliminating the need for a secondary processor. This allows the Micro to appear to a connected computer as a mouse and keyboard.
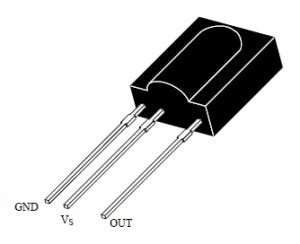
- IR Receiver (TSOP1738)
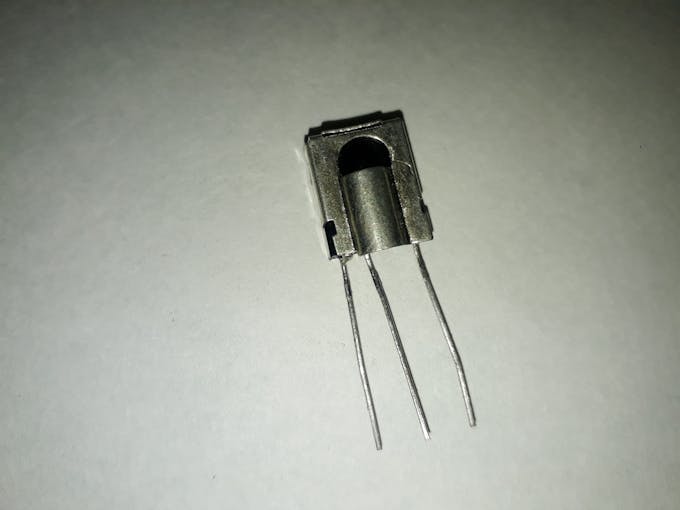
It is a miniaturized receiver for infrared remote control systems. The demodulated output signal can be directly decoded by a microprocessor. The TSOP1738 is compatible with all common IR remote control data formats.
Circuit Diagram :
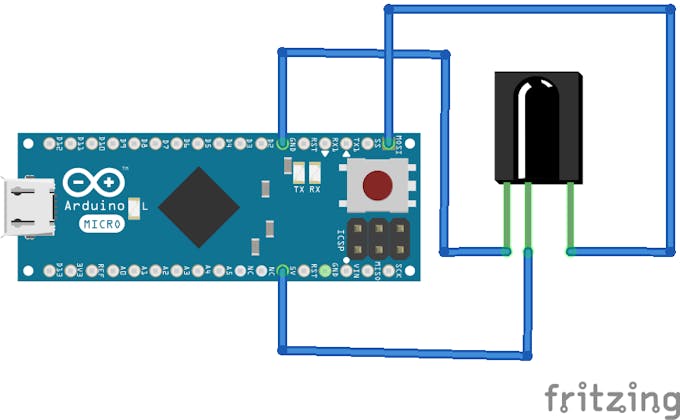

If you are using Leonardo there will be small change in the DATA pin .You need to connect data Pin into the MOSI pin of Leonardo.
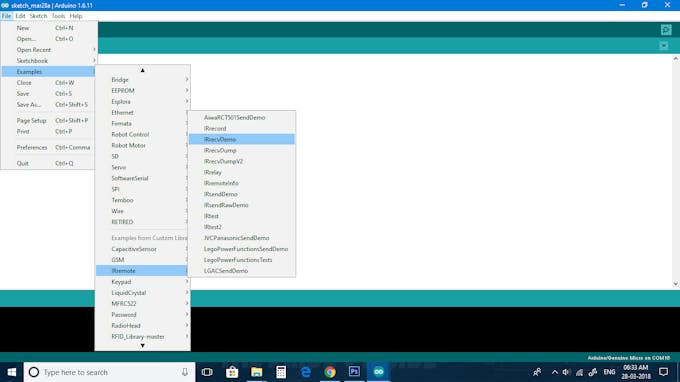
Installing IR Remote Library :
Download IR Remote Library From here and install it.
If you don't know how to install additional arduino libraries follow below link
https://www.arduino.cc/en/Guide/Libraries
Decoding IR remote signals:
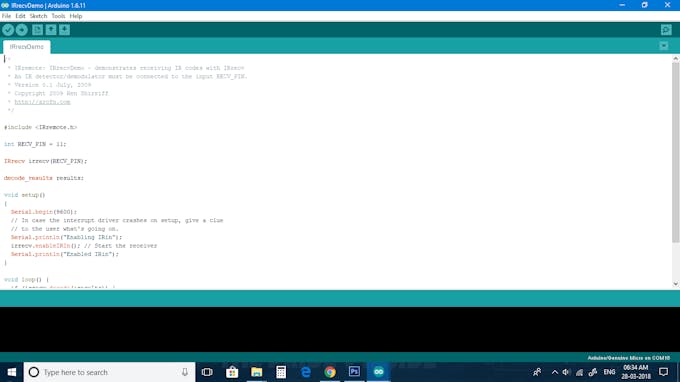
To decode signals from IR remote we can use "IRrecvDemo "arduino sketch as given with the IR Remote Library.
Note:
On example sketch (IRrecvDemo) you need to make small change in int RECV_PIN value . By Default it will be 11 but on Arduino Micro the MOSI pin is 16th pin. So make following modification.
- int RECV_PIN = 16;
If You are using Leonardo you need to change it to MOSI pin number.
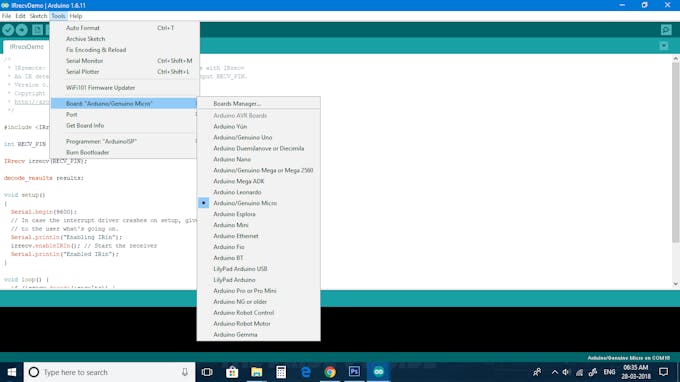
- Select Board( Arduino/Genuino Micro)
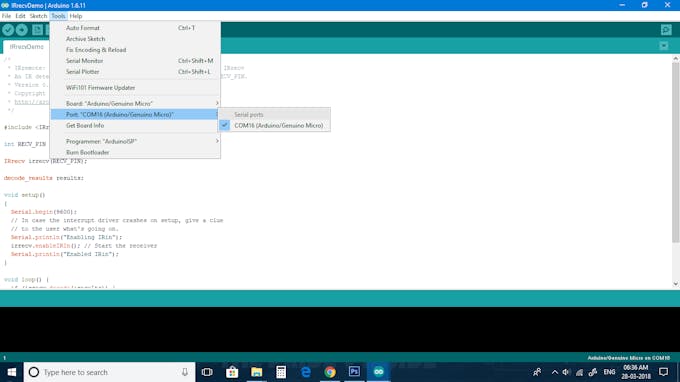
- Select Port
- Upload Your code
- Open Serial Monitor and obtain the IR Remote Signal values

Note Down the values for each button .
What's Next-The Code!
After obtaining signal values next step is to add the signal values into the program and make condition that if signal value from remote matches with the values in the program then, perform different keyboard operations.
Adding Keyboard Library to the program enables it to perform different keyboard Operations.
- //this is sample code that shows some example keyboard operaions
- #include
- #include
- int RECV_PIN = 16;
- IRrecv irrecv(RECV_PIN);
- decode_results results;
- void setup()
- {
- Serial.begin(9600);
- irrecv.enableIRIn(); // Start the receiver
- Keyboard.begin();
- }
- void loop() {
- if (irrecv.decode(&results))
- {
- switch(results.value)
- {
- //The power button is used to unlock your PC
- case 0x1FE48B7: Keyboard.print("P@@sW0rD"); // add your PC's Password here
- Keyboard.press(KEY_RETURN); //Enter Key
- delay(100);
- Keyboard.releaseAll();
- break;
- //Backward key is used for left key operation
- case 0x1FE40BF: Keyboard.press(KEY_LEFT_ARROW); //left key
- delay(100);
- Keyboard.releaseAll();
- break;
- //Forward Key is used for right key operation
- case 0x1FEC03F: Keyboard.press(KEY_RIGHT_ARROW); //right key
- delay(100);
- Keyboard.releaseAll();
- break;
- //Space bar operaion , It can be used for pause/play -0th key
- case 0x1FEE01F: Keyboard.write(32);//space bar operation
- delay(100);
- Keyboard.releaseAll();
- break;
- //Select all operation(Ctrl+a)-1st key
- case 0x1FE50AF: Keyboard.press(KEY_LEFT_CTRL);//Ctrl key
- Keyboard.write(97);// ascii value of 'a' is 97
- delay(100);
- Keyboard.releaseAll();
- break;
- //Copy Operation(Ctrl+c) -4th key
- case 0x1FE30CF: Keyboard.press(KEY_LEFT_CTRL);//Ctrl key
- Keyboard.write(99);//ascii value of 'c' is 99
- delay(100);
- Keyboard.releaseAll();
- break;
- //Paste Operation(Ctrl+v)-7th key
- case 0x1FE00FF: Keyboard.press(KEY_LEFT_CTRL);//Ctrl key
- Keyboard.write(118);//ascii value of 'v' is 118
- delay(100);
- Keyboard.releaseAll();
- break;
- //closes opened tab
- case 0x1FE9867: Keyboard.press(KEY_LEFT_ALT);//Alt Key
- Keyboard.press(KEY_F4);//F4 Key
- delay(100);
- Keyboard.releaseAll();
- break;
- }
- irrecv.resume(); // Receive the next value
- }
- }
- Upload above code
Done!
You can modify the above sketch as per your requirements .
Refer below links to add more keyboard functions
The below video shows some cool application of this project.
Otherwise you can visit my GitHub Page
hereThank you so much for reading if you need any more information feel free to ask in comments,and I'll do my best answer you.
Schematics, diagrams and documents
CAD, enclosures and custom parts
Code
Credits
Related products


Leave your feedback...