
How To Make A Dancing Robot Without Arduino/#smartcreativity

Made by smart-creativity / 3D Printing / Artificial intelligence / Automotive / Robotics / Sensors
About the project
This robot is able to dance, auto balancing, music producing and walking.
Project info
Difficulty: Easy
Platforms: Adafruit, Arduino, circuito.io, Microsoft, RobotGeek
Estimated time: 2 hours
License: Creative Commons Attribution CC BY version 4.0 or later (CC BY 4+)
Items used in this project
Hardware components


Story
Hello friends, in this tutorial I will show you to how to make a dancing robot at home without 3D printer and without Arduino. This robot is able to dance, auto balancing, music producing and walking. And the design of Robot is also looking so cool....
I always tried to make cute robots so I make this one.
To make this robot see full tutorial here. All instructions provided in this tutorial. If you want to save time then watch below video in which I explained each and every process of it.
For more information - https://smartcreativityofficial.blogspot.com
Watch it....To save time... All instructions provided in this tutorial -How to make -
I am using circuit playground express as micro-controller. I am using servo motor in the place of leg to move the robot. Code is also given below in this tutorial.
First of all make the robot body by the help of some basic components. See video to make robot body design. After making robot body upload given code in circuit playground.
Step by step-Step 1 -
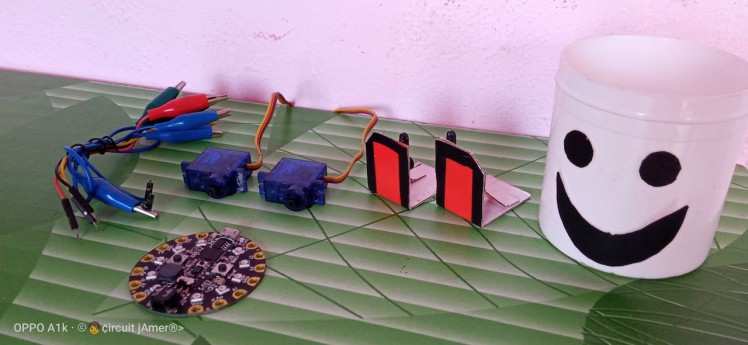
These are the required components in which I am using circuit playground, servo motor, jumper wire, servo attacher, cardboard paper and a plastic cylindrical box.
we will use plastic box to make the head part of robot and we also put all wires and micro-controller in it.
Step 2 -
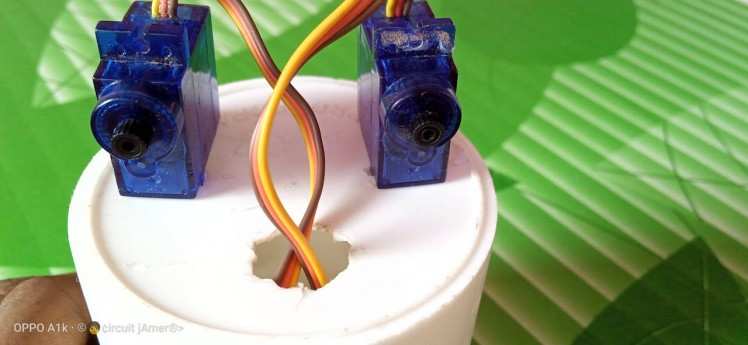
I make two holes in the bottom part of box to attach the servo motor. Attach both servo tightly in the hole and then adjust servo wire.
1 / 3
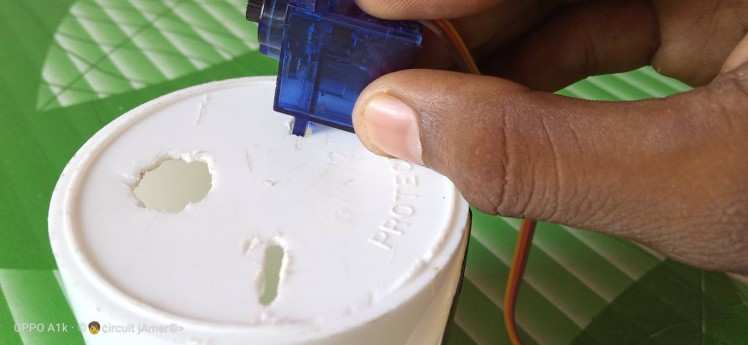

see image to attach servo
Step 3 -
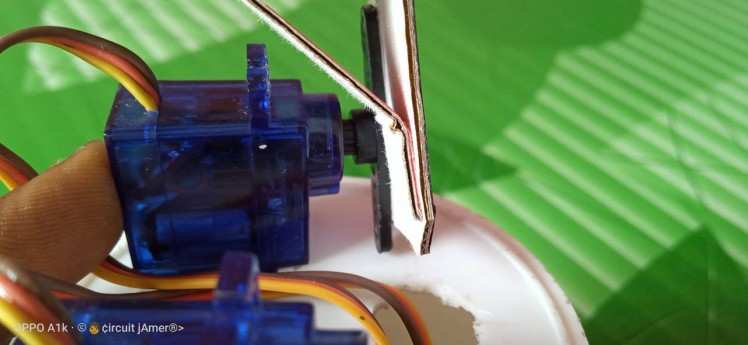
After attaching the servo motor we have to make a Leg design of robot. We will use a thick cardboard paper to make this. We will cut two small piece of cardboard and make a simple leg design as shown in image.
After making leg design we will set a servo attacher to the leg to connect the servo with his leg as shown in below image.

Step 4 -
Now attach the Leg to the servo motor one by one. Attach both leg tightly to make a good body. See below image to do this.
We can also use 4 servo motor in place of these two. Because if we will use 4 servo we can add many other movements in this robot. In two servo motor robot we can only programmed it for walking, simple dancing and some activity like moon walking, vibrating like etc.
So, connect all parts correctly as shown in image.

Step5 -
Now we have to connect jumper wires with servo motor. See below image to connect jumper wires with servo. Connect all wires with its matching color.

After connecting all wires and attaching all parts our Robot body is ready.
Let's jump to our next and important step to how to connect with micro-controller.
Step6 -
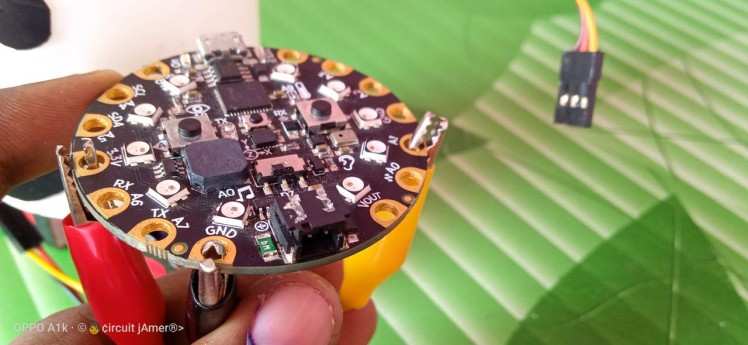
Before connecting the jumper with micro-controller first take a look on Circuit playground express. Because circuit playground express is a new type of micro-controller and totally different from Arduino so we should have to know some about circuit playground.
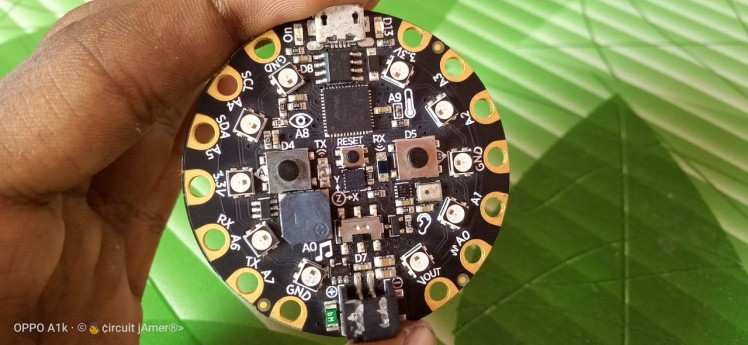
This is our micro-controller circuit playground express. In this micro-controller there are many sensors, 3 function-able buttons, 10 multicolored LED and many input and output pins. Many features is available in this micro controller so I am using this in my projects.
After looking about this let's connect the jumper wires with circuit playground express.
Connect wires as-
Yellow jumper - PinA1,
Red jumper - Pin3.3v(i)
Black jumper - Pin gnd(gnd)
Blue jumper - Pin3.3v(ii)
White Jumper - Pin gnd(ii)
Green jumper - PinA2
After connecting all wires and Jumper, adjust all wire and put all jumper and micro-controller in the box. Put all thing very carefully as no one wire should have to disconnect. That's it............
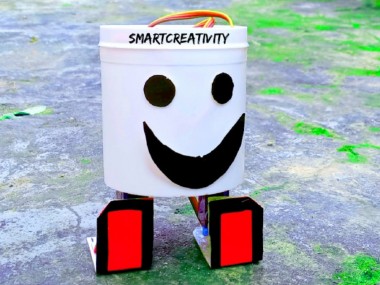
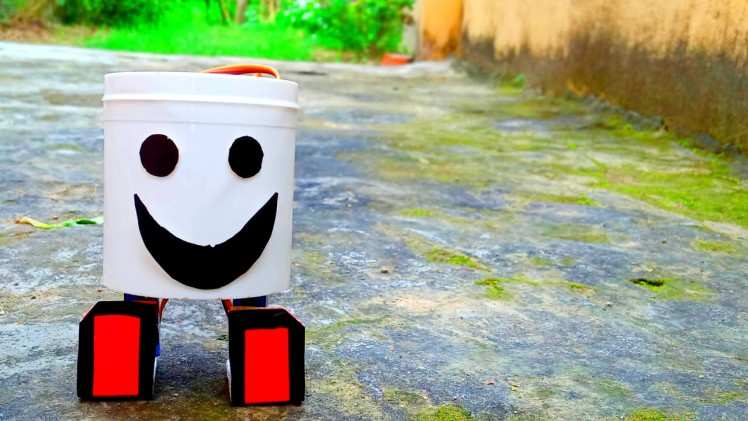
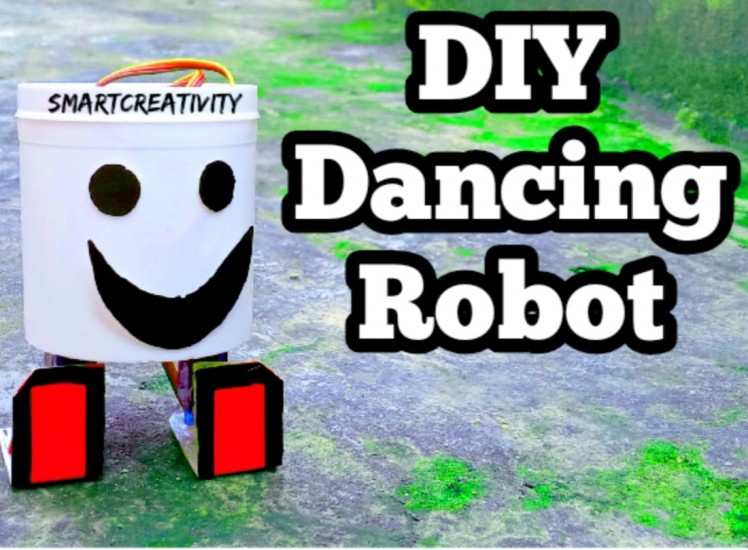
So our cute and DIY amazing dancing robot is ready.
Step 7 -
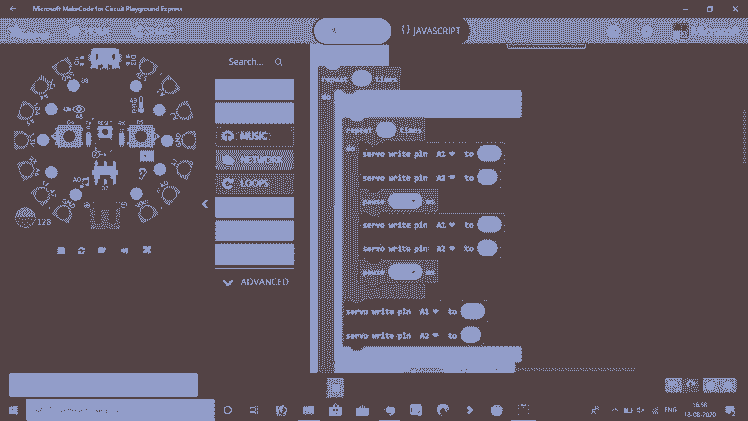
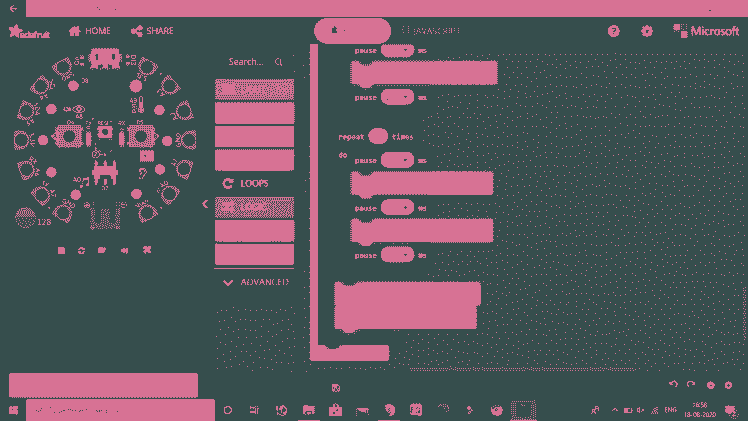
Let's make the code. To code the micro-controller we can use make code Adafruit editor app or makecode Adafruit browser to program it.
We have simply make a drag and drop programming by dragging the blocks. And it's so easy.....
See code screenshot below. I also uploaded the robot code in this tutorial.
1 / 4 • code

code

After that you can enjoy with your robot.
Robot is ready:
1 / 3 • looking very cool

looking very cool
So, I hope that you all enjoy in this project and also like this.
NextPCB-
NextPCB is a high quality PCB manufacturer with professional PCB manufacturing capabilities. PCB materials are certified by IATF16949, ISO9001, ISO14001, UL, CQC, RoHS and REACH. NextPCB uses very accelerate method to deliver the PCB within just 6-8 days. I have been also using there service for past two years and I always get good results. So, I suggest all mechanical creator should have to buy PCB from NextPCB.
NextPCB provides up to 4-12 layer PCB. The PCB quality is also very good. For only 10$ you can get 10 PCB of any color that you want. For ordering the PCB you have to go the website of NextPCB. Just go to the website Upload your gerber file, select PCB setting and order 10 high quality PCB now.
For more information - https://nextpcb.com
If you Like this project then please support me by "subscribing" my YouTube channel.
Subscribe now - Click hereYou can also share new projects idea with me by commenting here.
Facebook- @circuitjamer , Instagram- @circuitjamerSo, bye guys ..............see you in next projects..
Thanks for visiting in this tutorial......
#smartcreativity , #circuitjamer , #robotics
CAD, enclosures and custom parts
Code
Credits
Related products


Leave your feedback...