
Horus: The Weather Station

Made by electrouser829 / Environmental Sensing / Home Automation / Sensors / Weather
About the project
A Raspberry Pi-based weather station that measures temperature, humidity and pressure using the Astro Pi Sense HAT and uploads the data.
Project info
Difficulty: Moderate
Platforms: Microsoft, Raspberry Pi, Weather Underground
Estimated time: 7 hours
License: MIT license (MIT)
Items used in this project
Hardware components

Software apps and online services

Story
Introduction
A year ago I started to work with Raspberry Pi and try to build different devices and develop software for it. One of interesting projects at least for me was building a weather station. I was inspired by article. However I decided not just make another copy but add some additional functionality, outdoor waterproof and code improvements, including dew point calculation and exception logging.
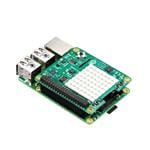
One more important fact is availability of Astro Pi Sense HAT. The HAT stacks on top of the Raspberry Pi and has the following hardware capabilities:
- Temperature, humidity, and pressure sensors
- Accelerator, gyroscope, and magnetometer
- 8×8 full-color RGB LED display
- 5-button joystick
Another big plus is Weather Underground (WU) letting you set up your own station and upload your data for others to use; your data becomes part of the aggregate weather data, and you (and your neighbors) can view your station’s data separately as well.
I decided to extend usage of the HAT. I used its LED display to show different styles: arrow, digits and filled square. I also used joystick to switch between different data (temperature, humidity, pressure) and various styles for each data entity.
I also improved outdoor usage of the project by introducing completely waterproof case, bought on ebay and adding cooling system (if needed or just simply adjust temperature results).
Weather Underground Setup
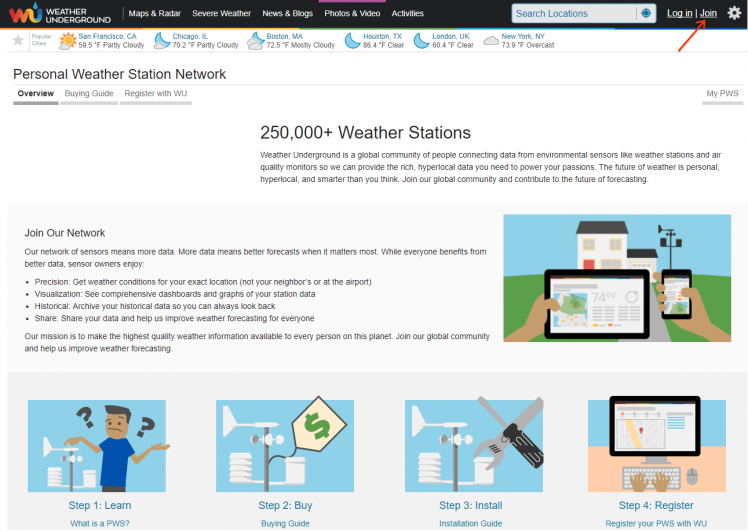
Weather Underground (WU) is a public weather service, now owned by the Weather Channel, that lets you upload local weather data into the WU database for public consumption. Setting up a WU weather station is free and easy to do. Go to Weather Underground Personal Weather Station Network and click the Join button in the upper-right corner.
 Log in to Weather Underground Personal Weather Station
After you fill all required data: email address, a user name, and password to create a new account, go back to the PWSN home page and click the My PWS button at the upper right. On the page that appears, populate the form to create your new personal weather station.
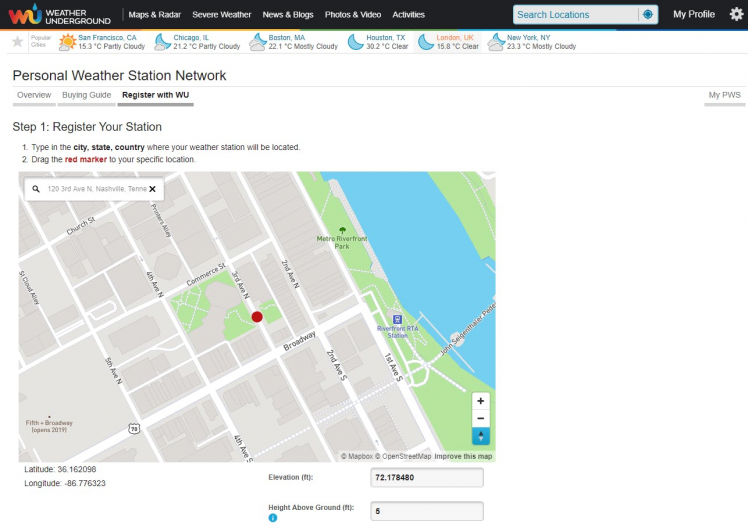 Registering Personal Weather Station
Once you complete the setup, WU will generate a station ID and an access key you’ll need to access the service. Be sure to capture those values, you’ll need them to configure the project application later.
Hardware Setup
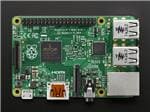
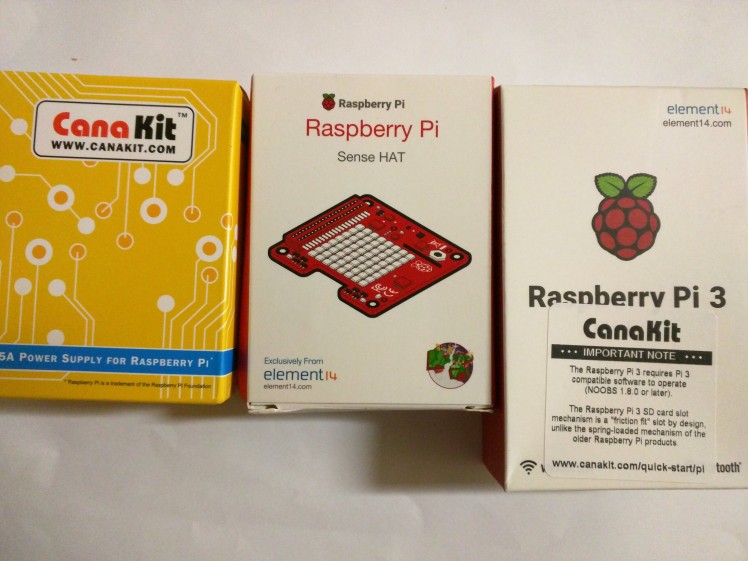 Power Supply, Sense HAT and Raspberry Pi 3
Assembly is pretty simple. Just mount the Sense HAT on top of the Raspberry Pi 2 (or you can easily use Pi3 and save on Wi-Fi dongle). You can also try Raspberry Pi Zero W, it should be cheaper and more energy efficient for this project.
Put heat sinks, plug in Wi-Fi dongle (if any), and power it up.
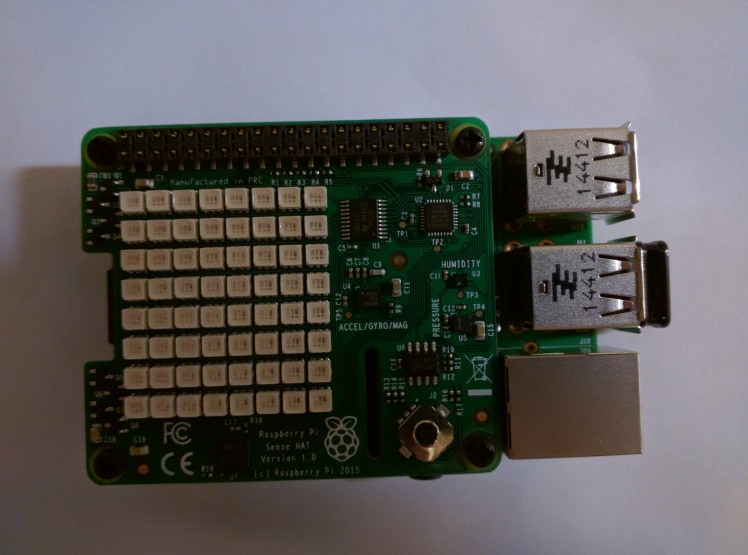 Installed Sense HAT over Raspberry Pi
Raspberry Pi OS Setup
The Raspberry Pi needs an OS to boot, so grab your microSD card, then follow the instructions here to download and install the OS on the SD card. Once that’s completed, insert the SD card into the Pi. Turn on your monitor, then plug the Pi’s power supply into a power outlet and the Micro-USB port on the Pi.
There are two options to setup your Raspbian OS, you can do it remotely or you can do it through GUI (attaching any display to your Raspberry Pi). I prefer to do it remotely, but any way you need to enable remote access and connect to your Wi-Fi network first of all. I would advise (and put screenshots) to use GUI, remote access is recommended for more advanced users, developers with Linux terminal experience.
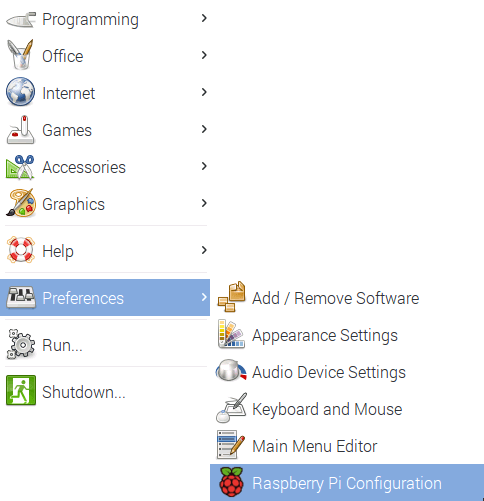 Raspberry Pi Configuration
Or you can use terminal command:
sudo raspi-config
For remote access I would recommend to use PuTTY it you need to get IP address of your Raspberry Pi, which can be done through your router administration or Raspbian config. You also need to enable SSH access to your Raspberry Pi. If you did not change default username and password, to access via SSH you need to enter: pi as username and raspberry as password.
By default, the Raspbian image only utilizes a part of the SD card’s storage (4GB); if the card you used for your Raspbian installation is larger than 4GB, you’ll need to expand the file system to use the whole disk, to make sure you’ll have room for the additional software used in this project. In the Raspberry Pi Configuration utility shown in the photo below, click the Expand Filesystem button to enable the Pi to use the whole SD card for storage. Making this change will require rebooting your Pi.
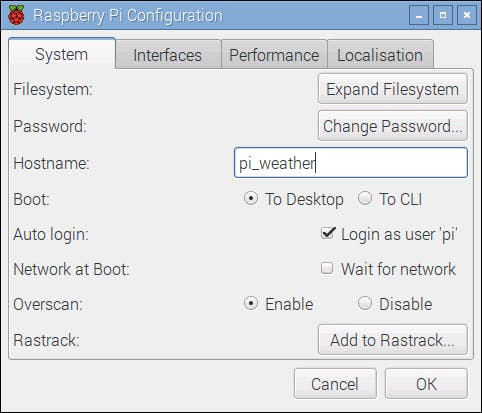 Raspberry Pi Configuration Window
Next you’ll need to update the Pi’s core software. Open a terminal window and execute the command:
sudo apt-get update
This command updates the Pi’s indexes of available software packages. Next, execute:
sudo apt-get upgrade
This command fetches and installs the latest and greatest versions of the Raspbian OS and other software packages installed on the Pi. It will take quite a while.
Weather Station Software Install
The Sense HAT uses its own Python libraries. To install them, go to the terminal window and execute the command:
sudo apt-get install sense-hat
If you use latest Raspbian Jessie OS it should have the latest version of Sense HAT.
Next, create a directory for the project files:
cd ~
mkdir weather_station
cd weather_station
Then copy the project’s Python source code to the new directory with this command:
wget https://github.com/UBayouski/WeatherStation/archive/master.zip
and extract the files with this command:
unzip -j master.zip
Weather Station Software Setup
I used MS Visual Studio developing this project, however you can use any IDE, text editor etc. it is completely a matter of your choice. In order to upload data to the Weather Underground service, our Python app needs access to the station ID and station access key you created earlier in the setup process. Open the project’s config.py (config.py.example in GitHub, needs renaming to config.py) file in your text editor of choice then populate the STATION_ID
and STATION_KEY
fields with the appropriate values from your Weather Underground Personal Weather Station:
class Config:
# Weather Underground configuration
STATION_ID = 'YOUR_STATION_ID' STATION_KEY = 'YOUR_STATION_KEY'
The project has two configuration settings that control how it works:
# specifies how often to upload values from the Sense HAT
UPLOAD_INTERVAL = 600 # in seconds
The app reads the temperature sensor on the Sense HAT every 60 seconds, for use in calculating ambient temperature:
UPDATE_INTERVAL = 60 # in seconds
But we don’t want to upload data to Weather Underground that frequently. So, the UPLOAD_INTERVAL
variable controls how often the app sends measurements to WU. To change this interval, just change the value to the right of the equal sign.
If you’re testing the app and don’t want your data uploaded to WU until you’re ready, change the value for WEATHER_UPLOAD
to False
(in Python, case matters, so it has to be False
, not false
):
# Set to False when testing the code and/or hardware and don't want to upload data to Weather Underground
WEATHER_UPLOAD = False
For remote file editing I would recommend to use FileZilla free and great software, you can setup access to your Raspberry Pi through creating new SSH project (if you didn't enable SSH access earlier for PuTTY you need to do it now).
UPDATE: New PLUGINS section in config.py.example, used to extend Weather Station functionality by adding plugins.
IMPORTANT: If you do not have any plugins, please still keep this field with empty tuple/list assigned to avoid exceptions.
Weather Station Test Launch
To run your weather station Python application, open a terminal window, navigate to the folder where you copied the project files and execute the following:
python ./weather_station.py
The terminal window should quickly sprout the following output:
Successfully read Weather Underground configuration values
Station ID: YOUR_STATION_ID
Successfully initialized sensors
Weather Station successfully launched
If you see something like that, you did everything right. If not, figure out what any error messages mean, fix things, then try again. At this point, the application will start collecting data every 60 seconds and uploading it to the Weather Underground every 10 minutes (unless you changed the app’s configuration to change the upload interval).
Start Weather Station Automatically
Finally, you must configure the Raspberry Pi so it executes the Python app on startup. In a terminal window, navigate to the folder where you extracted the project files. Then make the project’s Bash script file executable by executing the following command:
chmod +x start-station.sh
Next, open the Pi user’s session autostart file using the following command:
sudo nano ~/.config/lxsession/LXDE-pi/autostart
Add the following line to the end (bottom) of the file:
@lxterminal -e /home/pi/weather_station/start-station.sh
To save your changes, press Ctrl-O then press the Enter key. Next, press Ctrl-X to exit the nano application. Reboot the Raspberry Pi. When it restarts, the weather station’s Python process should execute in a terminal window.
Calculating Ambient Temperature
It turns out the Sense HAT has a design flaw, in that the humidity and pressure sensors (each of which can be used to measure temperature) are not thermally isolated from the Pi’s CPU, and therefore can’t measure ambient temperature accurately. The Pi community has figured out ways to read the CPU temperature, then use that value to guesstimate ambient temperature to within 1°C — pretty good. One of these solutions was used in the code so we can grab near-accurate temperature readings. This is especially important if you’re using a Raspberry Pi 3, which generates more heat than older Pi boards.
You can also connect a standalone temp/humidity sensor to the Pi’s GPIO pins, and edit the code to read that sensor too.
Using Joystick To Switch Data and Visual Styles
I decided to use Joystick functionality and extend the value of the HAT. I attached several events to handle up/down and left/right pushes.
We can set our station to show temperature, pressure or humidity they will differ in colors.
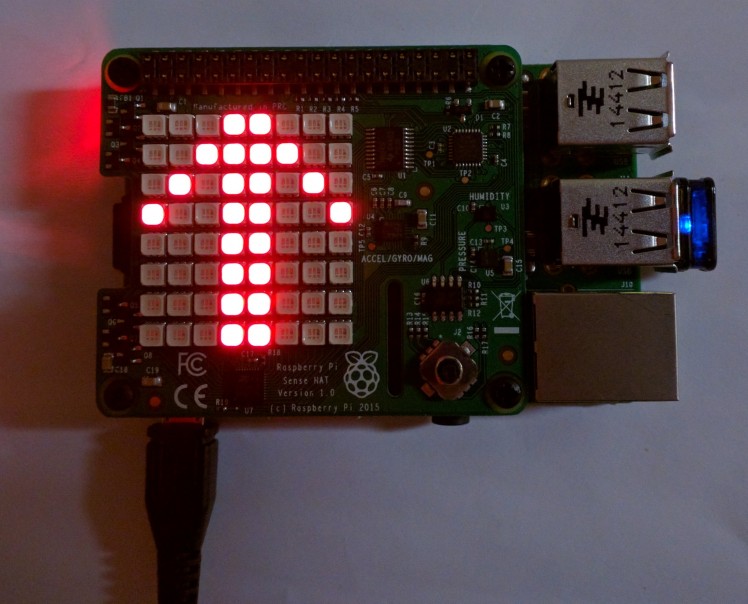 Temperature positive difference between previous and current readings
There are 3 visual style for each sensors data entity. It can be easily extended by creating new visual styles (there is base class VisualStyle).
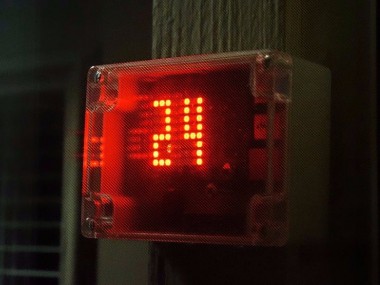
 Temperature Positive Digits Visual Style
Using joystick up/down switches between sensors data and left/right between visual styles.
 Humidity Square Visual Style
Mounting Your Weather Station Outdoors
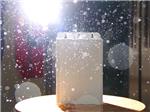
I decided to improve original project by adding complete outdoor waterproof support. I bought on ebay waterproof electronic enclosure case. It is really cheap and great, the only issue it is shipped from China and takes some time to get it. Moreover it is much easier to build because of ready to use greatly fitting the project parts.
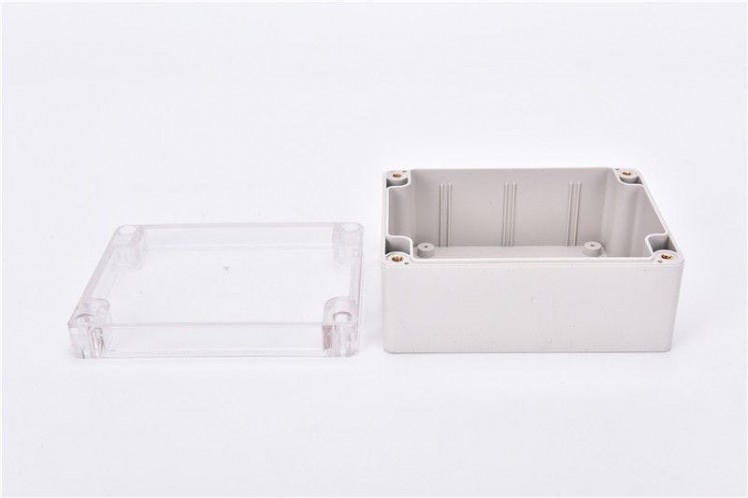 Waterproof Electronic Enclosure Case. Dimensions are great for Raspberry Pi.
However the issue occurred when I closed it with transparent plastic cover. The temperature increased (which should be obvious for me:)) and data upload to WU becomes inaccurate.
So, I drilled holes at the bottom of the case and added small 5V fan to the case to blow out warm air produced by Raspberry Pi CPU.
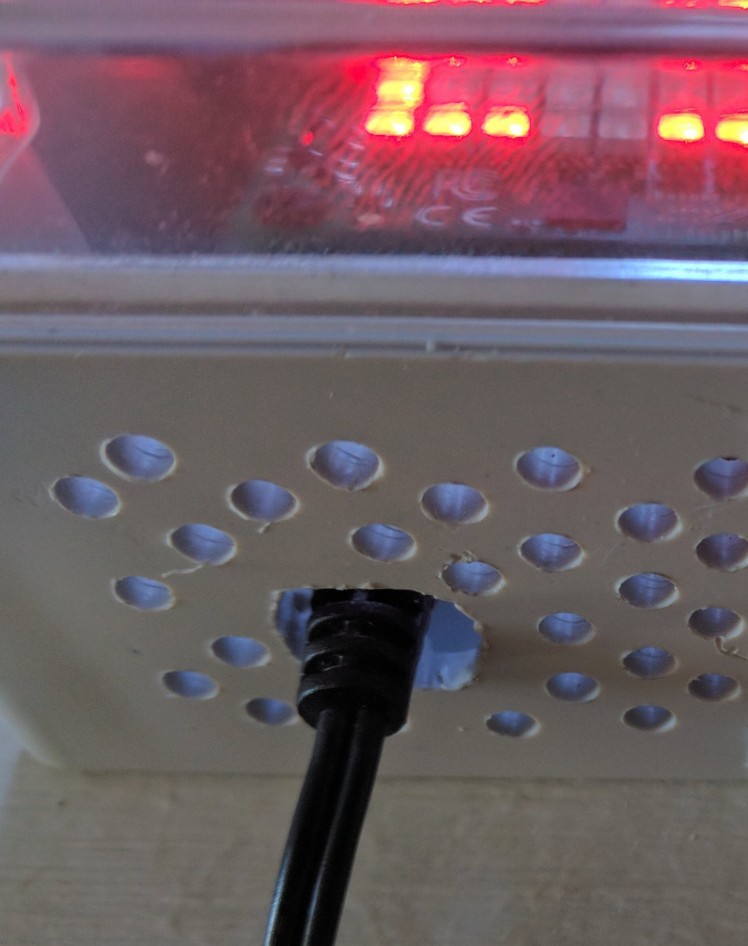 Drilled Holes at the Bottom of the Case
Holes and fan are at the bottom side of the case, so in case of rain water does not get inside of the case. You could see them on previous images of visual styles.
If you do not want to spend money and time you can just drill the holes and add some correcting value to your code to adjust temperature sensor value.
The only thing left to do, you need to mount your weather station inside the waterproof case, power it up and that's it! Don't forget to mount your weather station somewhere out of direct sunlight, or you will get incredible readings :)
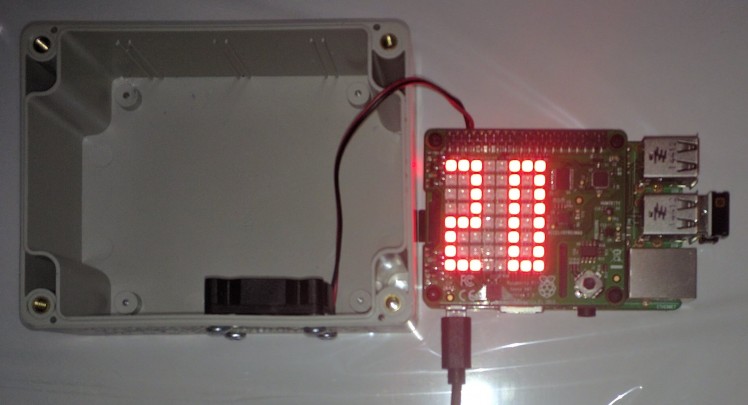
 Mounted Weather Station
Finally you get working personal weather station with free, cute and nice visual representation and analytics of sensors data.
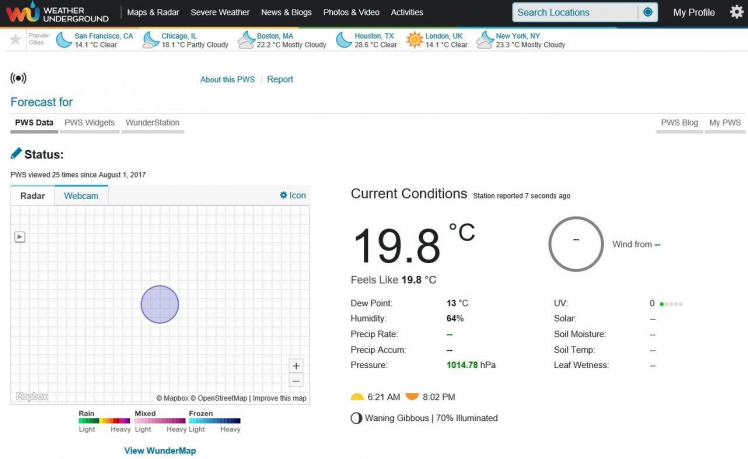 Personal Weather Station with provided sensors data (remove private data)
Schematics, diagrams and documents
Code
Credits
Related products


Leave your feedback...