

Arduino Stepper Motor Running For A Specific Time

Made by Ron / Automotive / Home Automation / Robotics / Sensors
About the project
In this tutorial we will learn how to rotate a stepper motor for a certain time period and then with a push of a button repeat it again.
Items used in this project
Hardware components

Story
In this tutorial we will learn how to rotate a stepper motor for a certain time period and then with a push of a button repeat it again. In this tutorial we use 10s period but you can change to any time.
Watch the Video!
Also check out this tutorials:
Move a Stepper Motor to an Exact Position
Arduino Nano and Visuino: Control Stepper Motor Tutorial With Buttons made by Boian Mitov
Step 1: What Will You Need
1 / 4


- Stepper motor 28byj-48 & stepper motor driver board
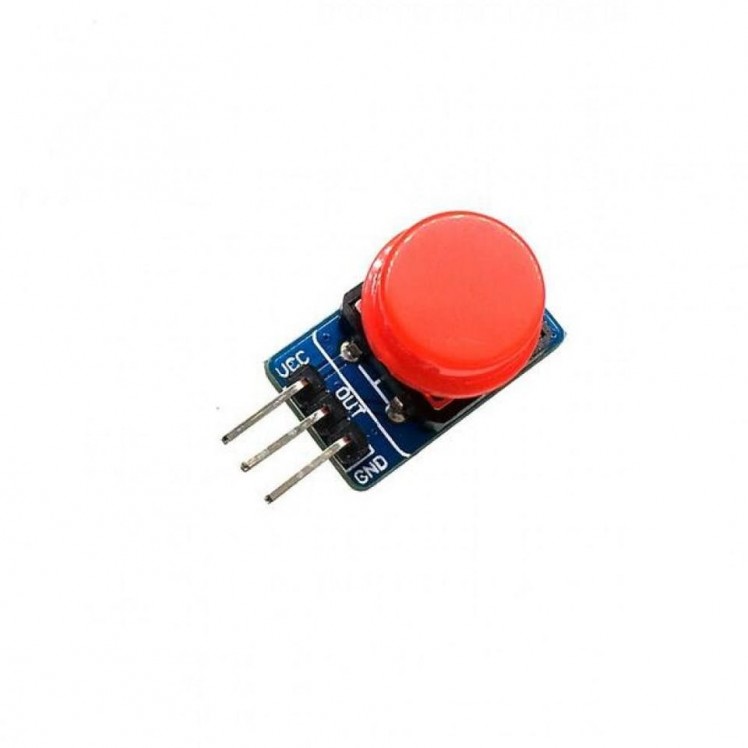
- Button module
- Jumper wires
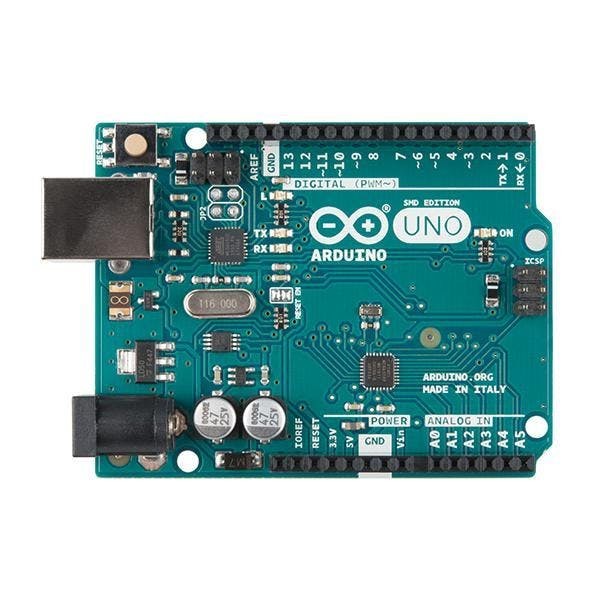
- Arduino or any other board
- Visuino software: Download Visuino
Step 2: The Circuit

- Connect Stepper Motor to Stepper Motor Driver
- Connect Arduino pin [5V] to Driver Board pin [VCC]
- Connect Arduino pin [GND] to Driver Board pin [GND]
- Connect Arduino digital pin [4] to Driver Board pin [IN1]
- Connect Arduino digital pin [5] to Driver Board pin [IN2]
- Connect Arduino digital pin [6] to Driver Board pin [IN3]
- Connect Arduino digital pin [7] to Driver Board pin [IN4]
- Connect Button module pin [Out] to Arduino digital pin [2]
- Connect Arduino pin [5V] to Button module pin [VCC]
- Connect Arduino pin [GND] to Button module pin [GND]
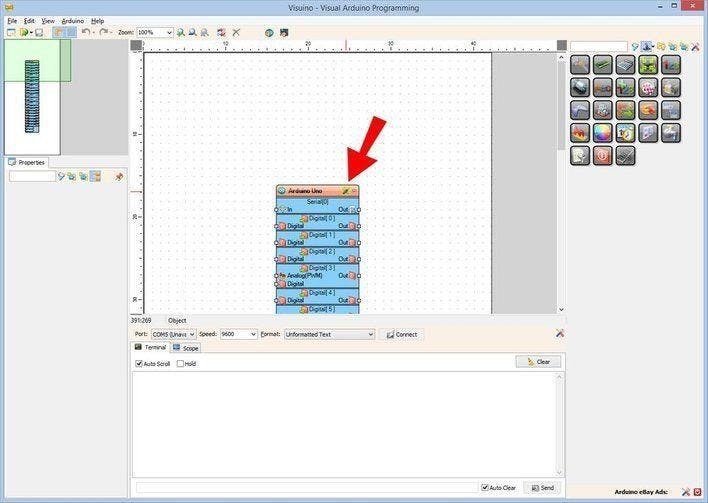
Step 3: Start Visuino, and Select the Arduino UNO Board Type
1 / 2

The Visuino: https://www.visuino.eu also needs to be installed. Download Free version or register for a Free Trial.
Start Visuino as shown in the first picture Click on the "Tools" button on the Arduino component (Picture 1) in Visuino When the dialog appears, select "Arduino UNO" as shown on Picture 2
Step 4: In Visuino Add, Set & Connect Components
1 / 9
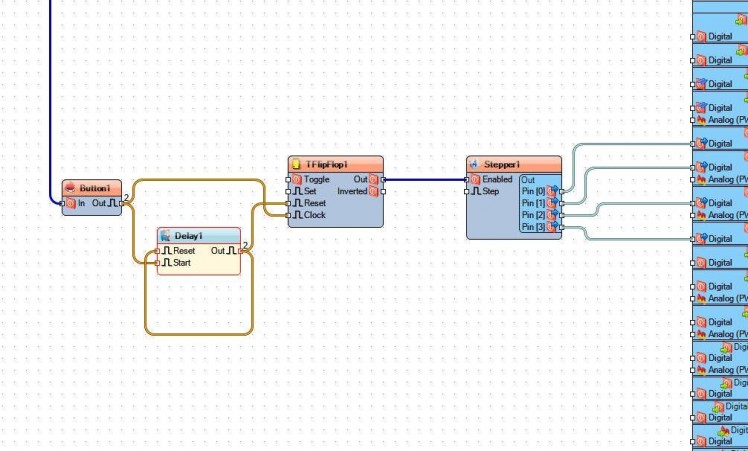


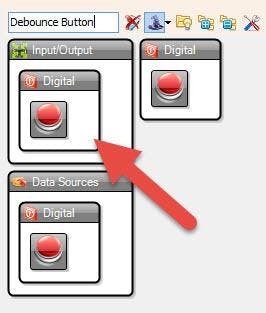
- Add "Debounce Button" component
- Add "Delay" component.
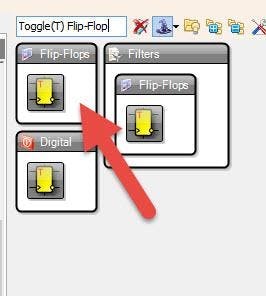
- Add "Toggle(T) Flip-Flop" component.
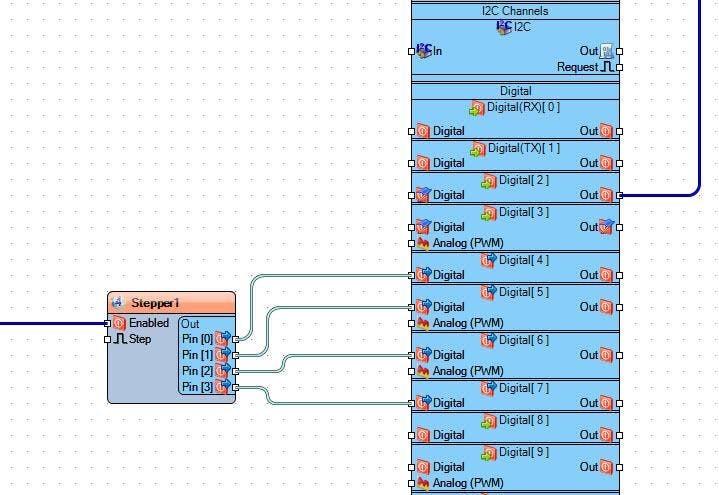
- Add "4 Wire Stepper Motor" component
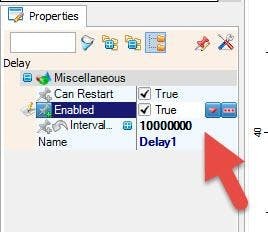
- Select "Delay1" and in the properties window set Interval to 10000000 micro seconds, you can change this number if you like, this is the time of the rotation. <<This will be the time of the rotation.
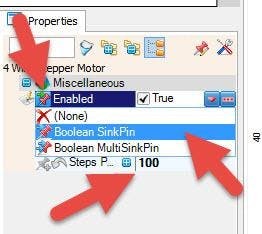
- Select Stepper1 and in the properties window select Enabled and click on the pin Icon and select Boolean SinkPin and set "Steps Per Second" to 100 <<This will be the speed of the rotation
- Connect Arduino Digital Out pin [2] to Button1 pin [In]
- Connect "TFlipFlop1" pin [Out] to Stepper1 pin [Enabled]
- Connect Button1 pin [Out] to TFlipFlop1 pin [clock] and Delay1 pin [Start]
- Connect Delay1 pin [Out] to TFlipFlop1 pin [Reset] and Delay1 pin [Reset]
- Connect "Stepper1" pin [0] to Arduino digital pin [4]
- Connect "Stepper1" pin [1] to Arduino digital pin [5]
- Connect "Stepper1" pin [2] to Arduino digital pin [6]
- Connect "Stepper1" pin [3] to Arduino digital pin [7]
- Connect Arduino Digital pin [2] to "Button1" pin [In]
Step 5: Generate, Compile, and Upload the Arduino Code
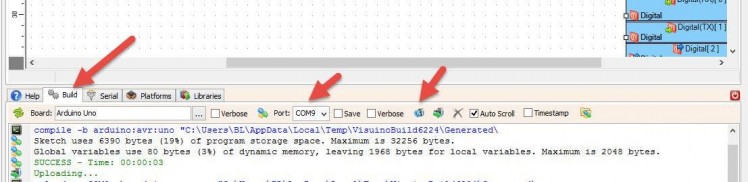
In Visuino, at the bottom click on the "Build" Tab, make sure the correct port is selected, then click on the "Compile/Build and Upload" button.
Step 6: Play
If you power the Arduino module, The motor will rotate for 10s and if you press a button it will rotate another 10s.
Congratulations! You have completed your project with Visuino. Also attached is the Visuino project, that I created for this tutorial, you can download it and open it in Visuino: https://www.visuino.eu
Schematics, diagrams and documents
Code
Credits
Related products


Leave your feedback...