
Maker Board Spotlight: Arduino MKR1000
Arduino boards are synonymous with the hobby embedded maker movement. They are easy to use, well documented, and have a huge online community. Most Arduino boards combine simple 8-bit architecture with a range of input and output options (I/O). They are great for learning and simple projects but lack the power, connectivity, and extensibility of ARM-based single-board computers (SBCs) and development boards. Arduino does, however, have an ace up its sleeve. The MKR1000 - an affordable, powerful, connected development board.
What is the Arduino MKR1000?
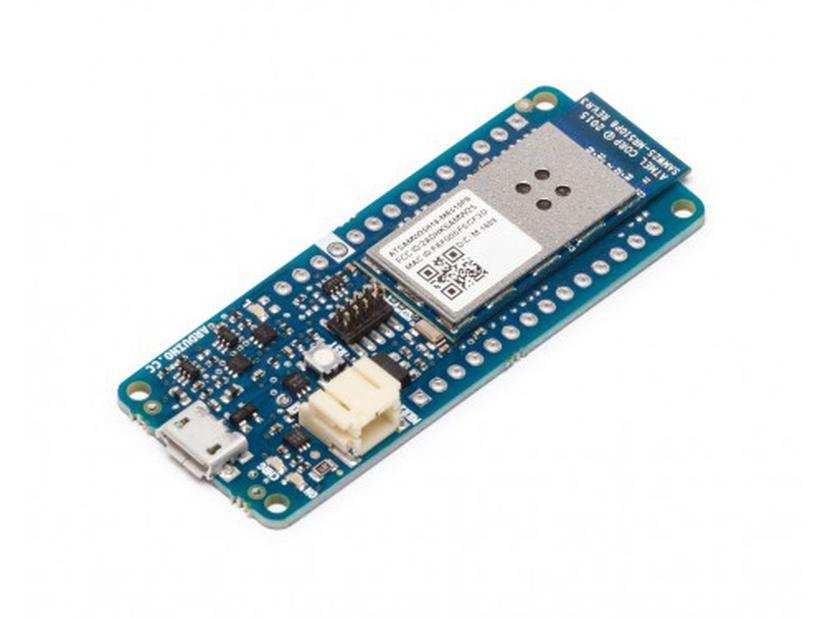
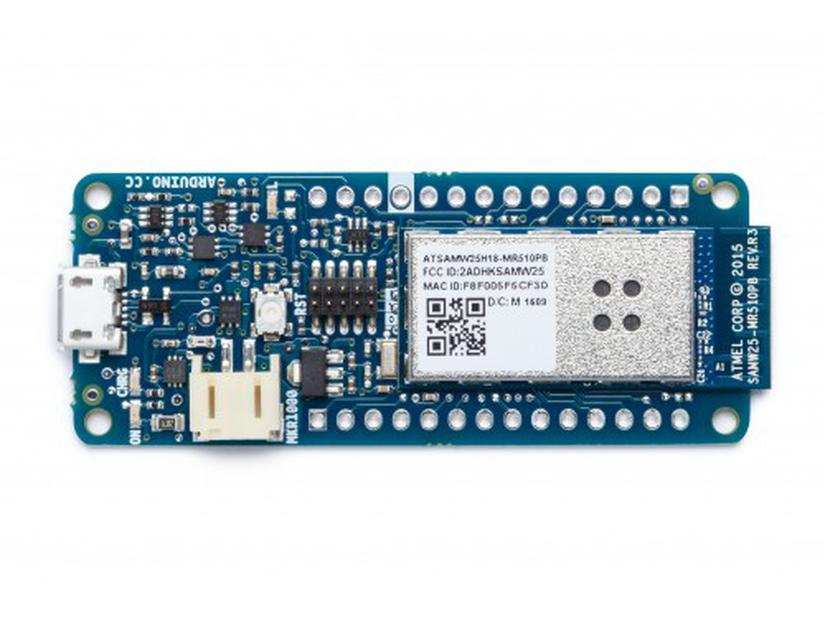
The 32-bit Atmel ATSAMW25 System on Chip (SoC) at the MKR1000's core combines an Arm Cortex-M0+ with a low-power WINC1500 Wi-Fi module. This is already a big step up in onboard power and connectivity compared to most other Arduino boards. The SoC supports 8 Digital I/O pins and 7 Analog Input pins. 12 pins can be configured as PWM outputs, and up to 10 pins can act as external hardware interrupts. Finally, and somewhat interestingly for musicians, the single 10-bit DAC output will convert digitally generated signals into analog voltages. You can change both the ADC and PWM resolutions via code and lower the DAC resolution if needed.
A notable difference and a hurdle complete beginners might have to consider is the fact that the MKR1000 is a 3,3v microcontroller, meaning that none of the pins are 5v tolerant. The MKR1000 also has a charge circuit and connector for a 3.7v LiPo battery, with a standby charge time of 4 hours at 350mah. Visually one of the biggest changes for the MKR1000 is the form factor. It's among the newer crop of Arduino boards that are closer to the Adafruit Feather form factor rather than the Uno and Nano footprint of the past.
Usefully, headers can be soldered to the top and used much like the Arduino Uno, to the bottom for breadboard use like the Arduino Nano, or even both making it the perfect prototyping machine. By far the biggest change here is native WiFi connectivity, something that many Arduino boards lacked until recently. There are already many libraries available through the Arduino IDE for working with Wi-Fi, making connected devices easier to build than ever.

Arduino MKR1000 Specs
- Microcontroller: SAMD21 Cortex-M0+ 32bit low power ARM MCU
- Board Power Supply (USB/VIN): 5V
- Supported Battery: Li-Po single cell, 3.7V, 700mAh minimum
- Circuit Operating Voltage: 3.3V
- Digital I/O Pins: 8
- PWM Pins: 12 (0, 1, 2, 3, 4, 5, 6, 7, 8, 10, A3 - or 18 -, A4 -or 19)
- UART: 1
- SPI: 1
- I2C: 1
- Analog Input Pins: 7 (ADC 8/10/12 bit)
- Analog Output Pins: 1 (DAC 10 bit)
- External Interrupts: 10 (0, 1, 4, 5, 6, 7, 8, 9, 16 / A1, 17 / A2)
- DC Current per I/O Pin: 7 mA
- Flash Memory: 256 KB
- SRAM: 32 KB
- EEPROM: no
- Clock Speed: 32.768 kHz (RTC), 48 MHz
- LED_BUILTIN: 6
- Full-Speed USB Device and embedded Host
- Dimensions: 61.5 x 25 mm
- Weight: 32 g
What can You do With the Arduino MKR1000 - Arduino MKR1000 Projects
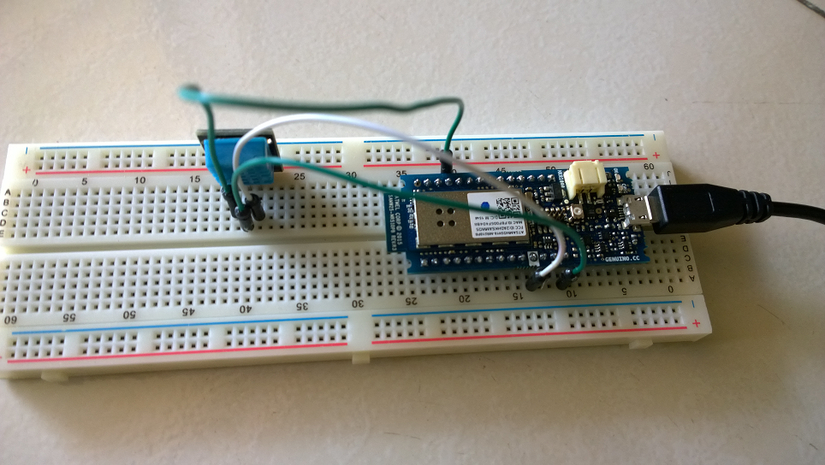
Native Wi-Fi connectivity makes the Arduino MKR1000 perfect for Internet of Things (IoT) projects, though its powerful processor and many options for I/O make it perfect for pretty much every beginner to intermediate project too.
A Simple Weather Station with a Web Interface
A weather station is a great beginner project for any development board. Temperature and humidity sensors are cheap and included in a lot of Arduino starter kits. The MKR1000's connectivity makes it a great candidate for setting up a web interface to display the sensor data. This Instructable by wesee shows how to use the MKR1000 with Losant to create a stylish dashboard for your miniature weather station.
DIY Pool Water Quality and Temperature Setup
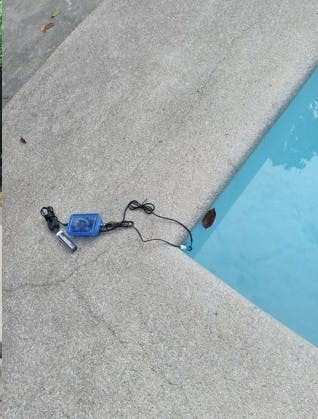
This project from Electromaker.io user elctrouser1623 is on a similar theme, but a little more advanced. It uses a DFRobot BME280 environmental sensor https://www.electromaker.io/shop/product/dfrobot to monitor the pH and temperature levels of swimming pools or aquariums. The data is then collected in a web interface powered by ARTIK Cloud, where the user can check current sensor readings along with changes over time.
DIY Windows 10 Powered Home Automation
As well as programming Arduino boards directly, a common development path is to use the Arduino as a peripheral that takes commands from another microcontroller or computer. This is exactly the approach Ioannis Kydonis took with his Windows 10 and MKR1000 powered home automation setup.
The full tutorial shows how they flashed the MKR1000 with WiFi Firmata, a sketch allowing the Arduino to take direct commands over a local Wi-Fi network. Then, they created a Universal Windows App to create a familiar and fitting window to control the relays attached to the MKR1000, turning on and off a light.
Remote GoPro Trigger

GoPros are the go-to cameras for adventurers, and the ability to connect to them wirelessly makes them great for remote control. This project from the Arduino Project Hub uses an MKR1000 to connect to and control a GoPro hero remotely. As well as starting and stopping filming, there are dedicated buttons for establishing a connection with the GoPro and powering it on and off, all over local AP networking requiring no Wi-Fi or cellular network.
Control Robots From Your Browser
The Johnny-Five JavaScript library is purpose-built for developing and controlling robots using Arduino boards and web development tools. It puts the MKR1000 into a peripheral role, controlling it directly over Wi-Fi, leaving you to do all of your coding in JavaScript, meaning you can control your robot from any browser. Charlie Gerard takes you through all the steps required to get up and running with the MKR1000 and Johnny-Five in their thorough tutorial on Medium.com.
A Great Beginner Arduino Board
With all of these great projects, it's easy to think that the MKR1000 is only suited for complex IoT projects, but it also makes a great first hobby development board. Arduino makes it just as easy to get up and running with as the Uno or any other board, and the official Arduino getting started guide has everything you need to learn how to use the Arduino IDE and start your own projects!
Should You Buy the Arduino MKR1000?
The Arduino MRK1000 is a powerful, connected development board designed to be accessible to all. While it packs in a lot more features than basic Arduino boards like the Uno and Nano, it remains easy to get started with. At the other end of the scale, if you are familiar with Arm Cortex microcontrollers the MKR1000 is a high-end evaluation board. It makes fast iterations over proof of concept and prototypes easy, and at just over $30 it's a cheap tool to test out a wide variety of projects. While there are cheaper and more powerful hobby boards out there, Arduino remains one of the best choices for easy to use and well-supported hardware, and the MKR1000 offers a lot to be excited about.

Ian Buckley is a writer, musician, and perpetual tinkerer. Commonly found surrounded by hobby electrical components, he's also a keen programmer and likes to build crazy-sounding instruments with microcontrollers. In addition to Electromaker, Ian writes over at MakeUseOf and has bylines at the likes of Online Tech Tips as well as Help Desk Geek.


Leave your feedback...