Water Quality Monitoring Using Mkr1000 And Artik Cloud
About the project
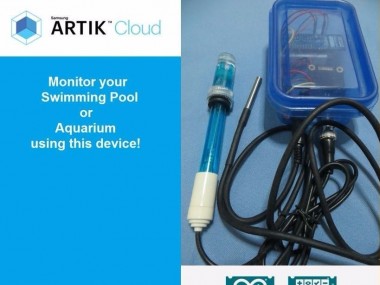
Water quality data monitoring for swimming pools, fish aquarium and more!
Project info
Items used in this project
Hardware components
Story
I. Objective
The primary objective of this project is to use Samsung ARTIK Cloud to monitor the pH and temperature levels of swimming pools.
II. ARTIK Cloud Setup
Step 1. Creating your new device
Sign up with ARTIK Cloud. Go to developer site and create new "device type".
 Figure 2.1.a ARTIK Cloud Dashboard
Enter your desired display and unique name.
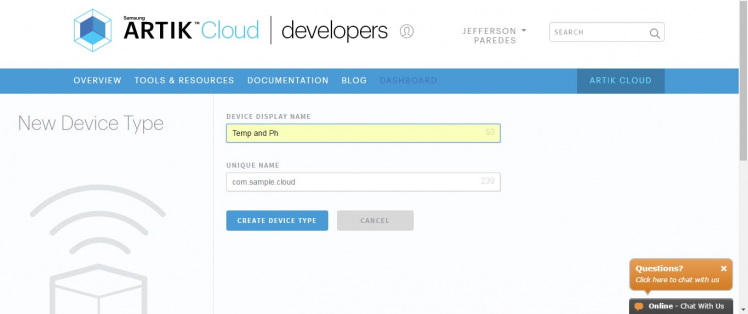 Figure 2.1.b New Device Type
Create new Manifest
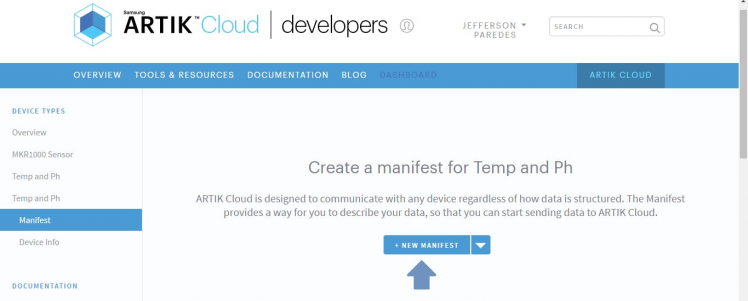 Figure 2.1.c Creating manifest
Enter field name and other description
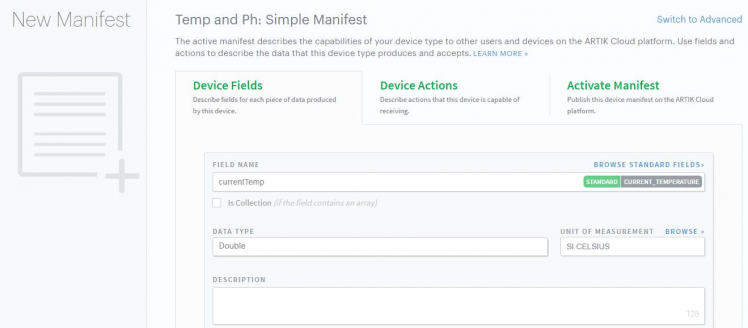 Figure 2.1.d Device fields
Click Save and then navigate to Activate Manifest Tab
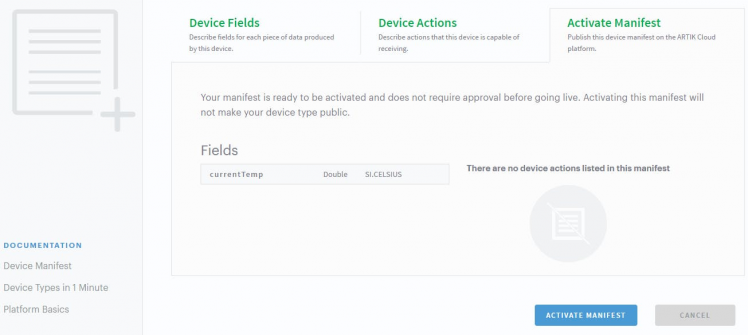 Figure 2.1.e Activate manifest
Click the ACTIVE MANIFEST Button to finish and you will be redirected here
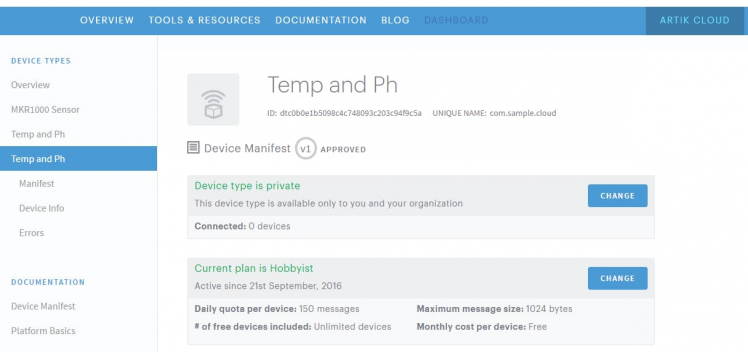 Figure 2.1.f Active device types
Done creating device type!
Now lets create your application that will use that device.
Step 2. Creating your application
Navigate to ARTIK Cloud Applications.
Click new application
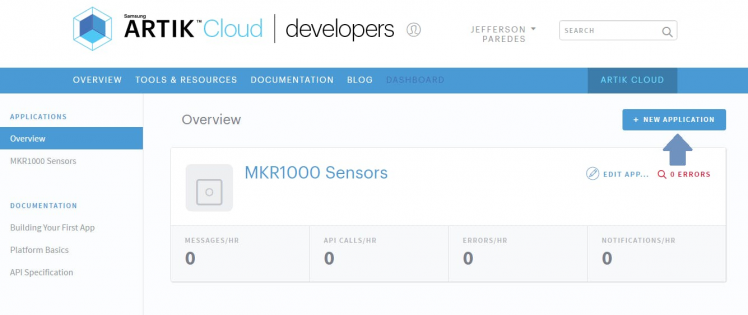 Figure 2.2.a Create new application
Enter your desired application name and authentication redirect url.
Note that the authentication redirect url is required. It is used to authenticate the users of this application hence will redirect to this url if in need of login.
We used http://localhost/index/ for sample.
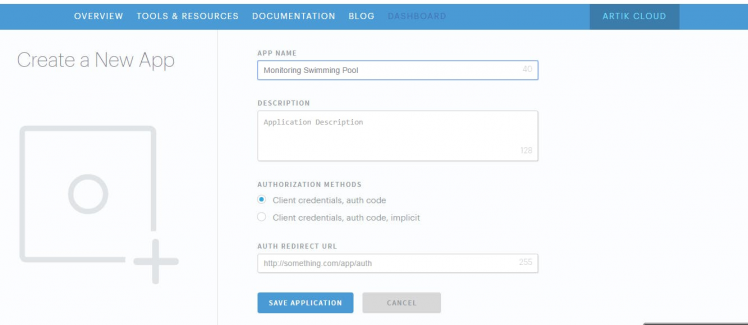 Figure 2.2.b set application description
Now set your application permission to read and write, navigate to your device then save.
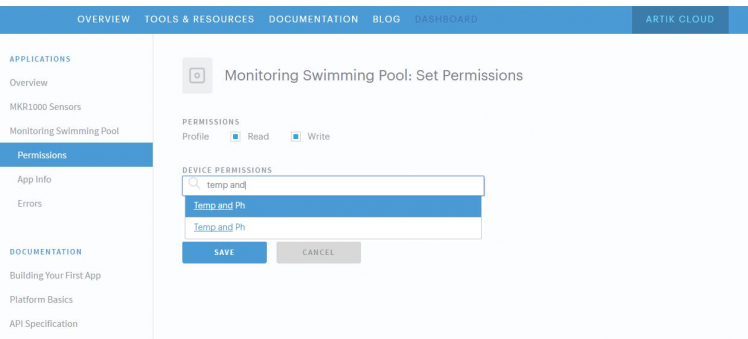 Figure 2.2.c set application permissions
Congratulation you now have your application!
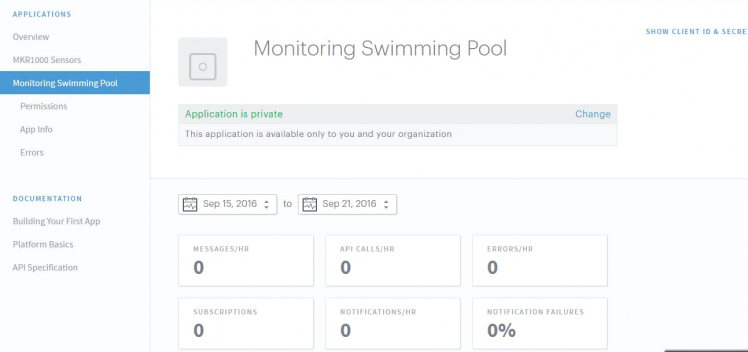 Figure 2.2.d your application
Now lets connect that application.
Step 3. Connect your device
Navigate to my devices and click connect another device.
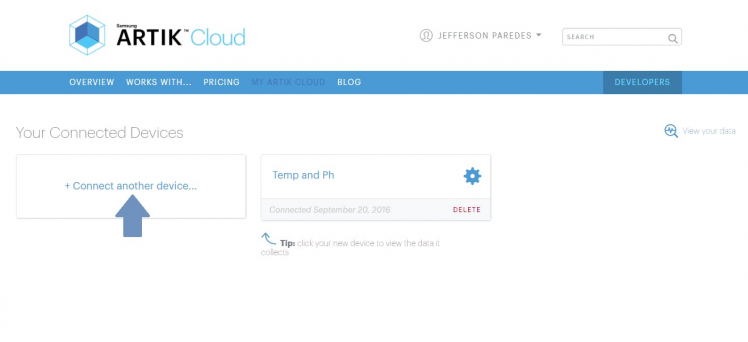 Figure 2.3.a connect another device
Click your new device type created earlier then click connect device.
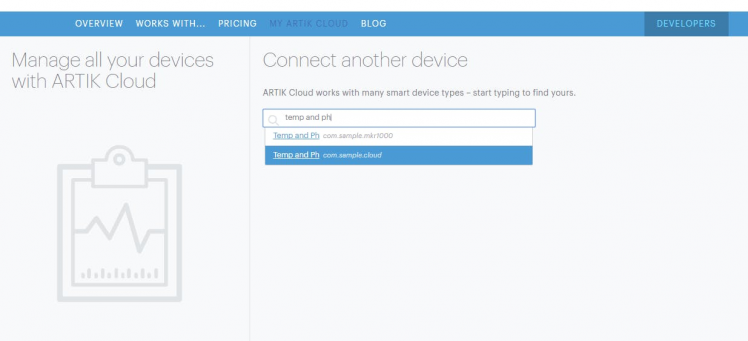 Figure 2.3.b connect another device description
Click your connected device settings.
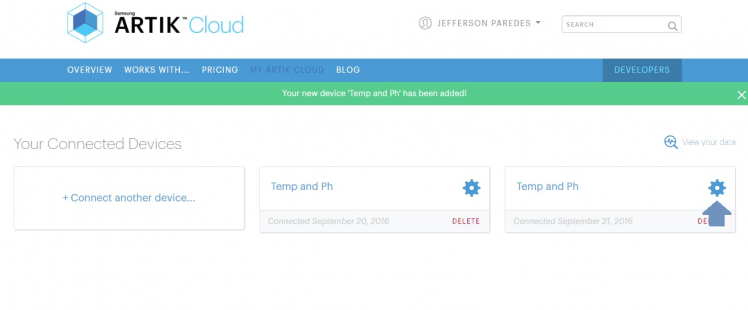 Figure 2.3.c view device setting
Take note of these info as you will needed it on the program.
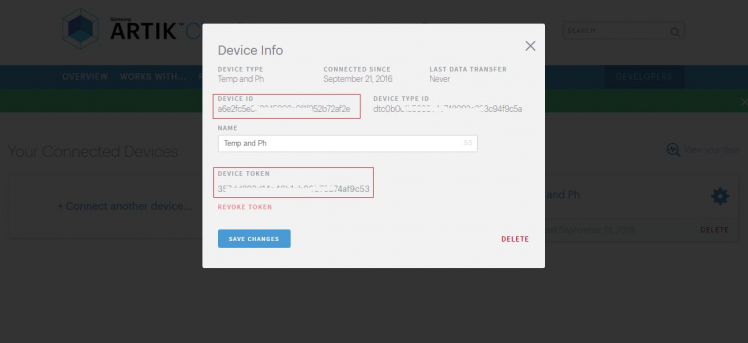 Figure 2.3.d device info
Now navigate to your connected device
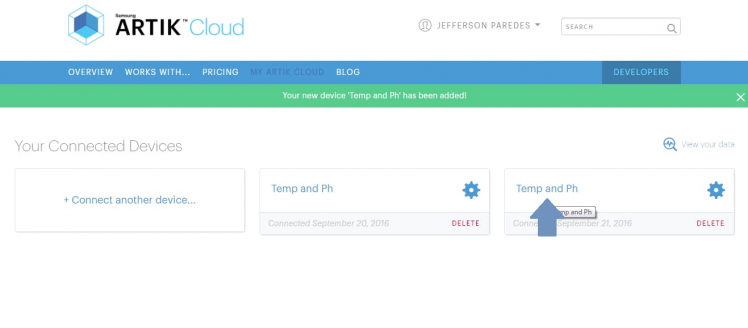 Figure 2.3.e navigate to view device
Done for ARTIK Cloud setup. Once your hardware is up, the chart will have data.
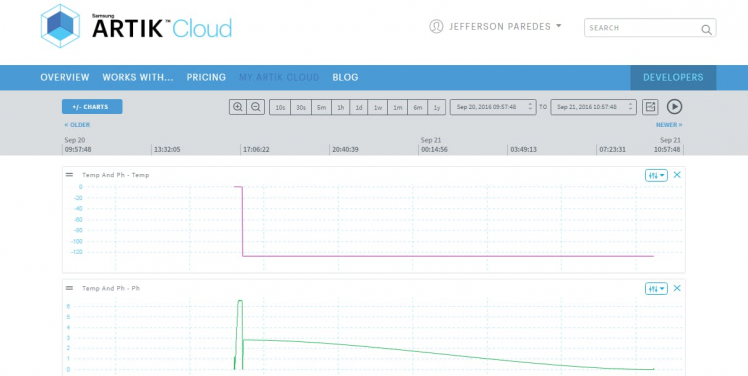 Figure 2.3.f device data update
Here's my sample wiring
; ;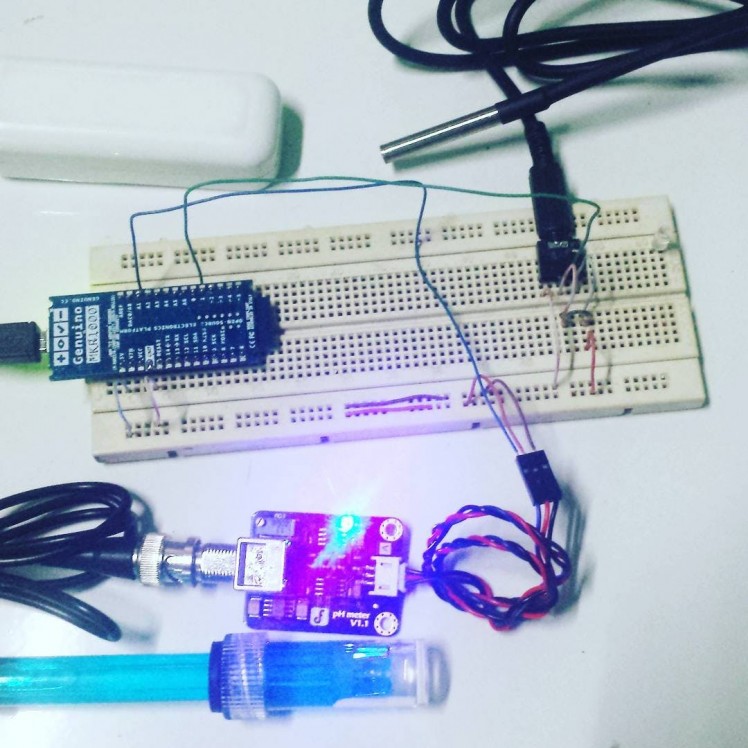 1 / 2
1 / 2
If you noticed we added an Audio Jack for easy detaching of temperature sensor. But this is optional.
Here's the connection of temperature sensor to the jack.
; ;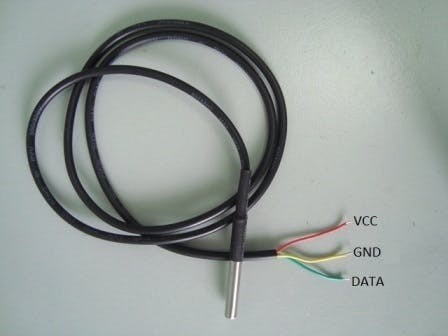 1 / 2 • Figure 3.2 Jack connection for temperature sensor
Step 2. Setup required software
Go to Arduino IDE and add the MKR1000 board.
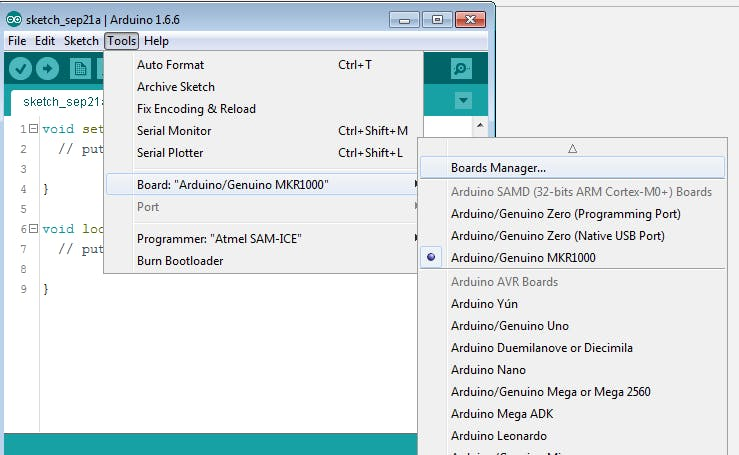 Figure 3.3.a add mkr1000 board
Search mkr1000 and click install
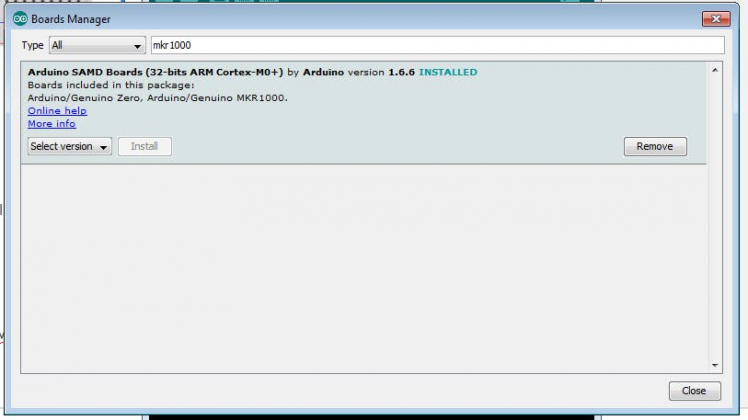 Figure 3.3.b add MKR1000
Add required library
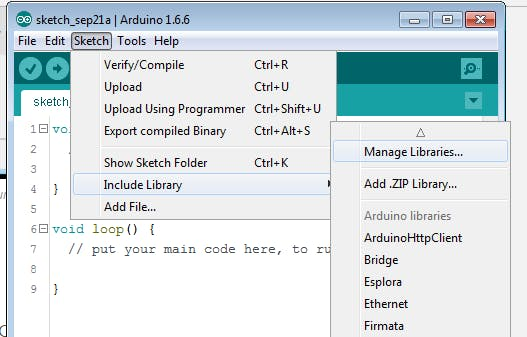 Figure 3.3.c add Libraries
Search for libraries to install:
- ArduinoJson - we'll be using this to send JSON data to ARTIK Cloud
- ArduinoHttpClient - host for connecting to API
- OneWire - needed to read digital input from Temperature sensor
- DallasTemperature - Dallas Temperature sensor required library
Finish adding required software!
Step 3. Upload the program
Now plug the MKR1000 to your PC/Laptop.
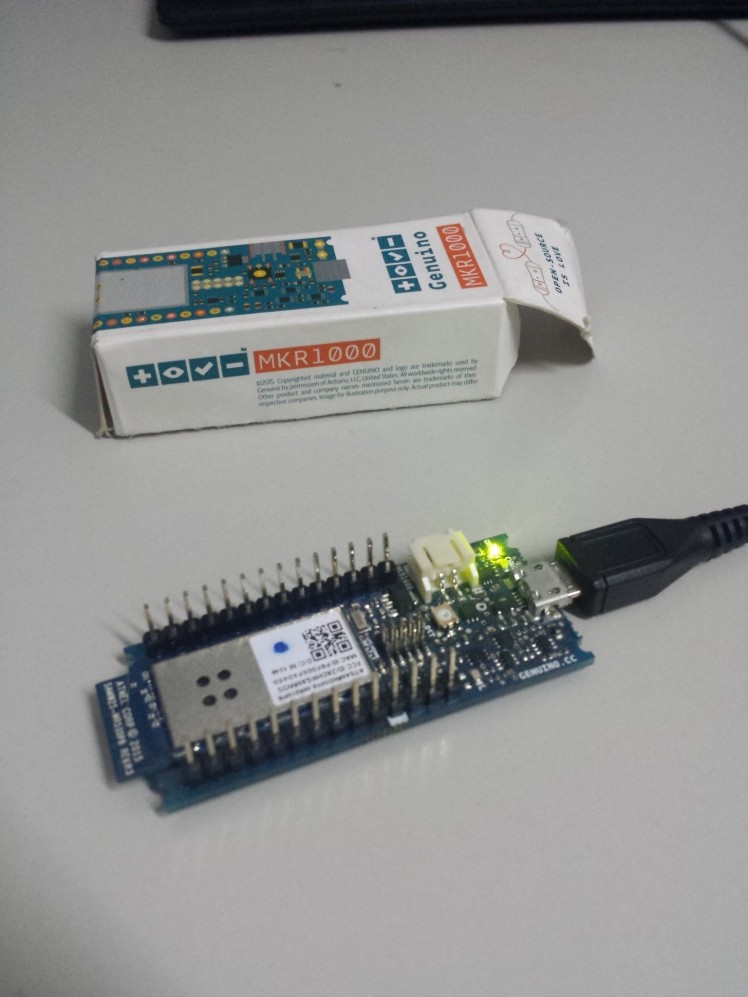 Figure 3.4.a plug mkr1000
Download the software on GitHub here
Change the following info:
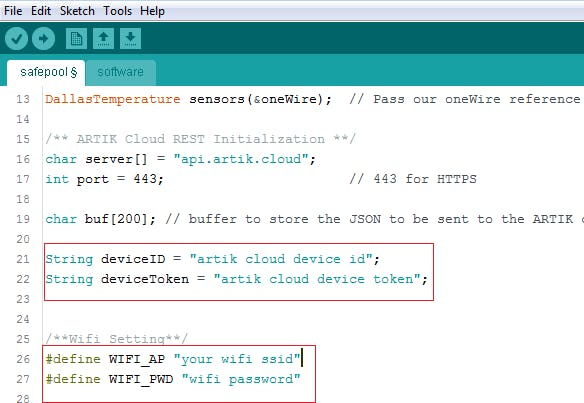 Figure 3.4.b software changes
Then Upload the Software Code to MKR1000 and start monitoring.
Note: Your WiFi must have internet connection.
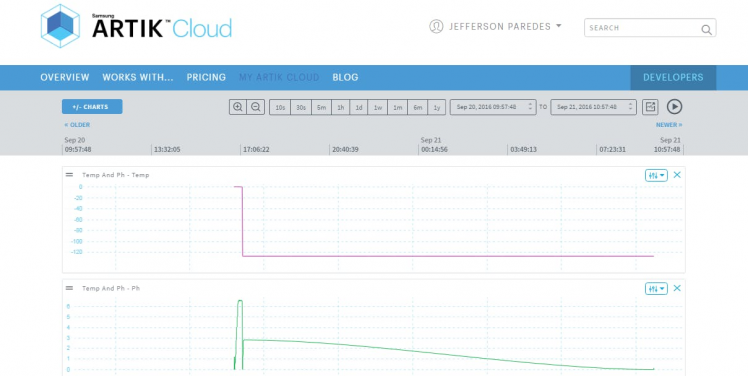 Figure 3.4.c ARTIK Cloud monitoring
IV. Field Test
We have tested the hardware sensor to Private, Public and School Swimming Pool. Collecting the data from these respondents' pool enabled us to analyze the capability of the hardware.
You can place the MKR1000 and sensor on a box and put it on your swimming pool away from water contamination. By doing this, you can monitor the quality of your water and normalize them by placing the desired chemicals.

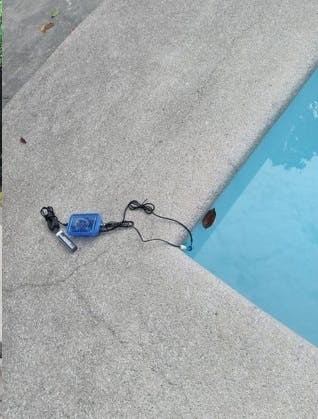 Figure 4.b Device placed near the swimming pool with power bank
Soon we will upload the tutorial on how to put all the circuits inside this box and the actual footage of testing.
V. Results
Hope this tutorial helps people to build their own DIY swimming pool water quality monitoring device. May there will be an increased awareness regarding the continuous degradation of the swimming pool water quality as people tend to focus more on the amenities that are offered instead of checking how safe they are. They also intend to contribute to the community by being able to provide a means to make water quality testing more efficient and effective without the unnecessary sacrifice of resources.
Happy building! :)






Leave your feedback...