
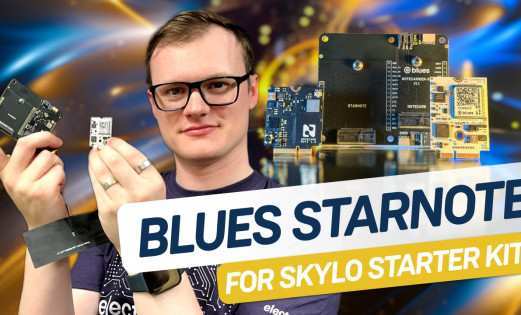
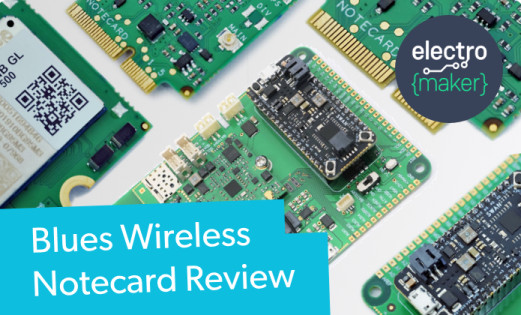
Connect, Create, Control: The Blues Starter Kit Review for IoT Developers
The Internet of Things (IoT) has come a long way in recent years, largely down to two reasons. Firstly, the technology has improved, allowing complex devices to run longer on battery power. Secondly, the tools available to developers have improved drastically.
Blues (previously Blues Wireless) combines both of these strengths into their hardware, software, and cloud products. Since the inception of the Notecard - a cellular IoT device that needs minimal power and takes simple commands - they've presented one of the lowest barriers to entry for IoT developers, regardless of previous experience.
Today, we'll review the new combined Wi-Fi and Cellular Notecard as part of their getting started kit available from their online store. Alongside the Wi-Fi/Cellular combined Notecard, Blues have released a cheaper version of their Wi-Fi only Notecard, and have a LoRa Notecard in the works - both priced at just $10.
The original Notecards provided Cellular or Wi-Fi connectivity via M.2 keyed boards that communicated with a host MCU or computer via JSON commands. Notecards package information into 'Notes', and communicate with the Blues Notehub cloud bidirectionally. This concept is central to the entire Blues workflow, and one that I've always resonated with.
The Blues Starter Kit
Is getting started with Blues' hardware as easy as I remember it? Well, spoiler alert: Yes. The simple but incredibly deep JSON interface combined with transparent pricing and ultra power-conscious hardware makes the Blues Starter Kit the simplest way to prototype, deploy, and maintain IoT devices I've ever seen.
Could you find cheaper, or lower power? Maybe, but you probably wont want to. Before we go into why though, let's see what came in the Starter Kit.
Blues Getting Started Kit: What's in the Box?
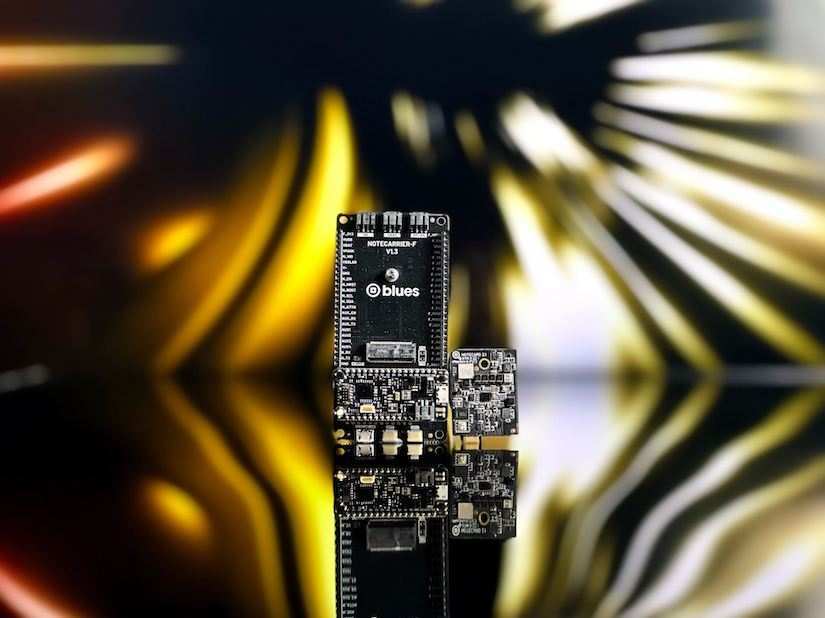
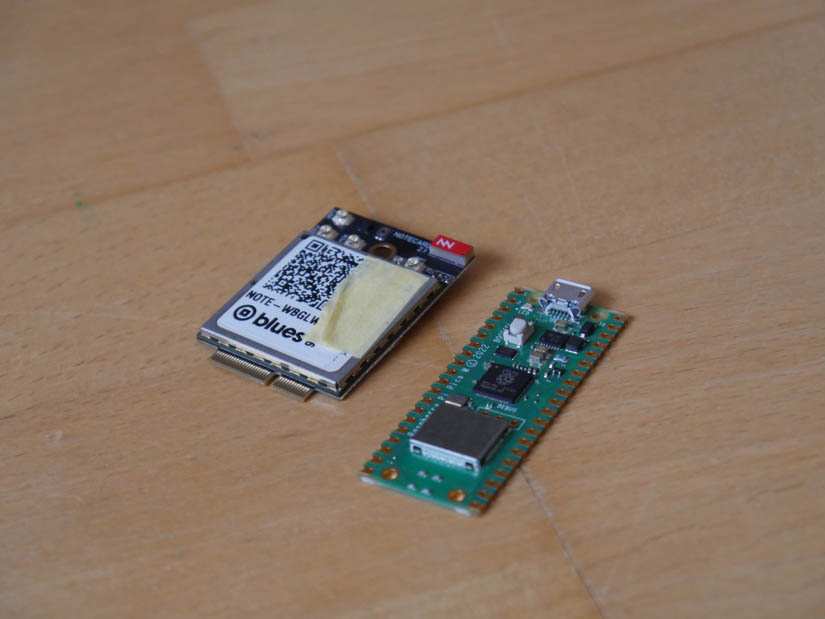
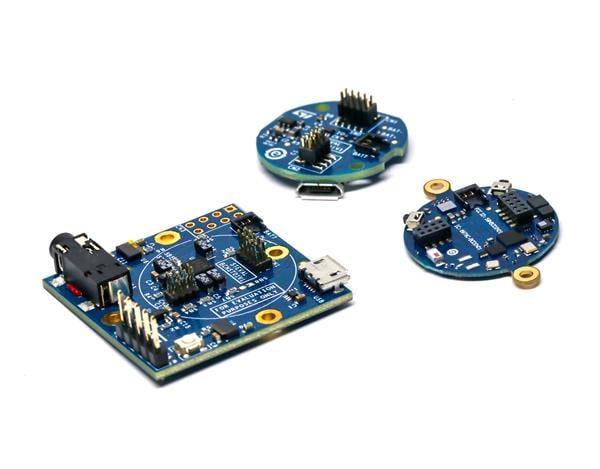
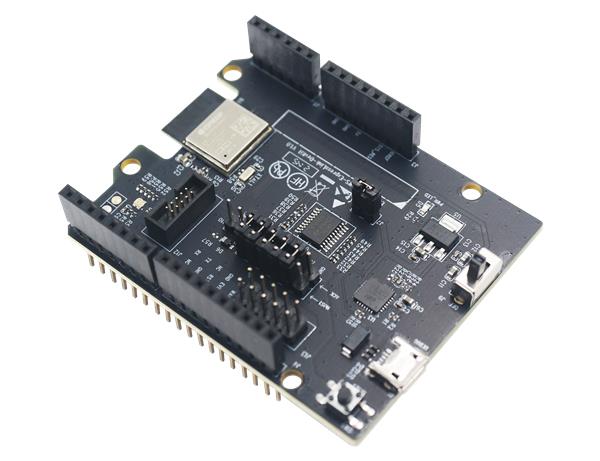
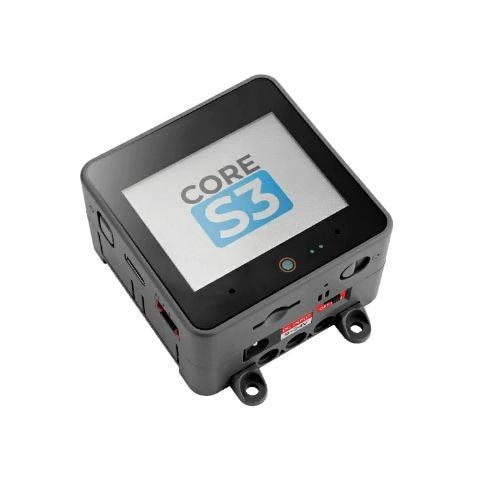
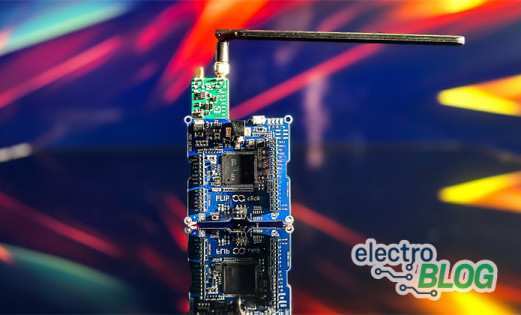
The getting started kit comprises of three main elements: The Notecard - which takes care of all the connectivity. The Swan MCU devboard - an STM32 based Adafruit Feather form factor development board, and the NoteCarrier F - one of several baseboards designed to accommodate the Notecard, and in this case the Swan MCU board too.
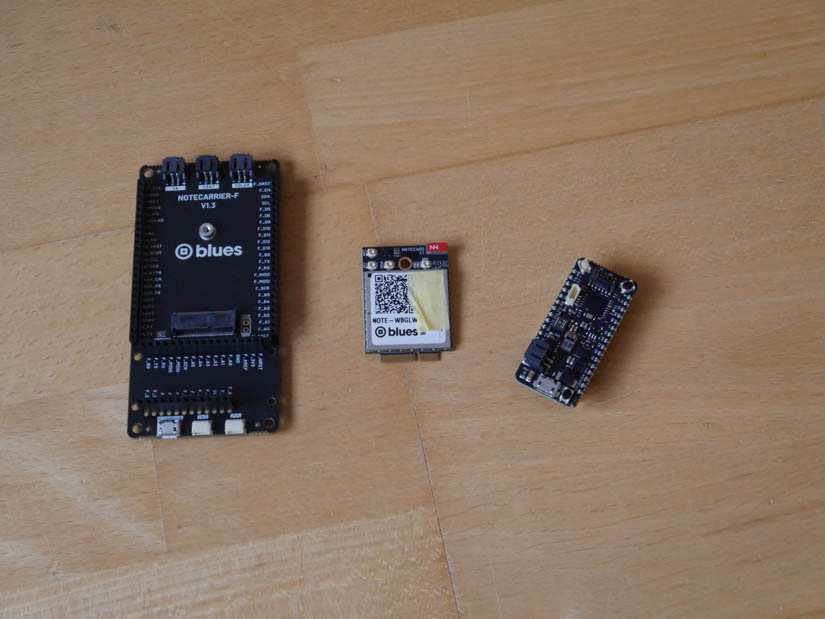
Ignore the tape covering the serial number!
The user experience is what really drew me to Blues in the first place, but before diving in, let's take a quick look the specs of each element of the kit.
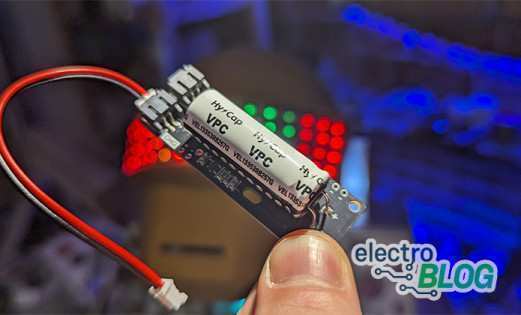
The Notecard Wi-Fi and Cellular
The new Wi-Fi and Cellular combi Notecard does more than just combine connectivity types into one unit. It also adds a number of improvements, including LTE Cat 1 support, and a more powerful onboard processor:
- ARM® Cortex-M4 MCU with 2MB Flash
- 3-axis accelerometer and temp sensor
- GNSS/GPS geolocation module with Cellular and Wi-Fi failover
- Secure element with embedded keys and certificates
- Some parts vary via region, but the European version I received features the Telit LE910C1-WWXD modem
- Silicon Labs WFM200S Wi-Fi Transceiver Module
- Fully Embedded SIM with zero setup - LTE-M / NB-IoT / GPRS
As before, the Notecard communicates with a host MCU via I2C, Serial or USB, and can even wake sleeping MCUs via its ATTN pin. It can even operate without a host MCU at all - more on that later. The onboard temperature and motion sensors come with onboard logic, an example being automatic alerts when the Notecard detects freefall, or triggering location and cloud sync events on movement.
As far as power use goes, this is somewhat of a difficult thing to quantify, as every project will have different overall power requirements, the Notecard alone has a 8µA idle current at 5.1V.
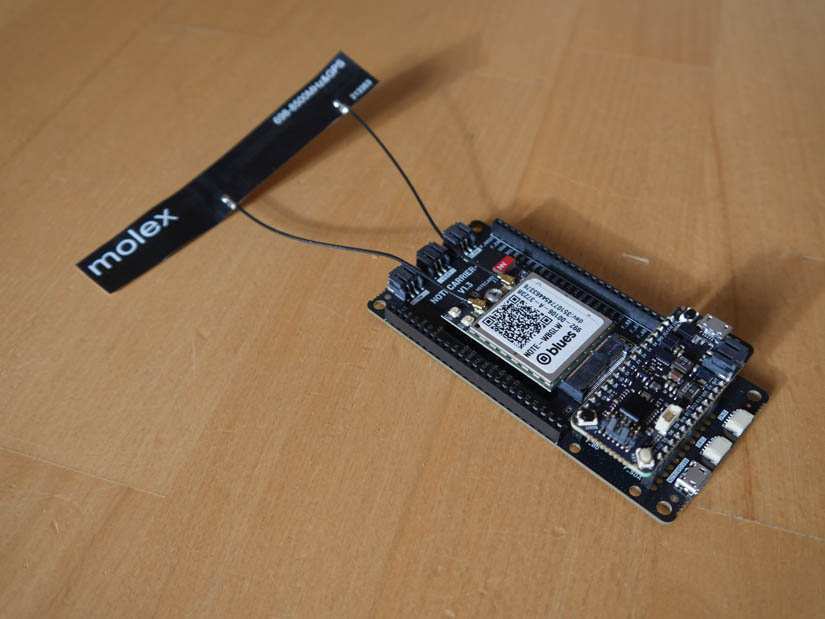
The Notecard is M.2 keyed, and requires a baseboard and separate aerial to function (included), which brings us nicely on to the Notecarrier baseboards.
The Notecarrier: A Baseboard for every Occasion
Notecarriers are baseboard for Notecards, each featuring an M.2 socket, and different configurations based on need. There's a Raspberry Pi Hat Notecarrier, the Notecarrier A and B for working with external MCUs and devboards, and the Notecarrier F which comes with the starter kit.
We'll be focussing on the Notecarrier F, but the Store page for Notecarriers has a good comparison chart.
The Notecarrier F exposes pretty much every pin on the Notecard and Swan MCU, though is compatible with any Adafruit Feather form factor board via female pin headers (12-pin and 16-pin). It also features Qwiic/Stemma QT I2C ports for attaching external peripherals to enhance your project's functionality. Notably (no pun intended), the Notecarrier F also boasts the ability to support the Outboard Firmware Update feature of the Notecard, empowering you to update your host's firmware independently, without the need for any collaboration from the host firmware.
Speaking of host MCUs, Blues also provide their own STM32 based devboard: The Swan
The Swan: Your Feathered Friend
The Swan R5 devboard is an STM32 development board in the Feather form factor.
- Feather-compatible dev board, powered by an STM32L4+ @ 120 MHz with 2MB of Flash and 640KB of RAM
- Expandable to 55 pins for access to additional I/O and buses
- Plenty of Flash and RAM for edge ML workloads or complex applications
- Support for C/C++, Arduino, and CircuitPython
- CORTEX Debug connector, enabling the use of Visual Studio Code, IAR, and STM32CubeIDE with optional SWD programmer
- Includes a Micro-USB port for easy power and serial connectivity
- Includes a PMIC accessible via a JST PH connector, allowing you to either power the board via a LiPo battery and/or recharge the battery via USB
In many ways, this seems like a regular Feather form factor STM32 dev board - and that's because it is. It's a great choice for the kit as it's powerful and well documented, but there's nothing Blues specific about it really - and that isn't a criticism. As we'll see soon, the options for interfacing with the Notecard are wide, and as you'll see soon, any board that talks MicroPython, Arduino, C/C++, Serial or I2C would be just as happy here.
As for the Swan however, it exposes a SWD for for working with STLINK and step debugging, but it can also be put into bootloader mode via the boot and reset buttons - or via software.
All Together Now
Getting started is as simple as slotting the Swan onto the Notecarrier F, screwing the Notecard into the M.2 slot, and attaching the aerial. Worth nothing is that my aerial did not have the annotations that the one on the Blues getting started guide has, but it was very obvious what should go where!
That's it for hardware setup - other than changing microUSB slots during the tutorial from the Notecarrier to the Swan board, there's no more fiddling to be done with the hardware.
Getting Started with Blues: A Remarkably Painless Affair
The hardware is only one aspect of working with the Notecard, as Blues provides Notehub, a cloud service for managing fleets of devices, events, firmware and routing.
However, since working with Notehub is one of the first things you do when you get started with the Notecard, it makes sense to cover it alongside the day 1 user experience.
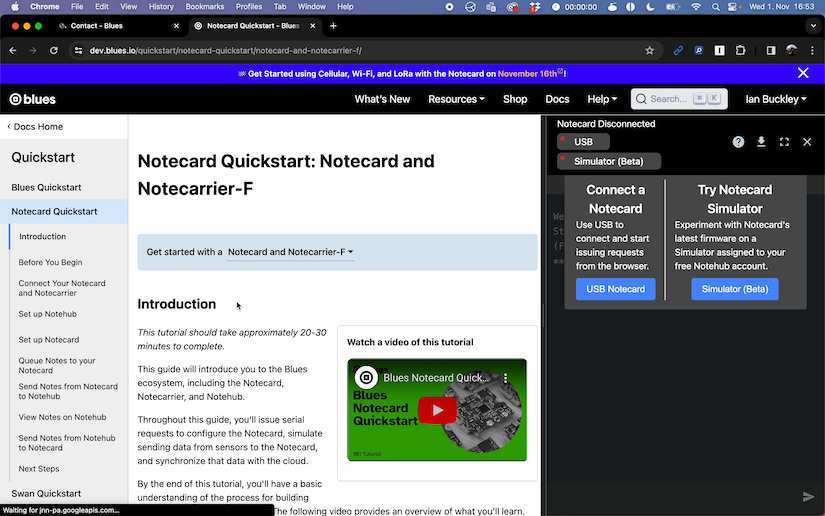
After plugging in the Starter Kit to a spare USB port, I headed to the Blues Developer Hub and clicked getting started. Following the Use the Notecard to Send Data prompt took me to a getting started site with a terminal prompt built into the browser. Note that you can go through this section right now - without any hardware - by using the Notecard Simulator in the same browser terminal.
Meanwhile, if you have a Notecard attached via USB and a browser that supports the Web Serial API (Chrome and Edge confirmed), then you are all set. No software installation or libraries, just straight in:
Pretty much the first thing you learn is how to create a JSON request to the card:
{"req":"card.version"}This brings up information about the attached card, but the format used is one that you'll be using for everything you do with the Notecard. There's a JSON command to set and query every aspect of the Notecard's functionality - and it was this approach that I found so refreshing the first time round I worked with Blues hardware.
I also got prompted to set up Wi-Fi on the device at this point, and from there it's time to set up Notehubso there's a place for your data to go.
Notehub
Notehub is a versatile platform that offers a rich feature set for data management, including detailed information on Notecard Devices, Event routing to external services, Over-the-Air firmware updates, and efficient data filtering. It can be used as a SaaS (Software as a Service) or open-source software, allowing customization to fit your specific needs.
So called "off-the-internet" communication has inherent security benefits, and much like Robin's recent experience with the MQTT Anywhere KitBlues prioritizes security. Notecards come with a factory-installed ECC P-384 certificate for added protection, but support further encryption when needed.
Creating an account takes just a few seconds, and your account comes with 5000 'credits' - an amount that I didn't get close to using during my tests - that refreshes each month. The eSIM comes with 500MB of free data, that costs $10 to recharge, and 15000 credits costs around $12. The payments are pay-as-you-go, though you can set up automatic billing when things start to get low. It's a very transparent approach to billing, and one that is very friendly to hobby devs like me. It's worth noting also that the Notehub has a RESTful API giving access to pretty much every aspect of your fleet and account, including billing data.
After creating an account and a new project, you need to bind your Notecard to the project. Again, there's a simple command for that:
{"req":"hub.set", "product":"com.your-company.your-name:your_product"}Where the product name is the unique ID the project gets at creation. The rest of the getting started guide teaches you how to add data to Notes - the data packets sent between the Notecard and Notehub - and how to initiate and check the status of a sync. All of this so far has been purely working with the Notecard, sending serial commands using JSON.
Adding an MCU
Up next is the getting started guide for the Swan MCU board, which takes you through setting up PlatformIO (with options for the STM32CubeIDE and Arduino IDE), and gives step by step instructions to create an IoT app. Before moving on, lets look at a small section of the code provided in the tutorial:
J *req = notecard.newRequest("hub.set");
JAddStringToObject(req, "product", productUID);
JAddStringToObject(req, "mode", "continuous");
JAddBoolToObject(req, "sync", true);
notecard.sendRequest(req);
Seem familiar? The Arduino, MicroPython and C/C++ libraries all package commands into the same JSON format on the host, before sending requests to an attached Notecard - just like we did in the browser on first startup.
The rest of the tutorial shows you how to set up environmental variables you can change from the browser, and how to send your data on from Notehub to a variety of endpoints including HTTP/HTTPS servers, MQTT brokers, AWS and others. Now might also be a good time to mention that Blues have created step-by-step video tutorials for each one of these steps too:
As a non engineer, albeit one with quite varied experience with getting started with a wide variety of hardware, Blues approach to getting up and running is refreshing. They provide clear instructions with minimal boilerplate with quick results. Blues clearly cares about the day one experience that their users have, and this is reflected in their choices, such as creating an interactive browser-based tutorial and integrating PlatformIO (and STMCubeIDE, Arduino IDE, Python) into the workflow while still retaining all of the of the under-the-hood fine grain control aspects that developers are used to.
Alongside a well-designed getting started process in terms of staging the complexity of the tools you use, the pacing is good as well. It allows people who do not necessarily have previous JavaScript or C programming knowledge to follow along and get results, even if they don't fully understand what is going on at a lower level.
When you do start to delve a little, you discover a large array of options, all of which are available using the same JSON commands, giving a huge amount of control over how and when your Notecard and host MCU gather and send data.
Going Deeper: 5 Blues Projects
1. Sending A Cellular/gps Tracker Around The World (literally)
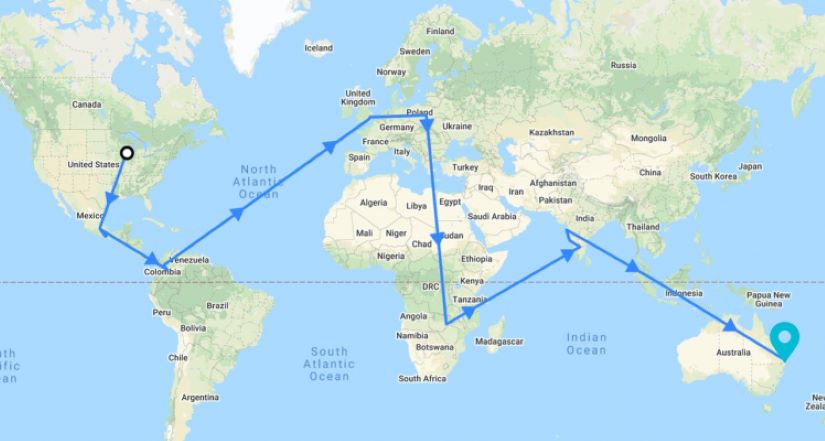
The team from Blues sent a Notecard on a Notecarrier A with a battery on a journey of a lifetime, touching almost every continent, and plotting the data routed from Notehub on Ubidots. All this using the same commands you learn in the first few minutes of the quickstart, plus a few clever battery power sensing tricks from the JSON API. No microcontroller in sight!
2. Remotely Query Sensor Data Via Sms
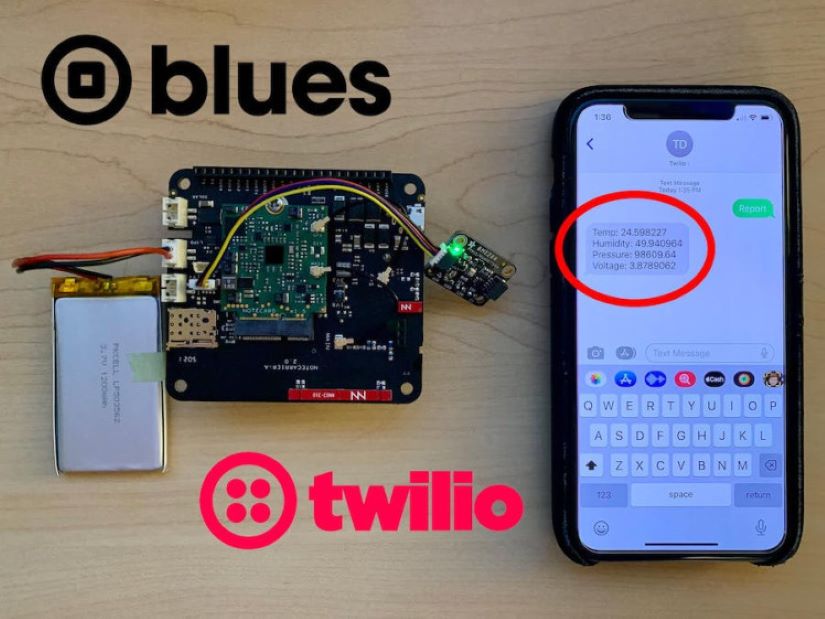
This takes the "MCU-less" idea one step further, adding an external sensor and the ability to query data via SMS using Twillio.
3. You Can Bus Build This Vehicle Monitor System Too!
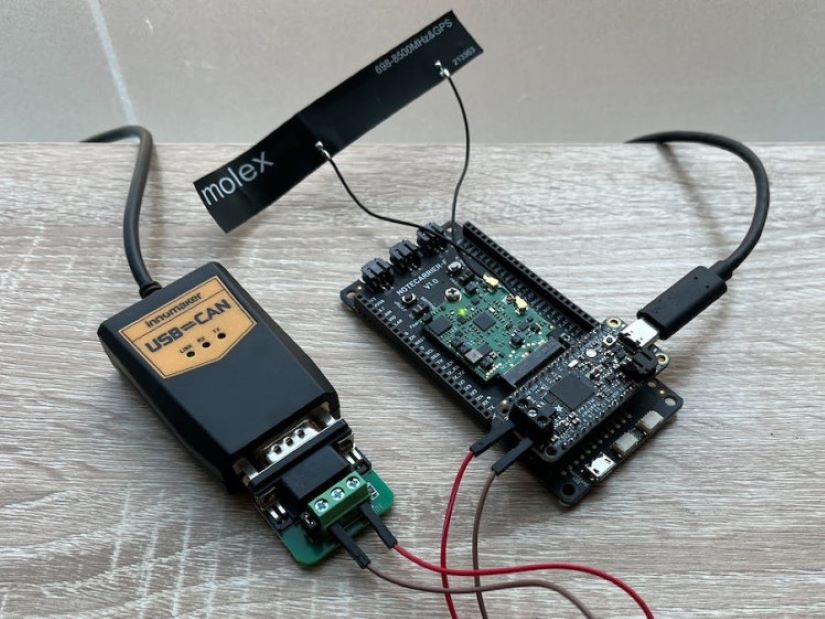
This CAN Bus project shows a couple of incredible things. Firstly. just how easy it is to set up custom car telemetry, and secondly how you can use Notehub Environment Variables to decide which data you want from the CAN Stream sent to the cloud - saving power and bandwidth!
4. Id Chicken Eggs With Thermal Images, Ml, And Cellular IoT
This project involves gathering temperature data in a chicken coop using a thermal camera, saving PNGs locally, and sending temperature data to Notehub.
This is only part 1 of the series. Part 2 - as yet unreleased - will use the saved images to train an Edge Impulse model. We can't wait to see where this one goes!
5. IoT Weather Data Logger Using Blues Wireless& Qubitro
This project shows how easy it is to integrate the Notecard hardware into an Arduino weather-sensing project, and use Notehub to route data to the Qubitro IoT cloud service. The beauty of this is that you could replace the Arduino with any other Microcontroller, or a Raspberry PI and everything from the Notecard onwards remains exactly the same!
It Gets So Much Deeper
This overview is already longer than it should be, and we haven't even got into the really fun stuff - like the fact that there is a fully fledged interactive command line tool for communicating with the Notecard, or how you can combine cloud defined low power modes with the ATTN pin of Notecards to control low power/sleep states of host MCUs.
We also haven't even touched on the Outboard DFU - which turns a Notecard into a programmer that can actually reprogram remote MCUs a page at a time rather than using traditional OTA methods.
This review has been somewhat glowing - and I'd like to remind you again that while I did receive this kit for free this is not a paid review and Blues didn't get to see it before it was published. It's been so positive as I've never had such a hassle free experience getting hardware like this up and running, and while I'm not an engineer working in the field, I cannot imagine any other product giving so much ease of use and consistency.
To get started with Blues, grab a kit from their store and get started - I'd be amazed if you were disappointed.

Ian Buckley is a writer, musician, and perpetual tinkerer. Commonly found surrounded by hobby electrical components, he's also a keen programmer and likes to build crazy-sounding instruments with microcontrollers. In addition to Electromaker, Ian writes over at MakeUseOf and has bylines at the likes of Online Tech Tips as well as Help Desk Geek.


Leave your feedback...