

Ultra-low Power Esp8266 Based Plant Care (no-coding!!!)

About the project
A AAA battery-powered plant care device with IoT Cricket Module, an ESP8266 based IoT module designed for battery power IoT with No-coding.
Project info
Difficulty: Moderate
Platforms: DFRobot, IFTTT, Things On Edge, Espressif, MQTT
Estimated time: 3 hours
License: GNU General Public License, version 3 or later (GPL3+)
Items used in this project
Hardware components

Software apps and online services
Story
Introduction
Recently, I made a plant care device that measures the moisture of your planter and lets you know whether you should water your plant or not. It also gives you the temperature around the plant. You can get notifications on your phone when your plants need water. I used the IoT Cricket WiFi module, an Esp8266 based IoT module that is very power efficient. Your device can run for more than 2 years just from two AAA batteries. Another advantage of Cricket is it is very easy to use and doesn't require any programming. You just need to configure it using the browser for serving your purpose.
In the next few steps, I will show you how can make your own plant care device using Cricket without any programming knowledge. I used 2 AAA cells for powering my device. The device measures the moisture level every 8 hours (of course you can change the timing from the configuration) and shows the result in the Android apps. Apps also show the battery level and let you know when you should change the battery.
It will take care of your plants for more than 2 years only from 2 AAA batteries!!! Then you can replace the battery for another two years and so on!
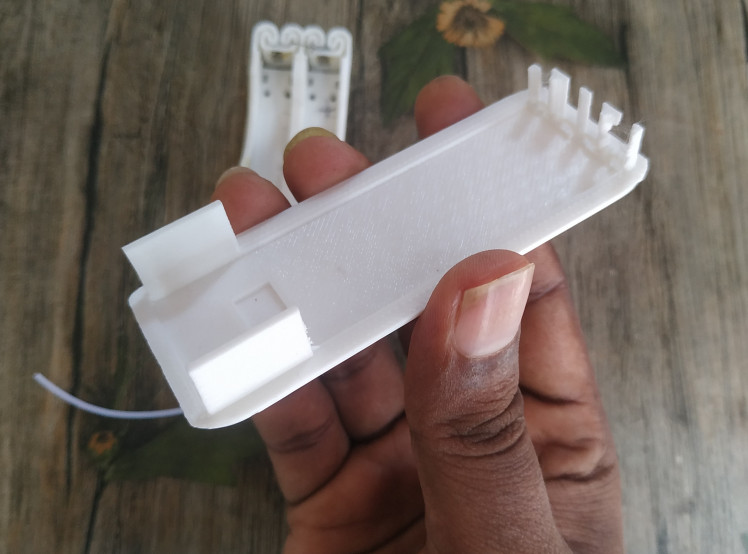
3D Design and Printing
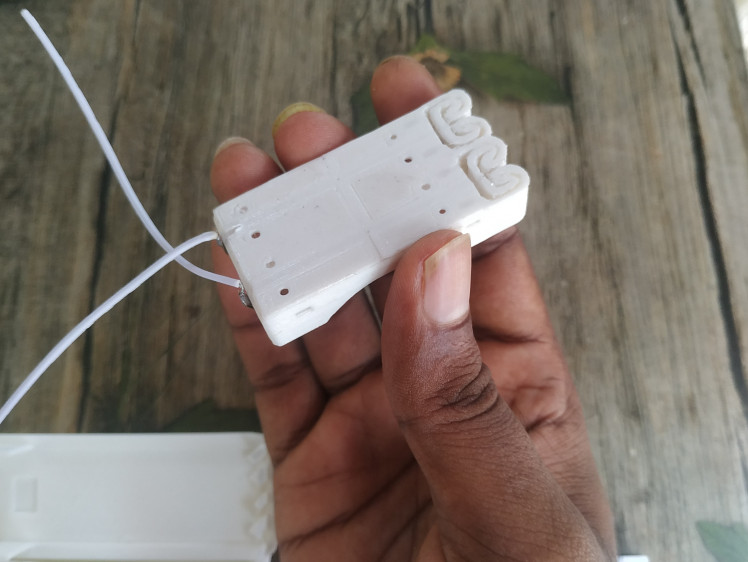
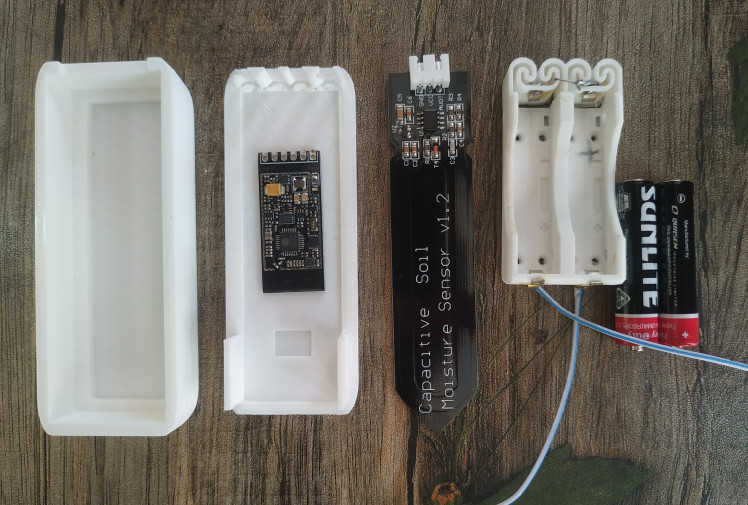
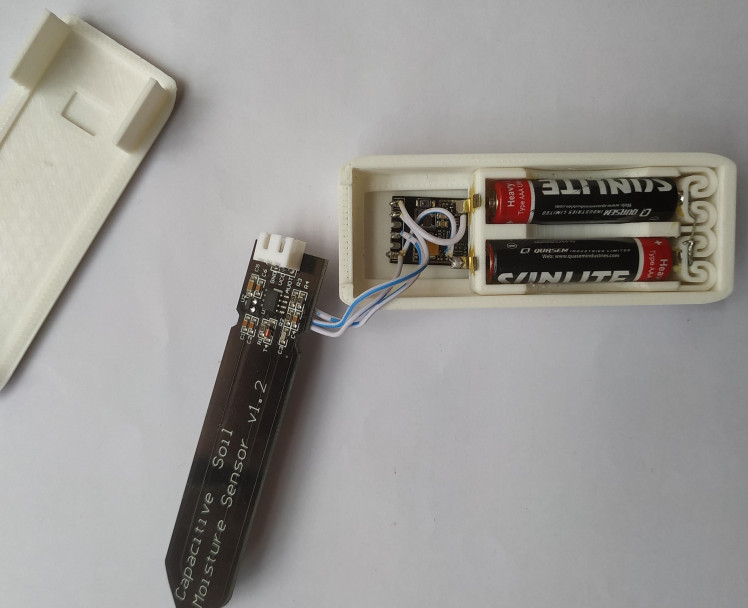
Before working on a project you first need to collect the hardware. The Cricket WiFi module and Capacitive moisture sensor are the main parts of the project. For powering the device we will use 2 AAA batteries. For protecting the hardware parts and giving the device a professional look you will be required some sort of casing for the components and the batteries. I designed 3D printed case for this purpose. As we are going to use 2 AAA batteries we also need a battery case for housing the battery. The battery case also connects two batteries in series to add the voltage. A single AAA cell has 1.5V output. Though you can run the Cricket from 1.5 V but for getting better efficiency from the battery you need to put 2 in series to make the output voltage 3V.
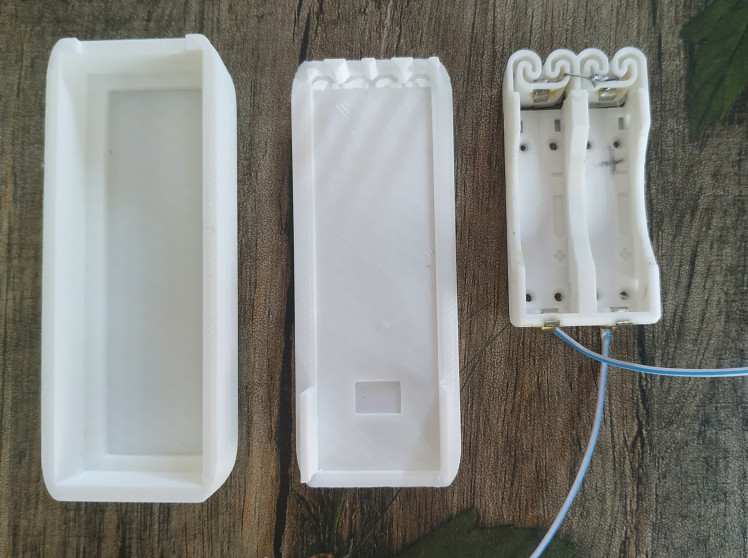
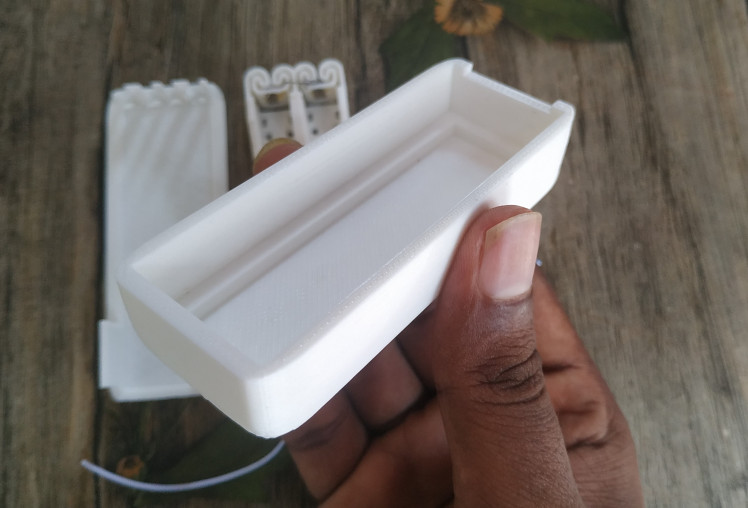
The 3D case was designed in Tinkercad and STL files are attached below. For the battery case, I use a design downloaded from Thingiverse.com. You can buy a dual AAA battery case if you don't like to print it. It will also reduce the hassle of placing springs and wires. I added a 3D STL file for the battery case.
Preparing 3D Printed Parts
For printing the files you may use PLA material and 20% infill is enough. Choose any color you like. I printed it with white color filament and it looks good. If you want to 3D print the battery case you will be required to add connectors, spring, and wire to the case.
Circuit Connection and Soldering
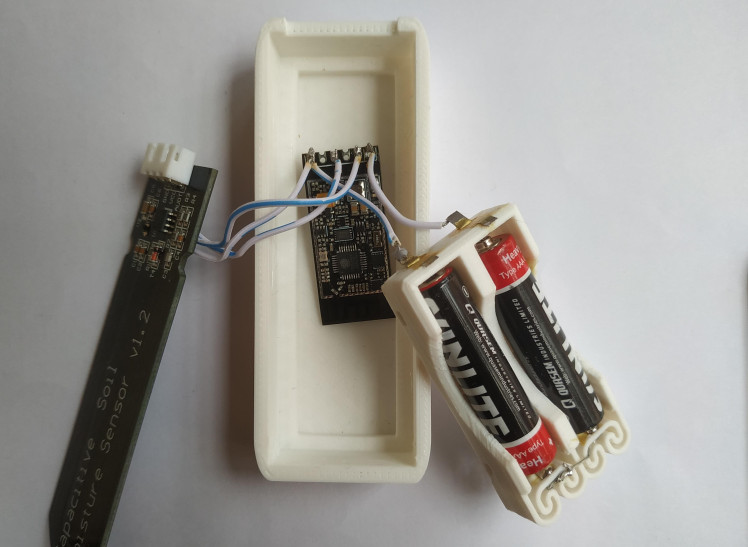
The connection is super simple. Connect the positive output of the battery case to the BAT pad of the Cricket and the negative terminal of the battery case to the GND pad of the cricket. The cricket module produces 3.3V output from the battery and we will use this 3.3V output to provide power to the sensor. The sensor's analog out is connected to the IO2 of the cricket. See the attached fritzing schematic for a better understanding.
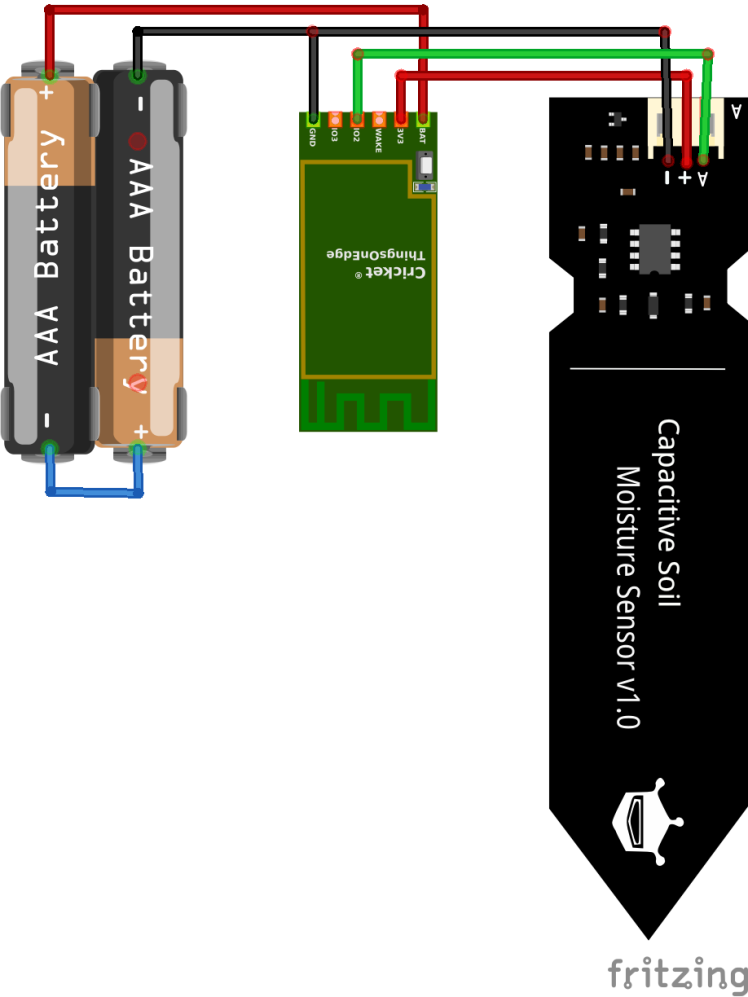
You need to do some solder work for make the connection among the Cricket, Sensor, and Battery. According to the schematic solder the battery case with the Cricket. For the soldering sensor, you have to use two extra wires each 5cm long.
When connecting the battery please double-check the polarity. Any wrong connection may burn your Cricket and the sensor as well. The sensor has a connector but I avoided it and soldered the wires to the bottom side of the sensor because the jumper provided to the sensor will take extra space inside the box.
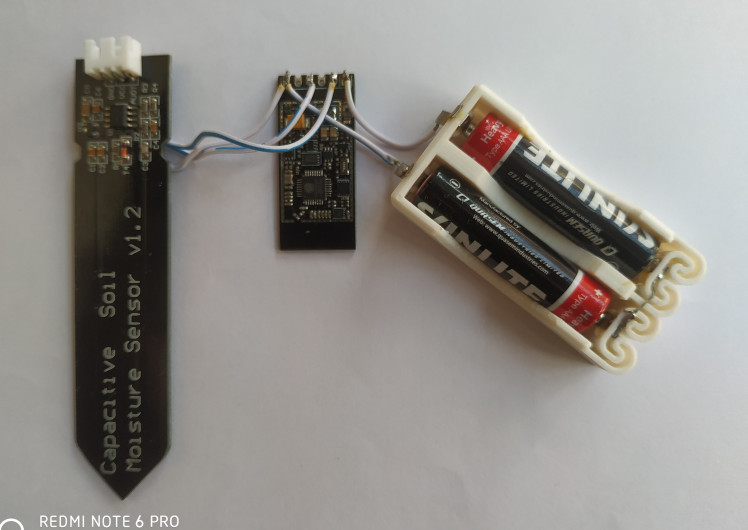
After completing the solder work, place the batteries on the holder and get ready for the configuration.
Configuring Cricket
Along with setting the wifi name and password, we will also configure the IoT Cricket module to read moisture sensor data and send the data to the cloud. We will use MQTT for sending data to the cloud and Cricket has its own MQTT server. Confuse with MQTT? Read all about MQTT protocol from the following link: https://www.hivemq.com/mqtt-protocol/
IOT Cricket is an easy-to-use ultra-low-power WiFi module, which can operate directly on batteries for a very long time (for years in many use cases). We can simply attach a sensor & battery and the device is ready to transmit data instantaneously via WiFi networks. But before starting the data transmission you need to configure it for connecting to your local wifi network. Don't be afraid, configuring Cricket is easy!
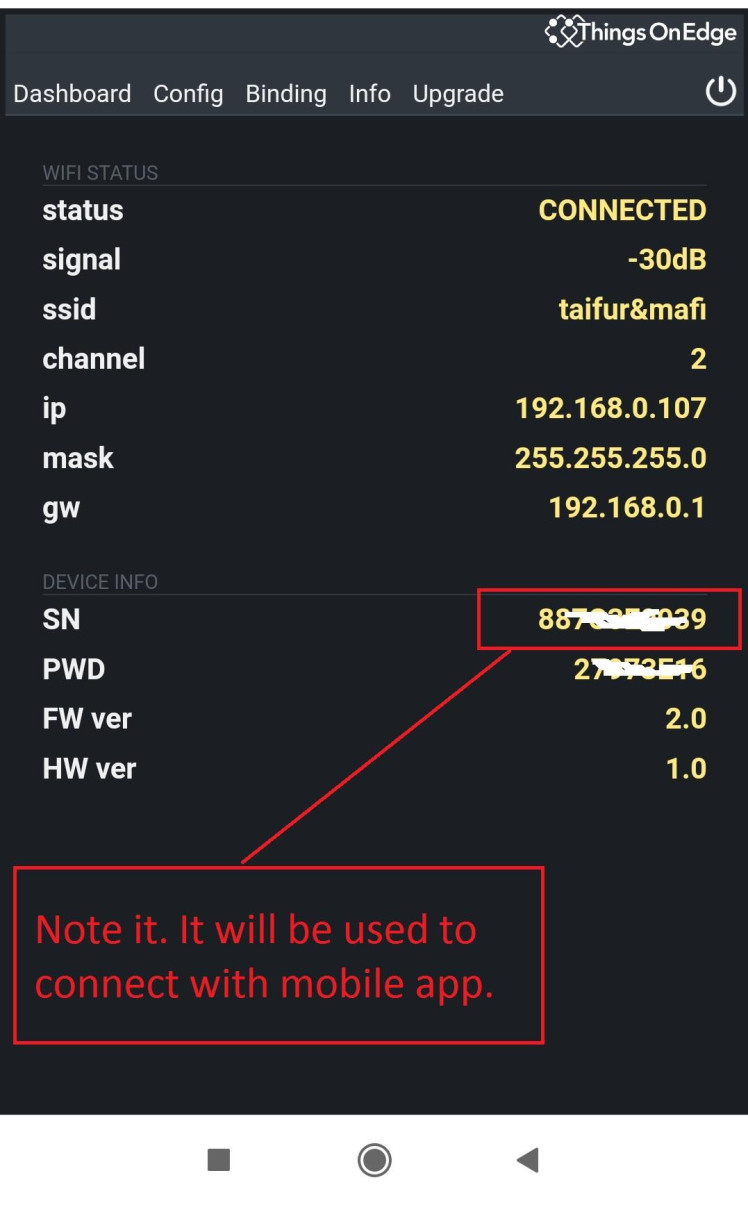
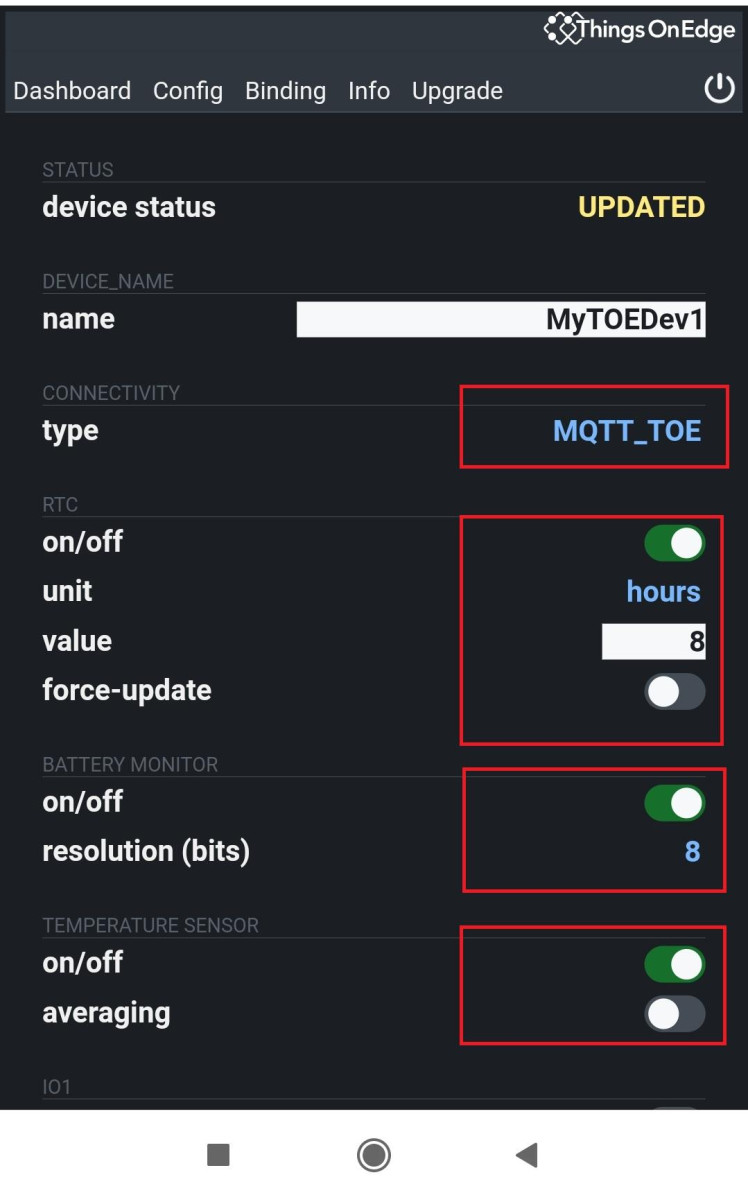

Without wasting further time let's start the configuration. First, we need to connect the Cricket to our WiFi network. To do this
Follow the images below to configure your device step by step. From step 5 you will get the unique device serial number. Note down the serial number, it will be required for connecting with the mobile app. See the image attached at the beginning.
Making the Android App
For remote monitoring of the moisture and battery level, we need a mobile app or browser-based dashboard. The app will receive the data from the MQTT broker (I hope you know what is MQTT) and show the information on the screen. For my project, I designed an Android app using the free Kodular platform.
Kodular is a free source and lets everyone be the creator, it needs no java or coding knowledge. Making an app on Kodular is like solving a block puzzle, it has innovative language (in other words code block) blocks. So to make an app all you have to do is connect the right blocks and if the function is not compatible then look for another block. Kodular is the fastest and lets you make production-ready apps. It has a simple and intuitive interface and offers many design possibilities even for complex applications. You need no expert consultation to make an app on Kodular but it has a set of limitations.
Kodular (formerly Makeroid) is an open-source online suite for mobile app development. It has an innovative component and block design which provides a free drag-and-drop Android app creator without coding, based on MIT AppInventor. Undoubtedly, Kodlar is feature-packed and is updated frequently, it also has an active community for quick resolutions (since you will be developing on your own or if you are new at it) but there are quite a few limitations.
I attached all the blocks below from my design. If you like to modify the app then these blocks will help you. You will be required an MQTT extension for making or modifying the app and you can download it for free from the internet. The apk file is also attached. You can directly download and use it without any modification. As Instructables does not allow to add source files, I could not attach them.
After installing run the application...
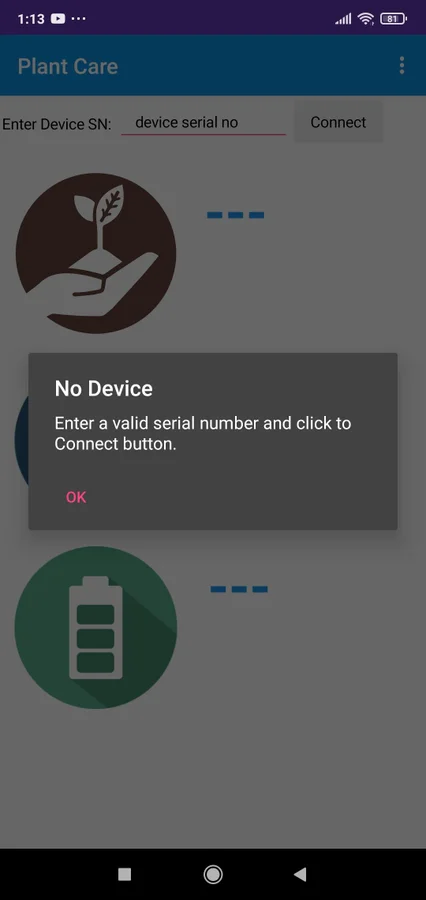
After running you need to provide the serial number of your Cricket module. You can get it from the configuration panel of the cricket and probably you noted it while configuring the Cricket, now you have to use it. After entering the serial number just click the Connect button.
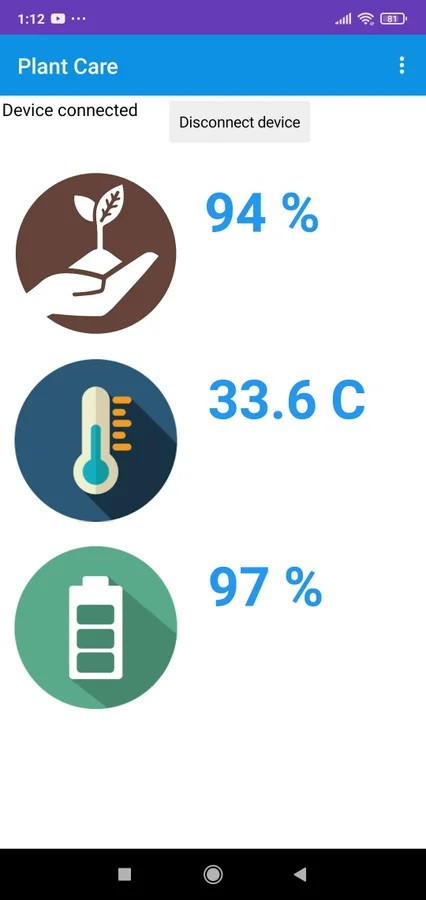
If the configuration of the Cricket goes well and the device is powered up then the device will be connected to the app and you will receive the data as like the following image. If you get it then Congratulation! You did the hard part and your device is almost ready.
For disconnecting you can tap to disconnect button and you can be reconnected with the same device or another by entering a new serial number.
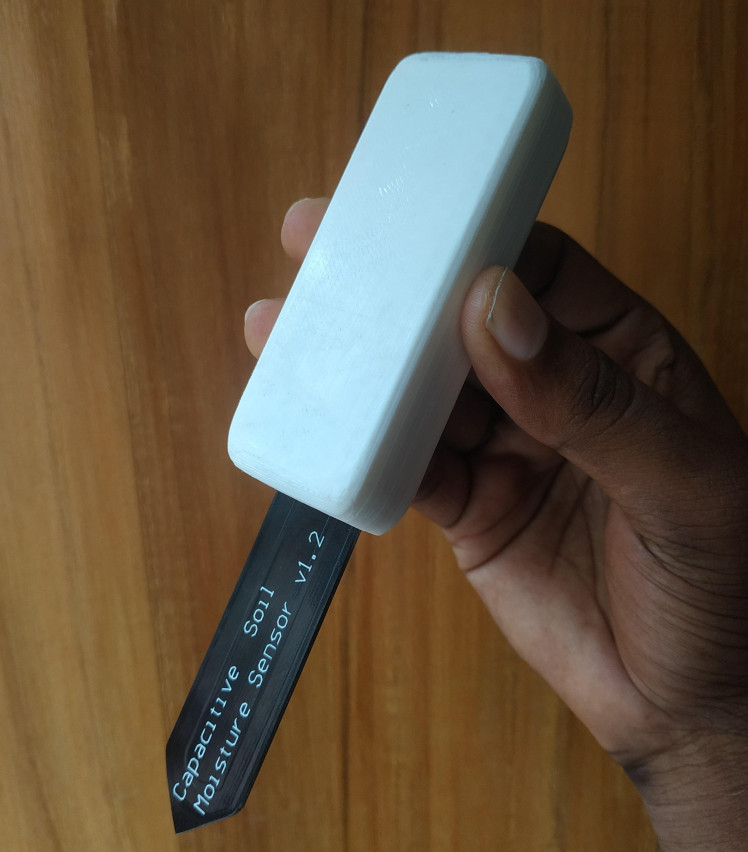
Placing Components Inside the Box
After soldering and configuring the Cricket and the WiFi and testing with the app you are ready to put all the stuff inside the box. First, place the cricket in the box and fixed in the right position using double-sided tape. Then place the battery case above the Cricket. The battery case is automatically placed in the right position after connecting the top part of the box.
Finally, place the sensor keeping the bottom side up, and add some hot glue before placing the top part of the box. Press the top part with a gentle press and keep it in place without moving the press till the glue becomes hard. Your device is now ready.
Enjoy
Two devices will run for more than two years from 2 AAA batteries if you set the time for 8 hours or more (battery consumption is directly related to the timing. Lesser the value more the consumption). You can monitor battery levels from mobile apps and replace them when required.
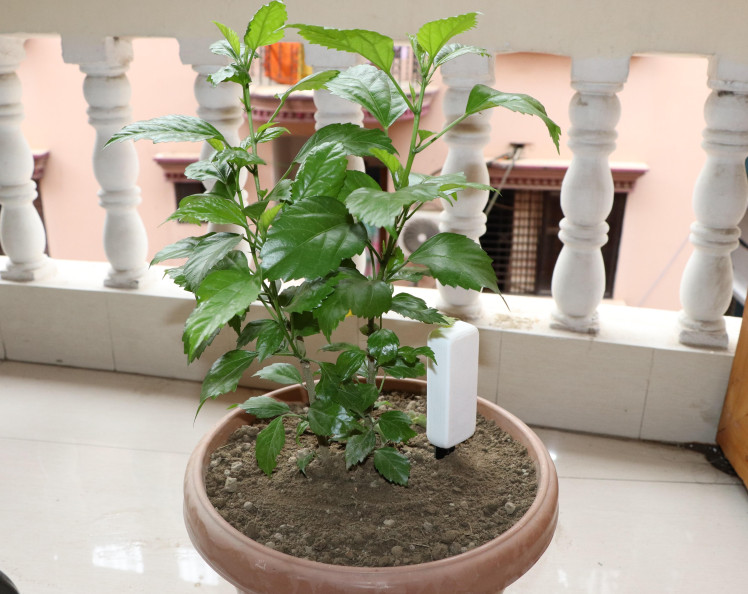
If you completed all the steps then your device is ready. Now you can place the device in your planter and start monitoring your plant from a remote place. I am sure, your pant will be happy getting this and you will never miss watering your plant.
Schematics, diagrams and documents
CAD, enclosures and custom parts
Code
Credits
Related products


Leave your feedback...