
Tuya Iot Smart Gas Knob

Made by atharva-pasalkar / Environmental Sensing / Security / Sensors / Sustainability / IoT
About the project
This project aims to develop a device that assists in the timely control of the gas knob using the TUYA IoT cloud platform. We’ll be creating an automatic burner control using a microcontroller and sensors for assisting and safety measurements, which helps control Gas Knob position (High, Medium, Low). We’ll be using a Gas senso
Project info
Items used in this project
Hardware components


Software apps and online services
Story
Introduction-
Are you a foodie and love to cook? Maybe yes or maybe, no? But you can’t deny one thing, like it or not, but you need to cook food, we all need to cook food, and that’s our daily need. The most important appliance we need in our kitchen without which you can’t cook is a Cooking Burner, or you can call it a cooking stove in India. We primarily use Liquefied Petroleum Gas (LPG) as fuel, and few use inductions, but the function is more or less the same and has problems. If you are a person like me who loves to cook and try some new dishes like drum rice, you sometimes have a short-term memory loss problem and forget to turn off your burner’s knob.
Eventually, I ended up making Burnt rice, just kidding, but this is a very common problem. Taking this problem into account, its seriousness is noticeable for older people who need to cook but can’t stand up for a very long time just to adjust the flame or young moms who want to tackle their little monsters and cook simultaneously. Now there is an intelligent solution to these problems, where you can handle your other activities like watching TV, hanging out in the garden, or even changing diapers. You don’t need to worry about your food set up on the burner, and a smart knob will take care of that.
Keeping your Gas knobs on for a very long time can lead to hazardous accidents every year. This can turn your food and your home into ashes if not taken care of. And unfortunately, we don’t have any such safety.
Overview of Project-
This project aims to develop a device that assists in the timely control of the gas knob using the TUYA IoT cloud platform. We’ll be creating an automatic burner control using a microcontroller and sensors for assisting and safety measurements, which helps control Gas Knob position (High, Medium, Low). We’ll be using a Gas sensor, Temperature and humidity sensor, and PIR sensor.
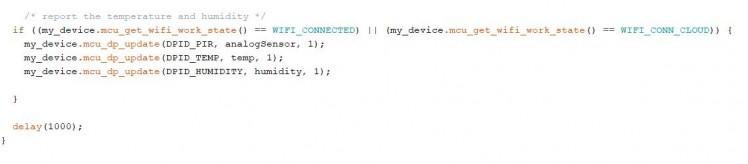
If by any circumstances, we keep our gas knob high, and the food is getting roasted, this is detected by temp and humidity sensors, and an immediate alert will be sent to the user via Tuya cloud. For gas leakage detection, we have a Gas sensor. Suppose you are sitting in the bedroom or hanging out and check who is present in the kitchen. The presence of any person in the kitchen will be sensed by the PIR sensor and the data is sent to the user. The widespread use of this project will make use of burner efficiently and save fuel.
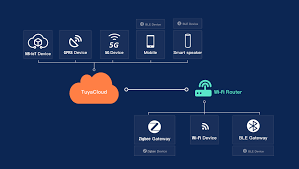
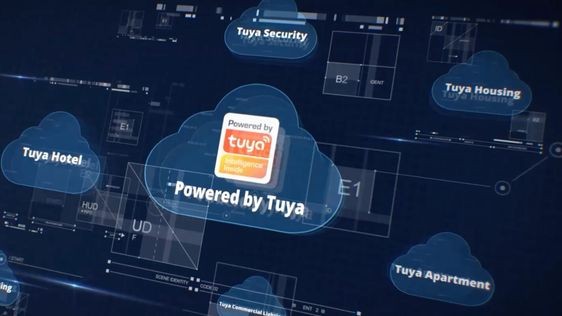
TUYA IoT Platform
Combining Cloud platforms with IoT makes it a lot easier to build, analyze, and manage devices. To cater to that need, Tuya, a global leading IoT cloud platform, launched its Cloud Development Platform in 2020. Tuya’s Cloud Development platform offers a SaaS (Software as a Service) development framework, the most widespread type of cloud app. Developers just need a Tuya-enabled device and code, and the Cloud service will handle the rest. So, developers won’t have to worry about spending money on a separate software and updating it every time. Tuya also offers OpenAPI for app developers and many other APIs to integrate your project with. Once the Tuya-enabled device is connected to the internet, app developers can use OpenAPI or the firmware offered by the Tuya itself to build Android, iOS, and web applications quickly.
To know more about the Tuya IoT platform and how to get started, refer to the links below:
https://developer.tuya.com/en/saas-development-framework?_source=19ea467a23656a5cb2f00ca04c47c11e
https://iot.tuya.com/cloud/?code=1234&_source=7249ab79fc1429854d902ebd585699d9
Why TUYA
I decided to use the Tuya IoT platform because it is simple, powerful, and can run on cheap modules like Esp8266. Also, the Tuya IoT platform gives you a drag-and-drop MIT app inventor-like feature to build your own IoT android and iOS mobile app on the go. So, your prototype can be the next smarter IoT product with the Tuya platform. For more details on Tuya, check https://steptostem.com/2021/08/getting-started-with-arduino-iot-control-with-tuya-iot-platform/.
Hardware
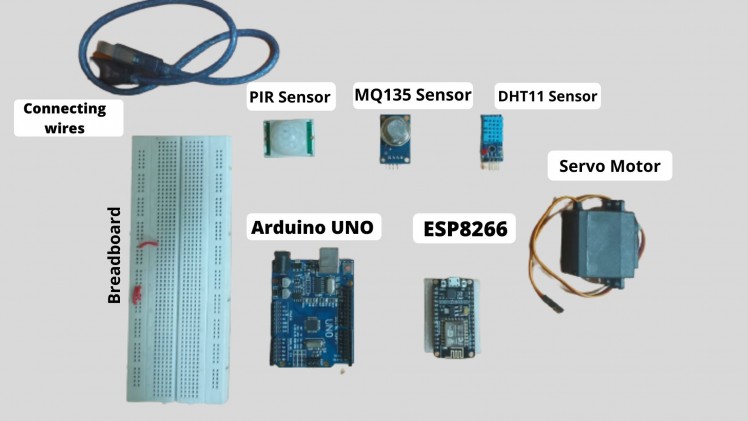
We need the following electronics components to make IoT Based Smart Kitchen project. All the components are readily available online or in local stores.
DHT11 Temperature humidity sensor- The DHT11 is a basic, ultra-low-cost digital temperature and humidity sensor. It uses a capacitive humidity sensor and a thermistor to measure the surrounding air and spits out a digital signal on the data pin (no analog input pins needed). It’s relatively simple to use but requires careful timing to grab data. You can get new data from it once every 2 seconds, so when using the library from Adafruit, sensor readings can be up to 2 seconds old. It comes with a 4.7Kor 10K resistor, which you will want to use as a pullup from the data pin to VCC.
MQ135 gas sensor- The MQ-135 Gas sensor can detect gases like Ammonia (NH3), sulfur (S), Benzene (C6H6), CO2, and other harmful gases and smoke. Similar to other MQ series gas sensors, this sensor also has a digital and analog output pin. When the level of these gases goes beyond a threshold limit in the air, the digital pin goes high. This threshold value can be set by using the onboard potentiometer. The analog output pin outputs an analog voltage that can approximate the level of these gases in the atmosphere.
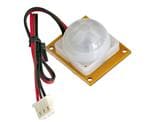
PIR Sensor- To ensure the safety and security of our homes or anywhere, we must install alarm systems. Motion sensors are one of the essential components of these systems. We can also employ PIR (Passive Infrared) Sensors for doing the same. HC-SR501 is a low-cost PIR sensor that can detect humans or animals by sensing the Infrared Radiation coming out of the body. A sensitivity control potentiometer can control its sensitivity, and it also has an onboard signal conditioning circuitry and Fresnel Lens to improve its field of view. It is used in Motion Activated lights in bathrooms, halls, rooms, alarm applications, etc.
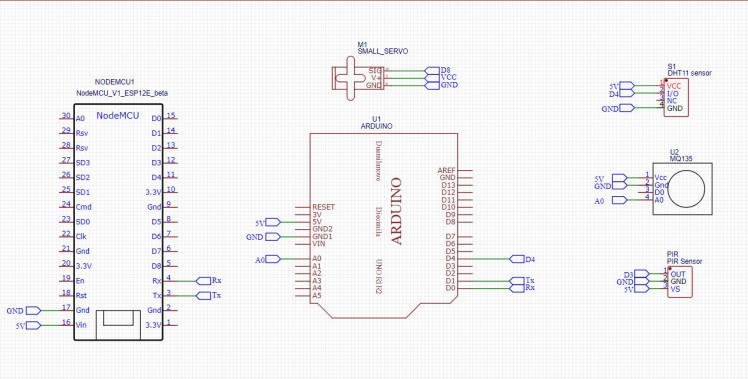
Circuit Diagram
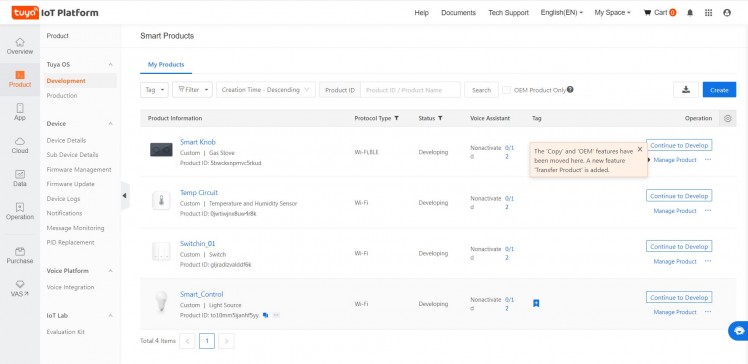
Creating Product on TUYA-
I am going to use the Tuya IoT platform to develop a smart device from scratch. The simplicity and fast response time of the Tuya IoT cloud are amazing, all you need to do is set up function definitions, design app panel, and burn authorization firmware, and your device is ready to go with Tuya Android and iOS app.
On the Tuya cloud development platform, the first thing you need to do is register using your email and create your free account. The free trial versions with a limited time period are available if you’re interested in just experiencing the platform for now. Follow these simple steps.
Cloud > Development > Create Cloud Project
Create ➡ Can’t find the category?
Enter the required product information:
Protocol ➡ Wi-Fi
Power Type ➡ Standard Power Consumption
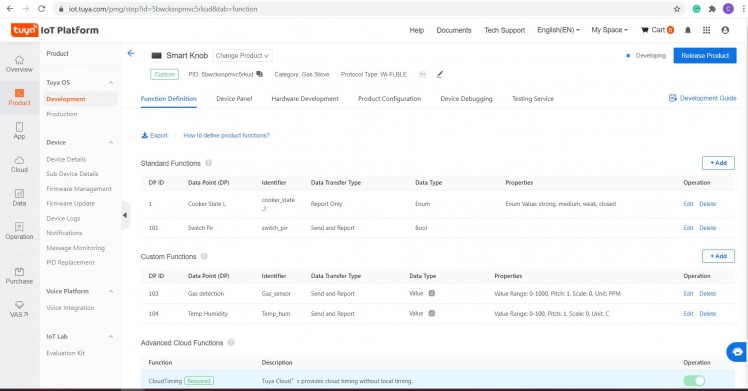
Create custom function definitions for your sensors with the below-shown data type and properties. Select the features you want to add to your product from Standard functions or create new ones (Custom) if not supported by Standard functions. Standard functions indicate the functions provided by Tuya for their product categories. Since there are lots of built-in products, it is easy to find the functions you need. Also, you can create your specialized functions named Custom functions, depending on your project.
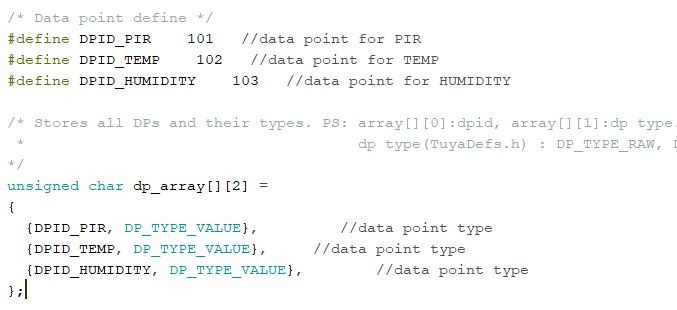
The data point (DP) is the abstract representation of a function, and each function has an ID and data type.
Data Point ID (DP ID): indicates the code of a data point (function). Tuya Cloud sends or receives data through data point IDs. I created four custom DP for PIR, Gas, Temp, and humidity sensors and one motor controlling DP for controlling Gas knob (you can add more functions
If you wish to add some of your own DPs and customize your project, Tuya can do that easily by customizing the DPs by clicking edit and add DP.
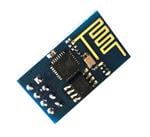
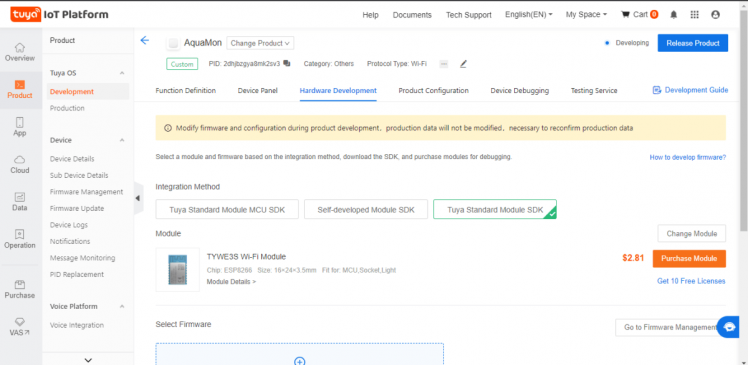
Select standard Tuya ESP8266 module SDK in the hardware development section. Even if you don’t, it’s okay. If you have a Standard TUYA module SDK, select the appropriate one or place an order, Tuya will deliver it.
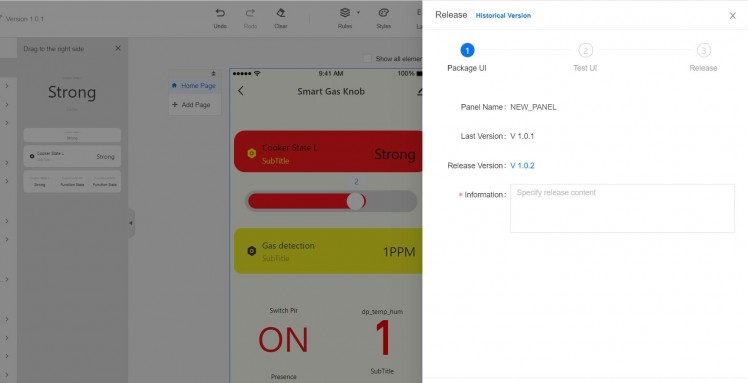
Designing our App Panel Interface
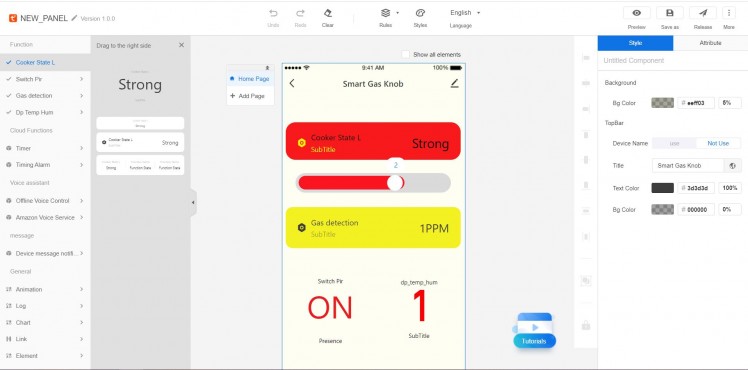
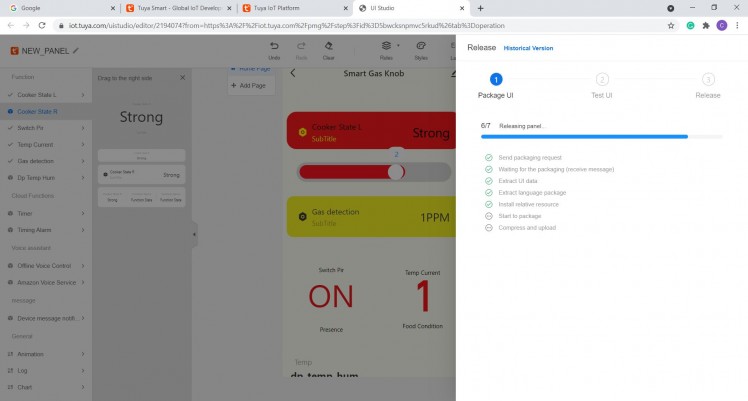
Making our own App Panel Interface is amazing, but you should look at the pre-designed App panel that Tuya provides. According to your project and selected DP, it will automatically show you a catchy App panel designs list. If you wish to make your own, then select the blank panel. You would be able to see all your DP UI elements which you can modify. In fact, there are lots of UI available for you to drag-and-drop and make a fantastic panel. Once it’s ready, click on the release button. I have also added chart and log elements for greater data summarization. Once your panel is released, you should see and use it by scanning through the Tuya IoT app on mobile.
Authorizing ESP8266 with Tuya IoT firmware
To use the NodeMCU ESP8266 as a Tuya product for this project, you need to flash and authorize it with the required firmware. To authorize the ESP8266, you have to send the product ID (PID) and your Tuya IoT account name (e-mail) to devops@tuya.com. After a while, they will send you a Token ID. Then, follow the steps below:
First, go to the Tuya PMS service page https://pms.tuya.com/en/login .and sign up for an account if you don’t have one. Then, go to
Production Manage ➡Work Order Management ➡ Activation Code Verification
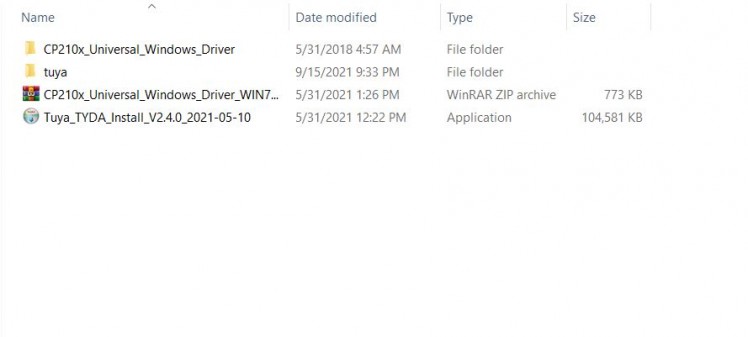
To activate the production certificate for the product, enter the Token ID. When the Token ID is confirmed, the ESP8266 is ready to be flashed and authorized. Remember, only once ID can authorize from a single account. To check your activated Tokens, go to the Activation Code List in the Production Manage -> Work Order Management list. You can download the cloud auth token burning application from the PMS console Software Download section or Download installations package on the Google drive https://drive.google.com/file/d/1SF-rM5qDLaPJiuMHrkqFauVyRXSSHMkj/view?usp=sharing from Tuya ESP8266 guide (link in the reference section) and log in with your PMS account.
You should keep in mind a few steps while setting up TYDA software; you may face the same problem that I faced and got them corrected.
When you download your Zip file, make sure you extract it on the desktop by creating a separate folder. Don’t try to extract it in a program file in Windows C. You can extract it anywhere but try to keep it on the desktop.
After extracting, go to the TYDA application, run it as administrator and install the software.
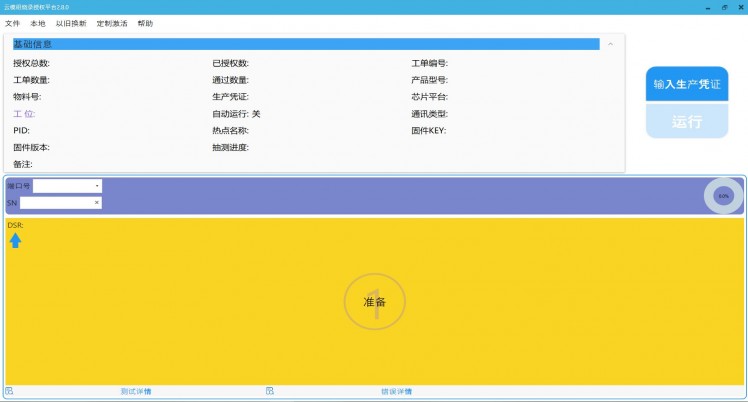
After Installing, open TYDA and log in using your PMS account details with the same email and password, or else it will show an error.
If it’s in Chinese till login, you click the first option, and after entering TYDA, select the language change option as shown.
Set the baud rate and test baud as shown in the above image. Also, click on Enter Token button and enter the token you got from the Tuya devops@tuya.com email reply.
Connect the NodeMCU V3 LoLin ESP8266 to the computer via a USB cable and select its port number, such as COM5. If you did not use it with the Arduino IDE or other compilers before, you might need to install its driver. Finally, click on flash to burn auth tokens. You would see a green box with success if nothing breaks.
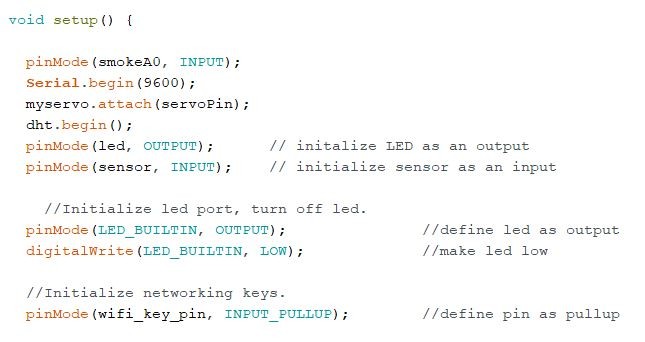
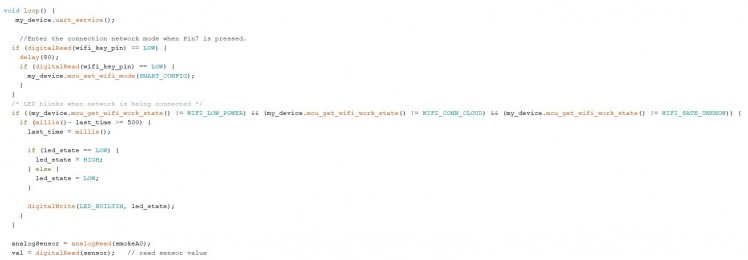
Programming and flashing Arduino
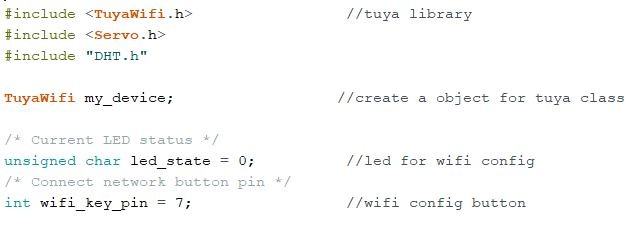
I will make this part simpler by going into details of the Tuya IoT Arduino library. First, import all required libraries to work with sensors and ESP8266 over Serial. Setup Tuya Serial connection
1. DHT11 Library: Download
2. MQ-135 Library: Download
3. Adafruit SSD1306 Library: Download
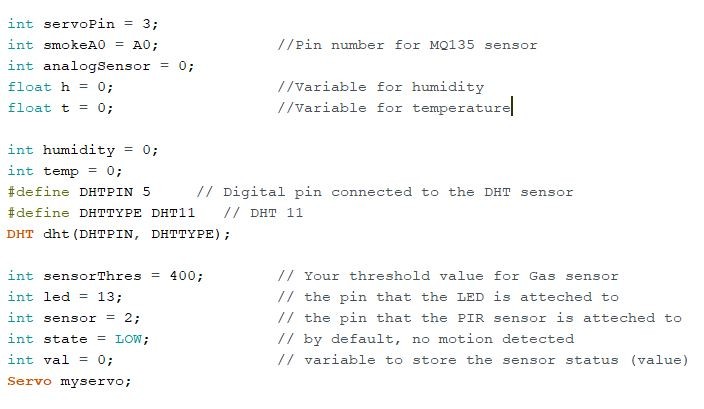
Start with defining and adding the library.


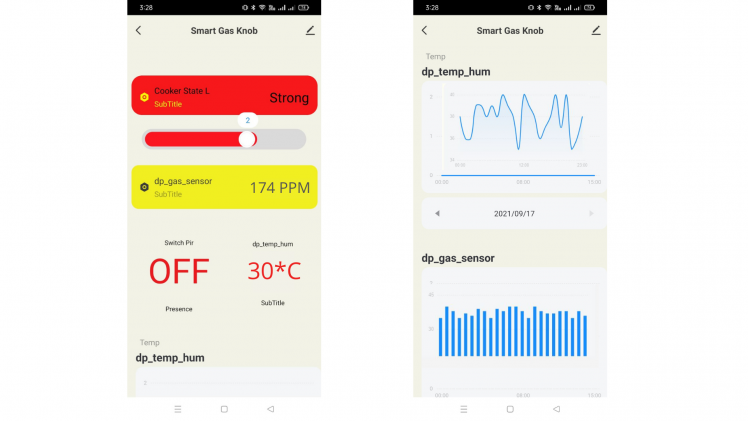
APP Panel Interface setup on the phone
Reference Links:
Join Arduino Beta Test: https://pages.tuya.com/develop/ArduinoBetaTest_discord?_source=cb5548a28033aee24543cdb4f47a8b61
Tuya Saas Development Framework: https://developer.tuya.com/en/saas-development-framework?_source=19ea467a23656a5cb2f00ca04c47c11e
Tuya Developer Platform: https://auth.tuya.com/?from=https%3A%2F%2Fiot.tuya.com%2Fopen%2F%3Fcode%3D1234%26_source%3D7249ab79fc1429854d902ebd585699d9
Schematics, diagrams and documents
Credits
Related products


Leave your feedback...