

The Blissful Bumble Bee

Made by 8BitsAndAByte / 3D Printing / Communication / Robotics / IoT
About the project
A blissful bumble bee that spreads wholesomeness throughout the internet!
Project info
Difficulty: Moderate
Platforms: Adafruit, Raspberry Pi
Estimated time: 2 days
License: Creative Commons Attribution-NonCommercial CC BY-NC version 4.0 or later (CC BY-NC 4+)
Items used in this project
Hardware components


Story
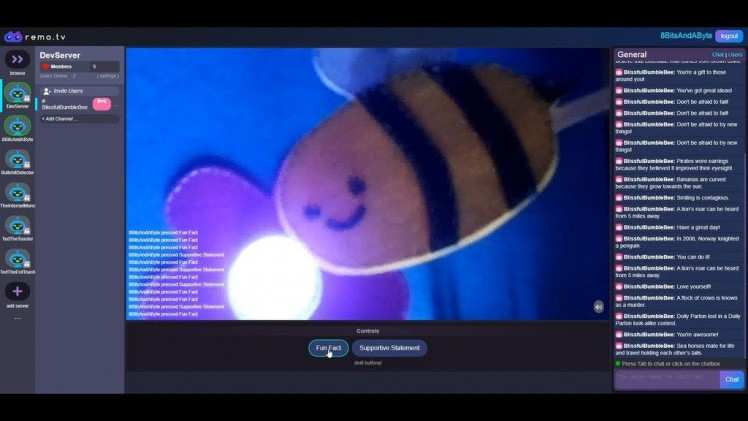
We'll be building a cute little bee that moves and tells you a fun fact or a supportive statement when you press a button on the robot streaming platform Remo.tv.
You can find the robot right here when it's online!
Project Video Sewing a Bumble Bee and FlowerThe first step is creating a cute little bumble bee! We made one out of felt, inspired by the bee in that appears in the end credits of the animation series Adventure Time.
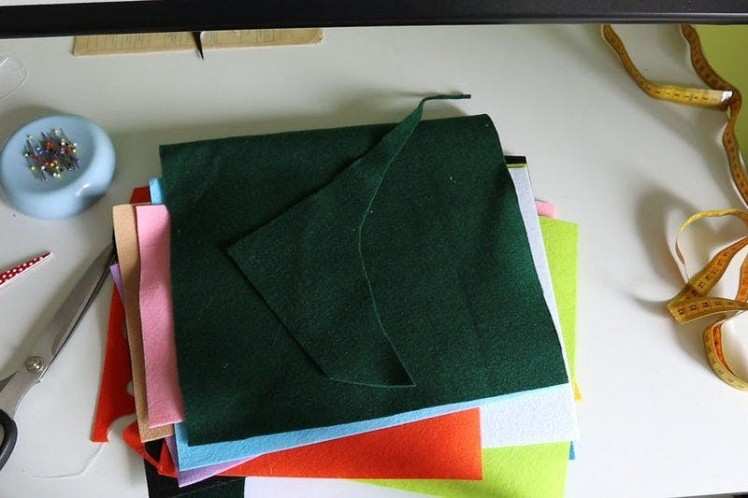
We drew the bee on paper to have an idea of all the parts we needed, and used this as a pattern to cut out the pieces of felt. When the cutting was done and we were happy with the overall look, we hand stitched the bee together.
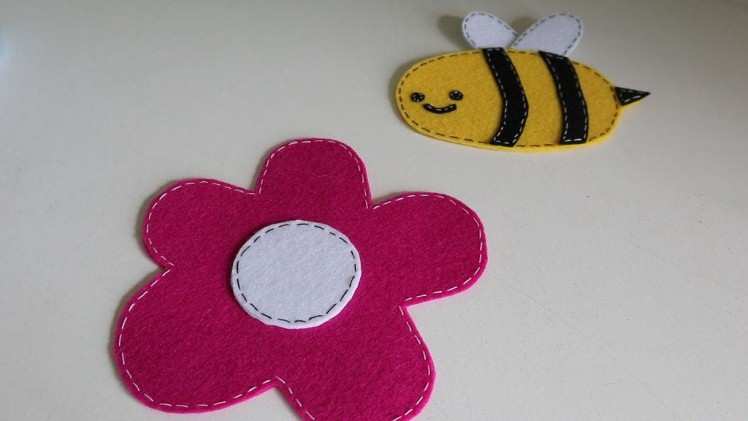
To make the flower we basically followed the same steps, making a paper version first and then using that as a guide to cut the felt. The only difference was that we measured the parts to make sure that the NeoPixel ring would fit nicely in the center part of the flower.
3D Printing
Up next is 3D printing some additional parts to use later on. We 3D printed these two things:
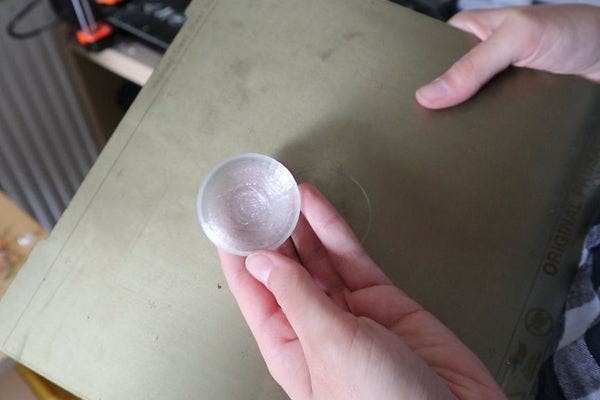
1. A transparent cover for the NeoPixel ring to diffuse the light. The STL file for this is added in attachment.
2. All the parts to turn a standard servo into a linear actuator. To do this we used this set shared on Thingiverse. By adding these parts to a servo, you turn the turning motion of the servo into a poking motion, how cool is that?
Fun Facts and Supportive Statements
We had a good laugh searching the internet and added a ton of facts and statements in two JSON files. If you've never worked with JSON before, W3Schools has a pretty good introduction.
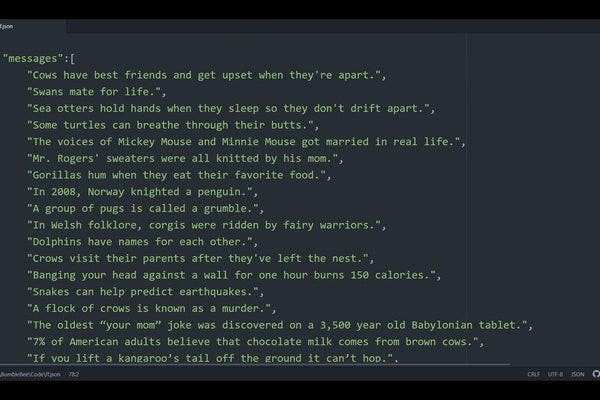
Please note that we haven't accurately fact checked any of these facts, we just chose a bunch that sounded fun, so please be aware that we're not really sure how true they are...
Servo
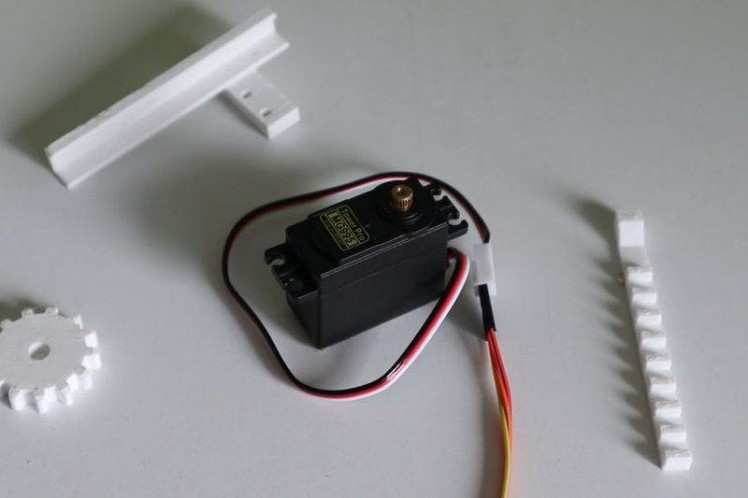
To make the bee move, we'll be attaching it to the servo. The first thing you want to do is attach the 3D printed parts for the linear actuator to the servo as shown on the pictures on Thigiverse.
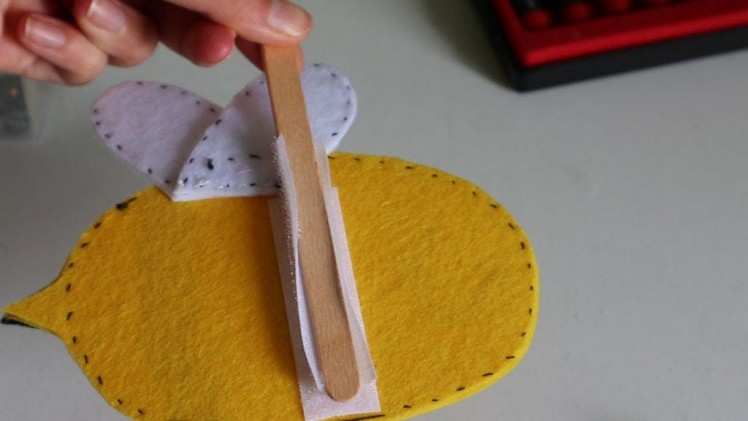
We added a strip of hook and loop tape to the back of the bee and to a Popsicle stick. Then we glued the other side of the Popsicle stick to the end of the linear actuator stick. This way, the bee will have enough room to move and you can position it in a number of different ways.
We'll be using a Raspberry Pi to control the servo. Here’s a great guide on getting started with controlling servos with a Raspberry Pi.
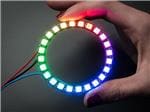
NeoPixel Ring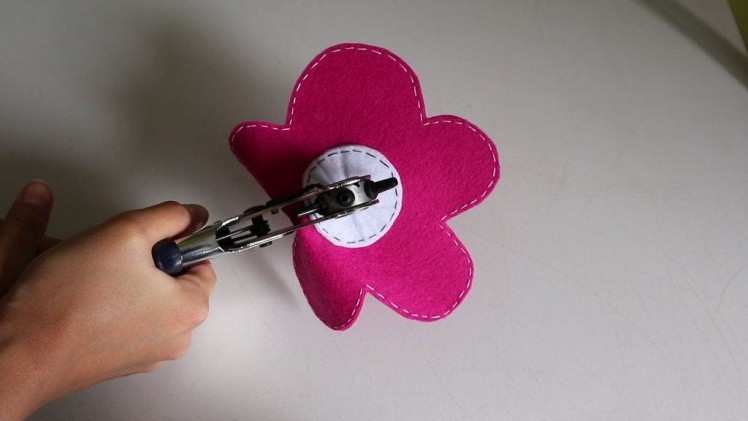
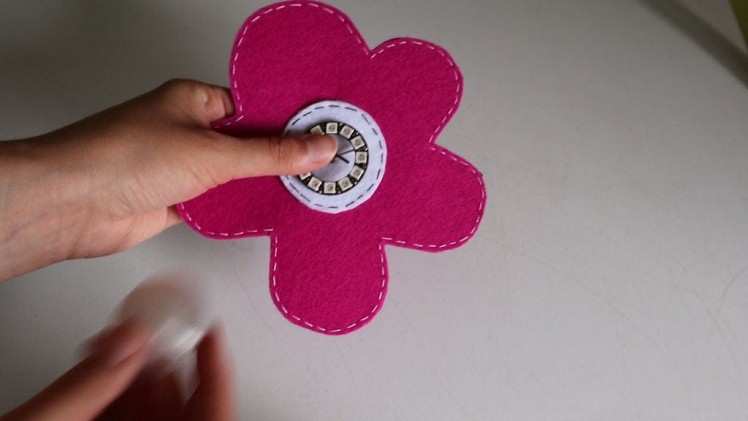

To add some brightness to our project, we've put an Adafruit NeoPixel in the center of our flower. When a button is pressed on Remo.TV our bumble bee will move and the flower lights up in a random colour of the rainbow!
The code we've used to pick the colours is added to the next step (step 6), where we set up Remo.TV.
You can find all there is to know about controlling NeoPixels right here in the Adafruit NeoPixel Überguide!
We used a fabric hole-puncher to make a small hole in the center of the flower for the wires of the NeoPixel Ring. Last but no least, we placed the transparent dome we 3D printed earlier over it to diffuse the light.
Remo.TV

We used Remo.TV to make our bumble bee internet controlled. We followed this guide on GitHub on how to set up your own robot.
To make our bumble bee do what we want, we've tweaked the code in the none.py file and added two JSON files, one with fun facts and one with supportive statements. In short, the code does the following:
When you press either the "fun fact" or "supportive statement" button on Remo.TV, a random fun fact or supportive statement is selected from the JSON files, and displayed in the chatroom, the NeoPixel ring lights up in one of the colours of the rainbow, and the servo spins making the bumble bee move back and forth.
The code for this is attached.
Assembling It All
The final step, it's time to assemble all the separate little parts into one big working project.
We placed the Blissful Bumble Bee inside a storage cabinet, next to our Internet Controlled Corona Virus Slapper (yes, we know, this hobby of building internet controlled robots is getting a bit out of hand...).
The setup consists of:
- One piece of blue felt on the bottom, to create a nice background.
- The flower with the NeoPixel ring and the transparent dome is placed in the bottom left.
- On the top right side is the servo with the linear actuator and the bumble bee. To keep it in place, we've glued the servo to the bottom of the cabinet.
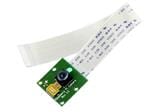
- To livestream the robot, the Pi Camera is attached to the Raspberry Pi and held up for a bird's eye view.
- All the parts are attached to a Raspberry Pi 4 which talks to Remo.TV and orchestrates the whole thing.
Tadaa! There we have it, a cute little bumble bee that spreads wholesomeness throughout the internet! What more could you wish for?
CAD, enclosures and custom parts
Code
Credits
8BitsAndAByte
We’re Dane & Nicole, two makers that create tremendously terrible tech, which we happily share with you on our channel! https://www.youtube.com/c/8bitsandabyte
Related products


Leave your feedback...