
The Ai Label Maker

Made by 8BitsAndAByte / Art / Artificial intelligence / Communication / Robotics / IoT
About the project
Next level home organization is... using AI to label all your stuff?!
Project info
Items used in this project
Hardware components

View all
Software apps and online services
Story
How will this artificially intelligent label maker work? The idea is as follows: take a picture of the stuff that needs a label, let AI detect the objects in the image and print out the labels on a piece of sticker paper. Let's get started!
Project Video Hardware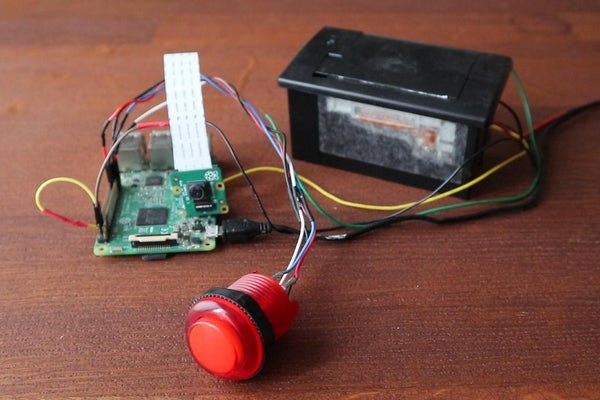
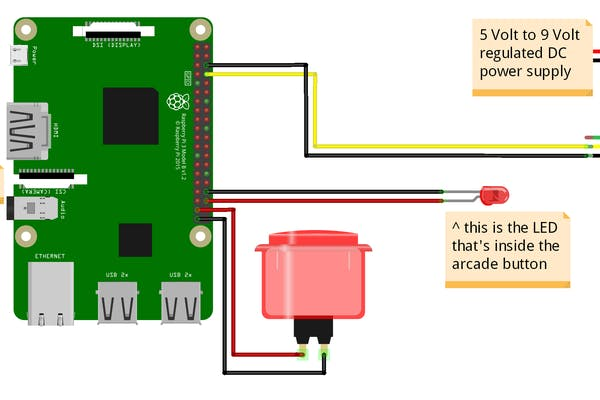
To create our label maker, we'll be using a number of components, all attached to a Raspberry Pi as you can see in the Fritzing Diagram above.
Raspberry Pi
For this project we used a Raspberry Pi 3B+, but it should also work perfectly with a Raspberry Pi 4.
If you're new to Raspberry Pi's, there's a great getting started tutorial right here.
Raspberry Pi Camera
As described above, the idea is to take a picture of the stuff that needs organizing. A great way to take pictures with a Raspberry Pi is by using a Raspberry Pi Camera. There's an excellent getting started guide about connecting and using a Pi Camera right here.
Adafruit Mini Thermal Receipt Printer
For the printing of the labels, we'll be using the Adafruit Mini Thermal Receipt Printer as it's an excellent way to print a bit of text. To learn more about the printer and how to set it up, check out this great learning guide by Adafruit.
This little receipt printer can print on rolls of thermal paper which is great, but then the labels aren't sticky. After some research, we discovered that rolls of thermal sticker paper meant for Paperang pocket printers have the same size as the rolls for the receipt printer, so we gave it a shot. Turns out it works brilliantly!
Arcade Button
Last but not least, we'll need something to trigger the photo making and label printing. We chose for an arcade button we still had lying around, but you could of course use other types of buttons or things to start the label making process. It's surprisingly difficult to find a good tutorial about wiring up an arcade button. We ended up using the wiring instructions from this arcade button guide and combined them with the code example provided in this button guide.
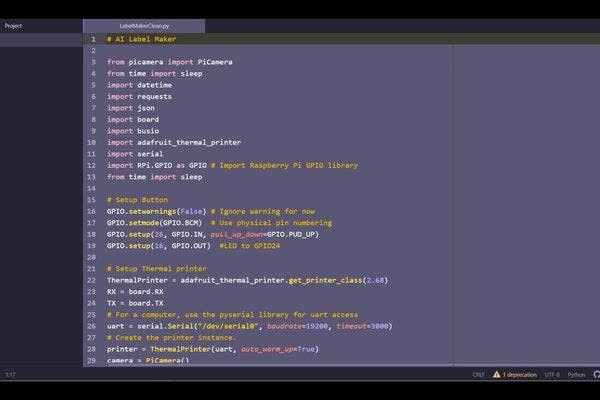
With all our hardware tested and wired up, we'll need to write a bit of python code to make everything do exactly what we want it to do. No worries though, the complete code is added to this step!

DeepAI DenseCap API
The only part of our label maker we haven't really covered so far is the AI part. To label the objects in the image, we'll be using the DeepAI DenseCap API. Our code sends the taken picture to DeepAI and we get an array of labels back. To use this API, you'll need to make a free account on the DeepAI website and copy-paste your API key into the part of the code that says 'YOUR-API-KEY-HERE'.
Code
In short, the provided code does the following:
In a never-ending loop, it will check if the button has been pressed.
If the button is pushed:
- The LED inside the arcade button will be turned on
- A unique filename will be made using the current date and time
- The Pi Camera turns on for a moment and takes a picture, which is given the unique filename
- The picture is sent to the DeepAI DenseCap API
- We wait to receive a JSON array containing captions of all the objects detected in the image
- We take the first caption, as that is the caption the AI is most certain of, and print that using the thermal receipt printer
If the button isn't pressed:
- Turn the LED inside the arcade button off

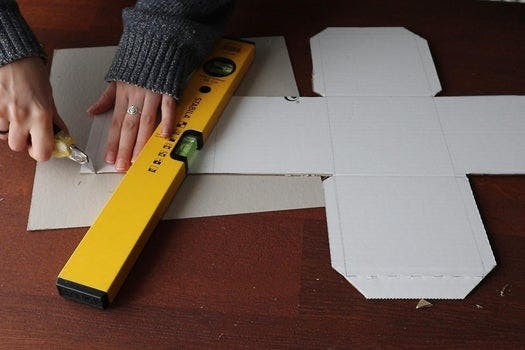
We've got our electronics working, now we just need to put them in something to keep all the bits together!
We measured the dimensions of the hardware and drew a box pattern based on this template on some scrap cardboard. We cut out the template as precisely as possible with a metal ruler and a utility knife.
We folded the box and found a nice place to put all the electronics.
To adjust the box to the label maker hardware we:
- Made a hole in the front for the lens of the Raspberry Pi Camera
- Used a giant needle to thread a bit of rope through the front of the box and through the attachment holes in the Raspberry Pi Camera to hold it in place
- Made a big round hole in the top for the arcade button
- Made a rectangular slot at the top for the labels to come out
- Added a cardboard platform to position the thermal receipt printer at the top of the box
- Made a small hole in the back for the two wires to exit
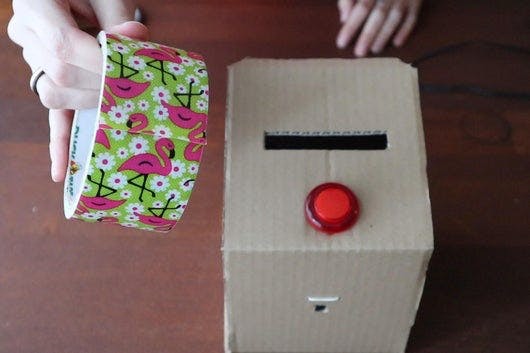
With all the holes and adjustments made, we first attached the Raspberry Pi Camera and the arcade button. Once these more fiddly parts were set, we glued the walls of the box together, but made sure to keep the top open. We assembled the hardware and used some flamingo duct tape to securely close the box at the top.
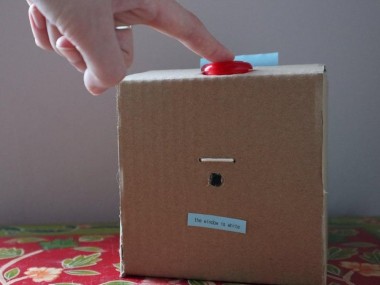
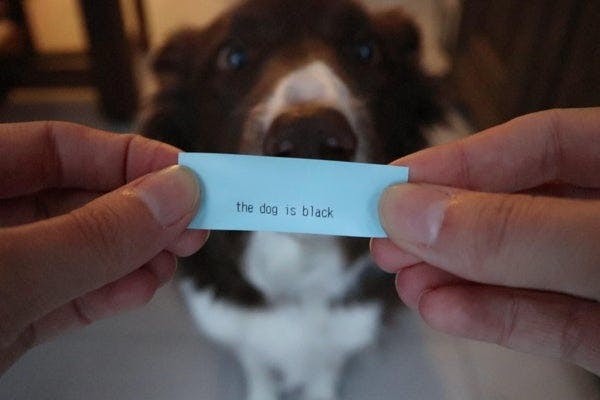
Label All the Things!

The time has come, we can finally efficiently label all the things!
For starters, we thought The AI Label Maker should label itself. Maybe it was because we used the Not-So-Smart-But-Very-Wholesome-Yet-Slightly-Creepy Mirror to take the selfie, but somehow the label turned out to be "the window is white"?!

We've been having a great time labelling all our possessions and we'll be taking suggestions of stuff to label and sharing more of the generated labels on our Twitter and Instagram over the next couple of weeks!
So euhm, anyone want a label?
Schematics, diagrams and documents
Code
Credits
8BitsAndAByte
We’re Dane & Nicole, two makers that create tremendously terrible tech, which we happily share with you on our channel! https://www.youtube.com/c/8bitsandabyte
Related products


Leave your feedback...