
Terminator Skull

Made by 314Reactor / Artificial intelligence / Communication / Robotics / Voice
About the project
A T-800 skull that can talk, listen and detect humans/objects using ML
Project info
Difficulty: Difficult
Platforms: Adafruit, Raspberry Pi, Seeed Studio, TensorFlow, Pimoroni
Estimated time: 1 day
License: GNU General Public License, version 3 or later (GPL3+)
Items used in this project
Hardware components

View all
Software apps and online services
|
|
Solder Wire, Lead Free | |
|
|
Multitool, Screwdriver | |
|
|
Markovify | |
|
|
NLTK | |
|
|
PostgreSQL | |
|
|
Portainer | |
|
|
Docker | |
|
|
TensorFlow |
View all
Story

Watching...
The Skynet funding bill is passed.
314Reactor, the creator which made the machines, made two Terminator skulls with a single board computer.
Their mission: to make a cool Terminator head that uses machine learning to see and talk.
The first Terminator was The Raspbinator, in the year 2018... before the Raspberry Pi 4. It was pretty cool.
The second was made using an Nvidia Jetson Nano, when it was new.
As before, the Pi Foundation was able to make a new Raspberry Pi. A more powerful single board computer.
It was just a question of when they would use one to make a new Terminator Skull...
Hold the CPU by its base tab.
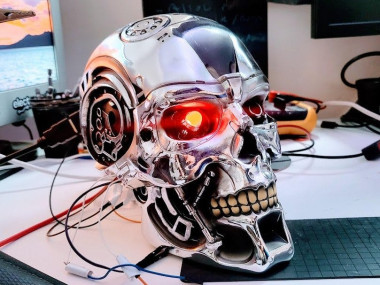
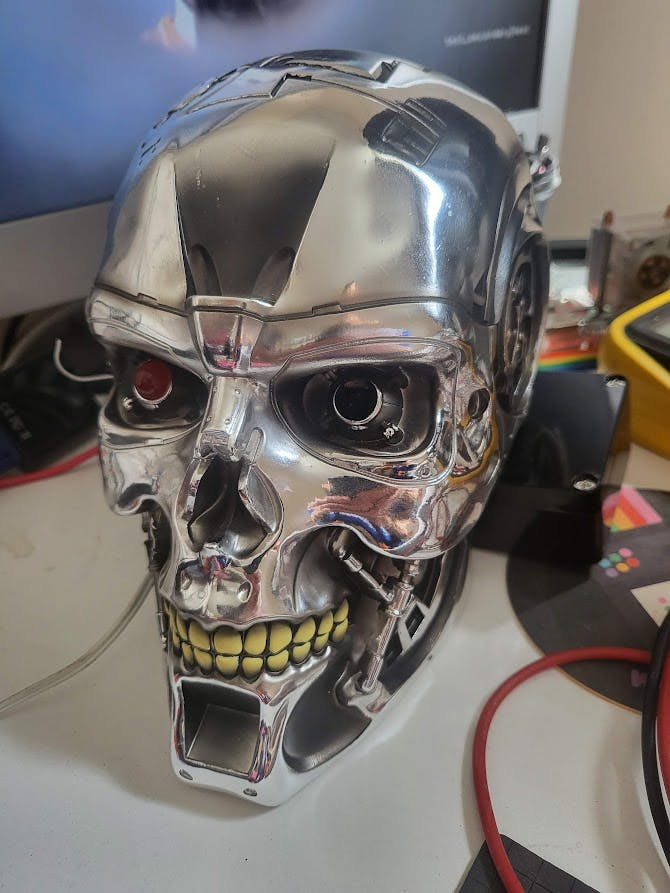
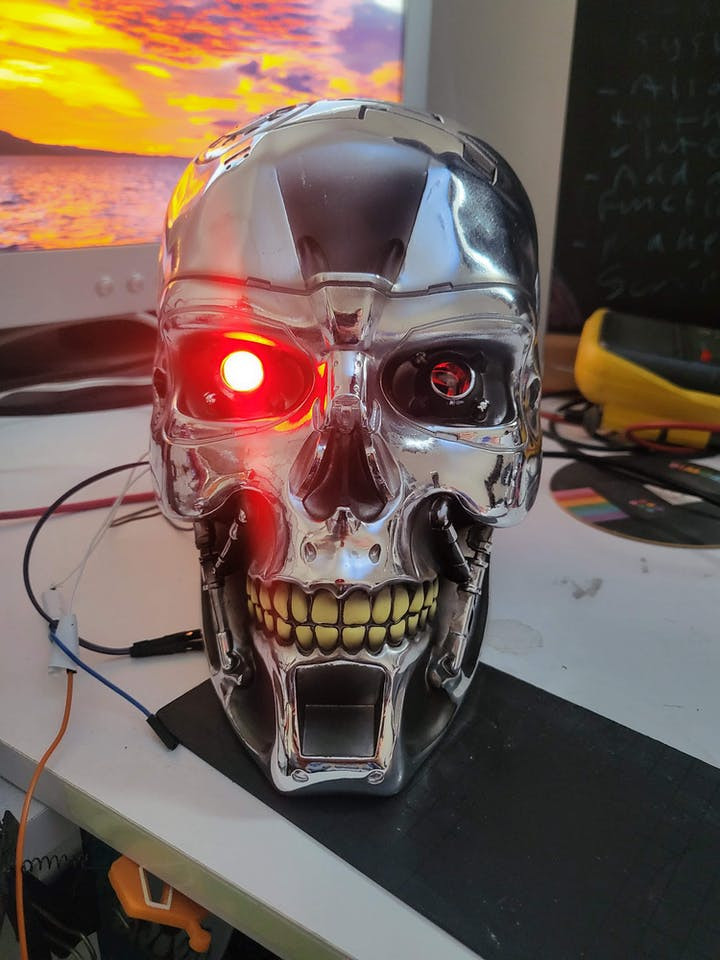
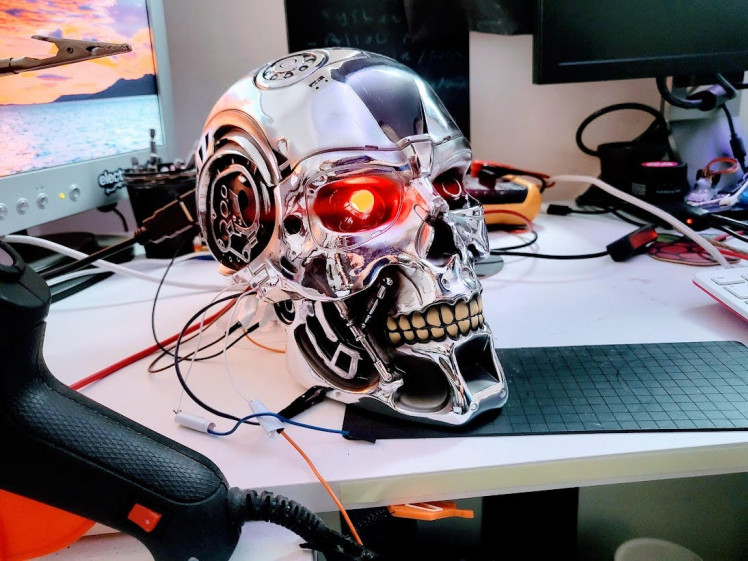
I finally got my hands on a good Terminator Skull that was screen accurate and also able to fit tech in and even poke a camera through one of the eye sockets, you can find one here.

Handsome.
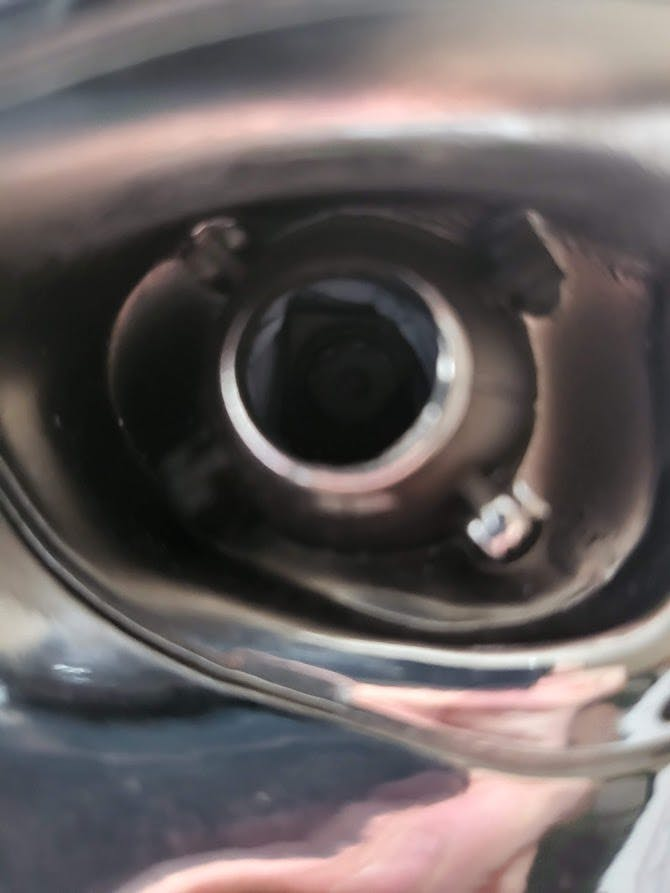
I was able to poke out one of the LED's there and use it as a good eye socket for a Raspberry Pi camera. There was also batteries and a small bit of electronics inside that would flash the LED's; I had to strip all that out.
The main processing unit for this is the Raspberry Pi 4 with 8GB RAM, this is quite important as this project uses a lot of software and ML stuff and so will use quite a bit of RAM.

Powerhouse.
On top of that I am using the very handy Braincraft HAT from Adafruit which has been designed with ML on the RPi in mind. It has a built-in microphone and connections for a speaker and other things which make it perfect for this project.
You can find all the installation stuff needed for the HAT here.

Very nice.
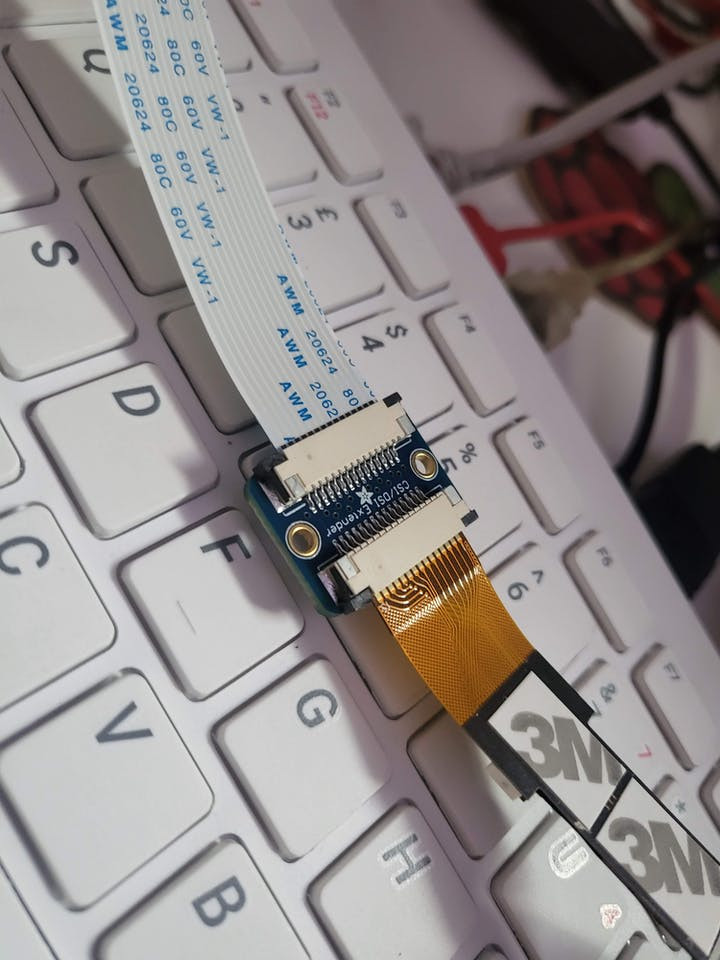
And of course I am using a camera to let the skull see, I am using the smaller camera; made for the Pi Zero; this is to make it easier to fit into the skull and see through the eye socket and using an adaptor to allow it to connect to a full-size Pi.

Tiny.
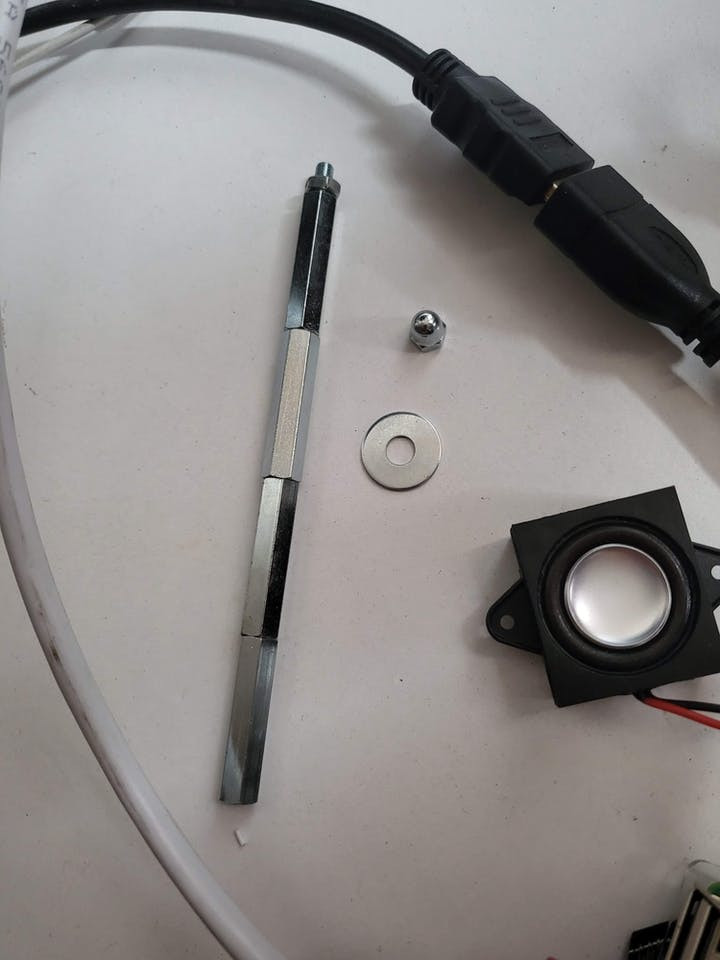
And there's a few other things as well, as can be found in the 'things' section such as an extended camera cable with a connector and a SD Card expander to allow for easier access to the SD Card while it is installed in the skull.
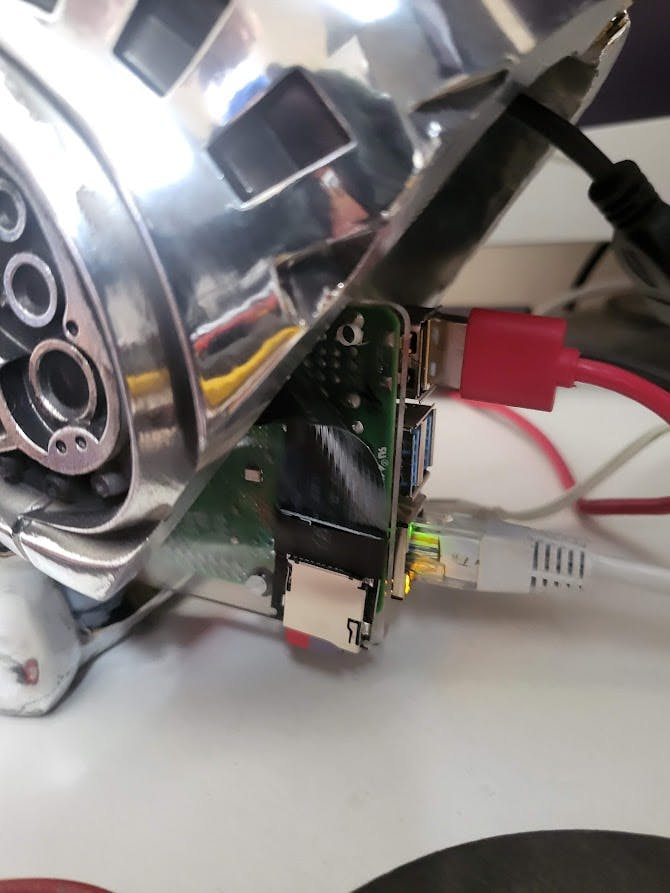
Testing the hardware, the Pi with the Braincraft HAT, speaker and camera:
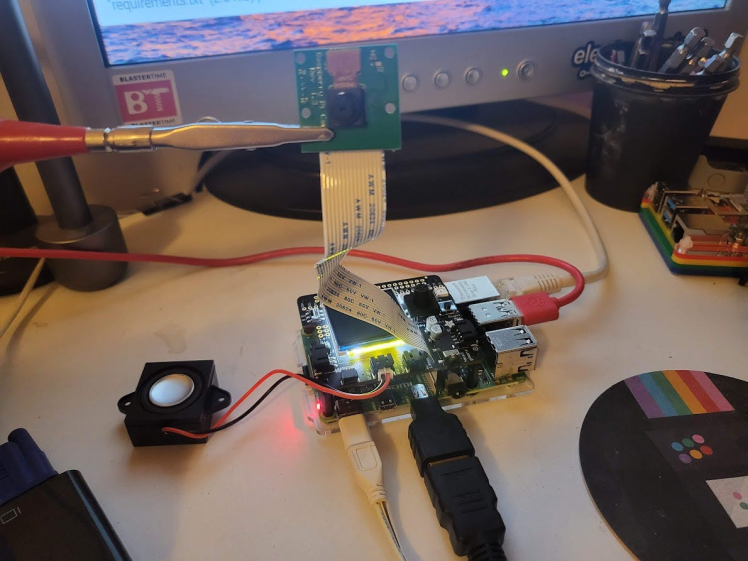
Attaching the speaker:
Aligning and attaching the camera:

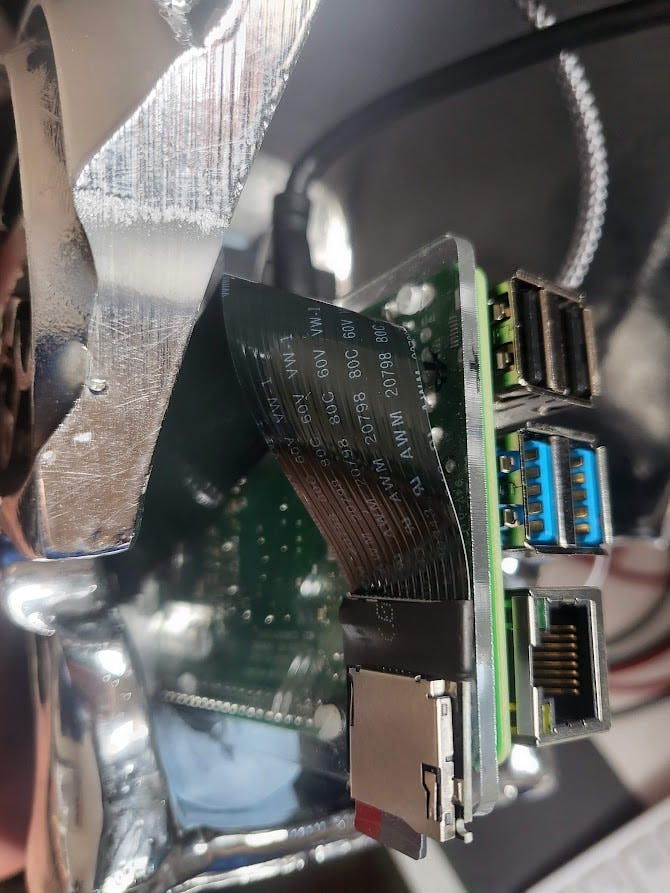
A quick look at the back:
The SD Card extension:
You can just about see the camera eye looking at you... scary:
I also hooked up the remaining red LED there into the Raspberry Pi using this tutorial:
1 / 2

And that veroboard is being held on with some sticky velcro.
And the skull being able to see:
Some of these photos were taking when I was prototyping up and using the larger Raspberry Pi camera, so things may differ from final.
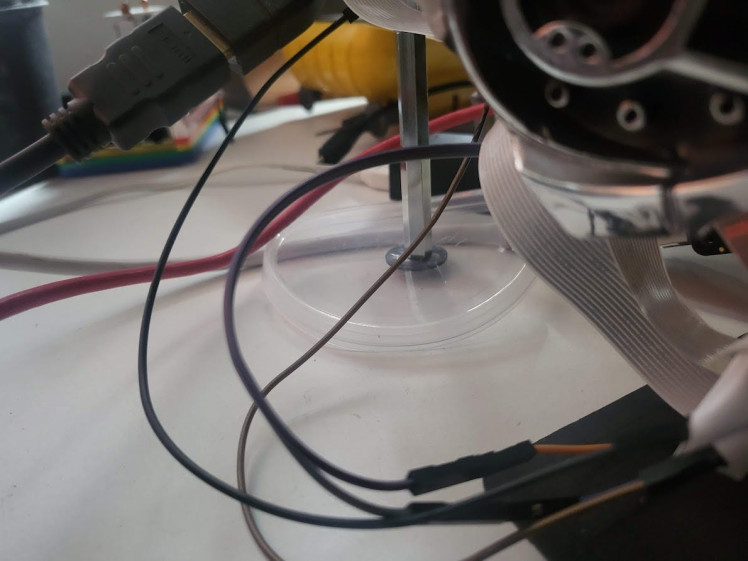
I found also the skull would keep tilting backwards so I made a custom stand for it, to stop it tipping; like that chair invention Homer made once:
1 / 2

And also some sticky velcro to help attach the RPi to the skull a bit better.

I am also using a camera without an IR filter so that is why the colour may look odd.
Trusted to Run it All
You will need the 64 bit version of the RPI OS which you can install to an SD card with the imager: https://www.raspberrypi.com/software/
You can grab the main code from here.
git clone --recursive https://github.com/LordofBone/t-800.gitAnd if there are any updates to the submodules in future you should be able to grab the latest code with:
git submodule update --remote --recursiveThis is a combination of a lot of my previous projects:
The Nvidianator is where I got a lot of the base code structure to build off of and update.
The Terminator HK Tank is where I got the event queue technology to expand upon - this is where all events and outputs are put into a priority queue and processed by individual threaded out functions. The skull can be watching and analysing while replying to something, with the events from the skulls vision going into the queue to be processed after the reply.
This has been cleaned up and improved greatly since the HK implementation; however there are some issues still, like events that never get consumed causing stalls and the need for more back-off to prevent multiples of the same event going in. This is all being noted down and fixes/improvements will continue to go in over time.
It is also where the serial connection technology is being taken from, which will allow for connections to an Arduino or other serial device in order to operate motors/servos etc. So this is open for future expansion of the skull (a full endoskeleton maybe?).
The other main part from HK Tank is the vision detection which uses Tensorflow to detect objects. As well as the mission parameter code from that which allows for setting of missions and other config with a YAML file.
So you could for instance set in the YAML a mission parameter that a human detection will kick off a speech interaction or send a signal to an Arduino that can fire off some RGB LED plasma - like in my HK Tank project. In future I will add to this and build out the documentation for it to allow for more detailed mission parameter setting and hopefully more complex and interesting behaviours.
In terms of talking and replying I am using the Bot Engine to handle faux emotions via text sentiment via Natural Learning Toolkit or Tensorflow tech
The Bot Engine also handles all the handy text to speech stuff under the hood as well as mentioned; integration with the Chatbot. This is something I have been working on for some time and in fact a very very old version of it was used in The Raspbinator, the code has been hugely enhanced and optimised over time and now runs a lot fast and uses a PostgreSQL database sat within a Docker container to run.
The Docker setup and training scripts can all be found under:
Bot_Engine/Chatbot_8/buildYou can get the instructions for building/running a container here.
Portainer is very handy for managing images/containers with a GUI.
The Chatbot is a submodule of the Bot Engine and is used for getting human input and generating replies that match inputs from a database; which can be trained on a set of text files (such a movie scripts etc). It also has the ability to use Markovify to generate additional replies when a match is not found in the database.
Finally, I am using something called Soran, which is a project that is on my GitHub but I have not yet made a Hackster/Electromaker page for yet. It is a Speech to Text integration I have made so that it can be easily imported into other projects and used - it is based off of TensorflowASR and basically as mentioned allows for easy integration and downloading of the required models.
There is another version of this based of off Mozillas Deepspeech called Guinan that I worked on to make for easy integrations/downloading of models etc. But I found that Mozillas Deepspeech did not have a wheel for installation on Python 3.9 for a 64 bit ARM OS, which is why I made Soran, as it works on both Windows and Linux x86/AArch64.
In my previous projects where I have required speech recognition I have been using wit.ai which was very good, but of course required an internet connection at all times and sending off of.wav files etc. So I have been looking for an offline solution for a while and when I discovered how well Deepspeech/TensorflowASR worked I knew I had to use it.
This means that once the skull has been setup and is running it should not require an internet connection and nothing has to leave the Pi.
I think that was almost all I could fit into this project, the RAM usage was pretty high and I think there is a memory leak somewhere, as every frame on the camera I can see the RAM go up a few MB; this is something I am going to work on to try and fix in future - if anyone has any suggestions let me know.
I also need to see if I can get the code to use all cores, I can see it reach around 50% usage on the CPU but no more; this results in speech to text processing very slowly as it is trying to do multiple things at once.
Also having Docker running the PostgresSQL database is another aspect that eats up RAM and CPU.
I was tempted to add Text Machina into the tech stack, but due to the aforementioned RAM issues and also the 8GB RAM on the Pi; this may have to wait until the Pi 5. This would have enabled some cool GPT-2 based text generation to supplement the Chatbot.
There is also some other setup required, such as the manual downloading of Python wheels to install on Raspberry Pi OS 64 bit (Bullseye or Buster). The instructions you can find here under "Raspberry Pi OS 64-bit ARM specific setup".
Also from the above link you will need to follow the instructions under "eSpeak setup" in order to get TTS working.
When installing on a RPi, due to the requirement to manually install Tensorflow rather than using PIP, any references to Tensorflow will need to be deleted out from the requirements.txt in the main project and also the submodules and their setup files. Hopefully soon Tensorflow gets added into PIP and this will just make everything a lot easier.
Finally run the requirements install for the T-800 itself:
The Braincraft HAT setup (ignore the screen instructions, it seems there isn't a kernel compatible with Bullseye 64 bit at the moment, which is a shame.
With some extra things to install on top from the picamera2 module and other things that aren't under pip:
sudo apt install -y python3-libcamera python3-kms++
sudo apt install -y python3-pyqt5 python3-prctl libatlas-base-dev ffmpeg python3-pip
sudo apt install sox
sudo apt install espeak-ng
sudo apt install python3-gst-1.0
pip install -r requirements.txtFor RPi 4 64 Bit Bullseye:
pip install -r requirements_pi.txtWhen everything is hopefully setup and working you can drop in training files into the
Bot_Engine/Chatbot_8/data/trainingfolder, as long as the training data meets the format as documented in the Chatbot 2022 Edition project.
And once that is done and working you should hopefully be able to run:
python setup_models_and_train.pyWhich will:
- Download the models for Soran STT
- Train the Bot Engine sentiment emotion engine on the Chatbot training data
- Train the Chatbot on the training data
- Download the Tensorflow vision model
And once all of that is done; there is one final piece of work that is in my list to try and automate for the future installations and that is some additional setup with the Tensorflow vision model, you can find the instructions for this here.
The bit you need to worry about here is the protobuf stuff:
Now, we need to use Protoc to compile the Protocol Buffer (.proto) files used by the Object Detection API. The.proto files are located in /research/object_detection/protos, but we need to execute the command from the /research directory. Issue:
cd /home/pi/tensorflow1/models/research
protoc object_detection/protos/*.proto --python_out=.
And finally finally you should be able to run the code with all the h/w and s/w requirements all setup:
python activate_t800.pyAnd things might work; this is a very complex project with some rough edges so even with all the h/w and requirements setup this still may take some tweaking/hacking to get working (especially if this is the future from 2022 and various dependencies/distros/raspberry pi's have moved on).
I can try and help if you are having issues, but as I say it is still quite hacky how this is put together so will need some serious work overall to get it to a better state. Consider this the beginning of an ongoing project.
Having these previous projects/code to hand made it a lot easier to hook everything together at least at a strategic level; actually getting everything to play together nicely and also update all the code and make it better was quite time consuming and there is still a lot to do; so watch this space.
You have to sign for the... it. You have to sign it out.
As you can see the framerate on the video isn't good, about the same as I had with the HK tank project, somewhere between 1-3 FPS; I wonder if there is a more optimised way of doing this vision detection or if there are any optimisations I am missing. But it does appear to be the norm as I've seen other Pi4's run the same with this model.
But it does successfully detect objects and humans easily and then you can talk to it and it will respond (not always with a response that makes sense). It also can misunderstand things said to it, but that is to be expected with STT; especially when running local.
The STT responses also take a long time to process, when Soran is run on its own it only takes a few seconds but it can take minutes when all of the other stuff is going at the same time. So there definitely needs to be some optimisation and fixing of the code; but it could also be the case that the Pi 4 is being pushed to its limits here.
Interestingly the object detection and vision all seem to work the same speed - so not sure why the speech inference is so slow when everything else is going; I need to see if I can get the STT running on another core or find out why it's running so slow.
Of course the quality of the responses also depends on the training data that the chatbot has been trained on as well as the STT functioning correctly.
Luckily the fan on the Braincraft HAT keeps the CPU cool - it never usually goes too far above 60 degrees C.
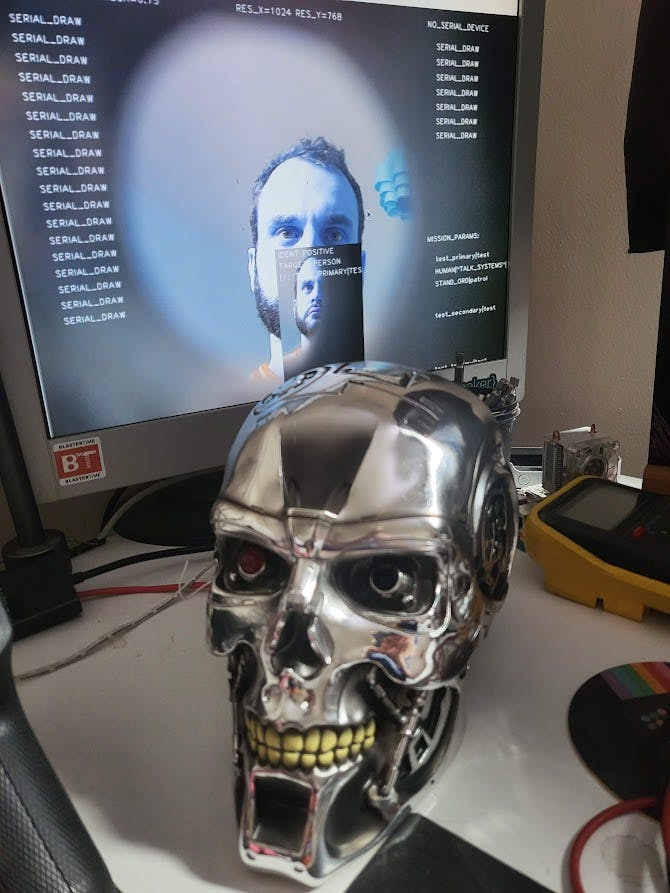
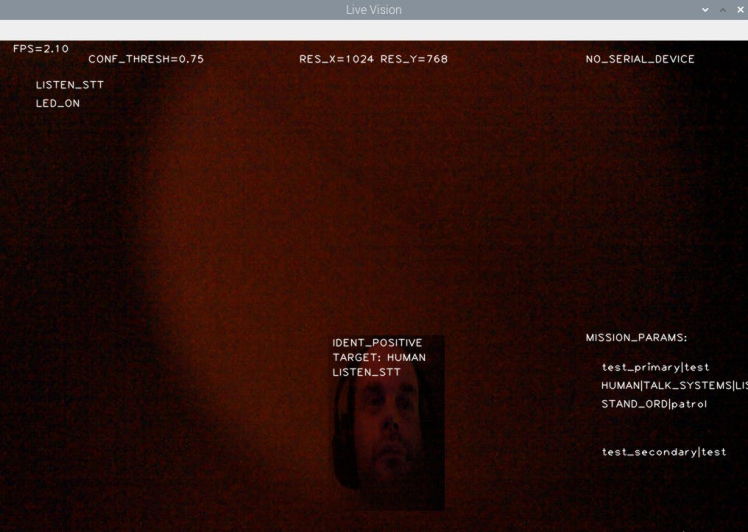
Here's a view of the vision capability, similar to the HK Tank:
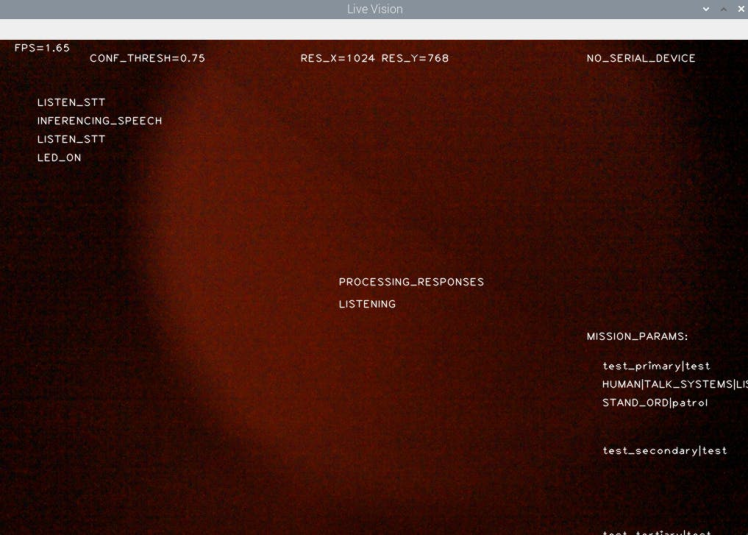
This shows off when the IR camera is in certain conditions and actually looks like Terminator vision. You can also see mission parameters, what it is currently doing an event list of what it's done etc.
Here's a shot just after it's detected someone:
And here's some more show off shots:
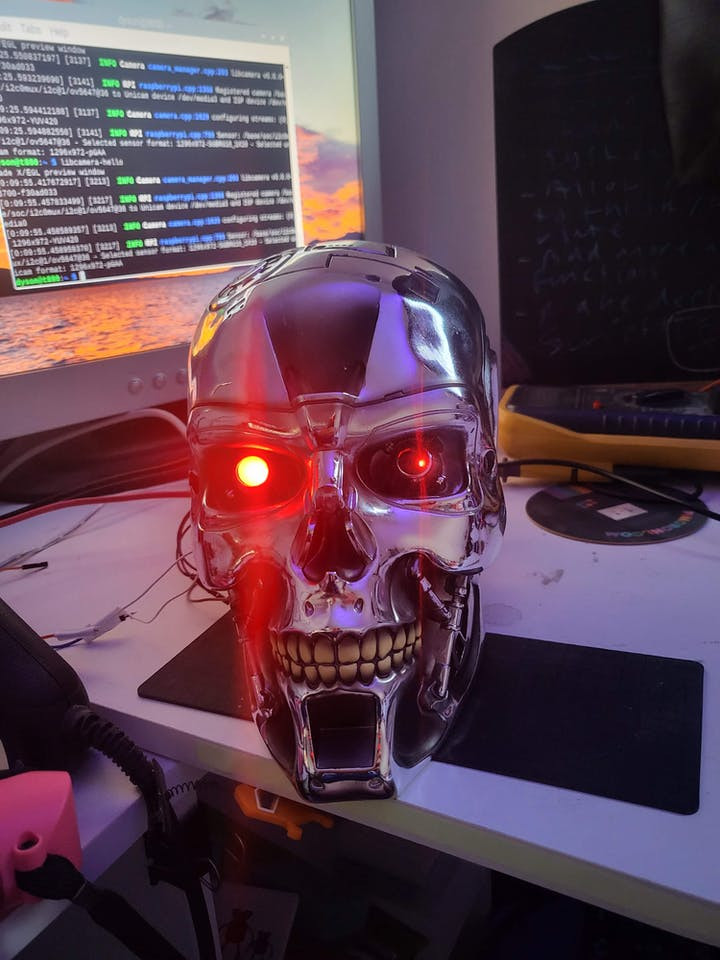
As seen there the right eye lights up but also, the power LED from the Pi can shine through as well; which is a cool unintended effect.
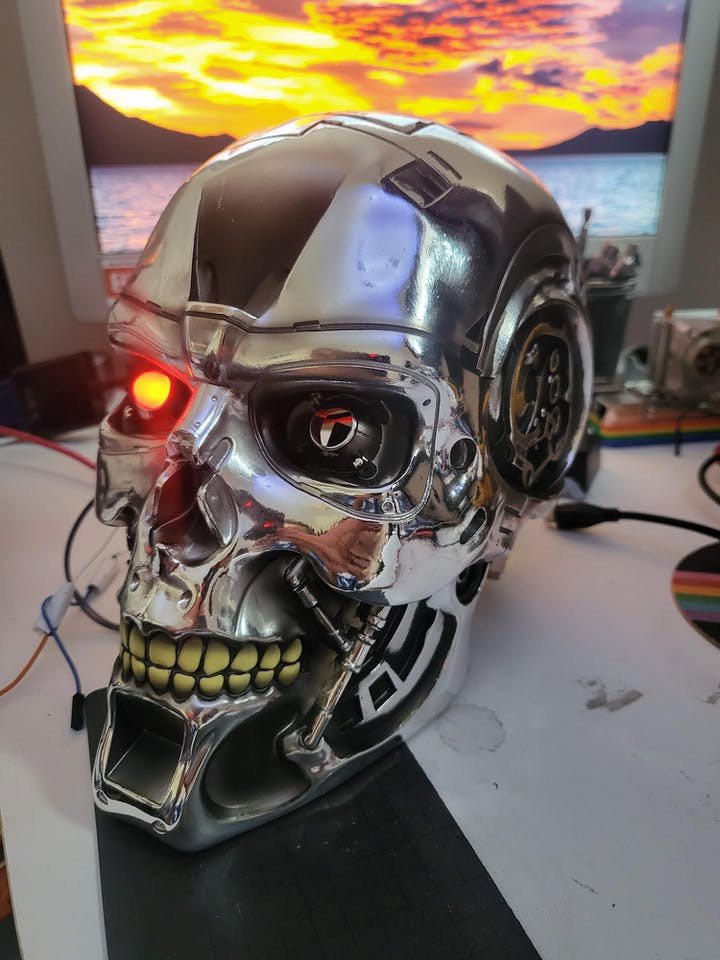
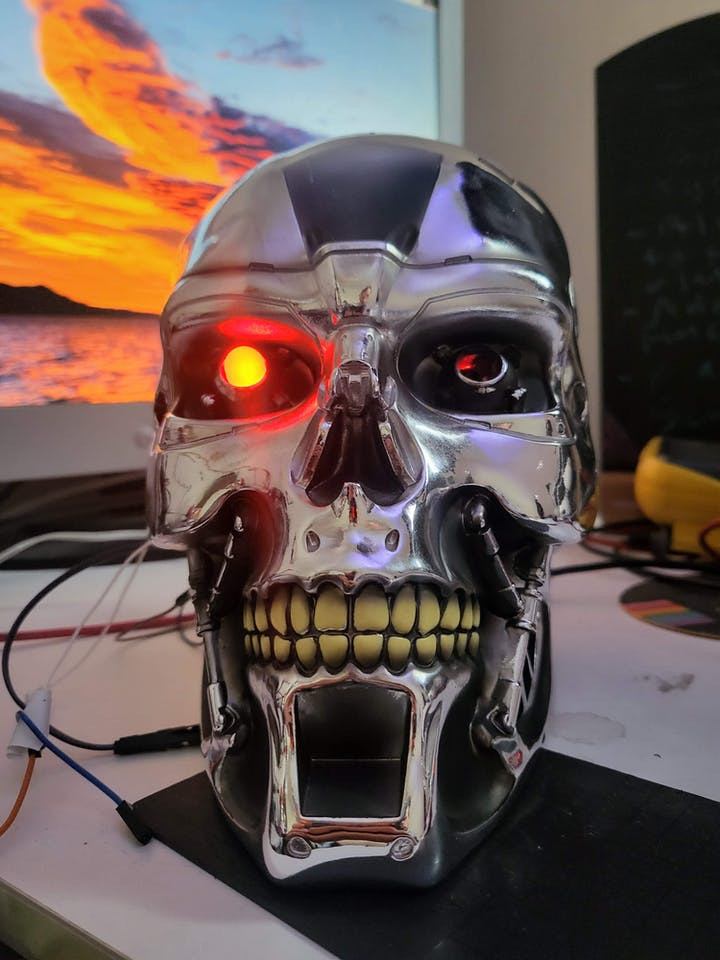

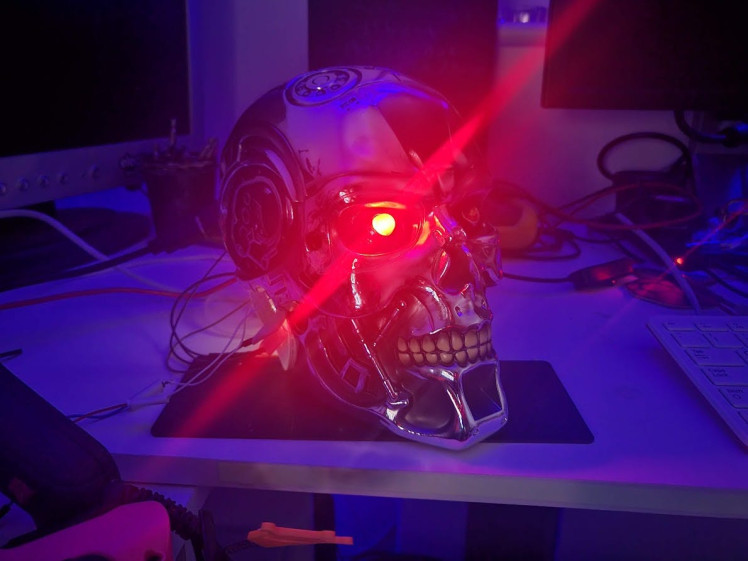
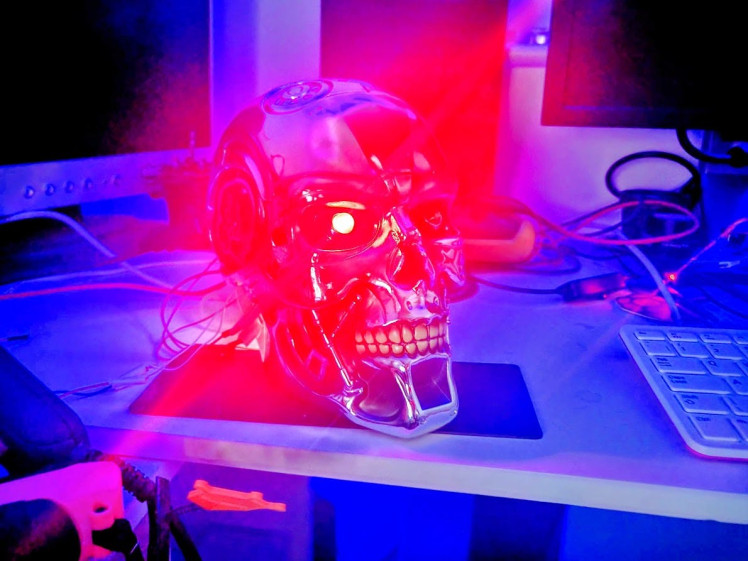
Looking quite 80's and cool.
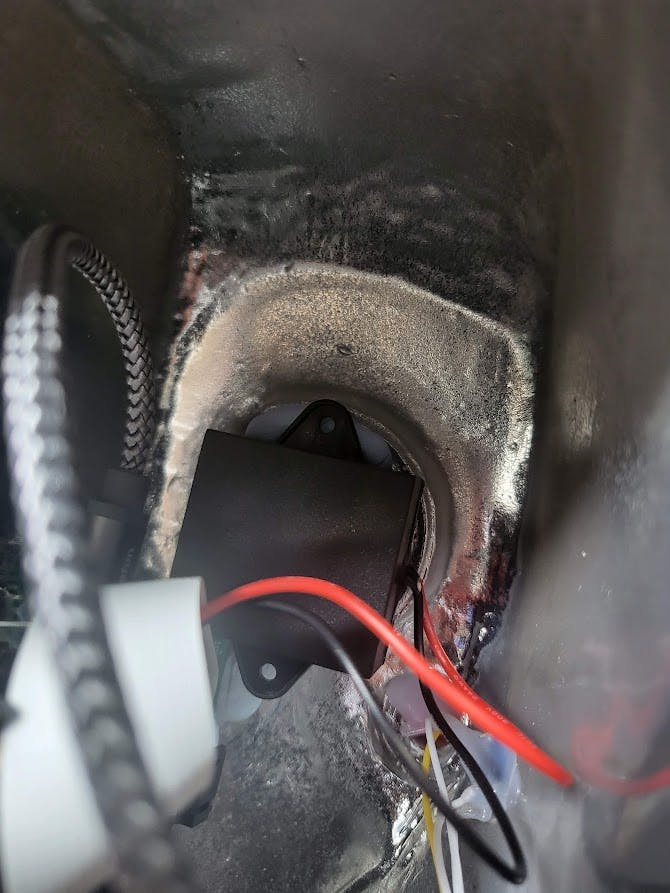
Although it is a little bit messy inside and around the back:
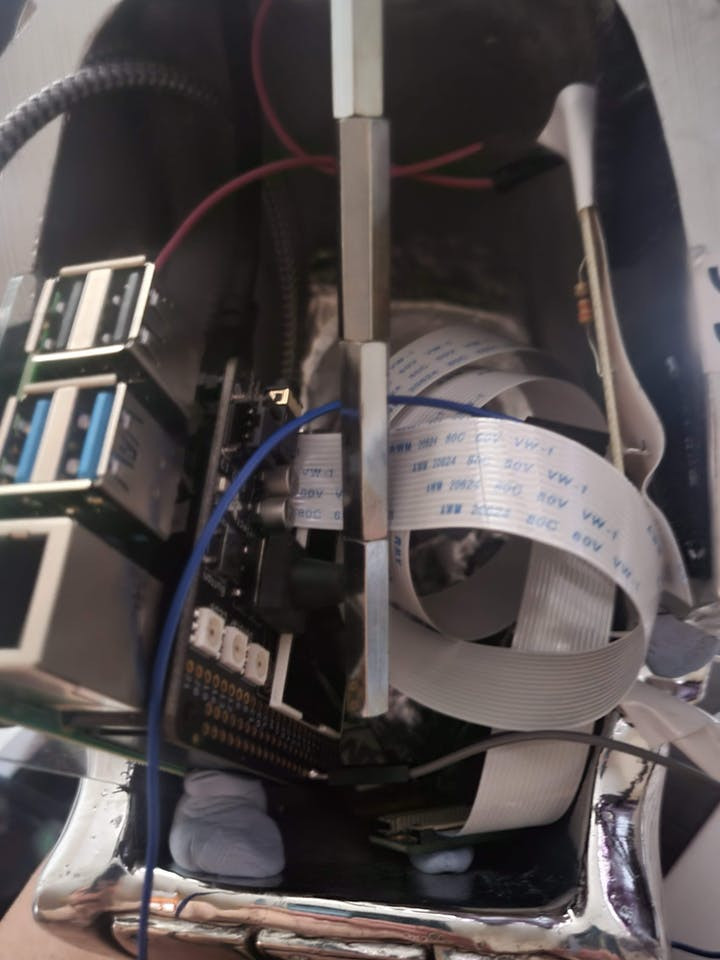
So I need to find a better way to mount everything in for the next evolution of the project and make it a more all-in-one but take-apart-able unit:
1 / 2

The year 2029, if I remember correctly.
So, as mentioned, this is all a bit on the hacky side at the moment and needs a lot of work in terms of the installation/setup and also the optimisations of the code. So please do consider this the start of an ongoing project that I will update over time and post here with the results.
Also as newer hardware gets released I will look into getting more power/memory into it; I have considered some Raspberry Pi alternatives; but I am not sure of their compatibility and documentation - but if anyone has any good suggestions let me know!
Having more RAM would allow for expansion of the capabilities; such as adding in Text Machina for some GPT-2 sentence generation to really enhance and mix-up its replies.
I could even hook GPT-3 into it if there is an internet connection available; which could result in some seriously cool interactions.
And more CPU power would help with the vision processing and the ability to multi-task; hopefully allowing for much quicker replies.
I think one of the most important things is the aesthetic from using the hollow Terminator skull - I have been on the lookout for something like this for some time and I've only found ones that are too small or ones that don't have eye sockets for allowing a camera to see through. So this has been a huge step in my dream to creating a Terminator.
In future I want to use the serial out to hook this all up to some robotics electronics and get a big exoskeleton for it; really kicking Skynet off.
My idea and initial code for this began in 2015 and here is the journey from Raspbinator to now:

https://www.hackster.io/314reactor/the-raspbinator-b03485

https://www.hackster.io/314reactor/the-nvidianator-341f7a
And all 3 in a row:

Very very cool.
So as stated please do keep an eye out for updates to this - I will not be using the current skull as a base to develop more as things advance and I get new ideas. Significant updates I will upload as a new project.
Please do let me know what you think, thanks for reading and do let me know if you have any advice for me to help improve the project!

Hasta la vista, baby.
Code
Credits
Related products


Leave your feedback...