
Pwm On Mikrobus Header Of Avr Iot Wg

Made by mahmood_ul_hassan / Lights / Robotics / Sensors / IoT
About the project
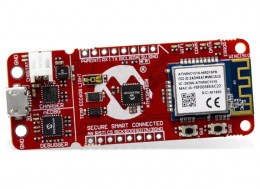
Atmel Start only support PWM functionality for ERR (Red), DATA (Yellow) and CONN (green) of AVR iot WG board. Here we will learn to configure TCA timer in split mode to enable PWM on mikroBUS header of this board.
Project info
Items used in this project
Hardware components

Story
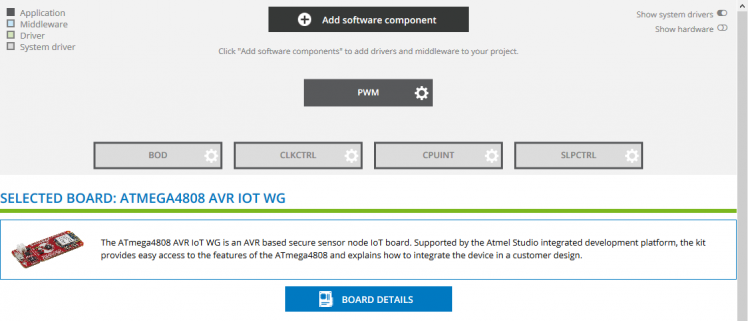
Atmel Start is very useful tool to configure and initialize all the peripherals but in AVR iot WG case it does not auto generate the PWM functions instead only generate initialization function for TCA0 in Split Mode. When TCA0 is used in Single Mode, it worked as 16-bit timer and can provide upto 3 wave outputs. These upto 3 possible wave out pins doesn't include the pwm labeled pin of mikroBUS header.
In order to use the PWM pin of mikroBUS header of AVR iot WG we need to configure the TCA0 in Split Mode. In Split Mode we can get upto 6 wave outputs but only half of the timer bits for each output to manipulate the wave form.
To make our life easier we will use easy_pwm library which contains all the necessary functions for easy TCA0 Split Mode configuration and pwm generation.
STEP 1:
Create new Atmel Start project for AVR iot WG development board. (HELP)
STEP 2:
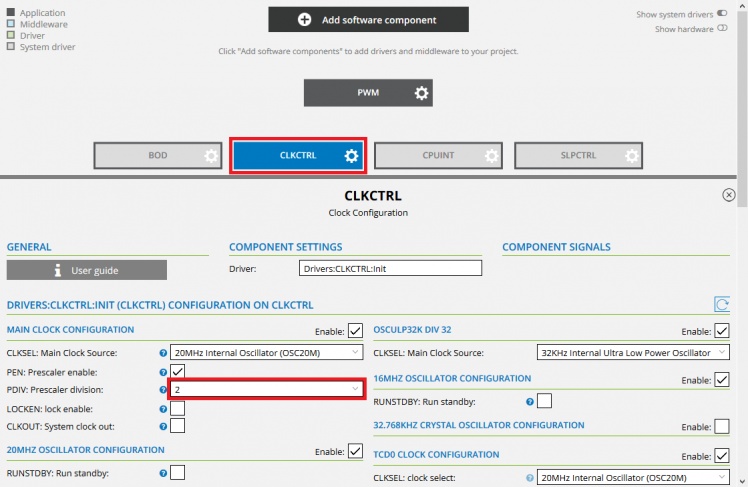
Goto "CLKCTRL" settings and change the "PDIV: Prescaler division" value to 2 under "Main Clock Configuration" as shown below.
STEP 3:
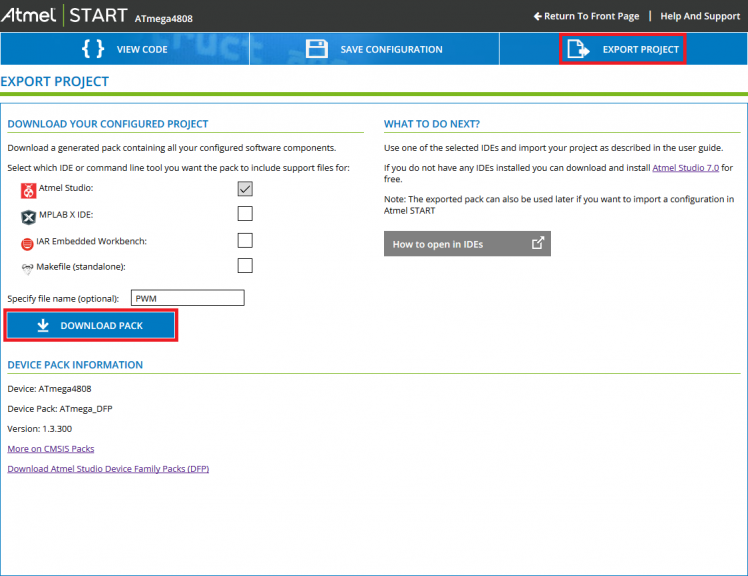
Now download the project without adding any software component.
STEP 4:
Also download the easy_pwm library from HERE.
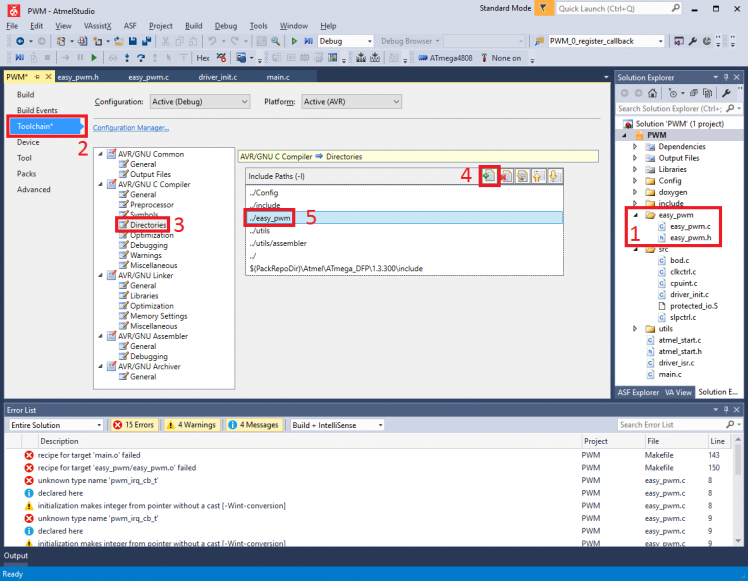
Open the downloaded Atmel Start project in ATMEL STUDIO 7 and add the easyPWM library folder in PWM project directory. After adding the library in to our project we can see the source and header files of easy_pwm in "solution explorer". Now add the location of library files in C compiler settings for this projects by following the steps shown in image below.
STEP 5:
Modify the main.c file by adding the following code before main function
- #include "easy_pwm.h"
- #define PD4 4 // pwm pin on mikroBUS header
After including easy pwm library and initializing the AVR in main function, we will configure the PD4 IO pin as pwm out.
- PORTD_set_pin_dir(PD4, PORT_DIR_OUT); // PD4 as output
- PORTD_set_pin_level(PD4, false); // PD4 set as low level output
- PORTMUX.TCAROUTEA |= (PORTMUX_TCA00_bm | PORTMUX_TCA01_bm); // Configure PD4 as PWM out pin
When IO pin is set as pwm out, we can initialize and enable the TCA0 in Split Mode. And set 50% duty cycle to generate square wave.
- easyPWM_init(SYSCLK_DIV_64); // initialize the TCA0 in split mode with clock = sysclk/64
- easyPWM_load_duty_cycle_ch4(0x80); // set pwm duty cycle at 50% for PD4
- easyPWM_enable_output_ch4(); // enable the PWM out at PD4
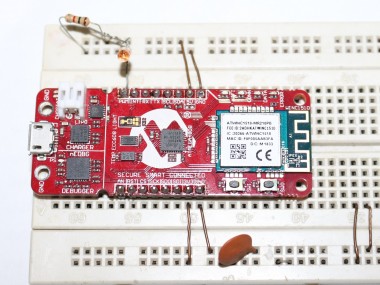
Now we can build and load on to AVR iot WG to test the pwm out by connecting the LED at pwm (PD4) pin of mikroBUS header.
For easy pwm testing, we can change the duty cycle in while loop.
Demo:
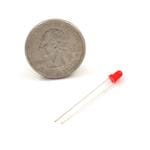
LED with series resistor of 1K is connected at PWM (PD4) pin of mikroBUS header and PWM is used to controlled the brightness of LED.
Changing the brightness of 1 Watt LED using pwm.
List of all the register used in easyPWM library for Split Mode configuration and operation of TCA0.
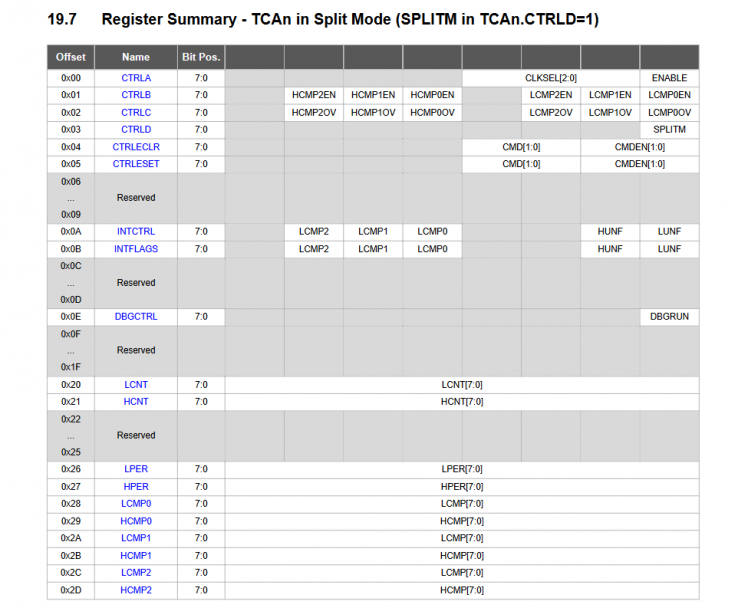
source: Page 218 ATmega4808 Reference Manual (DC40002015A)
Code
Credits
mahmood_ul_hassan
Electronics Engineer with specialization in Robotics Engineering, seven years of experience in electronics research and development. I worked mostly on designing custom labview based automatic test and measurement equipment. Hobbyist, ARM enthusiast, DIY maker
Related products


Leave your feedback...