
Persistence Of Vision Star Wars Lightsaber!

Made by bitluni / 3D Printing / Lights / Sensors / Star Wars
About the project
This project shows how to build a persistence of vision lightsaber using the ESP32, neopixels and a gyro.
Project info
Difficulty: Moderate
Platforms: Arduino
Estimated time: 5 days
License: Creative Commons Attribution-NonCommercial CC BY-NC version 4.0 or later (CC BY-NC 4+)
Items used in this project
Hardware components


View all
Story
Overview
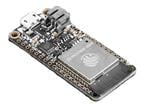
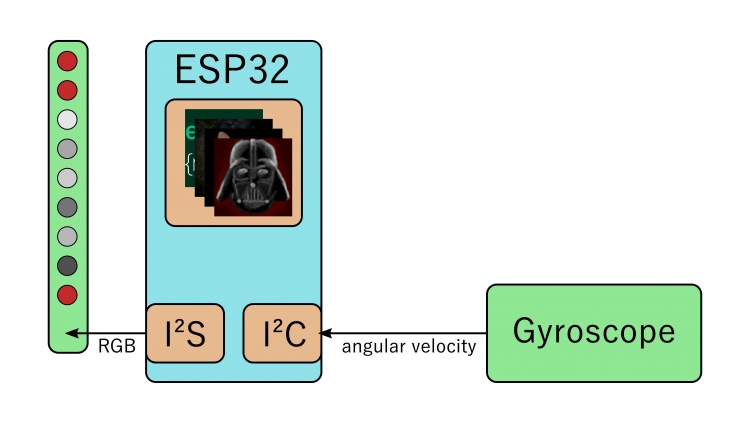
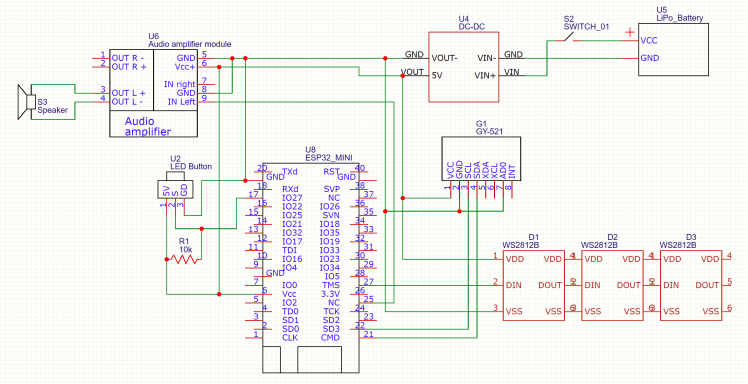
The ESP32 is the core of this project controlling the system and stores the images which can be displayed. It receives over I²C angular velocity data from the gyro and estimates the current angle of the lightsaber.

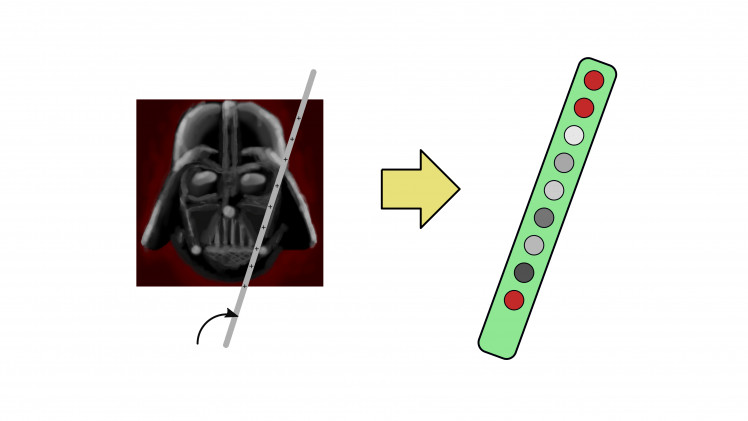
From this angle, a line is cast on the current image which determines the pixel colors for the NeoPixel array.
These color values are sent to the array over I²S. Just the I²S data line is used to emulate high and low signals specific to the WS2812b timings.
For highest coolness factor also sound is added. The samples for turning on and off are stored as binary arrays. If needed these can be changed using bitluni's wavetable editor. The hum sound is synthesized on the fly and is also pitched by the angular velocity. The rendered audio samples are sent to the first internal DAC which creates the analog voltage for the audio amplifier. The amplifier drives the speaker.

Wiring
Code
Any major ESP32 board can be used as long as it allows access to the pins as seen in the schematic. The following steps are needed to upload to code and the data to the microcontroller:
- Install Arduino IDE (if not present)
- Install ESP32 Arduino extension (if not present)
- Install Arduino ESP32 file system uploader (if not present)
- Upload the POVLightsaber sketch from the github repository
- Upload the data from the IDE Tools > ESP32 Sketch Data Upload
The Arduino project folder POVLightsaber contains a data folder where the binary images are placed. To replace the image the Converter tool can be used. The converter tool can be found in the code repository in the subdirectory Converter. The Converter.html can be opened with any modern Browser. Selecting an image will convert it to binary file image0.bin. Which can be stored from the link shown:
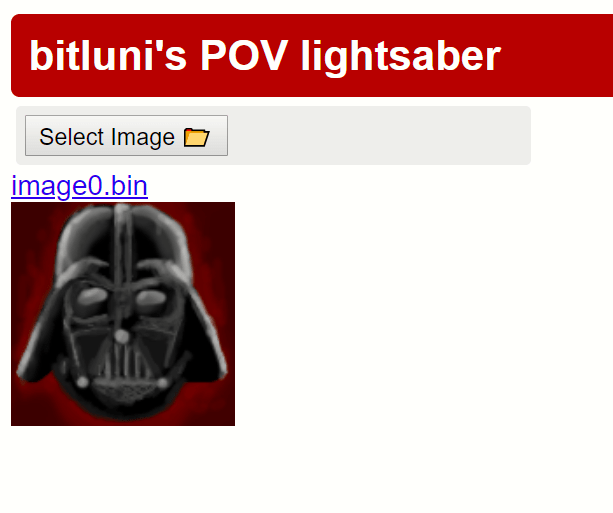
The file can be renamed tome image1.bin etc and placed in the data folder of the Arduino project replacing the corresponding image.
Operation
When the switch is turned on the ESP is powered up. While this is done the Lightsaber has to be held still for one second while it's taking reference samples from the gyro. From this point on holding the push button for 3 seconds will turn the Lightsaber on, holding it another 3 seconds turns it off.
Currently, 3 images can be uploaded, but this can be increased in the code. Pressing the button shortly will jump to the next image cycling around on multiple presses. This currently only works after the Lightsaber is powered up and not yet turned on. It's a quirk of the internal ESP32 system. Trying to switch the image after it was turned on it will reboot jumping to the first image again.
While wielding the angular velocity is used to accumulate the angle. This is never perfect so there will be a drift. When the Lightsaber is held still again it will detect this and recalculate the absolute angle from the accelerometer and the gravity.
Schematics, diagrams and documents
Code
Credits
Related products


Leave your feedback...